How To Get Chicken Crispy When Baked In The Oven
Want perfectly crispy chicken every time you use your oven? This guide covers everything from prep to baking to finishing touches. You will learn the best cuts, coatings, temperatures, and timing for crispy baked chicken that rivals fried chicken.
There is nothing quite like the sound of crispy chicken coming out of the oven. That golden, crunchy exterior gives way to juicy, tender meat inside. Yet so many people struggle with soggy, pale chicken when they try to bake it at home. The good news is that getting chicken crispy when baked in the oven is totally doable. You just need the right approach.
This guide will walk you through every step. From choosing the best cut to nailing the perfect oven temperature, we have got you covered. Whether you love crispy chicken breast or prefer skin-on thighs, you will find practical tips here. Let us dive in and make your next oven-baked chicken batch absolutely perfect.
Key Takeaways
- Pat the chicken dry: Moisture is the enemy of crispiness. Always dry your chicken thoroughly before seasoning or coating.
- Use a wire rack: Baking on a wire rack allows hot air to circulate underneath, giving you even crispiness on all sides.
- Choose the right cut: Chicken thighs and drumsticks with skin on produce the crispiest results in the oven.
- High heat is key: Baking at 425°F to 450°F helps the exterior crisp up fast while keeping the inside juicy.
- Don’t skip the resting step: Letting chicken rest after baking keeps juices inside and maintains crunch.
- Use panko or fine breadcrumbs: These create a lighter, crunchier coating than regular breadcrumbs.
- Brush with oil or butter: A light coating of fat before baking adds flavor and promotes golden browning.
📑 Table of Contents
- Why Oven-Baked Chicken Can Be Crispy
- The Best Chicken Cuts for Crispy Results
- Essential Prep Steps for Crispy Chicken
- The Best Coating and Breading Techniques
- Oven Temperature and Timing Secrets
- Pro Tips for Next-Level Crispy Chicken
- Common Mistakes to Avoid
- Best Seasonings and Flavor Combinations for Crispy Chicken
- Frequently Asked Questions
- Conclusion
Why Oven-Baked Chicken Can Be Crispy
Many people think crispy chicken can only come from deep frying. That is simply not true. Your oven can produce incredible crunch when you understand the science behind it. The key is controlling moisture, heat, and surface texture.
When chicken bakes, moisture escapes from the meat. If that moisture stays on the surface, it creates steam. Steam makes things soft. But if you remove surface moisture and apply high heat, the exterior dehydrates and crisps up. This is the basic principle behind every great crispy baked chicken recipe.
Another important factor is the Maillard reaction. This is a chemical process that happens when proteins and sugars in food are exposed to high heat. It creates that beautiful golden-brown color and complex flavor we love on crispy chicken skin. Understanding this helps you appreciate why certain techniques work so well.
The Role of Dry Heat
Ovens use dry heat to cook food. This is different from frying, which uses oil to transfer heat. Dry heat works best when the food surface is dry and exposed to direct heat. That is why placement and airflow matter so much. A crowded baking sheet traps steam and prevents crispiness. Giving your chicken space allows the dry heat to do its job properly.
Why Skin-On Chicken Works Best
Chicken skin acts as a natural barrier. It holds moisture in while the fat beneath it renders out during baking. That rendered fat fries the skin from the inside, creating a crispy layer. Skinless chicken can still get crispy, but it needs more help from coatings and oil. If you want the easiest path to crispy oven chicken, always choose pieces with skin on.
The Best Chicken Cuts for Crispy Results
Not all chicken cuts behave the same way in the oven. Some are naturally better suited for achieving a crispy exterior. Let us look at the best options and why they work so well.
| Cut | Skin | Crispiness Level | Best For |
|---|---|---|---|
| Thighs | Yes | Excellent | Drumstick-style crispy chicken |
| Drumsticks | Yes | Excellent | Snack-style crispy pieces |
| Wings | Yes | Excellent | Appetizers and game day snacks |
| Bone-in Breast | Yes | Good | Family-style meals |
| Boneless Breast | No | Moderate | Health-focused meals |
Chicken thighs and drumsticks are the champions of crispy baked chicken. They have more fat content than breasts, which helps the skin render and crisp up beautifully. Wings are another fantastic choice. They have a high skin-to-meat ratio, which means more crunch in every bite.
If you prefer crispy chicken breast, go for bone-in, skin-on pieces. Boneless, skinless breasts can still work, but you will need to rely heavily on breading and oil to achieve crunch. The bone helps distribute heat evenly, preventing the meat from drying out before the skin crisps.
Bone-In vs. Boneless: Which Crisps Better?
Bone-in pieces generally crisp up better than boneless cuts. The bone acts as a heat sink. It absorbs heat and releases it slowly, cooking the meat more evenly. This gives the skin more time to crisp without the meat drying out. Boneless pieces cook faster, which can be a double-edged sword. They can go from perfectly crispy to overcooked quickly.
Essential Prep Steps for Crispy Chicken
The prep work you do before the chicken hits the oven makes all the difference. Skipping these steps is the number one reason people end up with soggy results. Follow these prep guidelines every time for the best crispy chicken recipe outcomes.
Step 1: Pat the Chicken Completely Dry
This is the single most important step. Use paper towels and press firmly on every surface of the chicken. Remove as much moisture as possible. Do this before seasoning and again before applying any coating. The drier the surface, the crispier the result will be.
Some cooks like to leave the chicken uncovered in the fridge overnight. This air-drying technique removes even more surface moisture. It is a game changer for achieving that perfect crunch. Try it once and you will never go back.
Step 2: Season Generously
Salt does more than add flavor. It draws out moisture from the surface through osmosis. When you salt chicken and let it rest, the salt pulls moisture to the surface. Then when you pat it dry again, you remove that moisture. This creates an even drier surface for crisping. Use kosher salt for the best results. It has larger crystals that work more effectively than fine table salt.
Beyond salt, use your favorite spices and herbs. Paprika, garlic powder, onion powder, and black pepper are classic choices for crispy oven chicken. Do not be shy with your seasoning. The chicken needs enough flavor to stand out through the crunchy coating.
Step 3: Apply a Light Coating of Oil
A thin layer of oil on the chicken skin helps conduct heat evenly. It also promotes browning and crispiness. Use a high smoke-point oil like avocado oil or vegetable oil. Brush it on lightly with a pastry brush or use a spray bottle for an even, thin coat. Too much oil will make the chicken greasy rather than crispy.
The Best Coating and Breading Techniques
A good coating adds crunch and flavor to baked chicken. But not all coatings are created equal. The technique you use matters just as much as the ingredients. Here are the best methods for getting that satisfying crunch.
The Buttermilk Marinate Method
Buttermilk is a secret weapon for crispy chicken. The acidity in buttermilk tenderizes the meat while creating a surface that holds onto breading. Simply soak your chicken pieces in buttermilk for at least one hour, or up to overnight. Then dredge them in your chosen coating before baking.
This method works especially well for crispy baked chicken wings and tenders. The buttermilk creates a tangy flavor that complements the crunch. It also helps the coating stick better, so you do not end up with breading falling off in the oven.
The Panko Breadcrumb Coating
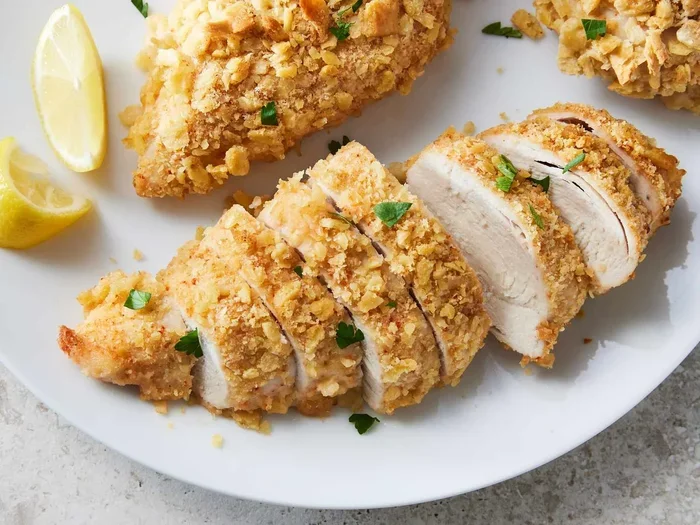
Panko breadcrumbs are lighter and flakier than regular breadcrumbs. They create a crunchier coating with less product. To use panko, dip your chicken in flour first, then beaten egg, then press into the panko. This three-step process creates a thick, crunchy layer that bakes up beautifully.
Panko absorbs less oil than regular breadcrumbs. This means your baked chicken stays lighter and healthier while still being crispy. It is the go-to choice for many home cooks who want restaurant-quality crispy chicken recipe results without deep frying.
The Simple Oil and Seasoning Method
You do not always need a breading. Sometimes the simplest approach works best. Rub the chicken skin with a small amount of oil and season with salt and spices. Bake at high heat and the skin will crisp up naturally. This method is perfect for those who want less breading and more of the natural chicken flavor.
This technique works especially well with chicken thighs and drumsticks. The fat under the skin renders out and fries the skin from within. You get a golden, crispy exterior with minimal effort. It is the easiest way to achieve crispy chicken skin baked in the oven.
Oven Temperature and Timing Secrets
Temperature and timing are where most people go wrong. Too low and the chicken steams instead of crisping. Too high and the outside burns before the inside cooks. Finding the sweet spot is essential for perfect crispy baked chicken every time.
The Ideal Oven Temperature
Bake your chicken at 425°F to 450°F for the best results. This high heat rapidly dehydrates the surface, creating a crispy crust. It also triggers the Maillard reaction faster, giving you that beautiful golden color. Lower temperatures like 350°F or 375°F are too gentle for achieving real crunch.
Preheat your oven fully before the chicken goes in. A fully heated oven ensures immediate contact with high heat. This sets the surface of the chicken right away and begins the crisping process from the moment it enters the oven. Do not skip this step.
How Long to Bake Chicken for Crispiness
Baking time depends on the size of the pieces and the oven temperature. At 425°F, chicken thighs and drumsticks typically need 35 to 45 minutes. Wings cook in about 25 to 30 minutes. Chicken breasts take around 25 to 30 minutes depending on thickness.
Use a meat thermometer to check doneness. The internal temperature should reach 165°F in the thickest part. Do not rely on timer alone. Every oven is different, and actual cooking times can vary. Checking with a thermometer takes the guesswork out entirely.
The Wire Rack Method
Place your chicken on a wire rack set over a baking sheet. This is the single best tip for even crispiness. The wire rack allows hot air to flow underneath the chicken. Without a rack, the bottom side sits in its own juices and steams. That bottom side will never get crispy.
A wire rack also lifts the chicken above the baking sheet, allowing fat to drip away. This prevents the chicken from sitting in grease and becoming soggy. If you do not have a wire rack, you can use a cooling rack placed inside a baking sheet. The results will be almost identical.
Should You Flip the Chicken?
Flipping chicken halfway through baking helps both sides crisp evenly. Use tongs to carefully turn each piece. This is especially important for thicker cuts like thighs and breasts. The side facing down gets direct heat from the baking sheet, which accelerates crisping. Flipping ensures both sides get equal exposure.
If you use a wire rack, flipping is less critical because air circulates on all sides. But flipping still helps the top side brown more evenly. Make it a habit for the best results with every batch of crispy oven chicken.
Pro Tips for Next-Level Crispy Chicken
You have mastered the basics. Now it is time to take your crispy baked chicken to the next level. These pro tips will elevate your results from good to absolutely outstanding.
Add Cornstarch to Your Breading
Mix cornstarch into your breading for an extra-crunchy exterior. Cornstarch creates a shatteringly crispy layer when baked. Use a ratio of about one part cornstarch to three parts breadcrumbs or panko. This trick is used by many professional kitchens and works wonders in home ovens.
Use a Finishing Broil
Once your chicken is cooked through, switch your oven to broil. Place the chicken back in for one to two minutes. Watch it closely. The broiler delivers intense top-down heat that adds an extra layer of crunch to the surface. This is a restaurant technique that works beautifully at home.
Let the Chicken Rest Before Serving
Resting chicken after baking is just as important as resting grilled chicken. Let it sit for five to ten minutes after removing it from the oven. This allows the juices to redistribute throughout the meat. It also lets the crust firm up and stay crispy. Cutting into chicken immediately causes juices to run out, and those juices can soften the crust.
Brush with Butter or Honey After Baking
A light brush of melted butter or honey on the chicken right after baking adds flavor and gloss. The butter enhances the golden color and adds richness. The honey creates a subtle sticky glaze that complements the crunch. Apply this while the chicken is still hot for the best results.
Do Not Crowd the Pan
Give each piece of chicken space. Overcrowding creates steam pockets that prevent crisping. Use two baking sheets if needed rather than fitting everything on one. The extra sheet is worth the effort. Your crispy chicken recipe will thank you for the extra room.
Cold Chicken Goes in Hot
Place your chicken in a hot oven rather than a cold one. Starting with high heat immediately begins crisping the surface. This technique locks in moisture while the outside gets golden and crunchy. It also reduces overall cooking time, which helps prevent the meat from drying out.
Common Mistakes to Avoid
Even experienced cooks make mistakes when trying to achieve crispy chicken in the oven. Here are the most common errors and how to avoid them.
Skipping the drying step: Moisture is the biggest enemy of crispiness. Always pat your chicken dry thoroughly before any seasoning or coating.
Using the wrong temperature: Baking at too low a temperature will steam the chicken rather than crisp it. Stick to 425°F or higher for best results.
Not using a wire rack: Baking directly on a sheet traps steam underneath and creates a soggy bottom. Always use a rack when possible.
Overcrowding the pan: Too many pieces on one sheet creates steam and uneven cooking. Give every piece room to breathe.
Opening the oven too often: Every time you open the oven door, the temperature drops. This slows crisping and can lead to uneven cooking. Trust the process and resist the urge to peek.
Removing chicken too early: Undercooked chicken is a food safety risk. Use a meat thermometer and make sure the internal temperature reaches 165°F before pulling it out.
Using too much coating: A thick, heavy coating can become doughy rather than crispy. Apply thin, even layers for the best crunch.
Best Seasonings and Flavor Combinations for Crispy Chicken
Seasoning is where you can get creative. The right blend of spices transforms simple baked chicken into something extraordinary. Here are some tried-and-true flavor combinations that pair perfectly with crispy chicken bake recipes.
Classic Herb: Rosemary, thyme, garlic powder, and lemon zest. This combination works beautifully with any cut and complements the natural flavor of chicken.
Spicy Korean: Gochugaru (Korean chili flakes), soy sauce, sesame oil, and ginger. This creates a sweet, spicy, and savory crispy chicken that is incredibly addictive.
Mediterranean: Oregano, basil, paprika, and a squeeze of lemon. Light and flavorful with a beautiful golden color from the paprika.
Buffalo Style: Hot sauce and melted butter brushed on after baking. This gives you buffalo chicken wings without the deep fryer.
Smoky BBQ: Smoked paprika, brown sugar, cumin, and black pepper. A sweet and smoky coating that caramelizes beautifully in the oven.
Experiment with different combinations to find your favorite. The beauty of oven-baked chicken is that it is so versatile. You can change the flavors completely with just a few ingredient swaps.
Frequently Asked Questions
Can you get crispy chicken without breading?
Yes, absolutely. The key is using high heat and dry skin. Rub the chicken with oil and salt, then bake at 425°F or higher. The skin will render and crisp up naturally without any breading. Chicken thighs and drumsticks work best for this method because they have more fat content.
Why is my baked chicken not crispy?
The most common reason is too much moisture on the surface. Always pat your chicken dry thoroughly before baking. Also check your oven temperature. If it is too low, the chicken will steam instead of crisp. Using a wire rack and not overcrowding the pan also make a big difference.
Does covering chicken with foil make it crispy?
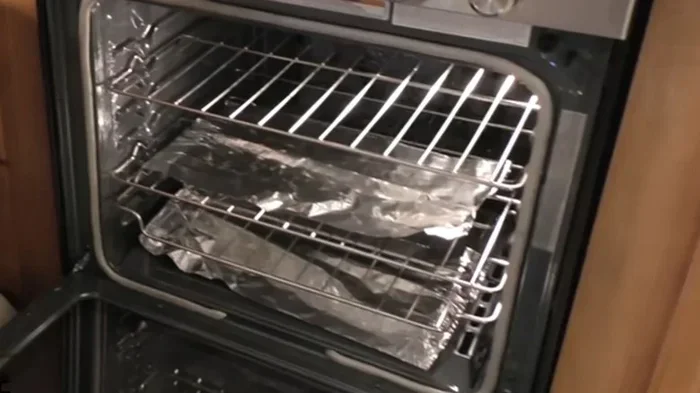
No, covering chicken with foil traps steam and prevents crispiness. Foil is useful for keeping chicken moist during the early stages of cooking, but remove it for the last 10 to 15 minutes to allow the surface to crisp up. For best results, skip the foil entirely when your goal is crunch.
What is the best oil for crispy baked chicken?
Avocado oil and vegetable oil are excellent choices because they have high smoke points and a neutral flavor. Olive oil works too but has a lower smoke point, which can affect the crispiness at very high temperatures. Use a light brush or spray for an even, thin coat on the chicken skin.
Can you use regular breadcrumbs instead of panko?
Yes, but panko gives a lighter and crunchier result. Regular breadcrumbs tend to absorb more moisture and can become dense or soggy. If you only have regular breadcrumbs, try toasting them in a dry pan before using them as a coating. This adds some crunch and helps them hold up better in the oven.
How do you keep chicken crispy after it comes out of the oven?
Place the chicken on a wire rack rather than a plate. This prevents steam from getting trapped underneath and softening the crust. Do not cover the chicken after baking, as trapped steam will make it lose its crunch. Serve it within 15 to 20 minutes for the best texture.
Conclusion
Getting chicken crispy when baked in the oven is easier than most people think. The secret lies in a few simple principles: dry the chicken thoroughly, use high heat, bake on a wire rack, and do not overcrowd the pan. With these techniques, you can enjoy crispy baked chicken that is golden, crunchy, and full of flavor.
Choose skin-on cuts like thighs, drumsticks, or wings for the best results. Apply your favorite coating or seasoning, and bake at 425°F to 450°F for the perfect crunch. Use the tips and tricks in this guide to elevate your oven-baked chicken from ordinary to extraordinary.
Remember that practice makes perfect. Every time you bake chicken, you will learn a little more about how your oven works and what techniques suit your taste best. Soon, crispy chicken from the oven will be second nature. Start with the basics, experiment with flavors, and enjoy the process. Your kitchen will smell incredible, and your family and friends will be impressed every time.
Now it is your turn. Pick up your favorite chicken pieces, dry them off, season them well, and get them in that hot oven. You will be enjoying crispy chicken that rivals any fried version in no time. Happy baking!