How To Replace Oven Door Hinges Without Professional Help
Replacing oven door hinges yourself is easier than you think and can save you hundreds of dollars. This guide walks you through every step of oven door hinge replacement with clear instructions and helpful tips. You will learn what tools you need, how to remove broken hinges, and how to install new ones safely.
Your oven door hinge is one of those parts you probably never think about until it breaks. Suddenly, your oven door sags, won’t close properly, or swings open at the worst possible moment. If you are dealing with a broken oven hinge, you might be tempted to call a repair technician right away. But here is the good news: you can learn how to replace oven door hinges on your own. This guide makes the process simple and easy to follow. You will have your oven door working like new in no time.
Many people assume that oven repair is a job for a professional. And sometimes it is. But replacing a hinge is one of the most straightforward oven door repair tasks you can do at home. All you need are a few basic tools, the right replacement parts, and a little patience. Whether you have a self-cleaning oven hinge or a standard gas oven, the process is very similar. Let us walk through it together, step by step.
Key Takeaways
- DIY-Friendly Task: Most homeowners can replace oven door hinges in under an hour with basic tools.
- Cost Savings: Doing it yourself avoids expensive service call fees that come with professional oven repair.
- Right Parts Matter: Matching your specific oven model and hinge type ensures a proper fit and long-lasting results.
- Safety First: Always disconnect power and let the oven cool before starting any repair work.
- Regular Maintenance: Simple cleaning and inspection habits can extend the life of your new oven door hinges.
- Know When to Call a Pro: Some situations, like electrical issues or severe frame damage, need professional attention.
📑 Table of Contents
- Why Oven Door Hinges Fail
- Signs You Need to Replace Your Oven Door Hinges
- Tools and Parts You Will Need
- How To Replace Oven Door Hinges: Step-by-Step
- Common Mistakes to Avoid
- When to Call a Professional for Oven Door Repair
- Maintenance Tips to Keep Your Oven Hinges in Good Shape
- Quick Tips for a Smooth Repair
- How Much Does It Cost to Replace Oven Door Hinges?
- Frequently Asked Questions
- Final Thoughts on Replacing Oven Door Hinges
Why Oven Door Hinges Fail
Oven door hinges take a lot of abuse over the years. They bear the weight of the heavy oven door every single day. Heat, grease, and moisture all take a toll on the metal. Understanding why hinges fail can help you prevent future problems.
Normal Wear and Tear
The most common reason hinges fail is simple age. Over time, the metal weakens from repeated opening and closing. The hinge pin wears down. Screws loosen. Eventually, the hinge can no longer support the door properly. This is especially true for older ovens that have seen many years of use.
Heat Damage and Warping
Ovens get extremely hot. The constant exposure to high temperatures can cause metal to warp over time. A warped hinge will not align correctly. This leads to gaps in the door, heat escaping, and poor cooking performance. If your oven door does not close flush, heat damage to the hinge might be the culprit.
Grease Buildup and Corrosion
Grease and food particles build up around the hinge area over time. This buildup can cause corrosion, especially on the hinge pin and screws. Corroded parts become stiff and eventually break. Regular cleaning of the hinge area can help prevent this issue.
Accidental Damage
Sometimes hinges break because of an accident. A heavy pot bumped against the door. The door was slammed too hard. A child pulled on the door with too much force. Any of these events can bend or snap a hinge. If the damage is sudden and obvious, the cause is usually easy to spot.
Signs You Need to Replace Your Oven Door Hinges
How do you know it is time to replace the hinges? Look for these clear warning signs.
- Door sags to one side: The oven door hangs unevenly when open.
- Door won’t stay closed: The latch does not hold the door shut properly.
- Visible gap between door and oven: You can see light or feel heat escaping from the edges.
- Door swings open on its own: The hinges can no longer hold the weight.
- Loose or wobbly hinge: The hinge moves when you touch it.
- Rattling or clicking sounds: You hear noise when the oven door moves.
- Door won’t open or close smoothly: The movement feels rough or stuck.
If you notice any of these issues, it is a good idea to inspect the hinges closely. Sometimes the problem is just a loose screw. But if the hinge itself is damaged, you will need to replace it. Replacing oven hinges early prevents further damage to the oven door and frame.
Tools and Parts You Will Need
Before you start, gather everything you need. Having the right tools and parts ready makes the job much smoother. You do not want to stop halfway through because you are missing something.
Tools Checklist
- Phillips-head screwdriver
- Flat-head screwdriver
- Adjustable wrench or socket set
- Pliers (needle-nose work best)
- Wire brush or old toothbrush
- Soft cloth and mild cleaner
- Flashlight or headlamp
- Needle-nose pliers for small parts
Choosing the Right Replacement Hinge
Not all oven hinges are the same. You need to find the right one for your specific oven model. The oven hinge kit you buy must match your oven brand, model, and door style.
Start by checking your oven manual. It usually lists the part number for the hinge. If you no longer have the manual, look for a model number sticker on the inside of the oven door frame or on the back of the oven. You can then search for the part online or at your local appliance parts store.
There are a few types of hinges to be aware of:
- Bottom-mount hinges: These attach at the bottom of the door and are the most common type.
- Top-mount hinges: These attach at the top and are found on some European-style ovens.
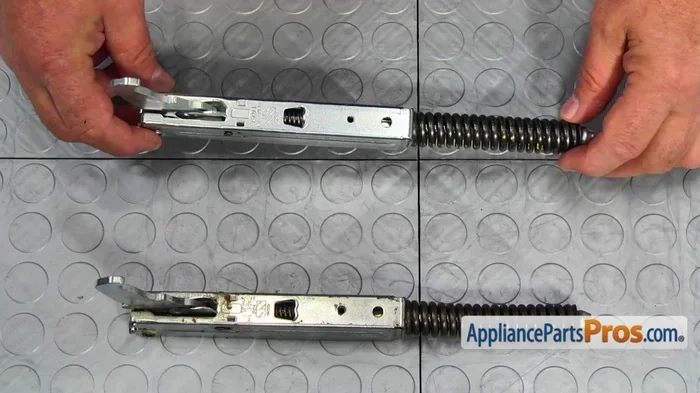
- Spring-loaded hinges: These have a built-in spring that helps the door open and close smoothly.
- Continuous hinges: These run along the full length of the door and are used on heavy-duty ovens.
Make sure you order the correct hinge type. If you are unsure, take the old hinge to the parts store and compare it. Many online retailers also have diagram guides that can help you match the part.
How To Replace Oven Door Hinges: Step-by-Step
This is the heart of the guide. Follow these steps carefully to replace your oven door hinges safely and correctly.
Step 1: Disconnect Power and Let the Oven Cool
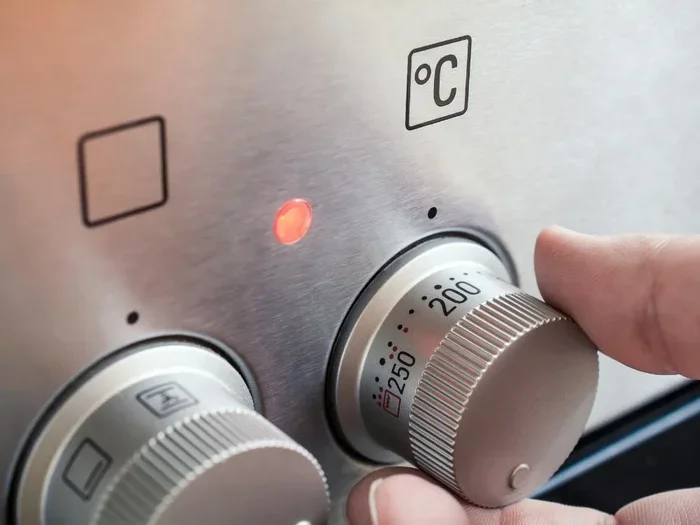
Safety comes first. Before you do anything, turn off the oven at the circuit breaker. Do not just switch the oven off at the control panel. You want to make sure there is no electrical connection. If you have a gas oven, turn the gas valve to the off position as well. Wait for the oven to cool completely. A hot oven can cause burns and can also warp plastic parts during removal.
Step 2: Remove the Oven Door
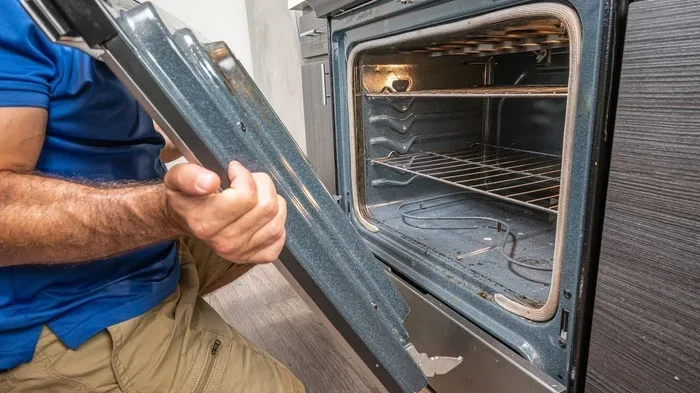
Most oven doors can be removed by lifting them slightly and sliding them off the hinge pins at the bottom. Open the door halfway, then lift the bottom of the door upward just a few inches. The door should slide off the lower hinge pins. Set the door gently on a soft towel or blanket on a flat surface.
Some ovens have a door release mechanism. Check your manual if this does not work. The release is usually a small lever or button located near the hinge area on the inside of the door.
Step 3: Remove the Old Hinges
Now you can access the hinges more easily. Use your screwdriver to remove the screws holding each hinge to the oven frame. There are usually two or three screws per hinge. Keep all the screws in a small bowl or container so you do not lose them.
Once the screws are out, carefully pull the hinge away from the frame. If the hinge is stuck, a gentle wiggle should free it. Use pliers if needed, but be careful not to bend the frame. Inspect the hinge area for any debris or buildup and clean it with a soft cloth.
Step 4: Install the New Hinges
Take your new oven door hinge out of the packaging. Compare it to the old hinge to make sure they look the same. Position the new hinge against the oven frame and start the screws by hand. This prevents cross-threading.
Once the screws are started, use your screwdriver to tighten them firmly. Do not overtighten, as this can strip the screw holes or crack the frame. Repeat this process for both hinges on the door.
Step 5: Reattach the Oven Door
With both new hinges securely in place, it is time to reattach the door. Lift the door back into position. Slide the bottom of the door onto the new hinge pins. Lower the door gently until it clicks or sits flush in the frame.
Check that the door opens and closes smoothly. It should move freely without catching or rubbing against the frame. If the door feels stiff, double-check that the hinges are aligned correctly.
Step 6: Test and Adjust
Open and close the door several times. Listen for any unusual sounds. Check the alignment from the outside. The door should sit evenly with no gaps on any side.
If the door is uneven, you can make small adjustments. Most hinges have a slight amount of play in the screw holes. Loosen the screws slightly, reposition the door, and then retighten. This is a quick and easy way to fine-tune the alignment.
Once everything looks and feels right, restore power to the oven. Run a test cycle at a low temperature to make sure the door seals properly and the oven heats correctly.
Common Mistakes to Avoid
Even simple repairs can go wrong if you are not careful. Here are some common mistakes people make when replacing oven door hinges.
- Skipping the power disconnect: This is a serious safety risk. Always disconnect power before starting any repair.
- Forcing parts during removal: If a screw or hinge is stuck, do not use excessive force. Apply a penetrating lubricant and wait a few minutes before trying again.
- Buying the wrong hinge: Not all hinges are interchangeable. Always verify the model number and hinge type before purchasing.
- Overtightening screws: This can damage the frame or strip the threads. Tighten until snug, not until you feel resistance.
- Ignoring the hinge pin: The hinge pin is a small but critical part. If it is damaged, replace it along with the hinge.
- Not cleaning the area first: Grease and debris can affect the fit and function of the new hinge. Clean the area before installation.
Avoiding these mistakes will save you time and frustration. It will also help your new oven door hinge replacement last longer.
When to Call a Professional for Oven Door Repair
DIY repairs are rewarding, but they are not always the right choice. There are situations where calling a professional is the smarter move.
If you notice damage to the oven frame itself, do not attempt to fix it yourself. A bent or cracked frame requires specialized tools and expertise. Similarly, if the oven door glass is cracked or broken, a professional should handle the replacement. Glass repair involves specific safety considerations that are best left to experts.
Electrical issues are another reason to call a pro. If your oven door will not close because of a faulty latch mechanism connected to the electronic control board, a technician can diagnose and fix the problem safely. The average oven repair cost for a professional service call ranges from $100 to $250, depending on your location and the repair needed. Sometimes paying for expert help is worth the peace of mind.
Also, if you have tried replacing the hinges and the door still does not work properly, it might be time to call in an expert. There could be a deeper issue that a visual inspection would not reveal.
Maintenance Tips to Keep Your Oven Hinges in Good Shape
Once you have replaced your hinges, you want them to last as long as possible. A little maintenance goes a long way.
- Clean the hinges regularly: Wipe down the hinge area after cooking. Grease and food buildup accelerate wear.
- Check screws periodically: Every few months, inspect the hinge screws and tighten any that have loosened.
- Lubricate moving parts: A small amount of high-heat grease on the hinge pin keeps the door moving smoothly.
- Avoid slamming the door: Treat the oven door gently. Slamming puts stress on the hinges and the door glass.
- Inspect the door seal: A worn door seal can make the hinges work harder. Replace the seal if it looks damaged or worn out.
These simple habits will extend the life of your new hinges and keep your oven running efficiently. Think of it as a small investment in the long-term performance of your oven.
Quick Tips for a Smooth Repair
Here are some extra tips that can make your hinge replacement easier and more successful.
- Take photos before disassembly: Photos help you remember how everything is connected. This is especially helpful if parts look similar but are not.
- Use a magnetic tray for screws: Small screws are easy to drop and lose. A magnetic tray keeps them organized.
- Label the hinges: Mark which hinge goes on which side with a piece of tape. Mixing them up can cause alignment issues.
- Work on a stable surface: Place the oven door on a towel or blanket to prevent scratches and accidental damage.
- Have a helper: A second pair of hands makes it easier to hold the door in position while you tighten screws.
These small steps might seem minor, but they can save you a lot of headaches. A little preparation makes any oven repair DIY project go more smoothly.
How Much Does It Cost to Replace Oven Door Hinges?
One of the biggest advantages of doing this repair yourself is the cost savings. A replacement oven hinge kit typically costs between $15 and $40 for a pair of hinges. If you need to buy tools, a basic screwdriver set costs around $10 to $20. In total, a DIY hinge replacement costs well under $50 in most cases.
Compare that to the cost of hiring a professional. A service call alone can cost $100 or more. Add the cost of the part and labor, and you could easily spend $200 to $400. Doing the repair yourself saves you a significant amount of money. It also gives you the satisfaction of fixing something on your own.
Of course, the exact oven repair cost varies depending on your oven brand and model. High-end or specialty ovens may have more expensive hinges. But even in those cases, the DIY approach still saves you a considerable amount compared to professional service.
Frequently Asked Questions
Can I replace just one oven door hinge, or do I need to replace both?
It is best to replace both hinges at the same time. Even if only one looks damaged, the other is likely worn too. Replacing both ensures even door alignment and balanced performance. It also saves you the hassle of doing the job twice later on.
How long does it take to replace oven door hinges?
Most homeowners complete the job in 30 to 60 minutes. The first time might take a little longer while you get used to the process. Once you have done it once, subsequent replacements will be even faster. Have your tools ready and follow the steps carefully for the best results.
Do I need any special tools to replace oven door hinges?
No special tools are required. A standard Phillips-head screwdriver, a flat-head screwdriver, and a pair of pliers are all you need. If the screws are stubborn, a penetrating oil spray can help loosen them. Most households already have these basic tools on hand.
Is it safe to use the oven immediately after replacing the hinges?
Yes, it is safe once the door is securely reattached and aligned properly. Make sure the door closes fully and the latch engages. Run a short test cycle at a low temperature to confirm everything works. If you notice any issues, check the hinge alignment before using the oven at high temperatures.
Where can I find replacement hinges for my specific oven model?
You can find replacement hinges online through appliance parts retailers, manufacturer websites, and general marketplaces. Always use your oven model number to search for the correct part. Your oven manual also lists the compatible hinge part number. Local appliance parts stores can often order the part for you if they do not have it in stock.
What should I do if the new hinge does not fit properly?
Double-check that you ordered the correct hinge for your oven model. Compare the new hinge to the old one to confirm they are the same size and style. If the fit is slightly off, check that all screws are in the correct holes. Sometimes a hinge can be adjusted within the screw holes for a better fit. If the problem persists, contact the seller for a replacement or consult a professional.
Final Thoughts on Replacing Oven Door Hinges
Learning how to replace oven door hinges is one of the most satisfying DIY repairs you can tackle. It is a task that saves you money, builds your confidence, and keeps your oven running at its best. The process is straightforward, the tools are basic, and the results are immediate. You do not need to be a handyman or a professional technician to get the job done right.
With the right oven hinge kit, a little patience, and the steps outlined in this guide, you can handle this repair in under an hour. You will avoid the hassle and expense of a service call. You will also gain the satisfaction of knowing you fixed the problem yourself.
Remember to take your time, follow each step carefully, and do not skip the safety precautions. If you run into any issues that feel beyond your comfort level, there is no shame in calling a professional. The goal is a properly functioning oven door that seals well and opens and closes smoothly.
Your oven works hard for you every day. A little maintenance and timely repair go a long way in keeping it running efficiently for years to come. So grab your screwdriver, order those replacement hinges, and get started today. Your oven door will thank you for it.