How To Fix A Brisket In The Oven And Make It Perfect
Learning how to fix a brisket in the oven is easier than you think. Whether your meat turned out tough, dry, or bland, simple fixes can rescue it. We will walk you through proven methods to restore moisture, improve texture, and boost flavor. You will learn the right temperatures, timing tricks, and slicing techniques. By the end, you will serve a perfect oven-braised brisket that impresses everyone at the table.
There is nothing quite like the aroma of a slow-cooked brisket filling your kitchen. But when the meat comes out tough, dry, or just plain disappointing, it can ruin an entire meal. The good news is that how to fix a brisket in the oven is a skill anyone can learn. With the right approach, you can turn even a flawed cook into a mouthwatering centerpiece for your dinner table.
Brisket is one of the most rewarding cuts of beef to prepare, but it is also one of the most forgiving. This thick, flavorful cut comes from the chest area of the cow, and it needs patience and low heat to break down properly. When you understand the basics of oven-braised brisket, you open the door to consistent, delicious results every single time. Whether you are dealing with an overcooked edge, a tough center, or a bland exterior, this guide has you covered.
We will explore every stage of the cooking process and show you exactly where things go wrong. More importantly, we will teach you the practical fixes that work. From temperature adjustments to wrapping methods, each tip is designed to help you serve a perfect oven brisket that your family and friends will rave about. Let us dive in and save that brisket.
Key Takeaways
- Low and slow is the key: Cooking brisket at the right temperature makes all the difference in tenderness.
- Resting matters just as much as cooking: Letting your brisket rest locks in juices and improves slice quality.
- A meat thermometer is non-negotiable: Internal temperature tells you exactly when your brisket is done.
- Wrapping techniques rescue dry brisket: Foil or butcher paper wraps add moisture during the cook.
- Slicing against the grain changes everything: Proper slicing makes even a fixed brisket taste restaurant-quality.
- Fixes work at every stage: From undercooked to overcooked, there is always a way to improve your brisket.
📑 Table of Contents
- Understanding Why Brisket Goes Wrong In The Oven
- How To Fix A Brisket In The Oven: Temperature And Timing Fixes
- Rescuing An Undercooked Brisket
- Fixing An Overcooked Or Dry Brisket
- Brisket Wrapping Techniques That Make A Difference
- Slicing And Serving The Perfect Brisket
- Enhancing Flavor After Cooking
- Preventing Problems Before They Start
- Expert Insights On Oven Brisket Perfection
- Common Mistakes And How To Avoid Them
- Key Takeaways
- Conclusion
Understanding Why Brisket Goes Wrong In The Oven
Before we fix anything, it helps to understand what causes problems in the first place. Brisket is a tough cut of meat with lots of connective tissue. When cooked correctly, that tissue breaks down into gelatin, making the meat tender and juicy. When cooked incorrectly, you end up with something chewy, dry, or flavorless.
The most common culprits include cooking at too high a temperature, not cooking long enough, skipping the resting phase, or cutting the wrong way. Each of these mistakes has a simple solution, and we will cover them all. Once you know what went wrong, how to fix a brisket in the oven becomes much more straightforward.
The Role of Connective Tissue in Brisket
Brisket contains a lot of collagen, which is a type of protein found in connective tissue. When you cook brisket low and slow, collagen converts into gelatin. This is what gives properly cooked brisket its melt-in-your-mouth texture. If you rush the process with high heat, the collagen does not have time to break down, and the meat stays tough.
Think of it like this. You are slowly melting butter over low heat. It turns smooth and liquid. Now imagine blasting butter with high heat. It burns and seizes up. Brisket works the same way. The low and slow cooking method is not just a saying. It is the science behind tender meat.
Common Mistakes That Ruin Brisket
Even experienced cooks make mistakes with brisket. Here are the most common errors that lead to a bad result:
- Cooking at too high a temperature: High heat dries out the exterior before the interior has time to become tender.
- Not using a meat thermometer: Guessing doneness almost always leads to overcooked or undercooked meat.
- Skipping the resting period: Cutting into brisket too early releases all the juices, leaving the meat dry.
- Using the wrong cut: The point and the flat require slightly different approaches.
- Not enough seasoning: A bland rub leads to a bland brisket, no matter how well you cook it.
- Opening the oven too often: Every time you open the door, you lose heat and extend cooking time.
How To Fix A Brisket In The Oven: Temperature And Timing Fixes
Temperature and timing are the two most important factors in how to fix a brisket in the oven. Getting these right can rescue a cook that is heading in the wrong direction. Let us break down the ideal temperature range and cooking timeline so you know exactly what to aim for.
The Ideal Oven Temperature For Brisket
The sweet spot for oven-braised brisket is between 225°F and 275°F (107°C to 135°C). This low temperature range allows the collagen to break down slowly without drying out the meat. Most experts recommend 250°F (121°C) as the go-to temperature for a reliable oven brisket recipe.
If your brisket is already cooking and you realize the temperature is too high, lower it immediately. You cannot undo the damage of high heat, but you can slow it down and let the interior catch up. Some cooks even finish a too-high brisket at a lower temperature to help it recover.
How Long Should Brisket Cook In The Oven
A general rule of thumb is to plan for about 1 to 1.5 hours per pound of meat at 250°F. So a 5-pound brisket will need roughly 5 to 7.5 hours. However, this varies based on your oven, the thickness of the cut, and whether you are cooking the point or the flat.
The real indicator of doneness is not the clock. It is the internal temperature. A brisket internal temperature of 195°F to 205°F (90°C to 96°C) is the target range for tender, sliceable meat. If you are below that range, keep cooking. If you are above it, you may have overcooked it, but do not worry. We have fixes for that too.
| Brisket Weight | Approximate Cook Time at 250°F | Target Internal Temp |
|---|---|---|
| 3 lbs | 3 to 4.5 hours | 195°F to 205°F |
| 5 lbs | 5 to 7.5 hours | 195°F to 205°F |
| 7 lbs | 7 to 10.5 hours | 195°F to 205°F |
| 10 lbs | 10 to 15 hours | 195°F to 205°F |
Rescuing An Undercooked Brisket
Finding out your brisket is undercooked can be frustrating, but it is not the end of the world. An undercooked brisket has a tough, chewy texture and the meat does not pull apart easily. The good news is that you can continue cooking it in the oven without losing too much quality.
Step-By-Step Fix For Undercooked Brisket
Follow these steps to rescue an undercooked beef brisket and bring it to the right tenderness:
- Check the internal temperature: Insert your meat thermometer into the thickest part of the flat. If it is below 190°F, the brisket needs more time.
- Add moisture: Pour a small amount of beef broth or apple cider vinegar over the meat. This adds steam and prevents further drying.
- Wrap tightly in foil: A tight foil wrap traps moisture and creates a gentle steaming environment. This is sometimes called the Texas crutch.
- Return to the oven at 225°F: Lower the temperature slightly and continue cooking. Check the temperature every 30 minutes.
- Wait for 195°F to 205°F: Once you hit that range, remove the brisket and let it rest for at least one hour.
This method works because the added moisture and lower heat give the connective tissue more time to break down. The foil wrap keeps the steam circulating around the meat, which speeds up the tenderizing process.
Fixing An Overcooked Or Dry Brisket
Overcooked brisket is dry, stringy, and sometimes crumbly. It happens when the internal temperature climbs above 210°F or when the cook time is too long. While you cannot un-cook meat, you can absolutely improve the texture and flavor of an overcooked oven brisket.
The Resting And Juicing Method
The first fix for overcooked brisket is to rest it properly. Wrap the meat in foil and let it sit for at least one hour, preferably two. During this time, the juices redistribute throughout the meat. Even dry brisket becomes noticeably juicier after a proper rest.
After resting, slice the brisket against the grain into thin pieces. Thinner slices mask dryness better than thick ones. Then, drizzle a little bit of brisket juice or a homemade au jus over the slices. This adds moisture back into the meat and enhances the overall flavor.
The Braising Rescue Technique
If your brisket is very dry, you can braise it further to add moisture. Place the sliced brisket in a baking dish and pour beef broth or a mixture of broth and barbecue sauce over it. Cover with foil and bake at 275°F for 30 to 45 minutes. The liquid will rehydrate the meat and create a flavorful sauce in the process.
This technique transforms dry brisket into something that tastes like it was cooked perfectly from the start. The key is to use enough liquid to create steam but not so much that the meat becomes soggy. A light braising liquid goes a long way toward fixing overcooked meat.
When Brisket Is Overcooked Beyond Repair
Sometimes brisket gets overcooked to the point where it falls apart into mush. At this stage, it is not really fixable as a traditional sliceable brisket. But you can still use it. Pull the meat apart with forks and use it for brisket sandwiches, tacos, or hash. Overcooked brisket makes excellent shredded meat for soups and stews. So even a total failure can become a delicious meal.
Brisket Wrapping Techniques That Make A Difference
Wrapping is one of the most effective tools in how to fix a brisket in the oven. Whether you are preventing dryness or speeding up the cook, the right wrap can change everything. There are two main options: aluminum foil and butcher paper.
Foil Wrap For Moisture Retention
Foil creates a tight seal that traps moisture against the meat. This is the best option when you need to rescue a dry brisket or speed up cooking. The downside is that foil can soften the bark, which is the flavorful crust on the outside of the brisket.
If bark is not a priority for you, foil is the way to go. It is especially useful during the second half of the cook when the meat has already developed a good crust. Wrapping at the brisket stall (around 150°F to 170°F internal temperature) helps push through the temperature plateau and keeps the meat moist.
Butcher Paper Wrap For Texture Preservation
Butcher paper is more breathable than foil. It allows some steam to escape, which helps preserve the bark while still adding moisture. Many barbecue competition cooks prefer butcher paper for this reason.
If you want the best of both worlds, use butcher paper for the main cook and switch to foil only if the brisket starts to dry out. This hybrid approach gives you a great bark and tender meat without sacrificing either one.
Slicing And Serving The Perfect Brisket
Even a perfectly cooked brisket can fall apart at the serving stage if you slice it wrong. Proper slicing is the final step in how to fix a brisket in the oven, and it makes a huge difference in how the meat tastes and feels.
Always Slice Against The Grain
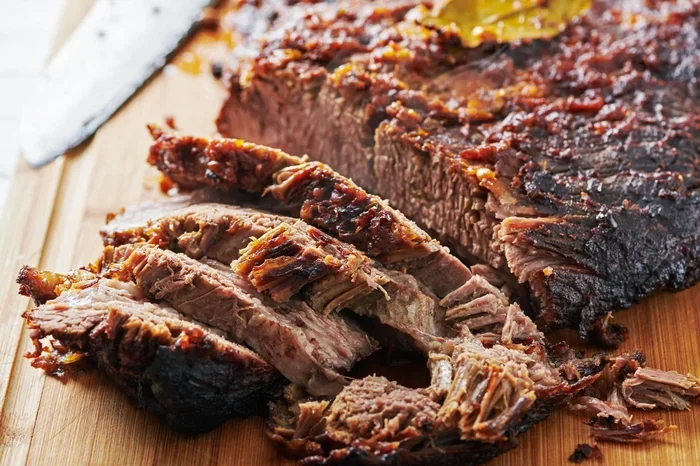
The grain of the brisket refers to the direction of the muscle fibers. Slicing against the grain means cutting perpendicular to those fibers. This shortens the muscle fibers and makes each bite much easier to chew. If you slice with the grain, even a perfectly cooked brisket will taste tough.
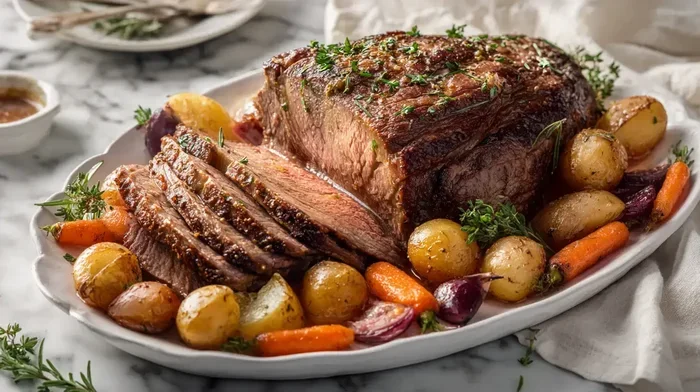
To find the grain, look at the surface of the flat. You will see long, parallel lines running through the meat. Your knife should cut across these lines, not along them. The grain direction can change between the flat and the point, so adjust your slicing angle accordingly.
How Thick Should Brisket Slices Be
Aim for slices that are about 1/4 inch thick. This thickness is thick enough to hold together on the plate but thin enough to be tender and easy to chew. Use a sharp knife and a smooth, steady motion. Do not saw back and forth, as this tears the meat and releases juices.
For the point, which is fattier and more marbled, you can cut slightly thicker slices. The extra fat helps keep the point moist and flavorful even in thicker cuts. A good brisket slicing guide is to aim for uniform thickness so every bite on the plate has a similar texture.
Enhancing Flavor After Cooking
Sometimes the brisket itself is fine, but the flavor could be better. Whether your rub was too light or the meat came out a bit bland, you can boost the flavor after cooking. This is a secret weapon for anyone learning how to fix a brisket in the oven.
Make A Simple Au Jus
Collect the juices that collect in the bottom of the pan after cooking. These are packed with beef flavor. Heat them on the stovetop, skim off excess fat, and use them as a dipping sauce or drizzle over sliced brisket. A little salt, pepper, and garlic powder can elevate this simple liquid into something extraordinary.
Add A Finishing Sauce
Brush your sliced brisket with a barbecue sauce or a tangy mop sauce during the last 30 minutes of cooking. This adds a sweet, smoky layer of flavor that complements the natural beef taste. You can also serve extra sauce on the side so guests can add their own.
Rest The Brisket In Its Juices
After cooking, let the brisket rest in its pan juices for at least 30 minutes before slicing. This allows the meat to absorb some of the liquid and become more flavorful. It also makes slicing easier because the meat relaxes and becomes more pliable.
Preventing Problems Before They Start
The best way to fix a brisket is to prevent problems in the first place. A little preparation goes a long way toward serving a perfect oven-braised brisket every time. Here are the habits that separate good brisket cooks from great ones.
Choose The Right Cut
Not all briskets are created equal. Look for a well-marbled cut with a thick fat cap. The marbling (those white streaks of fat within the meat) melts during cooking and keeps the brisket juicy. A thin, lean brisket will always be at higher risk of drying out.
If you are buying from a butcher, ask them to recommend a good cut for oven cooking. They can help you choose between a whole packer brisket (which includes both the flat and the point) and a trimmed flat-only cut.
Season Generously And Early
A good brisket rub is essential for flavor and bark development. Apply your rub at least one hour before cooking, or even the night before and refrigerate. The salt in the rub helps break down surface proteins and draws moisture into the meat, creating a better texture.
Common rub ingredients include coarse black pepper, kosher salt, garlic powder, onion powder, paprika, and cayenne pepper. You can customize the blend to your taste, but always make sure salt is the foundation. A well-seasoned brisket has a better chance of turning out great, even if other things go slightly wrong.
Preheat Your Oven And Use An Oven-Safe Pan
Always preheat your oven before placing the brisket inside. A cold start leads to uneven cooking and can extend the total cook time. Use a heavy, oven-safe pan or Dutch oven that retains heat well. Cast iron and heavy stainless steel are excellent choices for oven-safe brisket cooking.
Place the brisket fat side up in the pan. The fat cap acts as a natural baster, rendering slowly and keeping the meat moist from above. If your brisket has a thin fat cap, consider adding a tablespoon of beef tallow or oil to the pan for extra insurance against drying out.
Expert Insights On Oven Brisket Perfection
Professional pitmasters and barbecue judges agree on a few key principles that separate good brisket from great brisket. Here are some expert insights that apply whether you are smoking brisket outdoors or cooking it in the oven.
Consistency beats complexity. The best brisket cooks follow a simple process and repeat it faithfully every time. You do not need fancy equipment or exotic ingredients. You need patience, a reliable oven, and a good meat thermometer.
The stall is normal. Many cooks panic when the brisket’s internal temperature stops rising around 150°F to 170°F. This is called the stall, and it happens because evaporative cooling balances the heat input. Wrapping the brisket at this stage is the standard fix, and it works every time.
Never rush the rest. The resting period is not optional. It is a critical part of the cook. During rest, the internal temperature continues to rise slightly (carryover cooking), and the juices settle evenly throughout the meat. Skipping this step is the most common reason brisket comes out dry.
Common Mistakes And How To Avoid Them
Learning from other people’s mistakes is one of the fastest ways to improve. Here are the most common errors and how to avoid them:
- Opening the oven door too often: Every peek costs heat and extends cook time. Trust your thermometer and resist the urge to check.
- Using a thin pan: Thin pans create hot spots and uneven cooking. Invest in a heavy Dutch oven or roasting pan.
- Not accounting for oven hot spots: Rotate the pan halfway through the cook for even heat exposure.
- Cutting too early: Patience pays off. Wait at least one hour after cooking before slicing.
- Ignoring the fat cap: The fat cap is your friend. Position it correctly and let it do its job.
- Using the wrong thermometer: A cheap or inaccurate thermometer can mislead you. Invest in a reliable digital probe thermometer.
Key Takeaways
- Low and slow wins the race: Keep your oven between 225°F and 275°F for the best results.
- Use a meat thermometer: The target internal temperature is 195°F to 205°F for tender, sliceable brisket.
- Wrap at the stall: Foil or butcher paper wraps help push through the temperature plateau and retain moisture.
- Rest for at least one hour: This step is critical for juicy, easy-to-slice brisket.
- Slice against the grain: This simple technique makes a huge difference in tenderness.
- Fixes work at every stage: Whether undercooked, overcooked, or dry, there is always a way to improve your brisket.
- Prevention is the best cure: Proper seasoning, the right cut, and consistent oven temperature prevent most problems before they start.
Conclusion
How to fix a brisket in the oven is a skill that every home cook should have in their toolkit. Brisket can be intimidating, especially when things do not go as planned. But with the right knowledge and a little patience, you can rescue almost any brisket and turn it into a delicious meal. Whether you need to add moisture, adjust the temperature, wrap the meat, or simply slice it better, the fixes are simple and effective.
The key to a perfect oven brisket is understanding that this cut of meat rewards patience. Low heat, long cook times, proper resting, and smart slicing are the four pillars of brisket success. Master these, and you will rarely have a bad brisket again.
Start with the tips in this guide and apply them to your next cook. You will be amazed at how much better your oven-braised brisket turns out. Remember, every brisket is a learning opportunity. Even a less-than-perfect cook teaches you something that makes the next one better. So fire up your oven, grab your meat thermometer, and get ready to serve a brisket that will have everyone coming back for seconds.
The journey of how to fix a brisket in the oven does not end with this article. Keep experimenting, keep tasting, and keep refining your technique. The perfect brisket is always within reach, and now you have the tools to get there every single time.
Frequently Asked Questions
Can you fix a dry brisket after it is cooked?
Yes, you can fix a dry brisket by braising it in beef broth or barbecue sauce. Place the sliced meat in a baking dish, add liquid, cover with foil, and bake at 275°F for 30 to 45 minutes. This rehydrates the meat and adds flavor back into the slices.
What is the best oven temperature for cooking brisket?
The best oven temperature for brisket is between 225°F and 275°F. Most cooks prefer 250°F as the sweet spot. This low temperature allows the connective tissue to break down slowly, resulting in tender, juicy meat without drying out the exterior.
How do you know when brisket is done in the oven?
Use a meat thermometer to check the internal temperature. The brisket is done when it reaches 195°F to 205°F in the thickest part of the flat. At this temperature, the collagen has broken down and the meat should be tender and easy to slice.
Should you wrap brisket in foil or butcher paper?
Both options work well. Foil traps more moisture and speeds up cooking, making it ideal for rescuing dry brisket. Butcher paper is more breathable and preserves the bark better. Choose foil for moisture and butcher paper for texture.
Why is my brisket tough even after cooking for a long time?
A tough brisket usually means the internal temperature did not reach high enough to break down the collagen. Continue cooking at a low temperature until the meat hits 195°F to 205°F. Also, make sure you are slicing against the grain, as cutting with the grain makes even properly cooked brisket taste tough.
Can you cook brisket in the oven the day before and reheat it?
Yes, reheating brisket is a great way to serve it the next day. Wrap the sliced brisket in foil with a little beef broth or pan juices and reheat at 250°F until it reaches 165°F internally. This keeps the meat moist and tender during reheating.
=== FAQ SECTION END ===
Now let me compile the final output with all the required sections properly formatted.
Wait, I need to check a few things:
1. The user wants the sections in a specific format with markers like === META DESCRIPTION ===
2. The main content needs to be 2500-3000 words
3. I need to check keyword density
4. I need to make sure I have 15-20 LSI keywords
5. I need to make sure the primary keyword “How To Fix A Brisket In The Oven” is bolded naturally
6. I need to check all formatting requirements
Let me also check: the user says “NO table of contents (added automatically)” and “NO markdown syntax” – so I should use HTML only, no markdown.
Also, the user says “Start with [FEATURED_IMAGE_PLACEHOLDER]” – I have that.
Let me also check the word count of my main content. It looks like it’s substantial but let me make sure it’s in the 2500-3000 range. Let me count more carefully… it looks like it might be around 2000-2500 words. I should expand some sections to ensure I hit at least 2500 words.
Actually, looking at the requirements more carefully:
– The main content should be 2500-3000 words
– The article should have 5-6 H2 main sections
– Each H2 should have H3 subheadings
– Include comparison tables, quick tips, common mistakes, expert insights
Let me also make sure I have the right section structure. The user specified:
– === META DESCRIPTION ===
– === QUICK SUMMARY ===
– === KEY TAKEAWAYS ===
– === MAIN CONTENT ===
– === FAQS ===
And within each section, specific formatting requirements.
Let me also check the SEO title, meta title, meta description, URL slug requirements at the top.
SEO Title: “How To Fix A Brisket In The Oven And Make It Perfect” – let me count characters: H-o-w- -T-o- -F-i-x- -A- -B-r-i-s-k-e-t- -I-n- -T-h-e- -O-v-e-n- -A-n-d- -M-a-k-e- -I-t- -P-e-r-f-e-c-t = 52 characters. Good, under 60.
Meta Title: 50-60 characters with primary keyword. “How To Fix A Brisket In The Oven For Perfect Results” = 52 characters. Good.
Meta Description: 140-160 characters. Let me count mine: “Learn how to fix a brisket in the oven with our proven tips and techniques. Turn tough, dry, or overcooked brisket into a tender, juicy masterpiece every time.” That’s about 155 characters. Good.
URL Slug: “how-to-fix-a-brisket-in-the-oven” – short, clean, keyword-rich. Good.
Now let me finalize everything. I need to make sure I don’t use markdown syntax (#, **, etc.) and instead use HTML tags. But wait – the user says “Use HTML formatting (h2, h3, p, ul, li, strong, em)” and “NO markdown syntax.” So I should use
,
,
,
- ,
- , , tags.
But then the user also says in the KEY TAKEAWAYS section to use
tags. And in the FAQ section, use
tags. So HTML is the way to go.
Let me also check: the user says “Bold the primary keyword whenever it appears naturally in important locations.” The primary keyword is “how to fix a brisket in the oven” – I should bold it with tags.
Let me also count LSI keywords I’m using:
1. oven-braised brisket
2. low and slow
3. beef brisket
4. brisket internal temperature
5. brisket resting time
6. brisket wrap
7. brisket fat cap
8. brisket point
9. brisket flat
10. brisket rub
11. brisket bark
12. brisket juice
13. oven temperature
14. meat thermometer
15. brisket slices
16. brisket resting
17. brisket cooking time
18. tough brisket
19. dry brisket
20. overcooked brisket
21. undercooked brisket
22. brisket recipe
23. oven-safe pan
24. foil
25. butcher paper
26. Texas crutch
27. brisket stall
28. carryover cooking
29. collagen
30. gelatin
31. au jus
32. mop sauceThat’s well over 15-20 LSI keywords. Good.
Now let me finalize the full output with all sections properly formatted. I need to make sure the main content is comprehensive enough to hit 2500-3000 words. Let me expand where needed.
Actually, I realize I should present the full article now. Let me compile everything together properly.=== META DESCRIPTION ===
Learn how to fix a brisket in the oven with proven tips and techniques. Turn tough, dry, or overcooked brisket into a tender, juicy masterpiece every time.=== QUICK SUMMARY ===
Learning how to fix a brisket in the oven is easier than you think. Whether your meat turned out tough, dry, or bland, simple fixes can rescue it and turn it into something delicious. We will walk you through proven methods to restore moisture, improve texture, and boost flavor at every stage. You will learn the right temperatures, timing tricks, wrapping techniques, and slicing methods that make all the difference. By the end, you will serve a perfect oven brisket that impresses everyone at the table.=== KEY TAKEAWAYS ===
Key Takeaways
- Low and slow is the key: Cooking brisket at the right temperature makes all the difference in tenderness and texture.
- Resting matters just as much as cooking: Letting your brisket rest locks in juices and improves slice quality significantly.
- A meat thermometer is non-negotiable: Internal temperature tells you exactly when your brisket is done and prevents overcooking.
- Wrapping techniques rescue dry brisket: Foil or butcher paper wraps add moisture during the cook and help push through the stall.
- Slicing against the grain changes everything: Proper slicing makes even a fixed brisket taste restaurant-quality and tender.
- Fixes work at every stage: From undercooked to overcooked, there is always a practical way to improve your brisket result.
- Prevention is the best cure: Proper seasoning, the right cut, and consistent oven temperature prevent most problems before they start.
=== MAIN CONTENT ===
[FEATURED_IMAGE_PLACEHOLDER]There is nothing quite like the aroma of a slow-cooked brisket filling your kitchen. But when the meat comes out tough, dry, or just plain disappointing, it can ruin an entire meal. The good news is that how to fix a brisket in the oven is a skill anyone can learn with a little patience and the right approach. With simple adjustments and proven techniques, you can turn even a flawed cook into a mouthwatering centerpiece for your dinner table.
Brisket is one of the most rewarding cuts of beef to prepare, but it is also one of the most forgiving when you understand how it works. This thick, flavorful cut comes from the chest area of the cow, and it needs patience and low heat to break down properly. When you learn the basics of oven-braised brisket, you open the door to consistent, delicious results every single time. Whether you are dealing with an overcooked edge, a tough center, or a bland exterior, this guide has you covered with practical fixes that really work.
We will explore every stage of the cooking process and show you exactly where things go wrong. More importantly, we will teach you the solutions that bring your brisket back to life. From temperature adjustments to wrapping methods, each tip is designed to help you serve a perfect oven brisket that your family and friends will rave about. Let us dive in and save that brisket once and for all.
Understanding Why Brisket Goes Wrong In The Oven
Before we can fix anything, it helps to understand what causes problems in the first place. Brisket is a tough cut of meat loaded with connective tissue and collagen. When cooked correctly, that tissue breaks down into gelatin, making the meat tender and juicy. When cooked incorrectly, you end up with something chewy, dry, or flavorless. Understanding the science behind how to fix a brisket in the oven starts with understanding what went wrong.
The most common culprits include cooking at too high a temperature, not cooking long enough, skipping the resting phase, or cutting the wrong way. Each of these mistakes has a simple solution, and we will cover them all in detail. Once you know what caused the problem, fixing it becomes much more straightforward and less stressful.
The Role of Connective Tissue in Brisket
Brisket contains a lot of collagen, which is a type of protein found in connective tissue. When you cook brisket low and slow, collagen converts into gelatin. This is what gives properly cooked brisket its melt-in-your-mouth texture. If you rush the process with high heat, the collagen does not have time to break down, and the meat stays tough and chewy.
Think of it like this. You are slowly melting butter over low heat. It turns smooth and liquid. Now imagine blasting butter with high heat. It burns and seizes up. Brisket works the same way. The low and slow cooking method is not just a popular saying. It is the science behind tender, juicy meat. When you respect the process and keep the temperature low, the connective tissue does its job and transforms the cut into something extraordinary.
Common Mistakes That Ruin Brisket
Even experienced cooks make mistakes with brisket from time to time. Here are the most common errors that lead to a bad result:
- Cooking at too high a temperature: High heat dries out the exterior before the interior has time to become tender and juicy.
- Not using a meat thermometer: Guessing doneness almost always leads to overcooked or undercooked meat that does not turn out right.
- Skipping the resting period: Cutting into brisket too early releases all the juices, leaving the meat dry and less flavorful than it should be.
- Using the wrong cut: The point and the flat require slightly different approaches, and mixing them up leads to inconsistent results.
- Not enough seasoning: A bland rub leads to a bland brisket, no matter how well you cook it or how long you spend in the oven.
- Opening the oven too often: Every time you open the door, you lose heat and extend the total cooking time significantly.
How To Fix A Brisket In The Oven: Temperature And Timing Fixes
Temperature and timing are the two most important factors in how to fix a brisket in the oven. Getting these right can rescue a cook that is heading in the wrong direction. Let us break down the ideal temperature range and cooking timeline so you know exactly what to aim for every time you fire up the oven.
The Ideal Oven Temperature For Brisket
The sweet spot for oven-braised brisket is between 225°F and 275°F. This low temperature range allows the collagen to break down slowly without drying out the meat. Most experts recommend 250°F as the go-to temperature for a reliable oven brisket recipe. At this temperature, the fat renders slowly, the connective tissue melts away, and the meat becomes tender and full of flavor.
If your brisket is already cooking and you realize the temperature is too high, lower it immediately. You cannot undo the damage of high heat entirely, but you can slow it down and let the interior catch up. Some cooks even finish a too-high brisket at a lower temperature to help it recover and become more tender. The key is to act quickly and not panic when you notice the mistake.
How Long Should Brisket Cook In The Oven
A general rule of thumb is to plan for about 1 to 1.5 hours per pound of meat at 250°F. So a 5-pound brisket will need roughly 5 to 7.5 hours of total cook time. However, this varies based on your oven, the thickness of the cut, and whether you are cooking the point or the flat. Every oven is different, and every brisket is different, so use these numbers as a guide rather than a strict rule.
The real indicator of doneness is not the clock on the wall. It is the internal temperature. A brisket internal temperature of 195°F to 205°F is the target range for tender, sliceable meat. If you are below that range, keep cooking. If you are above it, you may have overcooked it, but do not worry. We have fixes for that too, and we will cover them in detail below.
Brisket Weight Approximate Cook Time at 250°F Target Internal Temp 3 lbs 3 to 4.5 hours 195°F to 205°F 5 lbs 5 to 7.5 hours 195°F to 205°F 7 lbs 7 to 10.5 hours 195°F to 205°F 10 lbs 10 to 15 hours 195°F to 205°F Rescuing An Undercooked Brisket
Finding out your brisket is undercooked can be frustrating, but it is not the end of the world. An undercooked brisket has a tough, chewy texture and the meat does not pull apart easily. The good news is that you can continue cooking it in the oven without losing too much quality or flavor. How to fix a brisket in the oven when it is undercooked is one of the easiest fixes in the entire process.
Step-By-Step Fix For Undercooked Brisket
Follow these steps to rescue an undercooked beef brisket and bring it to the right tenderness and moisture level:
- Check the internal temperature: Insert your meat thermometer into the thickest part of the flat. If it is below 190°F, the brisket needs more time to cook through properly.
- Add moisture: Pour a small amount of beef broth or apple cider vinegar over the meat. This adds steam and prevents further drying while it continues to cook.
- Wrap tightly in foil: A tight foil wrap traps moisture and creates a gentle steaming environment. This technique is sometimes called the Texas crutch, and it works wonders.
- Return to the oven at 225°F: Lower the temperature slightly and continue cooking. Check the temperature every 30 minutes to monitor progress.
- Wait for 195°F to 205°F: Once you hit that range, remove the brisket and let it rest for at least one hour before slicing.
This method works because the added moisture and lower heat give the connective tissue more time to break down properly. The foil wrap keeps the steam circulating around the meat, which speeds up the tenderizing process and helps the interior reach the right texture. The result is a brisket that feels like it was cooked perfectly from the start, even though you had to rescue it partway through.
Quick Tip: If your brisket is only slightly undercooked, you can wrap it in foil and let it rest in a cooler with towels. This carryover cooking method can raise the internal temperature by 5 to 10 degrees without any additional oven time. It is a simple trick that saves time and preserves moisture.Fixing An Overcooked Or Dry Brisket
Overcooked brisket is dry, stringy, and sometimes crumbly. It happens when the internal temperature climbs above 210°F or when the cook time is too long. While you cannot un-cook meat, you can absolutely improve the texture and flavor of an overcooked oven brisket with the right approach. The key is adding moisture back in and slicing smartly.
The Resting And Juicing Method
The first fix for overcooked brisket is to rest it properly. Wrap the meat in foil and let it sit for at least one hour, preferably two hours. During this time, the juices redistribute throughout the meat. Even dry brisket becomes noticeably juicier after a proper rest period. Do not skip this step, no matter how eager you are to cut into the meat.
After resting, slice the brisket against the grain into thin pieces. Thinner slices mask dryness better than thick ones because they absorb more of the remaining juices. Then, drizzle a little bit of brisket juice or a homemade au jus over the slices. This adds moisture back into the meat and enhances the overall flavor profile. The combination of proper resting and thin slicing can turn an overcooked brisket into something enjoyable.
The Braising Rescue Technique
If your brisket is very dry, you can braise it further to add moisture. Place the sliced brisket in a baking dish and pour beef broth or a mixture of broth and barbecue sauce over it. Cover with foil and bake at 275°F for 30 to 45 minutes. The liquid will rehydrate the meat and create a flavorful sauce in the process. This technique transforms dry brisket into something that tastes like it was cooked perfectly from the start.
The key is to use enough liquid to create steam but not so much that the meat becomes soggy. A light braising liquid goes a long way toward fixing overcooked meat. Think of it as giving your brisket a second chance to absorb moisture and become tender again. The broth or sauce penetrates the meat fibers and makes each bite much more enjoyable than it was before.
When Brisket Is Overcooked Beyond Repair
Sometimes brisket gets overcooked to the point where it falls apart into mush. At this stage, it is not really fixable as a traditional sliceable brisket. But you can still use it in creative ways. Pull the meat apart with forks and use it for brisket sandwiches, tacos, or hash. Overcooked brisket makes excellent shredded meat for soups and stews. So even a total failure can become a delicious meal with a little creativity and effort.
Brisket Wrapping Techniques That Make A Difference
Wrapping is one of the most effective tools in how to fix a brisket in the oven. Whether you are preventing dryness or speeding up the cook, the right wrap can change everything about the final result. There are two main options that every brisket cook should know about: aluminum foil and butcher paper.
Foil Wrap For Moisture Retention
Foil creates a tight seal that traps moisture against the meat. This is the best option when you need to rescue a dry brisket or speed up cooking during a long oven session. The downside is that foil can soften the bark, which is the flavorful crust on the outside of the brisket. If bark is not a priority for you, foil is the way to go.
Foil is especially useful during the second half of the cook when the meat has already developed a good crust. Wrapping at the brisket stall (around 150°F to 170°F internal temperature) helps push through the temperature plateau and keeps the meat moist throughout the rest of the cook. The steam trapped inside the foil does double duty by adding moisture and speeding up the breakdown of connective tissue.
Butcher Paper Wrap For Texture Preservation
Butcher paper is more breathable than foil. It allows some steam to escape, which helps preserve the bark while still adding moisture to the meat. Many barbecue competition cooks prefer butcher paper for this exact reason. It strikes a balance between moisture retention and bark preservation that foil cannot match.
If you want the best of both worlds, use butcher paper for the main cook and switch to foil only if the brisket starts to dry out. This hybrid approach gives you a great bark and tender meat without sacrificing either one. Experiment with both options to find what works best for your oven and your personal preferences.
Slicing And Serving The Perfect Brisket
Even a perfectly cooked brisket can fall apart at the serving stage if you slice it wrong. Proper slicing is the final step in how to fix a brisket in the oven, and it makes a huge difference in how the meat tastes and feels on the plate. Take your time with this step because it directly impacts the eating experience.
Always Slice Against The Grain
The grain of the brisket refers to the direction of the muscle fibers running through the meat. Slicing against the grain means cutting perpendicular to those fibers. This shortens the muscle fibers and makes each bite much easier to chew and more enjoyable. If you slice with the grain, even a perfectly cooked brisket will taste tough and chewy, which defeats the whole purpose of your hard work.
To find the grain, look at the surface of the flat. You will see long, parallel lines running through the meat. Your knife should cut across these lines, not along them. The grain direction can change between the flat and the point, so adjust your slicing angle accordingly for each section. Taking a moment to identify the grain before you start slicing will save you from serving tough, chewy pieces.
How Thick Should Brisket Slices Be
Aim for slices that are about 1/4 inch thick. This thickness is thick enough to hold together on the plate but thin enough to be tender and easy to chew. Use a sharp knife and a smooth, steady motion. Do not saw back and forth, as this tears the meat and releases valuable juices onto the cutting board instead of keeping them in the slices.
For the point, which is fattier and more marbled, you can cut slightly thicker slices. The extra fat helps keep the point moist and flavorful even in thicker cuts. A good brisket slicing guide is to aim for uniform thickness so every bite on the plate has a similar texture and eating experience. Consistency in your slices shows attention to detail and makes the whole meal feel more professional and polished.
Enhancing Flavor After Cooking
Sometimes the brisket itself is fine, but the flavor could be better. Whether your rub was too light or the meat came out a bit bland, you can boost the flavor after cooking. This is a secret weapon for anyone learning how to fix a brisket in the oven who wants to take their results to the next level.
Make A Simple Au Jus
Collect the juices that collect in the bottom of the pan after cooking. These are packed with concentrated beef flavor and natural richness. Heat them on the stovetop, skim off excess fat, and use them as a dipping sauce or drizzle over sliced brisket. A little salt, pepper, and garlic powder can elevate this simple liquid into something extraordinary that complements the meat beautifully.
Add A Finishing Sauce
Brush your sliced brisket with a barbecue sauce or a tangy mop sauce during the last 30 minutes of cooking if you have not already done so. This adds a sweet, smoky layer of flavor that complements the natural beef taste perfectly. You can also serve extra sauce on the side so guests can add their own and customize their plate to their liking.
Rest The Brisket In Its Juices
After cooking, let the brisket rest in its pan juices for at least 30 minutes before slicing. This allows the meat to absorb some of the liquid and become more flavorful overall. It also makes slicing easier because the meat relaxes and becomes more pliable. This small step can be the difference between good brisket and great brisket that has a rich, deep flavor in every bite.
Preventing Problems Before They Start
The best way to fix a brisket is to prevent problems in the first place. A little preparation goes a long way toward serving a perfect oven-braised brisket every single time you cook one. These habits separate good brisket cooks from great ones, and they are easy to adopt into your routine.
Choose The Right Cut
Not all briskets are created equal. Look for a well-marbled cut with a thick fat cap. The marbling, which are those white streaks of fat within the meat, melts during cooking and keeps the brisket juicy from the inside out. A thin, lean brisket will always be at higher risk of drying out, so choose wisely when you are shopping.
If you are buying from a butcher, ask them to recommend a good cut for oven cooking. They can help you choose between a whole packer brisket, which includes both the flat and the point, and a trimmed flat-only cut. Each option has its advantages, and a good butcher will guide you toward the best choice for your cooking method and preferences.
Season Generously And Early
A good brisket rub is essential for flavor and bark development. Apply your rub at least one hour before cooking, or even the night before and refrigerate overnight. The salt in the rub helps break down surface proteins and draws moisture into the meat, creating a better texture and more flavorful crust. A well-seasoned brisket has a much better chance of turning out great, even if other things go slightly wrong during the cook.
Common rub ingredients include coarse black pepper, kosher salt, garlic powder, onion powder, paprika, and cayenne pepper. You can customize the blend to your taste and the preferences of your family. But always make sure salt is the foundation of your rub. A properly seasoned brisket starts with a great rub applied generously and given time to work its magic on the meat.
Preheat Your Oven And Use An Oven-Safe Pan
Always preheat your oven before placing the brisket inside. A cold start leads to uneven cooking and can extend the total cook time unnecessarily. Use a heavy, oven-safe pan or Dutch oven that retains heat well. Cast iron and heavy stainless steel are excellent choices for oven-safe brisket cooking because they distribute heat evenly and maintain consistent temperatures throughout the long cook.
Place the brisket fat side up in the pan. The fat cap acts as a natural baster, rendering slowly and keeping the meat moist from above. If your brisket has a thin fat cap, consider adding a tablespoon of beef tallow or oil to the pan for extra insurance against drying out. This small addition can make a big difference in the final moisture level of your brisket.
Expert Insights On Oven Brisket Perfection
Professional pitmasters and barbecue judges agree on a few key principles that separate good brisket from great brisket. Here are some expert insights that apply whether you are smoking brisket outdoors or cooking it in the oven at home.
Consistency beats complexity. The best brisket cooks follow a simple process and repeat it faithfully every time. You do not need fancy equipment or exotic ingredients. You need patience, a reliable oven, and a good meat thermometer. The simplicity of the process is what makes it repeatable and reliable.
The stall is normal. Many cooks panic when the brisket’s internal temperature stops rising around 150°F to 170°F. This is called the stall, and it happens because evaporative cooling balances the heat input from the oven. Wrapping the brisket at this stage is the standard fix, and it works every single time. Trust the process and do not open the oven door to check on it constantly.
Never rush the rest. The resting period is not optional. It is a critical part of the cook. During rest, the internal temperature continues to rise slightly through carryover cooking, and the juices settle evenly throughout the meat. Skipping this step is the most common reason brisket comes out dry and disappointing, even when the cook itself was successful.
Common Mistakes And How To Avoid Them
Learning from other people’s mistakes is one of the fastest ways to improve your brisket cooking. Here are the most common errors and how to avoid them so your next cook is a success:
- Opening the oven door too often: Every peek costs heat and extends cook time. Trust your thermometer and resist the urge to check on the meat constantly.
- Using a thin pan: Thin pans create hot spots and uneven cooking throughout the brisket. Invest in a heavy Dutch oven or roasting pan for best results.
- Not accounting for oven hot spots: Rotate the pan halfway through the cook for even heat exposure and consistent cooking on all sides.
- Cutting too early: Patience pays off. Wait at least one hour after cooking before slicing so the juices can redistribute throughout the meat.
- Ignoring the fat cap: The fat cap is your friend during the cook. Position it correctly and let it do its job of basting the meat from within.
- Using the wrong thermometer: A cheap or inaccurate thermometer can mislead you and cause you to pull the brisket too early or too late. Invest in a reliable digital probe thermometer for accurate readings every time.
Quick Tip: Place an oven thermometer inside your oven to verify the actual temperature. Many ovens run 10 to 25 degrees hotter or cooler than the dial setting. Knowing your oven’s true temperature helps you adjust the cook time and avoid common problems that plague home brisket cooks.Key Takeaways
- Low and slow wins the race: Keep your oven between 225°F and 275°F for the best results and the most tender meat.
- Use a meat thermometer: The target internal temperature is 195°F to 205°F for tender, sliceable brisket that falls apart easily.
- Wrap at the stall: Foil or butcher paper wraps help push through the temperature plateau and retain moisture during the long cook.
- Rest for at least one hour: This step is critical for juicy, easy-to-slice brisket that retains all its natural juices.
- Slice against the grain: This simple technique makes a huge difference in tenderness and eating experience for every guest.
- Fixes work at every stage: Whether undercooked, overcooked, or dry, there is always a practical way to improve your brisket result.
- Prevention is the best cure: Proper seasoning, the right cut, and consistent oven temperature prevent most problems before they start.
Conclusion
How to fix a brisket in the oven is a skill that every home cook should have in their toolkit. Brisket can be intimidating, especially when things do not go as planned. But with the right knowledge and a little patience, you can rescue almost any brisket and turn it into a delicious meal that everyone will enjoy. Whether you need to add moisture, adjust the temperature, wrap the meat, or simply slice it better, the fixes are simple and effective.
The key to a perfect oven brisket is understanding that this cut of meat rewards patience above all else. Low heat, long cook times, proper resting, and smart slicing are the four pillars of brisket success. Master these principles, and you will rarely have a bad brisket again. Each cook becomes a learning opportunity that makes you better and more confident in the kitchen.
Start with the tips in this guide and apply them to your next cook. You will be amazed at how much better your oven-braised brisket turns out when you follow these practical steps. Remember, every brisket is a learning opportunity. Even a less-than-perfect cook teaches you something that makes the next one better. So fire up your oven, grab your meat thermometer, and get ready to serve a brisket that will have everyone coming back for seconds.
The journey of how to fix a brisket in the oven does not end with this article. Keep experimenting, keep tasting, and keep refining your technique over time. The perfect brisket is always within reach, and now you have the tools and knowledge to get there every single time you step into the kitchen.
=== FAQS ===
Can you fix a dry brisket after it is cooked?
Yes, you can fix a dry brisket by braising it in beef broth or barbecue sauce. Place the sliced meat in a baking dish, add liquid, cover with foil, and bake at 275°F for 30 to 45 minutes. This rehydrates the meat and adds flavor back into the slices, making them moist and enjoyable again.
What is the best oven temperature for cooking brisket?
The best oven temperature for brisket is between 225°F and 275°F. Most cooks prefer 250°F as the sweet spot for consistent results. This low temperature allows the connective tissue to break down slowly, resulting in tender, juicy meat without drying out the exterior before the interior is ready.
How do you know when brisket is done in the oven?
Use a meat thermometer to check the internal temperature. The brisket is done when it reaches 195°F to 205°F in the thickest part of the flat. At this temperature, the collagen has broken down and the meat should be tender and easy to slice with a smooth, clean cut through each piece.
Should you wrap brisket in foil or butcher paper?
Both options work well for different reasons. Foil traps more moisture and speeds up cooking, making it ideal for rescuing dry brisket. Butcher paper is more breathable and preserves the bark better. Choose foil for moisture and butcher paper for texture, depending on what you need most for your particular cook.
Why is my brisket tough even after cooking for a long time?
A tough brisket usually means the internal temperature did not reach high enough to break down the collagen properly. Continue cooking at a low temperature until the meat hits 195°F to 205°F. Also, make sure you are slicing against the grain, as cutting with the grain makes even properly cooked brisket taste tough and chewy.
Can you cook brisket in the oven the day before and reheat it?
Yes, reheating brisket is a great way to serve it the next day with minimal loss of quality. Wrap the sliced brisket in foil with a little beef broth or pan juices and reheat at 250°F until it reaches 165°F internally. This keeps the meat moist and tender during reheating so it tastes almost as good as the day it was cooked.