How To Dry Lemon Balm In Oven And Preserve Its Fresh Flavor
Drying lemon balm in the oven is the quickest way to preserve its bright, citrusy flavor for months. This guide walks you through how to dry lemon balm in oven with simple steps, low heat, and proper storage. You’ll learn preparation, timing, and creative uses so you can enjoy this fragrant herb all year long.
How To Dry Lemon Balm In Oven is a skill every home cook and herb lover should master. Lemon balm brings a bright, citrusy punch to teas, dishes, and even homemade remedies. But fresh lemon balm doesn’t last long. It wilts fast and loses its zing. Drying it in the oven locks in that fresh flavor for months. You’ll always have a handy supply ready. This guide shows you exactly how to do it. No fancy equipment needed. Just your oven and a little patience. By the end, you’ll feel confident. You’ll know the best temperature, timing, and storage tips. Let’s get started and preserve that wonderful lemon taste.
Key Takeaways
- Oven drying is fast and efficient: You can dry lemon balm in just 1-2 hours at a low temperature.
- Low heat is crucial: Keep the oven at 170°F or below to lock in the lemon flavor.
- Proper preparation matters: Wash and dry leaves thoroughly, remove stems, and spread them in a single layer.
- Store correctly for long shelf life: Use airtight containers away from light and heat.
- Dried lemon balm has many uses: Brew tea, season dishes, make sachets, or add to bath soaks.
- Avoid common mistakes: Don’t crumple leaves, skip the oven door slightly ajar, or store while still damp.
📑 Table of Contents
- Why Drying Lemon Balm In The Oven Is A Great Idea
- How To Prepare Fresh Lemon Balm For Drying
- How To Dry Lemon Balm In Oven: Step-By-Step Guide
- Storing Dried Lemon Balm Properly
- Creative Uses For Dried Lemon Balm
- Common Mistakes To Avoid When Drying Lemon Balm
- Final Thoughts On Drying Lemon Balm In The Oven
Why Drying Lemon Balm In The Oven Is A Great Idea
You might wonder why oven drying beats other methods. The answer is simple. It’s fast. It’s reliable. And it works in any kitchen. Oven drying lemon balm gives you control over temperature and airflow. That means consistent results every time. You don’t need a dehydrator or special racks. Your standard oven does the job perfectly. This method is ideal for small batches too. Whether you grow a little lemon balm in your garden or buy it fresh at the market, you can preserve it easily. The warm, gentle heat removes moisture quickly. It keeps the green color and the zesty aroma intact. Soon you’ll have a jar of dried lemon balm ready for all your favorite recipes.
The Benefits Of Oven Drying
- Speed: Oven drying takes just 1 to 2 hours. Air drying can take days.
- Consistency: You set the temperature and time. Every batch dries evenly.
- Flavor Lock: Low heat preserves the lemon essential oils. Your herbs stay fragrant.
- No Special Tools: You only need a baking sheet and parchment paper.
- Year-Round Supply: Enjoy fresh lemon balm flavor in winter when the plant is dormant.
When To Harvest Lemon Balm
Timing your harvest makes a big difference. Pick lemon balm just before it flowers. That’s when the essential oils are strongest. The leaves will be bright green and tender. Morning is the best time to cut. The dew has dried but the oils are still fresh. Choose a dry, sunny day. Avoid harvesting after rain. Wet leaves can lead to mold during drying. A good harvest gives you plenty of material. You’ll have more than enough to dry and store. How To Dry Lemon Balm In Oven works perfectly with freshly picked leaves. The fresher the start, the better the final flavor.
Quick Tip: Harvest no more than one-third of the plant at a time. This keeps the lemon balm healthy and growing strong all season.
How To Prepare Fresh Lemon Balm For Drying
Proper prep sets you up for success. You want clean, dry leaves ready for the oven. Skipping this step can lead to uneven drying or spoilage. Follow these simple prep steps every time. It only takes a few minutes but saves you from frustration later.
Choosing The Right Leaves
Select healthy, vibrant leaves. Avoid any that are yellow, brown, or spotted. Those damaged leaves won’t store well. They can also spread decay to good leaves. Pick leaves from the top of the plant. They are younger and more tender. Larger leaves near the bottom work too but may take a bit longer to dry. Remove any thick stems. Stems don’t dry the same way as leaves and can create uneven moisture. Focus on the leafy parts for the best oven dried lemon balm.
Washing And Drying The Leaves
Rinse the leaves gently under cool running water. This removes dirt, insects, and any residue. Use a colander or a salad spinner for gentle cleaning. After rinsing, you must dry the leaves completely. Any remaining water will steam in the oven instead of drying. That can lead to mushy, brown leaves. Pat them dry with a clean kitchen towel. Or lay them out on a clean towel and let them air dry for 15 minutes. You want the leaves to feel completely dry to the touch before they hit the oven. This step is crucial for preserving lemon balm flavor.
Removing Stems And Spreading
Pluck the leaves from the stems once they are dry. You can leave small stems attached if you prefer. They won’t hurt the drying process. But removing large stems helps the leaves dry faster and more evenly. Spread the leaves out on a parchment-lined baking sheet. Make sure they don’t overlap. A single layer is ideal. Overlapping creates pockets of moisture. Those pockets lead to mold and uneven texture. If you have a lot of leaves, use multiple baking sheets. Work in batches if needed. Proper spacing is one of the secrets to perfect lemon balm drying.
| Method | Time | Best For | Flavor Retention |
|---|---|---|---|
| Oven Drying | 1-2 hours | Quick batches, humid climates | Excellent with low heat |
| Dehydrator | 2-4 hours | Large quantities, set-and-forget | Very good |
| Air Drying | 1-2 weeks | Small amounts, dry climates | Good but slower |
As you can see, oven drying offers the best balance of speed and flavor. It’s the go-to method for most home herb lovers.
How To Dry Lemon Balm In Oven: Step-By-Step Guide
Now for the main event. How To Dry Lemon Balm In Oven is simple once you know the exact steps. You’ll set your oven to a low temperature, lay out the leaves, and wait. It’s that easy. Let’s walk through each step carefully so you get perfect results.
Setting Your Oven To The Right Temperature
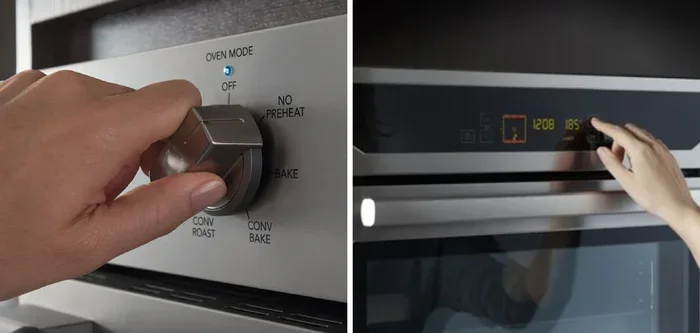
Temperature is the most important factor. You want low and slow. Set your oven to 170°F or below. Some ovens have a “warm” setting that works perfectly. If your oven doesn’t go that low, set it to the absolute lowest temperature. Then prop the door open slightly. A wooden spoon or a folded oven mitt works great. This lets moisture escape. It keeps the temperature from climbing too high. High heat destroys the delicate lemon oils. You’ll end up with browned, bitter leaves. Low heat keeps the flavor bright and fresh. Aim for a steady 150°F to 170°F. This range is ideal for herb drying in the oven.
Timing And Checking Progress
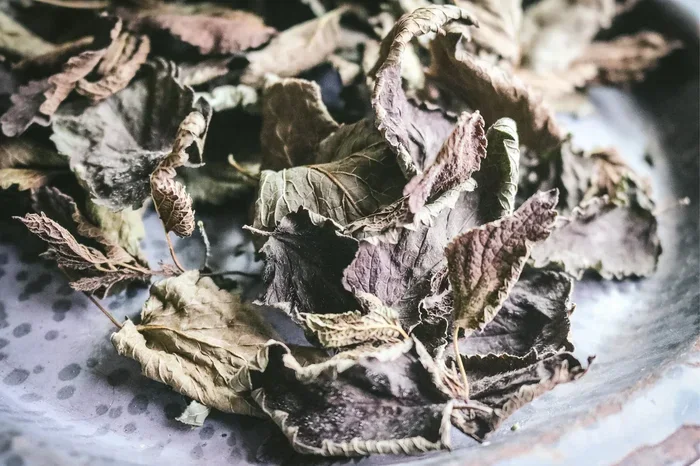
Place your baking sheet with the single layer of leaves on the middle oven rack. Set a timer for 30 minutes. After 30 minutes, open the oven and check the leaves. They should feel dry and crumbly. The edges might curl slightly. If they still feel damp, keep drying. Check every 15 minutes after that. Total drying time usually runs from 1 to 2 hours. Factors like leaf thickness and oven accuracy play a role. Humid kitchens might need a few extra minutes. Don’t rush this process. Patience yields the best dried lemon balm. The leaves are done when they crumble easily between your fingers. They should feel completely dry but still retain a green color.
Expert Insight: Professional herbalists recommend rotating your baking sheet halfway through. This ensures even drying on all sides. It’s a small step that makes a big difference in the final quality.
Quick Tips For Perfect Results
- Use parchment paper: It prevents sticking and makes cleanup easy.
- Don’t crowd the pan: Leave space between leaves for airflow.
- Keep the oven door ajar: This releases steam and prevents condensation.
- Cool completely before storing: Any residual heat can create moisture in the jar.
- Label your batch: Write the date and herb name on the container.
Key Takeaway: Low temperature, good airflow, and patience are the three pillars of successful oven drying. Stick to these and you’ll get excellent results every time.
Storing Dried Lemon Balm Properly
Drying is only half the battle. Proper storage keeps your oven dried lemon balm flavorful for months. You’ve put in the work. Now protect it. The right storage method locks in the citrusy aroma and prevents spoilage. Follow these storage tips and your herb will stay fresh.
Best Containers For Storage
Choose airtight containers. Glass jars with tight lids work perfectly. Mason jars are a popular choice. They’re clear so you can see the color. They also don’t absorb odors. If you prefer opaque containers, a tin or a dark glass jar works well too. Light degrades the flavor over time. Avoid clear jars stored on a sunny windowsill. A cupboard or pantry is ideal. Make sure the container is completely clean and dry before you add the leaves. Any moisture inside will cause mold. Storing dried herbs properly is simple but essential.
How Long Does Dried Lemon Balm Last?
When stored correctly, dried lemon balm lasts 6 to 12 months. The flavor is strongest in the first 3 to 6 months. After that, it slowly fades but remains safe to use. You can extend the shelf life by keeping the container in the fridge or freezer. Freezing works especially well for preserving essential oils. Just make sure the container is sealed tight to prevent freezer burn. Always use clean, dry spoons to scoop out leaves. Introducing moisture shortens the storage life significantly.
Keeping The Flavor Fresh
A few extra steps can keep your lemon balm tasting vibrant. Store the container away from heat sources like the stove or oven. Heat accelerates flavor loss. Keep it in a cool, dark place. You can also add a food-safe desiccant packet to the jar. This absorbs any stray moisture. For long-term storage, vacuum sealing is a great option. It removes air and prevents oxidation. These small efforts pay off with a potent, fragrant dried lemon balm supply all year round.
Key Takeaway: Airtight, cool, dark, and dry storage is the golden rule for preserving the flavor of your dried lemon balm.
Creative Uses For Dried Lemon Balm
Now that you have a jar of fragrant, dried lemon balm, what do you do with it? The uses are wonderfully diverse. This versatile herb adds a bright lemony note to so many things. You’ll find yourself reaching for it all the time. Here are some of the best ways to enjoy your harvest.
Brewing A Soothing Tea
Dried lemon balm tea is a classic and calming drink. Steep 1 to 2 teaspoons of dried leaves in hot water for 5 to 10 minutes. The flavor is gentle and citrusy. It’s perfect for unwinding after a long day. You can blend it with other herbs like chamomile or mint. Lemon balm tea is known for its soothing properties. Many people enjoy it before bed to promote relaxation. Using your own home-dried herbs makes the cup even more special. It’s a simple way to enjoy the benefits of lemon balm herb all year.
Cooking And Baking With Dried Lemon Balm
Dried lemon balm brings a bright, zesty kick to the kitchen. Crumble the leaves and sprinkle them into salads, soups, and stews. It pairs beautifully with chicken, fish, and vegetable dishes. In baking, try adding a pinch to shortbread cookies or lemon cakes. The flavor is more concentrated when dried. A little goes a long way. Start with small amounts and taste as you go. You can also infuse dried lemon balm into vinegar or oil. These infused creations make great gifts or kitchen staples. The possibilities for culinary herb preservation are truly endless.
Homemade Lemon Balm Sachets And Remedies
Dried lemon balm works beautifully in sachets. Fill small cloth bags with the dried leaves. Place them in drawers, closets, or under your pillow. The gentle lemon scent freshens the air naturally. Some people use lemon balm sachets as a natural insect repellent. You can also make a simple lemon balm balm for the skin. Steep the dried leaves in a carrier oil for a few weeks. Strain and use the infused oil for a soothing massage. These homemade remedies are a wonderful way to use your dried harvest. They make thoughtful, fragrant gifts too.
Quick Tip: Always crush dried lemon balm just before using. This releases the essential oils and maximizes the flavor and aroma.
Common Mistakes To Avoid When Drying Lemon Balm
Even with the best intentions, mistakes can happen. Knowing what to avoid saves you time and preserves the quality of your herb. Here are the most common errors and how to steer clear of them.
Using Too High A Temperature
This is the number one mistake. High heat scorches the leaves. It destroys the delicate lemon oils. The result is bitter, brown, and lifeless herb. Always keep the oven at 170°F or below. Patience is key. Low and slow wins the race. If you’re in a hurry, use a higher temperature but check every 10 minutes. However, low heat gives the best flavor retention.
Skipping The Drying Step Before Oven
Putting damp leaves straight into the oven creates steam. The leaves steam instead of dry. They turn brown and limp. Always make sure your leaves are completely dry before they hit the pan. Pat them with a towel or let them air dry first.
Overcrowding The Baking Sheet
Stacking or overlapping leaves traps moisture. The center leaves won’t dry properly. They can develop mold. Spread everything in a single layer with space between leaves. Use multiple trays if you need to. Proper airflow is non-negotiable for even herb drying.
Storing While Still Warm
Warm leaves placed in a sealed jar create condensation. That moisture leads to mold and spoilage. Let the dried lemon balm cool completely to room temperature before you put it in storage containers. This simple step prevents a lot of headaches.
Ignoring The Humidity In Your Kitchen
Drying in a humid environment slows things down. It can also lead to uneven results. If your kitchen is very damp, consider running a fan near the oven door. Or dry your lemon balm on a drier day. You can also use the oven’s convection setting if you have one. The fan inside the oven helps circulate air. This speeds up drying and improves consistency.
Key Takeaway: Avoiding these five mistakes will dramatically improve the quality and shelf life of your dried lemon balm.
Final Thoughts On Drying Lemon Balm In The Oven
Learning how to dry lemon balm in oven opens up a world of flavor and convenience. You can preserve the bright, citrusy taste of summer all year long. The process is simple, fast, and requires no special equipment. Just a low oven temperature, a little patience, and proper storage. You now know how to prepare the leaves, dry them perfectly, and use them in teas, cooking, and homemade remedies. The tips and common mistakes covered here will guide you to success. Start with a small batch to build your confidence. Soon you’ll be drying lemon balm like a pro. Your kitchen will smell incredible, and your dishes will shine with fresh, homemade flavor. Enjoy the process and the delicious results. Happy drying!
Frequently Asked Questions
What is the best temperature to dry lemon balm in the oven?
The best temperature is between 150°F and 170°F. Keeping it low preserves the delicate lemon oils and prevents the leaves from burning. Use the lowest setting your oven allows and prop the door open slightly for airflow.
How long does it take to dry lemon balm in the oven?
It usually takes 1 to 2 hours. Check the leaves every 15 to 30 minutes after the first half hour. They are done when they feel completely dry and crumble easily between your fingers.
Can I dry lemon balm on a baking sheet without parchment paper?
You can, but parchment paper makes cleanup much easier and prevents the leaves from sticking. It also promotes even airflow underneath the leaves, which helps them dry uniformly.
Is oven-dried lemon balm as flavorful as air-dried?
Yes, oven drying at a low temperature locks in the flavor very well. In fact, it can be better than air drying in humid climates because it removes moisture quickly before mold has a chance to form.
How should I store dried lemon balm to keep it fresh?
Store it in an airtight glass jar in a cool, dark place like a pantry or cupboard. Make sure the leaves are completely cool before sealing the jar to prevent condensation and mold growth.
What can I do with dried lemon balm leaves?
You can brew a soothing tea, sprinkle them into soups and salads, bake them into cookies, fill sachets for drawers, or infuse them into oils and vinegars. The uses are versatile and delicious.