How Long To Cook 5Lb Ham In Oven For The Best Results
Learning how long to cook 5lb ham in oven is easier than you think. This guide walks you through oven temperature, timing, and glaze steps for a juicy, flavorful ham. You will discover the best baking methods, common pitfalls to avoid, and pro tips that guarantee restaurant-quality results at home.
Cooking a ham in the oven might seem intimidating at first. But once you understand the basics, how long to cook 5lb ham in oven becomes simple and even enjoyable. Whether you are preparing a holiday meal or a weekend family dinner, this guide covers everything you need to know.
A perfectly baked ham fills your kitchen with a mouthwatering aroma and delivers slices that are juicy, tender, and full of flavor. The key is getting the oven temperature, cooking time, and ham glaze just right. In this article, we break down every step so you can serve a show-stopping ham with confidence.
We will cover everything from selecting the right ham to pulling it out of the oven at the perfect moment. You will learn about bone-in ham versus boneless ham, different smoked ham options, and how to make a brown sugar ham glaze that everyone will love. By the end, you will feel like a true ham expert.
Key Takeaways
- Plan for about 15-20 minutes per pound when baking a 5lb ham at 325°F for tender, juicy meat.
- Use a meat thermometer to check that the internal temperature reaches 145°F for safe, perfectly cooked ham.
- Apply your glaze in the last 20-30 minutes of cooking to prevent burning and achieve a beautiful caramelized finish.
- Let the ham rest for 15-20 minutes after removing it from the oven to lock in juices and make carving easier.
- Bone-in hams offer more flavor but take slightly longer to cook than boneless options.
- Avoid common mistakes like cooking at too high a temperature or skipping the resting period.
📑 Table of Contents
- Understanding Your 5Lb Ham Before Cooking
- Oven Temperature and Setup for Perfect Ham
- Step-by-Step Guide: How Long to Cook 5Lb Ham In Oven
- Making the Perfect Ham Glaze
- Checking Doneness and Resting the Ham
- Common Mistakes to Avoid When Cooking Ham
- Expert Insights for the Best Ham Every Time
- How to Store and Reheat Leftover Ham
- Conclusion
Understanding Your 5Lb Ham Before Cooking
Not all hams are the same. Before you set the timer, it helps to know what kind of pork ham you are working with. This small step makes a big difference in your final result.
Bone-In vs. Boneless Ham
A bone-in ham comes with the center bone still inside. This adds more flavor during the baking ham process. The bone also acts as a natural heat shield, which means the meat around it cooks a bit slower. Bone-in ham is a popular choice for holiday ham dinners because it looks impressive and tastes rich.
A boneless ham is easier to carve and often comes already sliced. It cooks a little faster since there is no bone to heat through. If you are short on time or prefer easy serving, a boneless ham works great.
Spiral Ham vs. Whole Ham
A spiral ham comes pre-sliced in a spiral pattern. This makes serving super easy. However, spiral hams can dry out faster if you are not careful with ham cooking time and temperature.
A whole ham is uncut and gives you more control. You can score the surface and apply glaze exactly how you want it. Many home cooks prefer a whole ham for oven-baked ham because it stays moist and develops a beautiful crust.
Smoked Ham vs. Fresh Ham
A smoked ham has already been cured and smoked. It has a deep, savory flavor and usually just needs to be heated through in the oven. Most store-bought hams are smoked.
A fresh ham is raw and needs to be fully cooked from the start. Fresh hams take longer and require more seasoning. For most home cooks, a smoked ham is the easiest and most flavorful option for oven roasting.
Oven Temperature and Setup for Perfect Ham
Getting the oven temperature right is the foundation of a great ham. Too hot and the outside burns before the inside is done. Too low and you end up waiting for hours.
Best Temperature for Baking Ham
The recommended oven temperature for cooking a 5lb ham is 325°F. This gentle heat allows the meat to cook evenly and stay juicy. Most ham recipes call for this standard temperature because it works well for both bone-in and boneless ham.
Some cooks like to start at a higher temperature for the first 15 minutes to get a nice sear on the outside. Then they drop it down to 325°F for the rest of the cook. This trick adds a beautiful golden color without drying out the meat.
How to Position the Ham in the Oven
Place the ham flat-side down on a rack inside a roasting pan. This allows hot air to circulate around the entire ham. If your ham has a fat cap, leave it on top. The fat melts during cooking and bastes the meat naturally.
Add about one cup of water or apple juice to the bottom of the roasting pan. This creates steam that keeps the oven environment moist. Moist air helps prevent the ham from drying out during the long ham cooking time.
Covering the Ham With Foil
Covering the ham with aluminum foil for most of the cook is a smart move. The foil traps moisture and keeps the surface from over-browning too early. Remove the foil during the last 20 to 30 minutes so the glaze can caramelize properly.
Some recipes skip the foil entirely for a crispier exterior. This works well for spiral hams that are thinner and cook faster. But for a whole 5lb ham, covering with foil for the first two-thirds of cooking is the best approach.
Step-by-Step Guide: How Long to Cook 5Lb Ham In Oven
Now let us get into the heart of the matter. How long to cook 5lb ham in oven depends on a few factors, but the general rule is straightforward.
The General Rule for Cooking Time
The standard guideline is about 15 to 20 minutes per pound at 325°F. For a 5lb ham, this means roughly 75 to 100 minutes of total cook time. That is about 1 hour and 15 minutes to 1 hour and 40 minutes.
Here is a simple breakdown:
- Boneless ham: About 15 minutes per pound
- Bone-in ham: About 18 to 20 minutes per pound
- Spiral ham: About 12 to 15 minutes per pound
These numbers give you a solid starting point. But always use a ham thermometer to check the final result. The internal temperature is the real indicator of doneness.
Step-by-Step Cooking Process
Follow these steps for the best results every time:
- Preheat your oven to 325°F while you prepare the ham.
- Remove the ham from its packaging and discard any glaze packets if included.
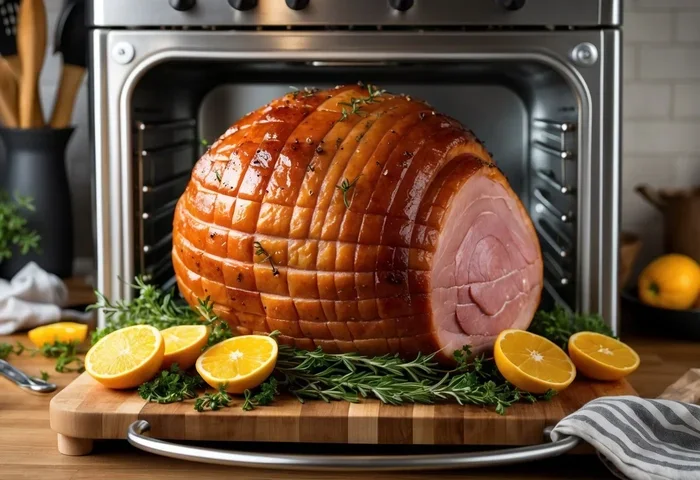
- Score the surface with a sharp knife in a diamond pattern. Cut about a quarter inch deep into the fat cap.
- Place the ham flat-side down on a rack in a roasting pan.
- Add liquid to the bottom of the pan, about one cup of water or apple juice.
- Cover loosely with foil and place the pan in the oven.
- Cook for about two-thirds of the total time with the foil on.
- Remove the foil and apply your glaze during the last 20 to 30 minutes.
- Check the internal temperature with a meat thermometer inserted into the thickest part.
- Remove from the oven when it reaches 145°F and let it rest before carving.
Quick Tips for Timing
- Set a timer for the halfway point to check progress.
- Rotate the pan halfway through for even browning.
- Start checking the temperature 15 minutes before the estimated finish time.
- Every oven is different, so use the thermometer as your true guide.
Making the Perfect Ham Glaze
A great ham glaze transforms a good ham into a spectacular one. The glaze adds sweetness, a touch of tang, and that beautiful caramelized finish everyone loves.
Classic Brown Sugar Glaze
This is the most popular glaze for a reason. It is simple, delicious, and pairs perfectly with any smoked ham or pork ham.
- 1 cup brown sugar
- 2 tablespoons Dijon mustard
- 1 tablespoon apple cider vinegar
- 1 tablespoon melted butter
- A pinch of cloves or cinnamon
Mix all ingredients in a small bowl until smooth. Spread half the glaze over the ham after removing the foil. Apply the rest in the final 10 minutes of cooking. This layering creates a deep, rich flavor with a sticky, glossy finish.
Honey Mustard Glaze
For a sweeter option, try a honey mustard glaze. Combine honey, whole grain mustard, and a splash of pineapple juice. Brush it on during the last 15 minutes. This glaze works beautifully on boneless ham and adds a tropical twist.
Maple Bourbon Glaze
Feeling fancy? A maple bourbon glaze adds a rich, autumnal flavor. Mix pure maple syrup, a splash of bourbon, and a dash of black pepper. This glaze is perfect for a holiday ham or a special weekend dinner.
When to Apply the Glaze
The most important rule is to apply the glaze during the last 20 to 30 minutes of cooking. Applying it too early causes the sugar to burn. The ham cooking time for glazing is short, but it makes a huge visual and flavor impact.
Checking Doneness and Resting the Ham
Knowing when your ham is done is just as important as getting the right ham cooking time. Undercooked ham is unsafe, and overcooked ham turns dry and tough.
Internal Temperature Guide
The USDA recommends an internal temperature of 145°F for whole pork ham. Use a digital ham thermometer inserted into the thickest part of the meat. Avoid touching the bone, as it reads hotter than the surrounding meat.
Here is a quick reference table for different ham types and their target temperatures:
| Ham Type | Target Internal Temp | Resting Time |
|---|---|---|
| Fully Cooked Smoked Ham | 140°F (reheating) | 15-20 minutes |
| Fresh Ham (Raw) | 145°F | 20-25 minutes |
| Bone-In Spiral Ham | 140°F (reheating) | 15 minutes |
| Boneless Ham | 145°F | 15-20 minutes |
Why Resting Matters
Resting the ham after it comes out of the oven is a step many people skip. But it is essential. During resting, the juices redistribute throughout the meat. If you carve immediately, the juices run out and your ham turns dry.
Wrap the ham loosely in foil and let it rest for 15 to 20 minutes. This also gives the internal temperature time to rise a few degrees through carryover cooking. The final internal temperature will be about 5°F higher than when you pulled it out.
How to Carve a 5Lb Ham
Carving a ham looks impressive but is simple once you know the basics. For a bone-in ham, start by cutting slices along the bone. Work perpendicular to the bone for even, thin slices. For a boneless ham, slice against the grain for the most tender result.
Use a sharp carving knife and a sturdy cutting board. A serrated knife works well on spiral ham slices. Serve the carved ham on a platter with the glaze drizzled on top for a beautiful presentation.
Common Mistakes to Avoid When Cooking Ham
Even experienced cooks make mistakes with oven-baked ham. Knowing what to avoid saves you time, money, and a lot of frustration.
Cooking at Too High a Temperature
The biggest mistake is cranking the oven up to speed things along. High heat dries out the exterior long before the inside is done. Stick to 325°F and be patient. Good ham cooking tips always start with the right temperature.
Skipping the Thermometer
guessing when the ham is done leads to overcooking or undercooking. A ham thermometer is a small investment that pays off every time. Do not rely on the pop-up timer that sometimes comes with spiral hams. Those are often inaccurate.
Applying the Glaze Too Early
Sugar burns at high temperatures. If you put the glaze on too early, it turns black and bitter. Always wait until the last 20 to 30 minutes. This single tip alone can elevate your ham recipe from good to great.
Not Letting the Ham Rest
Cutting into the ham right out of the oven is tempting. But the juices will flood the cutting board instead of staying in the meat. Give it 15 to 20 minutes of rest and you will notice the difference in every slice.
Overcooking the Ham
Overcooking is the enemy of a juicy ham. Once the internal temperature hits 145°F, pull it out. The carryover heat will bring it up a few more degrees. Leaving it in the oven for an extra 10 minutes can turn a moist ham into a dry one.
Expert Insights for the Best Ham Every Time
Professional chefs and experienced home cooks share a few secrets that take your baking ham game to the next level.
Soak the Ham Overnight
If you have a very salty cured ham, soaking it overnight in cold water can reduce the saltiness. This step is especially helpful for fresh hams or heavily cured country hams. Change the water once or twice during the soak.
Use Apple Juice Instead of Water
Adding apple juice to the roasting pan instead of plain water adds a subtle fruity flavor. The steam carries this flavor into the ham as it cooks. It is a small change that makes a noticeable difference in your ham oven recipe.
Baste the Ham Every 20 Minutes
Basting keeps the surface moist and builds flavor. Use the juices from the bottom of the pan and spoon them over the ham every 20 minutes. This simple habit gives you a more flavorful and beautifully glazed exterior.
Add Whole Cloves for Classic Flavor
Press whole cloves into the scored surface of the ham before cooking. This is a traditional technique that adds a warm, aromatic flavor. Cloves pair especially well with brown sugar and mustard glazes.
Save the Ham Bone
Do not throw away the bone after carving. The bone-in ham bone is full of flavor. Simmer it in water for a few hours to make a rich ham stock. Use this stock for soups, beans, or rice dishes. It is a great way to get more value from your whole ham purchase.
How to Store and Reheat Leftover Ham
Leftover ham is one of the best parts of cooking a big ham. Proper storage keeps it fresh and safe to eat for days.
Wrap leftover slices tightly in plastic wrap or aluminum foil. Store them in the refrigerator for up to 5 days. For longer storage, place the ham in an airtight container or freezer bag and freeze for up to 3 months.
To reheat, wrap a slice in foil and warm it in the oven at 325°F for about 10 minutes. You can also reheat slices in the microwave, but the oven method keeps the texture better. Avoid reheating the whole ham unless you plan to eat it all at once.
Conclusion
Cooking a 5lb ham in the oven does not have to be stressful. With the right oven temperature, a solid understanding of ham cooking time, and a delicious glaze, you can serve a ham that rivals any restaurant. Remember to use a ham thermometer and always let the ham rest before carving.
The key to a perfect ham is patience and attention to detail. Follow the steps in this guide, avoid the common mistakes, and you will have a show-stopping baking ham that your family and guests will love. Whether it is a holiday ham or a midweek dinner, a well-cooked ham brings people together around the table.
Now that you know exactly how long to cook 5lb ham in oven, it is time to put this knowledge into action. Grab your roasting pan, preheat the oven, and get ready to enjoy one of the most satisfying meals you can make at home. Happy cooking!
Frequently Asked Questions
Can I cook a 5lb ham at 350°F instead of 325°F?
You can, but it is not recommended. Higher temperatures dry out the ham faster and increase the risk of burning the outside before the inside is fully cooked. Stick to 325°F for the best results.
How do I know if my ham is fully cooked?
Use a digital meat thermometer to check the internal temperature. For a fully cooked smoked ham, aim for 140°F. For a fresh ham, the target is 145°F. Always insert the thermometer into the thickest part of the meat, avoiding the bone.
Should I cover my ham with foil while cooking?
Yes, covering the ham with foil for the first two-thirds of cooking helps retain moisture and prevents the outside from drying out. Remove the foil during the last 20 to 30 minutes so the glaze can caramelize properly.
Can I use a store-bought glaze packet instead of making my own?
Yes, store-bought glaze packets work fine in a pinch. But making your own glaze gives you control over the sweetness, salt level, and flavor. Homemade glazes with brown sugar, mustard, and apple cider vinegar taste significantly better.
How long should I let the ham rest before carving?
Let the ham rest for 15 to 20 minutes after removing it from the oven. This resting period allows the juices to redistribute, making the ham juicier and easier to carve. Wrap it loosely in foil during resting to keep it warm.
What is the difference between smoked ham and cured ham?
Smoked ham has been cured and then exposed to smoke for flavor. Cured ham is preserved through a salt or brine process. Most smoked hams sold in stores are also cured. Both types are fully cooked and only need to be heated in the oven before serving.