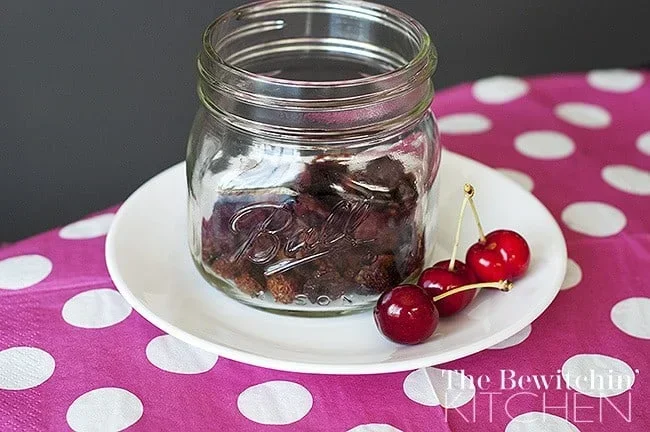
How To Dehydrate Cherries In Oven Step By Step Guide
Learn how to dehydrate cherries in oven with this easy, foolproof method. You’ll get chewy, sweet homemade dried cherries perfect for snacking and baking. This step-by-step guide covers everything from prep to storage.
If you’ve ever wondered how to dehydrate cherries in oven, you’re in the right place. Drying cherries at home is simpler than you think, and it yields a delicious, healthy snack. Oven-dried cherries are chewy, concentrated in flavor, and perfect for trail mixes, baking, or just munching. This step-by-step guide walks you through the entire process, from picking the best fruit to storing your finished product. You’ll learn the ideal oven temperature, prep tricks, and how to tell when they’re perfectly dry.
Many people buy dried cherries from the store, but making them at home is cheaper and lets you control the ingredients. You can use sweet or tart cherries, and the result is a homemade dried cherry snack that’s free of added sugars and preservatives. Whether you want to preserve a bumper harvest or just enjoy a healthy treat, dehydrating cherries in the oven is the way to go.
Quick Tip: Always start with fresh, ripe cherries. They have the best flavor and highest nutrient content for your dried cherry snacks.
Key Takeaways
- Low and slow drying: Use 200°F to 225°F for perfectly chewy cherries without burning.
- Patience is key: Drying takes 4 to 8 hours depending on oven and cherry size.
- Prep matters: Wash, pit, and dry cherries thoroughly before placing on the tray.
- Store properly: Keep dried cherries in airtight containers in a cool, dark place for up to a year.
- Versatile snack: Use them in oatmeal, baked goods, trail mix, or eat them straight from the jar.
- No special equipment needed: Just a regular oven, baking sheet, and parchment paper.
📑 Table of Contents
Why Dehydrate Cherries In The Oven?
Using your oven to dry cherries is one of the easiest methods. You don’t need a fancy dehydrator or special equipment. Most kitchens already have an oven that can handle the low heat required for cherry dehydration. This method works well for small batches and gives you full control over the drying process.
Oven drying also allows you to monitor the cherries closely. You can adjust the temperature or rotate the trays if needed. The result is a chewy, flavorful dried cherry snack that tastes much better than many store-bought versions. Plus, it’s a great way to preserve cherries for months.
Benefits Of Homemade Dried Cherries
- Cost-effective: Buy cherries in season and dry them for year-round snacking.
- No additives: You control what goes into your food. No sulfur dioxide or extra sugar.
- Custom texture: Dry them chewy or crispy, depending on your preference.
- Nutrient-rich: Dried cherries retain antioxidants, fiber, and vitamins.
- Easy to store: They take up less space than fresh cherries.
Quick Tip: Line your baking sheet with parchment paper to prevent sticking and make cleanup a breeze.
Homemade vs Store-Bought Dried Cherries
Store-bought dried cherries often contain added sugar, sulfur dioxide, or other preservatives. Homemade oven-dried cherries let you avoid all of that. The table below highlights the key differences.
| Feature | Homemade Oven Dried | Store-Bought |
|---|---|---|
| Added Sugar | None | Often high |
| Sulfites | None | Common |
| Texture Control | Full control | Fixed |
| Cost | Lower | Higher |
| Freshness | Peak freshness | Variable |
Making your own cherry dehydration snacks means you know exactly what you’re eating. It’s a smart choice for health-conscious families.
Choosing The Best Cherries For Dehydration
The type of cherry you pick affects the final flavor and texture. You can use almost any variety, but some work better than others. Look for cherries that are ripe, firm, and free of bruises. Sweet cherries like Bing or Rainier produce a candy-like snack. Tart cherries like Montmorency are great for baking and have a tangy punch.
Sweet vs. Tart Cherries
Sweet cherries are milder and sweeter when dried. They’re perfect for eating straight from the jar. Tart cherries have a bright, zesty flavor that shines in granola, muffins, and trail mixes. Both types dry beautifully, so choose based on how you plan to use them.
Quick Tip: If you’re drying cherries for the first time, try a mix of sweet and tart to find your favorite.
Always wash your cherries thoroughly before drying. Remove the stems and pits. You can leave them whole or cut them in half. Halved cherries dry faster and are easier to eat. Pat them completely dry with a clean towel. Any extra moisture can lead to mold during storage.
Expert Insight: Tart cherries are higher in antioxidants than sweet cherries. If you’re drying for health benefits, consider using Montmorency or similar tart varieties.
Step-by-Step Guide To Dehydrating Cherries In The Oven
This is the core of how to dehydrate cherries in oven. Follow these steps for perfect results every time.
Preparing The Cherries
Start by rinsing the cherries under cool water. Remove the stems and pit them. You can use a cherry pitter or a small knife. Lay the cherries out on a clean kitchen towel and let them air dry for about 30 minutes. This step is crucial. Any water left on the fruit will extend the drying time and could cause steaming instead of dehydrating.
For a more uniform dry, you can slice the cherries in half. Place them on a parchment-lined baking sheet in a single layer. Make sure they don’t overlap. Overlapping creates steam and leads to uneven drying. Quick Tip: Use two baking sheets and rotate them halfway through drying for even results.
Oven Temperature And Setup
Set your oven to the lowest possible temperature, ideally between 200°F and 225°F. If your oven doesn’t go that low, use the warm setting or the lowest bake setting. The goal is gentle, consistent heat. Too high a temperature will cook the cherries instead of drying them, resulting in a tough, leathery texture.
Prop the oven door open slightly with a wooden spoon. This allows moisture to escape and keeps the temperature from rising too high. You can also use the oven’s convection fan if it has one, as it circulates air and speeds up cherry dehydration.
Expert Insight: Professional food dehydrators often use a temperature of 135°F, but ovens typically run hotter. Keeping the oven at the low end and propping the door helps mimic a dehydrator’s environment.
Drying Time And How To Tell They’re Done
Drying time varies based on cherry size, oven temperature, and humidity. Plan for 4 to 8 hours. Check the cherries every hour after the first three hours. They’re done when they feel dry and leathery but still slightly tacky. They should not be crispy or brittle. A properly dried cherry will bend without breaking.
Let the cherries cool completely on the baking sheet. They will soften slightly as they cool. Store them while still slightly warm to prevent condensation.
Common Mistake: Don’t rush the process by raising the oven temperature. High heat creates hard exteriors and moist interiors, which leads to spoilage.
Storing Your Oven-Dried Cherries The Right Way
Proper storage keeps your dried cherries fresh and flavorful for months. The key is to keep out moisture and light.
Container Options
- Airtight glass jars: Mason jars work perfectly. They’re easy to see and keep out moisture.
- Vacuum-sealed bags: These remove air and extend shelf life significantly.
- Food-grade plastic containers: Use containers with tight-fitting lids.
- Mylar bags with oxygen absorbers: Ideal for long-term storage of over a year.
Store the containers in a cool, dark, and dry place, like a pantry or cupboard. Avoid storing them near the stove or in direct sunlight. Heat and light degrade the quality and nutrients of oven-dried cherries.
Quick Tip: Add a small packet of silica gel or a bay leaf to the container to absorb any residual moisture and deter pests.
When stored correctly, dehydrated cherries can last 6 to 12 months. Check them periodically for any signs of moisture or mold.
Creative Uses For Dried Cherries
Once you’ve mastered how to dehydrate cherries in oven, you’ll find dozens of ways to enjoy them. Dried cherries add a burst of flavor and nutrition to many dishes.
Snacking And Trail Mixes
Eat them straight from the jar as a healthy, chewy snack. Mix them with nuts, dark chocolate chips, and coconut flakes for a homemade trail mix. They’re a great source of natural energy for hikes or workouts.
Baking And Cooking
Add chopped dried cherries to muffins, scones, bread, and cookies. They pair wonderfully with almonds and orange zest. Stir them into oatmeal or yogurt for a fruity crunch. You can also blend them into a cherry leather or fruit roll-up for kids’ lunches.
Rehydrating For Recipes
If a recipe calls for fresh cherries, you can rehydrate dried cherries by soaking them in warm water or brandy for 30 minutes. This plumps them up and releases their deep, concentrated flavor. Use them in sauces, cakes, or as a topping for ice cream.
Making Cherry Leather
Blend dried cherries with a little water or fruit juice until smooth. Spread the mixture on a parchment-lined baking sheet and dry at 200°F for 2 to 3 hours. The result is a healthy, fruit leather that’s perfect for lunchboxes.
Expert Insight: Dried cherries are a great source of melatonin, which may support better sleep. A small handful before bed can be a calming, healthy snack.
Troubleshooting Common Problems
Even with a simple method, issues can arise. Here’s how to troubleshoot common problems when dehydrating cherries in the oven.
Cherries Are Still Moist After Several Hours
This usually means the oven temperature is too low or the cherries are overlapping. Increase the temperature by 10 to 15 degrees and ensure the cherries are in a single layer. Prop the oven door open wider to allow more steam to escape.
Cherries Are Hard And Crunchy
The oven was too hot or they dried too long. Next time, lower the temperature and check them earlier. Over-dried cherries can be softened by placing a damp paper towel over them for a few hours, but they won’t return to their original texture.
Mold Or Stickiness
Mold appears when cherries aren’t fully dried or when moisture gets back in. Ensure cherries are completely cool before storing. If you see any stickiness, spread them back on the baking sheet and dry for another hour or two.
Common Mistake To Avoid: Don’t store slightly warm cherries in a sealed container. The trapped heat creates condensation, which leads to mold. Always let them cool to room temperature first.
Conclusion
How to dehydrate cherries in oven is a simple, rewarding process that anyone can master. With just an oven, some parchment paper, and fresh cherries, you can create a delicious, healthy snack that lasts for months. The key is low heat, patience, and proper storage. Once you start making your own oven-dried cherries, you’ll never go back to store-bought versions. Enjoy them in trail mixes, baked goods, or on their own. Give it a try, and you’ll have a stash of chewy, flavorful cherries ready whenever you need them.
Frequently Asked Questions
What temperature should I set my oven to for dehydrating cherries?
Set your oven to the lowest temperature possible, ideally between 200°F and 225°F. This gentle heat slowly removes moisture without cooking the cherries. If your oven doesn’t go that low, use the warm setting and prop the door open.
How long does it take to dehydrate cherries in the oven?
It typically takes 4 to 8 hours, depending on the cherry size, oven temperature, and humidity. Check them every hour after the first three hours. They’re done when they feel dry and leathery but still slightly tacky.
Do I need to pit the cherries before dehydrating?
Yes, you should pit and remove the stems before drying. Pitted cherries dry more evenly and are easier to store and eat. You can leave them whole or cut them in half for faster drying.
Can I use frozen cherries for dehydration?
Yes, frozen cherries work well. Thaw them completely and pat them dry before placing on the baking sheet. The freezing process breaks down the cell walls slightly, which can speed up drying.
How do I know when dried cherries are fully dehydrated?
They should feel dry and leathery but still slightly tacky to the touch. They should bend without snapping. If they’re crispy, they’ve been over-dried. Let them cool completely before judging, as they soften slightly.
What’s the best way to store homemade dried cherries?
Store them in airtight containers like glass jars or vacuum-sealed bags in a cool, dark place. You can add a silica gel packet to absorb moisture. Properly stored, they last 6 to 12 months.