How To Set Up Coffee Grinder Step By Step For Beginners
Setting up your coffee grinder the right way transforms your morning routine and unlocks rich, flavorful coffee every single time. This step-by-step guide walks beginners through choosing the right grinder, adjusting settings, and dialing in the perfect grind size for any brew method. You will learn practical tips, common mistakes to avoid, and expert tricks to get consistent results from day one.
There is nothing quite like the aroma of freshly ground coffee filling your kitchen in the morning. But if you just bought a new coffee grinder and are not sure where to start, the setup process can feel a little overwhelming. The good news is that getting your grinder ready does not need to be complicated.
Whether you picked up a burr grinder or a simple blade model, this guide will walk you through every step. You will learn how to assemble the parts, adjust the grind settings, and fine-tune everything for your favorite brewing method. By the end, you will feel confident and excited to grind your first batch of beans.
Setting up a coffee grinder properly is one of the most overlooked steps in making great coffee at home. Many people skip it entirely and wonder why their brew tastes off. Taking just a few extra minutes to set things up correctly makes a huge difference in flavor, consistency, and overall enjoyment.
Key Takeaways
- Choose the right grinder type: Burr grinders offer consistency, while blade grinders are budget-friendly but less precise.
- Adjust grind size carefully: Different brewing methods need different grind sizes, from coarse to extra fine.
- Clean your grinder regularly: Routine maintenance keeps your coffee tasting fresh and your machine running smoothly.
- Measure by weight, not volume: Using a scale ensures consistent, repeatable results every time you brew.
- Avoid common setup mistakes: Things like grinding too fine or skipping calibration can ruin your coffee experience.
- Practice makes perfect: Dialing in your grinder takes a few tries, but the payoff is a noticeably better cup.
📑 Table of Contents
- Why Setting Up Your Coffee Grinder Matters
- Understanding the Types of Coffee Grinders
- Step-by-Step Guide to Setting Up Your Coffee Grinder
- Adjusting Grind Settings for Different Brew Methods
- Cleaning and Maintenance Tips
- Common Mistakes to Avoid When Setting Up Your Coffee Grinder
- Expert Tips for Getting the Most Out of Your Grinder
- Conclusion
Why Setting Up Your Coffee Grinder Matters
Before we dive into the steps, let us talk about why setup matters so much. A coffee grinder is the bridge between whole beans and your final cup. If that bridge is not built right, the whole journey suffers.
When you grind beans just before brewing, you preserve the oils and aromas that give coffee its rich flavor. Pre-ground coffee loses freshness fast, sometimes within minutes of being ground. A properly set up grinder gives you consistent grind size, which means every particle extracts at the same rate. This leads to a balanced, flavorful cup without bitterness or sourness.
On the flip side, a poorly set up grinder can create a mix of dust and chunks. This uneven grind causes over-extraction in some areas and under-extraction in others. The result is a muddy, unbalanced taste that no amount of good beans can fix.
Consistency Is Everything
Think of it like cooking with a knife. If your cuts are all different sizes, some pieces will burn while others stay raw. The same idea applies to grind coffee beans. Uniform particles mean uniform extraction, and uniform extraction means delicious coffee. This is exactly why the setup process deserves your attention.
Understanding the Types of Coffee Grinders
Not all grinders are created equal. Before you set anything up, it helps to know what kind of grinder you have. The two main types are burr grinders and blade grinders, and they work very differently.
Burr Grinders
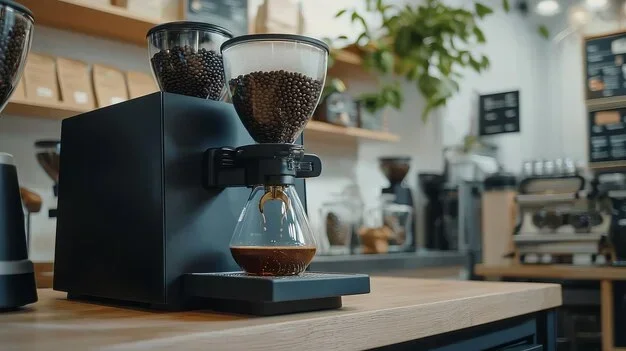
Burr grinders use two revolving surfaces, called burrs, to crush beans into consistent particles. They are the gold standard for home brewing because you can control the grind size with precision. Whether you want a coarse French press grind or a fine espresso grind, a burr grinder can handle it.
There are two subtypes: flat burr and conical burr. Flat burrs tend to produce very uniform particles, while conical burrs are quieter and generate less heat. Both types deliver excellent results for grind coffee beans at home.
Blade Grinders
Blade grinders use a spinning blade to chop beans into smaller pieces. They are affordable and compact, making them popular for beginners. However, they do not offer the same level of consistency as burr grinders. The grind size can vary widely, from powder to large chunks, all in the same batch.
If you have a blade grinder, do not worry. You can still make great coffee with it. The key is to pulse the grinder instead of running it continuously. This helps prevent over-grinding and gives you slightly more control over the texture.
| Feature | Burr Grinder | Blade Grinder |
|---|---|---|
| Grind Consistency | Very consistent | Inconsistent |
| Price Range | $50 to $300+ | $15 to $50 |
| Grind Size Control | Adjustable | Limited |
| Best For | All brew methods | Drip coffee, casual use |
| Durability | Long-lasting | Shorter lifespan |
Step-by-Step Guide to Setting Up Your Coffee Grinder
Now let us get into the hands-on part. Follow these steps carefully, and your grinder will be ready to go in no time.
Step 1: Unbox and Inspect All Parts
When you first open the box, take a moment to look over everything. You should see the main body, the hopper (where beans go), the grind chamber, and any collection accessories. Check that nothing is damaged from shipping. If any parts are missing, contact the manufacturer right away.
Lay everything out on a clean, dry surface. This is also a great time to wash any removable parts with warm water and mild soap. Let them dry completely before moving on. Never submerge the motor base in water, as this can cause serious damage.
Step 2: Assemble the Grinder
Follow the manufacturer’s instructions to put the grinder back together. Each model is slightly different, but the general process is similar. Typically, you will attach the grind chamber to the base, insert the burrs or blade, and place the hopper on top.
Make sure all parts are seated firmly. A loose component can cause vibration, noise, or inconsistent grinding. If you have a burr grinder, check that the burrs are aligned correctly. Misaligned burrs can lead to uneven grind size and potential damage over time.
Step 3: Choose Your Grind Size
This is where the real magic happens. Most grinders have a dial or slider that lets you adjust the distance between the burrs. Turning it one way makes the grind finer; turning it the other way makes it coarser.
Start with a medium setting if you are unsure. You can always adjust from there. Here is a quick reference for popular brewing methods:
- Coarse grind: French press, cold brew
- Medium-coarse grind: Chemex, Clever Dripper
- Medium grind: Drip coffee makers, pour over
- Medium-fine grind: AeroPress, siphon brewer
- Fine grind: Espresso, Moka pot
- Extra fine grind: Turkish coffee
Finding the right grind size for your method is the single most important factor in brewing great coffee. Take notes as you experiment so you can reproduce your perfect setting every morning.
Step 4: Calibrate the Grinder
Calibration ensures your grinder is producing the grind size you intend. Start by grinding a small batch of beans and examining the output. Hold the grounds up to a light source and look for uniformity.
If you see a lot of dust mixed with larger chunks, you may need to adjust the setting. Keep tweaking and testing until you achieve a consistent texture. This process might take a few rounds, but it is worth the effort. Grind consistency directly impacts the taste of your final cup.
Step 5: Measure and Grind
For the best results, use a kitchen scale to measure your beans before grinding. A good starting ratio is about 15 to 18 grams of coffee for every 250 milliliters of water. Weighing your beans removes guesswork and helps you replicate your favorite cup every single time.
Add the measured beans to the hopper, place your collection container under the outlet, and start grinding. For blade grinders, use short pulses rather than running the motor continuously. This prevents heat buildup, which can burn the beans and alter the flavor.
Adjusting Grind Settings for Different Brew Methods
One of the most exciting parts of owning a coffee grinder is the ability to switch between grind sizes for different brewing methods. Each method extracts coffee differently, and the grind size plays a huge role in that process.
Coarse Grind for French Press
A French press needs a coarse grind that resembles sea salt. If the grind is too fine, the coffee will be gritty and over-extracted. If it is too coarse, the brew will be weak and watery. The ideal French press grind allows water to flow through slowly while extracting just the right amount of flavor.
Fine Grind for Espresso
Espresso requires a fine grind that is much closer to powdered sugar. The high pressure used in espresso machines forces water through the grounds quickly, so a finer grind increases the surface area and speeds up extraction. Getting this right takes practice, but the reward is a rich, velvety shot of espresso.
Medium Grind for Pour Over
Pour over methods like the Hario V60 or Kalita Wave work best with a medium grind. This size sits right between coarse and fine, allowing for a balanced extraction as hot water drips through the grounds slowly. A medium grind produces a clean, bright cup that highlights the unique flavors of your beans.
Extra Fine for Turkish Coffee
Turkish coffee demands an extra fine grind that is almost flour-like. The coffee is brewed directly in water without filtering, so the grounds remain in the cup. This method produces a thick, strong, and incredibly aromatic beverage that is beloved across the Middle East and Mediterranean regions.
Cleaning and Maintenance Tips
A clean grinder is a happy grinder. Over time, oils from coffee beans build up inside the grinding chamber, and old grounds can turn stale. Regular cleaning keeps your coffee grinder performing at its best and ensures every cup tastes fresh.
Daily Cleaning Routine
After each use, remove any remaining grounds from the collection container and the grind chamber. A small brush or a dry cloth works well for this. If you use your grinder daily, a quick wipe-down after every session prevents buildup and keeps things running smoothly.
Weekly Deep Clean
Once a week, disassemble the removable parts and wash them with warm, soapy water. Let everything dry completely before reassembling. For the grinding chamber and burrs, use a specialized grinder cleaning brush to reach tight spaces. Some people also use grinder cleaning tablets, which dissolve and flush out built-up oils.
Monthly Maintenance
Once a month, inspect the burrs or blade for wear. Over time, burrs can become dull and lose their sharpness, which affects grind consistency. If you notice your coffee tasting different even with fresh beans, it might be time to replace the burrs. Check your grinder’s manual for specific maintenance instructions.
Quick Tip: After cleaning your grinder, grind a small batch of plain white rice to absorb any remaining moisture and oils. This is a simple trick many baristas use to keep their grinders in top shape.
Common Mistakes to Avoid When Setting Up Your Coffee Grinder
Even the best coffee grinder can cause problems if you make avoidable mistakes during setup. Here are the most common errors beginners make and how to steer clear of them.
Skipping the Break-In Period
New grinders, especially burr models, often need a break-in period. Grinding about a pound of beans helps the burrs settle into their optimal alignment. Skip this step, and you may notice inconsistent grind size for the first few uses.
Using Stale or Low-Quality Beans
A great grinder cannot fix bad beans. Always use fresh, high-quality whole beans for the best results. Stale beans produce flat, lifeless coffee no matter how well your grinder is set up. Look for roast dates on the bag and try to use beans within two to four weeks of roasting.
Grinding Too Much at Once
It might be tempting to grind a full week’s worth of coffee in one batch, but this is a mistake. Ground coffee starts losing flavor almost immediately after grinding. Grind only what you need for each session to enjoy the freshest possible cup.
Ignoring Static and Mess
Coffee grounds can create static, especially in dry environments. This causes grounds to stick to the grinder and your collection container. A quick trick is to lightly mist the beans with a few drops of water before grinding, or to use a grinder with an anti-static design.
Not Adjusting for Room Temperature
Heat affects coffee beans and grinding performance. If your kitchen is very warm, the beans can become oily and clumpy, which clogs the grinder. Conversely, cold beans in winter are harder and may require a slightly different grind setting. Pay attention to your environment and adjust as needed.
Expert Tips for Getting the Most Out of Your Grinder
Once your coffee grinder is set up and running, these expert tips will help you take your brewing game to the next level.
Store beans properly. Keep your coffee beans in an airtight container away from light and heat. A cool, dark pantry is ideal. Avoid storing beans in the fridge, as moisture and odors can affect the flavor.
Grind by weight, not volume. Scoops and tablespoons are not precise enough for consistent results. A simple digital kitchen scale removes all guesswork and helps you dial in the perfect ratio every time.
Experiment with different beans. Single-origin beans from different regions offer unique flavor profiles. Try Ethiopian beans for fruity, floral notes, or Brazilian beans for chocolatey, nutty flavors. Each bean may need a slight adjustment to your grind size to bring out its best qualities.
Keep a coffee journal. Write down your grinder settings, bean type, water ratio, and tasting notes for each brew. Over time, this journal becomes your personal reference guide for making the perfect cup. It also helps you troubleshoot when something tastes off.
Pair your coffee with complementary foods. If you enjoy roasting your own snacks alongside your coffee routine, try roasting whole almonds in the oven for a fresh, crunchy addition to your morning ritual. The warm, nutty flavor pairs beautifully with a rich brew.
Refresh stale herbs for flavor experiments. If you like adding dried botanicals to your coffee, you can dry lemon balm in the oven to create a bright, citrusy coffee infusion. This simple technique adds a new dimension to your daily cup.
Conclusion
Setting up your coffee grinder does not have to be intimidating. With the right approach and a little patience, anyone can master the process. Start by understanding your grinder type, then follow the setup steps carefully. Adjust your grind size based on your preferred brewing method, and commit to regular cleaning and maintenance.
The difference between a poorly set up grinder and a well-calibrated one is noticeable in every single cup. Fresh, consistently ground coffee brings out the true character of your beans, turning an ordinary morning into something special. Take the time to learn your grinder, experiment with settings, and enjoy the journey.
Remember, great coffee starts long before the water touches the grounds. It starts with how you set up and care for your coffee grinder. Follow the tips in this guide, trust your palate, and soon you will be brewing café-quality coffee right in your own kitchen.
Frequently Asked Questions
How long does it take to set up a coffee grinder?
Setting up a new coffee grinder typically takes about 15 to 30 minutes. This includes unboxing, assembling, and doing an initial calibration test. The more you use it, the faster you will get at adjusting settings for your preferred brew method.
Can I use a blade grinder for espresso?
Technically yes, but blade grinders do not produce the fine, consistent grind needed for proper espresso. The results will be uneven and often lead to a sour or bitter taste. If you are serious about espresso, a burr grinder is strongly recommended.
How often should I clean my coffee grinder?
You should do a quick daily cleanup after each use and a deeper weekly cleaning. Monthly maintenance, including burr inspection, helps ensure long-term performance. Keeping up with this routine prevents stale oils from affecting your coffee flavor.
What is the best grind size for a beginner?
Medium grind is the best starting point for beginners. It works well with most drip coffee makers and pour over methods. From there, you can adjust finer or coarser based on your taste preferences and brewing equipment.
Do I need to calibrate my grinder if it is brand new?
Yes, even brand new grinders benefit from calibration. Factory settings are general guidelines, and your personal taste may require slight adjustments. A few test grinds will help you find the sweet spot for your favorite beans and brew method.
Can I grind other things besides coffee in my grinder?
Yes, many grinders can handle spices, nuts, and dried herbs. However, grinding non-coffee items can leave strong residual flavors. If you plan to use your grinder for multiple purposes, consider having a separate unit dedicated to coffee to preserve flavor purity.