How To Use On Stove Coffee Maker For Fresh Daily Brews
Using an on stove coffee maker is one of the best ways to enjoy rich, full-bodied coffee without relying on electricity. This guide walks you through every step, from choosing the right stovetop brewer to pulling the perfect cup of fresh coffee. You will learn proper brewing techniques, cleaning tips, and common mistakes to avoid for the best morning coffee experience.
There is something deeply satisfying about brewing coffee on the stove. The smell fills your kitchen, the process feels intentional, and the result is a cup that tastes far better than most drip machines can deliver. An on stove coffee maker gives you full control over every part of the brewing process. Whether you prefer a strong espresso-style shot or a milder, more relaxed cup, stovetop brewing lets you customize every sip.
If you have never used one before, the process might seem a little intimidating. But it is actually quite simple once you understand the basics. This guide covers everything you need to know about using an on stove coffee maker for fresh daily brews. From choosing your device to mastering the pour, you will find clear, practical steps that make morning coffee feel like a ritual rather than a chore.
Stovetop coffee brewing has been around for centuries. Long before electric machines existed, people relied on stovetop methods to make their daily coffee. Today, these devices are making a strong comeback. More coffee lovers are discovering that a manual stovetop brewer offers something electric machines simply cannot. It is hands-on, it is satisfying, and it produces a genuinely rich coffee flavor that is hard to beat.
Key Takeaways
- Choose the Right Type: Moka pots and percolators are the two most popular on stove coffee maker options for home brewing.
- Use Fresh Grounds: Freshly ground coffee beans make a huge difference in flavor and aroma.
- Control Your Heat: Medium heat and proper temperature control prevent bitter or burnt coffee.
- Clean Regularly: Routine cleaning keeps your stovetop brewer performing at its best.
- Avoid Common Mistakes: Overfilling, using boiling water, and skipping the pre-wet step can ruin your brew.
- Experiment with Brew Time: Adjusting brewing time lets you fine-tune your coffee taste to your preference.
📑 Table of Contents
What Is An On Stove Coffee Maker?
An on stove coffee maker is a manual brewing device designed to sit directly on a burner. Unlike electric coffee machines, it uses heat from your stove to boil water and push it through coffee grounds. The result is a bold, full-bodied cup of coffee that many people find far superior to drip-brewed coffee.
How Does It Work?
The basic principle is simple. Water sits in a lower chamber and heats up on the stove. As it reaches boiling point, steam pressure pushes the hot water up through a funnel or tube. The water passes through ground coffee and rises into an upper chamber. Gravity and pressure do all the work. No electricity needed. No buttons to press. Just heat, water, and ground coffee.
Why Choose Stovetop Brewing?
There are many reasons to switch to a manual coffee maker for your morning routine:
- No electricity required: Perfect for camping trips, power outages, or kitchens with limited outlets.
- Rich flavor: Stovetop brewing extracts more oils from the grounds, giving you a deeper, more complex coffee taste.
- Full control: You decide the water temperature, grind size, brew time, and strength.
- Durability: Most stovetop brewers are made from stainless steel or aluminum and last for years.
- Affordability: A quality stovetop coffee maker costs far less than most electric machines.
- Ritual and enjoyment: The process of making coffee on the stove is calming and rewarding.
Types Of On Stove Coffee Makers
Not all stovetop coffee makers are the same. There are a few main types, and each one brews coffee a little differently. Understanding these differences helps you pick the right one for your taste and kitchen setup.
Moka Pot
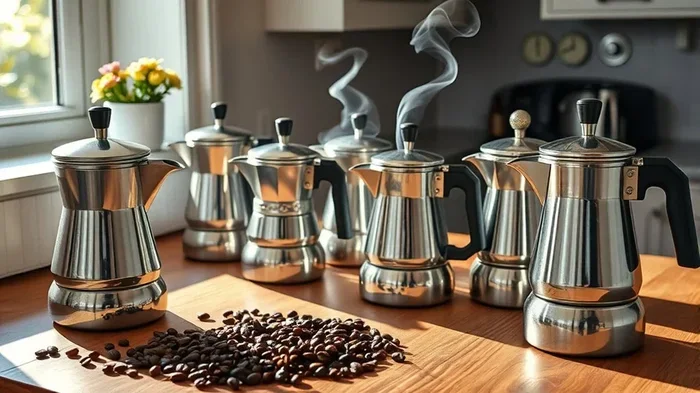
The moka pot is the most famous type of stovetop espresso maker. It was invented in Italy and is sometimes called a stovetop espresso maker. A moka pot has three chambers: a bottom water chamber, a middle funnel filled with coffee grounds, and a top collection chamber. When the water heats up, steam pressure forces it through the grounds and into the top chamber. The result is a strong, concentrated cup that resembles espresso but is slightly milder.
Moka pots come in different sizes, from single-cup models to large pots that can brew six or eight cups at once. They work on gas stoves, electric stoves, and induction cooktops (if you choose an induction-compatible model).
Percolator
A coffee percolator works differently from a moka pot. It cycles boiling water through the coffee grounds repeatedly. The water rises through a tube, spills over the grounds, and then drips back down into the bottom chamber. This process continues as long as the stove is on. Percolators produce a very strong, bold cup of coffee. They were extremely popular in the mid-20th century and are still beloved by many coffee enthusiasts today.
Other Stovetop Brewers
Beyond moka pots and percolators, there are other types of on stove coffee maker devices worth mentioning. Some use a simple infusion method where grounds steep in hot water before being filtered. Others use a siphon-style mechanism. Each type offers a slightly different coffee brewing experience and a unique cup profile. If you are exploring options, consider trying a few different styles to find what suits your palate best.
Step By Step Guide To Using Your On Stove Coffee Maker
Now that you know what an on stove coffee maker is and what types exist, let us walk through the actual brewing process. These steps apply to most stovetop brewers, though specific details may vary by model.
Step 1: Gather Your Supplies
Before you start, make sure you have everything ready:
- Your stovetop coffee maker (clean and dry)
- Fresh, cold filtered water
- Coarsely ground coffee beans (or pre-ground coffee)
- A stove or heat source
- A spoon or stirrer
- A mug or cup for serving
The quality of your coffee grounds matters enormously. Always use fresh beans and grind them just before brewing if possible. Pre-ground coffee loses flavor quickly, so try to buy it in small quantities and use it within a few weeks.
Step 2: Fill The Bottom Chamber With Water
Remove the top chamber and the coffee basket from your stovetop brewer. Fill the bottom chamber with cold water up to the safety valve or just below it. Never fill past the valve, or pressure will build up unsafely. The water level determines how much coffee you will brew, so match it to your needs.
For the best coffee flavor, use filtered or bottled water. Tap water with heavy chlorine or mineral content can affect the taste of your brew.
Step 3: Add Coffee Grounds To The Basket
Place the coffee grounds into the filter basket. The general rule is two tablespoons of ground coffee per six ounces of water. However, you can adjust this based on how strong you like your coffee. For a bolder coffee taste, add a little more. For a milder cup, use a bit less.
Do not pack the grounds down tightly. A level, even spread works best. Over-packing can slow the water flow and lead to over-extraction, which makes coffee taste bitter.
Step 4: Assemble The Coffee Maker
Place the basket with grounds back into the lower chamber. Screw the top chamber on tightly. Make sure the seal is secure so no steam or water escapes during brewing. A loose connection can cause leaks and uneven coffee extraction.
Step 5: Place On The Stove
Set your assembled on stove coffee maker on a burner set to medium heat. Do not use high heat. High heat can cause the water to boil too quickly, which leads to a harsh, bitter coffee taste. Medium heat gives the water time to extract the best flavors from the grounds gradually.
If you are using a moka pot, you will hear a gurgling sound as the water pushes through the grounds. This is normal and actually a good sign. When the gurgling slows down and you hear a hissing sound, the coffee is almost ready.
Step 6: Remove From Heat And Serve
As soon as you hear the hissing and see dark liquid coming into the top chamber, remove the stovetop coffee maker from the heat. This prevents over-extraction. Place a cold damp towel under the base or run it under cool water to stop the brewing process immediately.
Pour the fresh coffee into your mug and enjoy it right away. Stovetop coffee tastes best when served fresh. It does not hold its flavor as well as some machine-brewed coffee, so drink it soon after brewing for the best coffee taste.
Step 7: Cool Down And Clean
Let the stovetop brewer cool before disassembling it. Once cool, remove the grounds and rinse all parts with warm water. Never use soap on a moka pot or percolator, as it can strip away the seasoning and affect future brews. For a deeper clean, refer to our guide on how to clean a Cosori air fryer toaster oven for general kitchen appliance cleaning tips that also apply to coffee makers.
Tips For The Perfect Brew
Getting the perfect cup from your on stove coffee maker takes a little practice. These tips will help you achieve excellent results every time.
Use The Right Grind Size
For stovetop brewing, use a medium to coarse grind. Fine grounds can slip through the filter and make your coffee gritty. They can also clog the channel and cause uneven coffee extraction. If you buy whole beans, grind them just before brewing for the freshest possible coffee flavor.
Preheat Your Water
Using room temperature or slightly warm water instead of cold water can speed up the brewing process and reduce the time the grounds are exposed to heat. This helps prevent over-extraction and produces a smoother coffee taste.
Control The Heat Carefully
Heat control is the single most important factor in stovetop brewing. Too much heat boils the water too fast and extracts bitter compounds. Too little heat and the water may not push through properly. Start with medium heat and adjust as needed. Every stove is different, so pay attention to how your specific burner performs.
If you notice your oven or stove not heating evenly, it may affect your brewing results. For tips on resolving oven temperature issues that could affect your stovetop heat distribution, check out our troubleshooting guide.
Experiment With Brew Time
Brew time affects coffee extraction significantly. A shorter brew time gives you a lighter, milder cup. A longer brew time produces a stronger, more intense flavor. Try adjusting the time by 30 seconds at a time until you find your sweet spot. Keep notes so you can repeat your perfect brew every morning.
Fresh Beans Make All The Difference
The quality of your beans directly impacts your morning coffee. Buy whole beans from a reputable roaster and use them within two to four weeks of the roast date. Store them in an airtight container away from light and heat. This simple step elevates your stovetop coffee maker experience from good to outstanding.
Warm Your Cup Before Brewing
This is a small trick that makes a big difference. Fill your serving mug with hot water while the coffee is brewing. Pour it out just before you pour in the fresh coffee. A warm cup keeps the coffee at the ideal drinking temperature longer and preserves the coffee flavor and aroma.
Cleaning And Maintenance
Taking care of your on stove coffee maker ensures it lasts for years and keeps producing great-tasting coffee. Neglecting cleaning can lead to buildup of oils, residue, and mineral deposits that ruin the flavor of future brews.
Daily Cleaning Routine
After every use, disassemble your stovetop brewer and rinse all parts with warm water. Remove the coffee grounds from the basket and discard them. Wipe down the outside of the pot to remove any coffee stains or residue. Let all parts air dry before reassembling.
Deep Cleaning Weekly
Once a week, give your stovetop coffee maker a more thorough cleaning. Soak the removable parts in warm water for 15 to 20 minutes. Use a soft brush to clean any stubborn residue from the filter basket and channels. For hard water stains, soak the parts in a mixture of water and white vinegar for 30 minutes, then rinse thoroughly.
Remember, never use harsh detergents or soap on aluminum or stainless steel stovetop brewers. These can strip the natural seasoning and leave a soapy taste in your coffee. If you also use other kitchen appliances like air fryers or toaster ovens, keeping them clean helps maintain a fresh kitchen environment for all your cooking and brewing tasks.
Replacing Parts
Over time, the rubber seal and filter basket of your on stove coffee maker may wear out. Check these parts regularly for cracks, warping, or thinning. Replace them as needed to maintain a proper seal and consistent coffee brewing performance. Most manufacturers sell replacement parts directly or through authorized retailers.
Common Mistakes To Avoid
Even experienced stovetop brewers make mistakes sometimes. Knowing what to avoid helps you get better results faster.
Using Boiling Water
Never start with boiling water in your stovetop coffee maker. Boiling water is too hot and extracts bitter compounds from the grounds almost immediately. Always use cold or room temperature water and let the heat of the stove do the work.
Using Too Fine A Grind
Fine grounds clog the channels and create pressure buildup. This leads to uneven coffee extraction and a bitter, harsh taste. Stick to a medium or coarse grind for the best results.
Overfilling The Grounds Basket
It is tempting to add extra grounds for a stronger cup. But overfilling the basket blocks water flow and causes the coffee to taste sour or bitter. Keep the grounds level and do not press them down.
Leaving The Brewer On The Heat Too Long
Once the coffee has finished brewing, remove the stovetop brewer from the heat immediately. Leaving it on the burner continues the extraction process and will make your coffee taste burnt and bitter. The cold towel trick works wonders here.
Skipping The Pre-Wet Step
Some brewers benefit from a quick pre-wet. Before adding grounds, rinse them with a small amount of hot water. This wakes up the coffee grounds and helps release their oils for a richer coffee flavor. It is a small step that makes a noticeable difference.
Stovetop Coffee Maker vs Electric Coffee Maker
You might wonder how an on stove coffee maker compares to a standard electric coffee maker. Both have their strengths, and the best choice depends on your needs and preferences.
Electric coffee makers are convenient and fast. You can set them the night before and wake up to a fresh pot. They are great for making multiple cups quickly for a family or office. However, they offer less control over the brewing process, and many coffee lovers feel the flavor is thinner and less rich.
A stovetop coffee maker requires more hands-on attention, but the reward is a richer, more flavorful cup. You control the water temperature, the grind size, the brew time, and the strength. The process itself becomes part of the morning ritual. Many people find that slowing down and making coffee on the stove actually improves their morning routine and sets a positive tone for the day.
For those who love both convenience and quality, consider using a stovetop brewer for special mornings and an electric machine for busy weekdays. This gives you the best of both worlds.
Conclusion
Using an on stove coffee maker is one of the simplest and most rewarding ways to improve your daily coffee routine. It gives you complete control over every aspect of brewing, from water temperature to coffee extraction time. The result is a rich, full-bodied cup of fresh coffee that tastes far better than most electric machines can produce.
Start by choosing the right type of stovetop coffee maker for your needs. Master the basic brewing steps. Experiment with grind size, water temperature, and brew time until you find your perfect combination. Keep your brewer clean and well-maintained, and it will serve you well for many years.
The beauty of a manual coffee maker is that it turns a daily task into a mindful ritual. Each morning becomes an opportunity to slow down, enjoy the process, and savor the aroma of freshly brewed coffee. Give it a try tomorrow morning. Your taste buds will thank you.
Frequently Asked Questions
Can I Use An On Stove Coffee Maker On An Induction Cooktop?
Yes, but only if your stovetop coffee maker is made from a magnetic material like stainless steel or has an induction-compatible base. Aluminum moka pots do not work on induction cooktops unless they have a special induction disc attached. Check your product specifications before using it on an induction surface.
How Long Does It Take To Brew Coffee On The Stove?
Most on stove coffee maker devices take between 3 and 8 minutes to brew a full pot. Moka pots typically brew in about 4 to 5 minutes on medium heat. Percolators may take a bit longer since they cycle the water through the grounds multiple times. The exact time depends on your stove, the amount of water, and the type of brewer you are using.
What Is The Best Coffee Grind Size For Stovetop Brewing?
A medium to coarse grind works best for stovetop coffee makers. Fine grounds can clog the filter and cause over-extraction, leading to bitter coffee. If you are using a burr grinder, set it to a level slightly coarser than what you would use for a drip machine. This ensures proper water flow and balanced coffee flavor.
How Often Should I Clean My On Stove Coffee Maker?
You should rinse your stovetop brewer after every single use and do a deeper cleaning at least once a week. Weekly deep cleaning removes coffee oils, mineral deposits, and residue that build up over time. Regular cleaning keeps your coffee taste fresh and extends the life of your device significantly.
Can I Reuse Coffee Grounds In A Stovetop Coffee Maker?
It is not recommended. Used grounds have already released most of their flavor and oils during the first brew. Reusing them produces weak, flat coffee with little coffee flavor. Always use fresh grounds for each brew to get the best results from your on stove coffee maker.
Why Does My Stovetop Coffee Taste Bitter?
Bitter coffee usually means over-extraction. This happens when the water stays in contact with the grounds too long, the heat is too high, or the grind is too fine. Lower the heat, shorten the brew time, or switch to a coarser grind. Also make sure you are not leaving the stovetop coffee maker on the burner after brewing is complete.