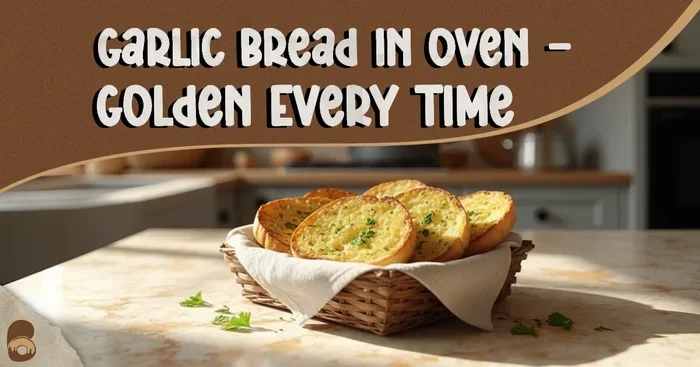
What Temp To Cook Garlic Bread In The Oven At Home
The perfect temp to cook garlic bread in the oven is between 375°F and 425°F, depending on your bread and toppings. Baking garlic bread at 375°F gives a soft, buttery interior, while 425°F delivers a crispy, golden crust. Learn the exact oven temperature, timing, and pro tips to make restaurant-quality garlic bread at home every single time.
Ever wondered what temp to cook garlic bread in the oven at home? The answer is simpler than you think, but getting it just right can turn a simple side dish into a crowd favorite. Whether you are using a crusty baguette or soft store-bought bread, the oven temperature sets the stage for perfect texture and flavor.
Garlic bread oven temperature is the key to crispy edges, melted butter, and that golden top everyone loves. In this guide, we will walk you through the exact degrees, timing, and tricks to make garlic bread in the oven that tastes like it came from a fancy restaurant. You will learn how to adjust the heat for different bread types and toppings.
By the end, you will know exactly how hot to bake garlic bread for your next dinner party or cozy night in. We will cover everything from the ideal oven range to common mistakes and fun variations. Let us dive into the perfect oven settings and make your garlic bread unforgettable.
Key Takeaways
- Ideal Temperature Range: Bake garlic bread at 375°F for soft bread or 425°F for extra crispiness.
- Preheat Your Oven: Always preheat to the target temperature before baking for even cooking.
- Butter Matters: Use a mix of softened butter, garlic, and herbs for the best flavor.
- Bread Choice: French baguette, ciabatta, or thick-sliced white bread all work great at these temps.
- Timing is Key: 10-15 minutes at 375°F or 8-12 minutes at 425°F prevents burning.
- No Foil for Crispiness: Skip the foil to get a golden, crunchy top.
- Fresh Herbs Win: Add chopped parsley or basil right before serving for a fresh burst.
📑 Table of Contents
The Perfect Oven Temperature for Garlic Bread
The garlic bread oven temperature you choose changes everything. Too low and the bread turns pale and soft. Too high and the butter burns before the inside warms up. So what is the sweet spot?
Most recipes agree that 375°F to 425°F is the ideal range. The lower end, 375°F, works best for thicker breads and when you want a soft, buttery interior. The higher end, 425°F, gives you a crispy, golden crust in less time. What temp to cook garlic bread in the oven depends on the bread you use and how crunchy you like it.
Why Temperature Matters So Much
Heat activates the butter and garlic flavors. At the right garlic bread oven temperature, the butter melts slowly, soaking into the bread while the edges caramelize. If the oven is too cool, the bread steams instead of toasting. This leaves you with a soggy result.
On the other hand, a blast of high heat quickly sets the outside. The Maillard reaction kicks in, creating those delicious brown spots. This reaction needs temperatures above 350°F. So keeping your oven in the 375°F to 425°F range ensures you get both flavor and crunch. The Maillard reaction is a chemical process between amino acids and sugars. It is what gives baked goods their rich, golden color and complex flavor. Without enough heat, you miss out on that deep, savory taste.
Another factor is moisture. Bread contains a lot of water. At 375°F, the surface heats up gradually. This allows the moisture to evaporate slowly, creating a crisp crust while the inside stays soft. At 425°F, the moisture evaporates faster, giving you a crunchier exterior. Both are delicious, but they serve different moods and meals.
The Sweet Spot: 375°F vs 425°F
Baking garlic bread at 375°F is the most common choice. It works well with French baguettes, ciabatta, and thick-sliced bread. You get a gentle toasting that keeps the inside moist. The butter has time to soak in without burning. This temperature is also forgiving. If you get distracted, the bread is less likely to burn.
Baking garlic bread at 425°F is perfect for thinner slices or when you want a super crispy result. This higher heat also melts cheese faster if you are adding toppings. Just watch the bread closely because it can go from golden to burnt in minutes. I recommend setting a timer for 8 minutes and checking early.
Here is a simple rule of thumb. If you are using a standard loaf from the bakery, start with 375°F. If you are using thin slices or you want a snack-style crisp bread, go for 425°F. The garlic bread oven temperature is flexible, so do not be afraid to experiment.
Key Takeaways:
- 375°F: Soft, buttery, and forgiving for beginners.
- 425°F: Crispy, fast, and ideal for thin bread or extra toppings.
- Always preheat the oven before placing the bread inside.
How to Make Garlic Bread from Scratch
Making garlic bread at home is easier than ordering pizza. You only need a few ingredients and the right oven temperature. Follow these steps to create homemade garlic bread that beats anything from a box. Once you make it fresh, you will never go back to the freezer aisle.
Gather Your Ingredients
You will need:
- One French baguette or ciabatta loaf
- 1/2 cup of unsalted butter, softened
- 3 to 4 cloves of garlic, minced
- 2 tablespoons of fresh parsley, chopped
- 1/2 teaspoon of salt
- 1/4 teaspoon of black pepper
- 1/4 cup of grated Parmesan cheese (optional)
- 1 tablespoon of olive oil (optional)
The garlic butter mixture is the soul of the dish. Use softened butter so it spreads easily. Cold butter will tear the bread and create uneven pockets of garlic. The olive oil adds a subtle fruity note and helps the butter brown faster.
Quick Tip: Use a fork to mash the garlic into the butter. This releases more flavor than just chopping. You can also use a garlic press for the smoothest result. If you do not have fresh garlic, garlic powder works in a pinch. Use 1/2 teaspoon of garlic powder for every clove of garlic the recipe calls for.
Mix the Garlic Butter
In a bowl, combine the softened butter, minced garlic, parsley, salt, and pepper. Mix until everything is evenly distributed. If you want a richer flavor, add the grated Parmesan. This mixture will melt into the bread as it bakes, creating layers of flavor.
Some people like to add a tiny pinch of sugar to the mix. Sugar helps with caramelization. It gives the bread that deep golden color without burning the garlic. Just a quarter teaspoon is enough. You can also add a squeeze of lemon juice for a bright, fresh note that cuts through the richness.
Expert Insight: Let the garlic butter sit at room temperature for 10 minutes before spreading. This allows the flavors to meld together. The garlic will mellow slightly and the butter will become even easier to spread. This small step makes a big difference in the final taste.
Assemble and Bake
Preheat your oven to 375°F. Slice the baguette in half lengthwise. Spread the garlic butter generously over the cut sides. Do not skimp on the butter. It is the carrier of flavor and the key to crispiness. Use a spatula or the back of a spoon to spread it evenly.
Place the bread on a baking sheet lined with parchment paper. If you like a softer top, cover it loosely with foil. For a crispy finish, leave it uncovered. Bake for 10 to 12 minutes. The bread is done when the edges are golden brown and the butter is bubbling.
If you are using a thinner bread like a sub roll, reduce the baking time to 8 to 10 minutes. Thinner bread dries out faster. Check it at the 8-minute mark to prevent burning.
Key Takeaways:
- Softened butter spreads evenly and prevents tearing.
- Preheat the oven before putting the bread in.
- 10-12 minutes at 375°F gives perfect results for a standard baguette.
- Parchment paper makes cleanup easy and prevents sticking.
Store-Bought vs Homemade Garlic Bread
Both options have their place. Store-bought garlic bread is convenient, while homemade gives you control over flavor and texture. Let us compare them side by side so you can decide which is best for your needs.
Quick Comparison Table
| Factor | Store-Bought | Homemade |
|---|---|---|
| Prep Time | 5 minutes | 15 minutes |
| Flavor Control | Limited | Full control |
| Texture | Can be soggy | Crispy and buttery |
| Cost | $3-$5 per pack | $1-$2 per loaf |
| Best For | Quick weeknight meals | Dinner parties and holidays |
| Preservatives | Often contains them | None, just real ingredients |
| Customization | None | Add any herbs, cheese, or spices |
Which One Should You Pick?
If you are in a rush, store-bought works fine. Just bake it at 375°F for 8 to 10 minutes. However, homemade garlic bread is worth the extra few minutes. The garlic bread oven temperature is the same, but the result is far superior. Fresh bread, real butter, and minced garlic create a depth of flavor that no frozen block can match.
Homemade bread lets you adjust the garlic intensity. You can add more herbs or less salt. It also uses fresher ingredients with no preservatives. For a special occasion, homemade is the clear winner. Your guests will notice the difference immediately.
Even the best store-bought garlic bread benefits from a quick toast at 375°F for 5 minutes. This revives the crust and makes the butter melt evenly. If you are using frozen garlic bread, unwrap it and let it sit at room temperature for 10 minutes before baking. This prevents the inside from being cold while the outside burns.
Expert Insight: The secret to great store-bought garlic bread is to brush it with a little extra melted butter right before it goes in the oven. This adds a homemade touch and boosts the crispiness significantly.
Key Takeaways:
- Store-bought saves time but lacks freshness.
- Homemade offers better flavor and texture control.
- Either way, use the same oven temperature for great results.
- Revive store-bought bread with a quick butter brush and 5-minute toast.
Tips for Getting Crispy, Golden Garlic Bread
Getting the perfect crunch is all about technique. The oven temperature is important, but small details make a big difference. Here are the best tips for crispy garlic bread that looks and tastes amazing.
The Butter Mixture Trick
Do not just use plain butter. Whip the butter with a little bit of olive oil. This creates a lighter mixture that spreads thinner and crisps up faster. The olive oil also adds a subtle Mediterranean flavor. Use a ratio of 3 parts butter to 1 part olive oil for the best results.
Another trick is to add a pinch of sugar to the garlic butter. Sugar helps with caramelization. It gives the bread that deep golden color without burning the garlic. Just a quarter teaspoon is enough. You can also add a tiny drop of honey for extra browning power.
Quick Tip: If you want an extra kick, mix a pinch of red pepper flakes into the butter. This adds a gentle heat that complements the garlic perfectly. It is a favorite among my friends and family.
Foil or No Foil?
This is a common debate. Using foil traps steam and keeps the top soft. It is great if you prefer a pillowy interior. However, if you want a crispy top, skip the foil. Let the top face the direct heat of the oven. The direct heat evaporates surface moisture quickly, creating that satisfying crunch.
Quick Tip: For the best of both worlds, bake the bread uncovered for 8 minutes, then cover with foil for the last 2 minutes. This gives you a crisp bottom and a slightly softer top. It is the perfect middle ground for families who like both textures.
Rack Position in the Oven
Always place the baking sheet on the middle oven rack. The top heating element can scorch the bread if it is too close. The middle rack ensures even heat circulation around the garlic bread. This prevents hot spots from burning one side.
If your oven has hot spots, rotate the baking sheet halfway through baking. This simple step prevents one side from burning while the other stays pale. Most home ovens have uneven heat distribution, so this trick is a game changer.
Key Takeaways:
- Whip butter with olive oil for a lighter, crispier result.
- Skip the foil for maximum crunch, or use it for the last 2 minutes.
- Middle rack ensures even toasting.
- Rotate the pan halfway through for even browning.
Common Mistakes, Flavor Variations, and Reheating
Even with the right garlic bread oven temperature, small errors can ruin your loaf. Avoid these common mistakes to get perfect results every time. I have made all of these errors myself, so I know exactly how disappointing they can be.
Burning the Top
The most frequent mistake is leaving the bread in too long. Butter and garlic brown very fast at high temperatures. Set a timer for 8 to 10 minutes when baking at 425°F. Check early. You want golden brown, not dark brown. Burnt garlic tastes bitter and can ruin the entire batch.
If you notice the top is browning too quickly, tent it with foil. This lowers the heat on the surface while the inside continues to warm. Do not walk away from the oven. Garlic bread can go from perfect to burnt in under a minute. Stay nearby and watch for the first signs of golden color.
Using Cold Butter
Cold butter does not spread evenly. It creates clumps of raw garlic and dry patches of bread. Always soften the butter to room temperature before mixing. It should be easy to spread with a knife but not melted into a liquid. The ideal state is cool but pliable.
Common Mistake: Microwaving the butter to soften it. This often creates hot spots that partially cook the garlic. The garlic turns bitter and loses its fresh flavor. Instead, leave the butter out on the counter for 20 to 30 minutes. It will soften naturally and evenly.
Overloading with Garlic
More garlic does not always mean better flavor. Too much raw garlic can overpower the bread and burn at high temperatures. Stick to 3 to 4 cloves for a standard loaf. If you love garlic, use roasted garlic instead. Roasted garlic is sweeter and less likely to burn. It also adds a mellow, nutty flavor that complements the butter beautifully.
Another mistake is using garlic powder instead of fresh garlic without adjusting the amount. Garlic powder is more concentrated. A little goes a long way. If you must use garlic powder, start with 1/2 teaspoon and taste the butter mixture before spreading.
Cheese-Stuffed and Herb-Forward Variations
Once you master the basic garlic bread oven temperature, you can experiment with flavors. For cheese-stuffed garlic bread, slice the baguette in half lengthwise but do not cut all the way through. Create a pocket and stuff it with shredded mozzarella or cheddar. Spread the garlic butter on the outside and bake at 375°F for 12 to 15 minutes. The cheese melts inside while the outside turns crispy.
Fresh herbs transform garlic bread from simple to sophisticated. Try adding fresh basil, oregano, or thyme to the garlic butter. Finely chop the herbs and mix them in just before spreading. Fresh herbs release their oils when they hit the warm butter, filling your kitchen with an incredible aroma. For an Italian-inspired twist, add a pinch of dried oregano and a sprinkle of red pepper flakes.
You can also lighten the bread by mixing the butter with Greek yogurt. The yogurt adds creaminess with less fat. Use a 1:1 ratio of butter to yogurt for the best texture. Bake whole wheat garlic bread at 375°F for the same time. The higher fiber content may require an extra minute or two.
Expert Insight: Adding a drizzle of honey to the garlic butter creates a sweet-savory balance. This works especially well with a sprinkle of sea salt. The honey helps the butter brown faster, so reduce the oven temperature by 10°F to 365°F. This prevents the sugar from burning while still achieving a beautiful caramelized crust.
Reheating Leftover Garlic Bread
Garlic bread is best fresh, but leftovers can still be delicious if you reheat them properly. The wrong method turns them into a hard, chewy mess. The right method brings back the crispiness and melts the butter again.
Always reheat garlic bread in the oven. The garlic bread oven temperature for reheating is 350°F. This lower temperature gently warms the bread without drying it out. Microwaving is the enemy of crispy garlic bread. It steams the bread and makes it rubbery.
Wrap the leftover bread loosely in foil and place it in the oven for 5 to 7 minutes. The foil traps just enough moisture to keep the inside soft while the oven heat restores the crust. Remove the foil for the last 2 minutes if you want extra crunch.
If your leftover garlic bread is already a bit stale, brush it with a tiny bit of melted butter before reheating. This adds moisture and fresh flavor. It is like giving the bread a second life.
Key Takeaways:
- Set a timer and watch the bread closely.
- Soften butter to room temperature for even spreading.
- Use roasted garlic for a milder, sweeter flavor.
- Go easy on garlic powder because it is more potent than fresh.
- Reheat at 350°F for 5 to 7 minutes with foil.
- Never microwave garlic bread if you want it to stay crispy.
Conclusion: Your Go-To Garlic Bread Guide
Making perfect garlic bread at home is all about getting the oven temperature right. Whether you choose 375°F for a soft, buttery loaf or 425°F for a crispy, golden crunch, the process is simple and rewarding. Now you know exactly what temp to cook garlic bread in the oven at home and how to adjust for your preferences.
Remember to preheat your oven, use softened butter, and keep an eye on the bread. Small details like rack position and foil usage can elevate your result from good to great. With the tips and variations in this guide, you can make garlic bread that suits any occasion, from a quick weeknight dinner to a holiday feast.
Next time you are planning a dinner or just craving a snack, pull out the baking sheet and give it a try. Your kitchen will smell amazing, and everyone will want the recipe. Happy baking!
Frequently Asked Questions
What is the best temperature to cook garlic bread in the oven?
The best garlic bread oven temperature is 375°F for soft, buttery bread or 425°F for extra crispy results. Both work well depending on the bread thickness and your personal preference.
How long should you bake garlic bread at 375°F?
Bake garlic bread at 375°F for 10 to 12 minutes for a standard baguette. Thinner bread or rolls may need only 8 to 10 minutes. Watch for golden edges and bubbling butter.
Can you use frozen garlic bread in the oven?
Yes, frozen garlic bread works great. Preheat the oven to 375°F, unwrap the bread, and let it sit at room temperature for 10 minutes first. Bake for 8 to 12 minutes until golden and crispy.
Do you need foil when baking garlic bread?
Foil is optional. Using foil keeps the top soft, while skipping it gives a crispy crust. For the best of both worlds, bake uncovered for 8 minutes, then cover with foil for the last 2 minutes.
What kind of bread is best for garlic bread?
French baguettes, ciabatta, and thick-sliced white bread are the best choices. They hold up well to the garlic butter and crisp nicely at the recommended garlic bread oven temperature.
How do you reheat leftover garlic bread?
Reheat leftover garlic bread in the oven at 350°F for 5 to 7 minutes. Wrap it loosely in foil to keep the inside soft, then remove the foil for the last 2 minutes to restore the crunch.