How To Make A Solar Oven With Aluminum Foil At Home
Want to cook with the sun? Learning how to make a solar oven with aluminum foil is easier than you think. This guide walks you through building a powerful homemade solar oven using cardboard, foil, and everyday items. You will save energy, cut bills, and explore the exciting world of solar cooking at home.
Have you ever wondered if you could cook food using nothing but sunlight? How to make a solar oven with aluminum foil is a question many curious minds ask. The answer is simpler than you might think. With a few household items and a little patience, you can build a working solar oven that actually cooks your meals. This guide will show you exactly how to do it, step by step.
Making a solar oven with aluminum foil at home is one of the most rewarding DIY projects you can try. It does not require fancy tools or expensive materials. You probably already have everything you need sitting in your kitchen right now. Whether you want to save on energy bills, explore off-grid cooking, or just have fun with a science project, this guide has you covered. Let us dive in and start building.
Key Takeaways
- Simple Materials: You only need cardboard, aluminum foil, plastic wrap, and a few other household items to build your solar oven.
- Free Cooking Energy: A DIY solar oven harnesses the sun’s power to bake, roast, and dehydrate food without using electricity or gas.
- Beginner-Friendly: No special skills are required. The step-by-step instructions make this project easy for kids and adults alike.
- Cost Effective: Building a homemade solar oven costs almost nothing compared to buying a commercial solar cooker.
- Eco-Friendly Cooking: Solar cooking reduces your carbon footprint and supports renewable energy use in the kitchen.
- Versatile Use: You can bake bread, roast vegetables, heat water, and even dehydrate food with your foil solar oven.
- Safety First: Always supervise children and follow safety tips to avoid burns and ensure a successful build.
📑 Table of Contents
- What Is a Solar Oven and How Does It Work?
- What You Will Need to Build a Solar Oven
- Step-by-Step Guide: How to Make a Solar Oven with Aluminum Foil
- Tips for Getting the Best Results from Your Solar Oven
- Common Mistakes to Avoid When Building a Solar Oven
- What Can You Cook in a Solar Oven?
- Benefits of Solar Cooking at Home
- Expert Insights on Maximizing Solar Oven Performance
- Key Takeaways
- FAQ
- Conclusion
What Is a Solar Oven and How Does It Work?
A solar oven is a device that uses sunlight to generate heat for cooking. Instead of relying on gas or electricity, it captures the sun’s energy and converts it into thermal energy. This heat then cooks your food slowly and evenly. The basic idea is simple. Sunlight hits a reflective surface, bounces inward, and gets trapped inside a cooking chamber.
The Science Behind Solar Cooking
Here is how solar cooking works in plain terms. The aluminum foil acts as a reflector. It bounces sunlight into the oven box. The dark-colored interior absorbs this light and turns it into heat. Then, the clear cover (usually plastic wrap or glass) traps the heat inside. This creates a greenhouse effect. The temperature inside can reach 200 to 300 degrees Fahrenheit on a sunny day. That is hot enough to bake, roast, and even boil water.
Thermal energy is the key player here. The foil does not create heat on its own. It simply redirects the sun’s rays into a concentrated area. The darker the surface inside the oven, the better it absorbs heat. This is why many solar oven designs use black paper or dark-colored pots. The combination of reflection, absorption, and heat trapping makes the whole system work beautifully.
What You Will Need to Build a Solar Oven
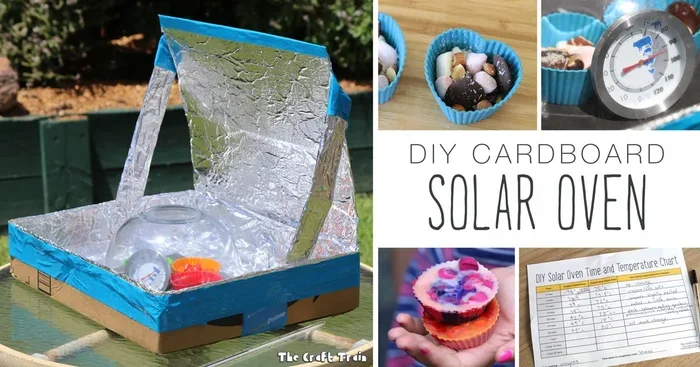
Before you start, gather all your materials. Having everything ready makes the build process smooth and enjoyable. Here is a simple list of what you need for a basic box solar oven.
Materials List
- Cardboard box: A medium-sized shipping box works great. Choose one with a lid or make a flap from extra cardboard.
- Aluminum foil: This is your main reflector. You will need a good-sized sheet or roll.
- Plastic wrap or clear glass: This serves as the oven window to trap heat inside.
- Black construction paper or black paint: This creates the heat-absorbing interior surface.
- Glue stick or white glue: For attaching the foil and paper to the cardboard.
- Duct tape or packing tape: To reinforce the structure and seal edges.
- A ruler and scissors: For measuring and cutting cardboard.
- A stick or wooden skewer: This acts as a prop to angle the reflector flap.
- A dark-colored pot or pan: This goes inside the oven for cooking.
Optional but Helpful Extras
You can enhance your homemade solar oven with a few extras. A thermometer helps you track internal temperatures. A small oven mitt protects your hands when handling hot food. Some builders add insulation inside the box using crumpled newspaper. This helps retain heat even on slightly cloudy days. You can also paint the outside of the box black to reduce heat reflection from the exterior.
Step-by-Step Guide: How to Make a Solar Oven with Aluminum Foil
Now comes the fun part. Follow these steps carefully to build your very own solar cooker DIY project. Each step is designed to be simple and clear. Take your time and enjoy the process.
Step 1: Prepare the Cardboard Box
Start by choosing a cardboard box that is sturdy and the right size. A box that is about 12 by 12 by 8 inches works well for most cooking needs. If the box has a lid, great. If not, you can cut one piece of cardboard to serve as a hinged lid. Make sure the box is clean and dry before you begin. Remove any tape or labels that might interfere with the foil.
Step 2: Line the Interior with Black Paper
Take your black construction paper and glue it to the inside bottom and sides of the box. The black surface is essential because it absorbs sunlight and converts it into heat. Use a glue stick to attach the paper smoothly. Avoid wrinkles because they can create air pockets that reduce heat absorption. If you prefer, you can also spray the interior with black paint. Just make sure it dries completely before moving to the next step.
Step 3: Cover the Inside with Aluminum Foil
This is the most important step in learning how to make a solar oven with aluminum foil. Take your aluminum foil and wrap it around the inside of the box lid. The foil should be smooth and shiny on the inside. This side reflects sunlight into the oven. Use your glue stick to attach the foil carefully. Smooth out any bubbles or wrinkles. You want the surface as flat and reflective as possible. The better the reflection, the more heat your oven captures.
Next, line the inside walls of the box with foil as well. This creates multiple reflective surfaces that bounce sunlight toward the cooking pot. The more reflections, the more concentrated the heat becomes. Think of it like using several mirrors to focus light on one spot.
Step 4: Create the Reflector Flap
Cut a piece of cardboard that is slightly larger than the open top of the box. Cover one side of this cardboard completely with aluminum foil, shiny side out. This flap acts as your main reflector. Attach it to the back of the box using duct tape so it can open and close like a door. When you prop this flap open, it angles sunlight directly into the oven. Use a wooden stick or skewer to hold the flap at the best angle toward the sun.
Step 5: Add the Heat-Trapping Window
Cut a piece of clear plastic wrap and stretch it over the open top of the box. Secure it with tape on all sides. This plastic wrap serves as the oven window. It lets sunlight in but traps the heat inside. This is the same principle that makes a greenhouse work. Some builders prefer to use a sheet of clear glass instead. Glass works even better for heat retention but is heavier and more fragile.
Step 6: Insulate and Seal the Edges
To boost performance, add insulation inside the box walls. Crumpled newspaper works perfectly for this. Place it between the cardboard layers to reduce heat loss. Seal all gaps and edges with duct tape. Even a small gap can let heat escape and lower your oven temperature. The tighter the seal, the better your oven performs.
Step 7: Position Your Oven and Start Cooking
Place your finished solar oven in direct sunlight. Angle the reflector flap so it faces the sun directly. Use a stick to prop it at the right angle. The sun moves across the sky, so you may need to adjust the flap every 30 minutes or so. Place your dark pot or pan inside the oven on the black paper. Close the lid and cover with the plastic wrap window. Now wait and let the sun do the work.
Tips for Getting the Best Results from Your Solar Oven
Building the oven is only half the battle. Using it effectively makes all the difference. Here are some practical tips to help you get the best results every time you cook with your DIY solar oven.
Choose the Right Time of Day
The best time to use your solar oven is between 11 a.m. and 3 p.m. This is when the sun is at its highest and strongest. Cooking earlier or later in the day will take much longer. Plan your meals around peak sunlight hours for the best results.
Use Dark-Colored Cookware
Dark pots and pans absorb heat far better than light-colored ones. If you have a black cast iron skillet or a dark ceramic pot, use it inside your oven. You can also place a piece of black paper under lighter cookware to improve heat absorption. This small trick can significantly boost your cooking temperature.
Keep the Oven Sealed
Every time you open the oven to check on food, you lose heat. Try to resist the urge to peek too often. Each opening can drop the internal temperature by 10 to 20 degrees. Use a thermometer to monitor progress without opening the lid too frequently.
Adjust the Angle Throughout the Day
The sun moves across the sky, so your reflector angle needs to change too. A simple rule of thumb is to keep the reflector pointed directly at the sun. You can use a stick or pencil to cast a shadow and check if it is aligned properly. When the shadow is shortest and directly under the stick, your reflector is aimed correctly.
Be Patient
Solar cooking takes longer than conventional cooking. A dish that takes 30 minutes in a regular oven might take one to two hours in a solar oven. This is normal. The gentle, even heat actually preserves more nutrients and flavors in your food. Embrace the slower pace and enjoy the process.
Common Mistakes to Avoid When Building a Solar Oven
Even with the best instructions, mistakes can happen. Here are some common errors people make when building a reflector oven and how to avoid them.
- Using wrinkled foil: Wrinkles scatter sunlight instead of reflecting it. Smooth your foil carefully for the best results.
- Skipping the insulation: Without insulation, your oven loses heat quickly. Always add newspaper or other insulating material inside the walls.
- Using clear plastic that traps too much moisture: Some plastics trap steam and create condensation. Use food-safe plastic wrap and vent slightly if needed.
- Placing the oven in partial shade: Even a small shadow can dramatically reduce performance. Always place your oven in full, direct sunlight.
- Overfilling the oven: Leave space inside for heat to circulate. Overcrowding reduces cooking efficiency and leads to uneven cooking.
- Forgetting to preheat: Just like a regular oven, a solar oven benefits from preheating. Give it 20 to 30 minutes in the sun before adding food.
What Can You Cook in a Solar Oven?
The versatility of a solar oven might surprise you. You can cook a wide variety of foods with just the power of the sun. Here are some ideas to get you started.
- Baked potatoes: Wrap potatoes in foil and place them in the oven. They cook beautifully in about one to two hours.
- Roasted vegetables: Cut vegetables into small pieces, add a little oil and seasoning, and roast them slowly.
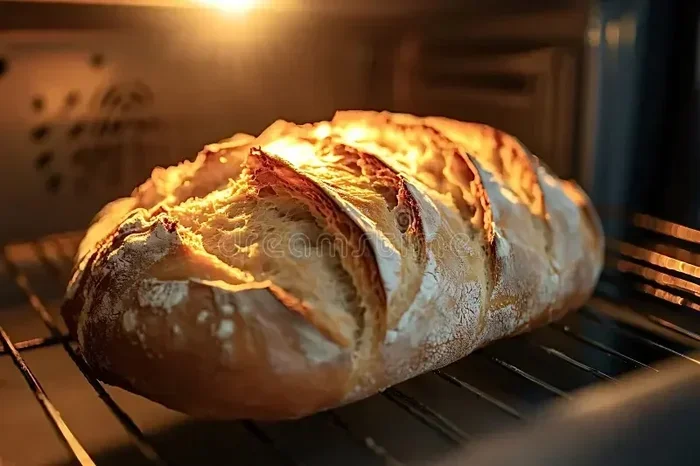
- Baked bread: You can bake simple bread dough in a dark pot. The gentle heat creates a lovely crust.
- Reheated leftovers: Solar ovens work great for warming up last night’s dinner without using your kitchen stove.
- Boiled water: You can heat water for tea, coffee, or instant meals.
- Fruit dehydration: Slice fruits thinly and dry them in the oven for healthy, homemade snacks.
- Scrambled eggs: Crack eggs into a dark pan and cook them slowly in the sun. They turn out surprisingly well.
Solar food dehydrator capabilities are a bonus feature of your oven. On warm, sunny days, you can dry herbs, fruits, and jerky. This adds another useful function to your DIY project and extends your solar cooking adventures.
Benefits of Solar Cooking at Home
Building and using a solar oven offers many benefits beyond just saving money. Let us look at why solar cooking is worth your time and effort.
Saves Energy and Money
Every meal you cook in your solar oven is one less meal cooked with gas or electricity. Over time, this adds up to real savings on your energy bills. Solar cooking is completely free once you have built your oven. The fuel source, sunlight, costs nothing and will never run out.
Environmentally Friendly
Solar energy cooking produces zero emissions. It does not burn fossil fuels or release harmful gases into the atmosphere. By choosing to cook with the sun, you reduce your personal carbon footprint. This small change contributes to a healthier planet for everyone.
Safe and Low Maintenance
Unlike gas stoves or open fires, solar ovens have no open flames. There is no risk of gas leaks or accidental fires. This makes them especially safe for families with young children. There are also no moving parts to maintain. Your foil solar oven simply sits in the sun and does its job.
Great for Outdoor Adventures
Solar ovens are perfect for camping trips, picnics, and backyard gatherings. They are lightweight, portable, and require no fuel to carry. You can cook a hot meal anywhere the sun shines. This makes them a fantastic addition to your outdoor cooking gear.
Expert Insights on Maximizing Solar Oven Performance
Experienced solar oven builders share a few insider tips that can take your cooking to the next level. These insights come from years of testing and refining solar cooker DIY designs.
Use a double-glazed window if possible. Two layers of plastic wrap or a glass pane creates an even better heat trap. The air gap between the layers acts as additional insulation. This small upgrade can raise your oven temperature by 10 to 20 degrees.
Paint the outside of the box matte black. This prevents the exterior from reflecting sunlight away from the oven. A matte black surface absorbs ambient heat from the surrounding air and keeps the interior warmer longer.
Track the sun with a simple shadow method. Push a stick upright into the ground next to your oven. When the shadow is shortest and points directly north (in the northern hemisphere), the sun is at its peak angle. Adjust your oven and reflector to match this position for maximum efficiency.
Use a dark-colored lid on your pot. The lid traps steam and heat inside the pot. This speeds up cooking and keeps food moist. A dark lid absorbs additional solar energy and transfers it directly to the food inside.
Key Takeaways
- Simple Materials: You only need cardboard, aluminum foil, plastic wrap, and a few other household items to build your solar oven.
- Free Cooking Energy: A DIY solar oven harnesses the sun’s power to bake, roast, and dehydrate food without using electricity or gas.
- Beginner-Friendly: No special skills are required. The step-by-step instructions make this project easy for kids and adults alike.
- Cost Effective: Building a homemade solar oven costs almost nothing compared to buying a commercial solar cooker.
- Eco-Friendly Cooking: Solar cooking reduces your carbon footprint and supports renewable energy use in the kitchen.
- Versatile Use: You can bake bread, roast vegetables, heat water, and even dehydrate food with your foil solar oven.
- Safety First: Always supervise children and follow safety tips to avoid burns and ensure a successful build.
FAQ
Can I really cook a full meal in a solar oven made with aluminum foil?
Yes, absolutely. Many people successfully bake casseroles, roast chicken, and even make cakes in foil solar ovens. The key is to give it enough time and keep the oven properly angled toward the sun. Most meals take one to three hours depending on the dish and the sunlight available.
How hot can a homemade solar oven get?
A well-built box solar oven can reach temperatures between 200 and 300 degrees Fahrenheit on a clear, sunny day. The temperature depends on several factors including the reflector angle, insulation quality, and how well you seal the oven. Adding a glass cover instead of plastic wrap can push temperatures even higher.
Can I use my solar oven on a cloudy day?
Solar ovens work best in direct, bright sunlight. On cloudy days, they still function but at reduced efficiency. You may notice a significant drop in temperature and cooking time increases. For best results, use your oven on clear days with full sun exposure between 11 a.m. and 3 p.m.
Is aluminum foil safe to use inside a cooking oven?
Yes, aluminum foil is safe for use in a solar oven. It does not touch the food directly in most designs. The foil serves only as a reflector on the outside surfaces of the oven. As long as you use it to line reflective surfaces and not as direct food contact, it is perfectly safe for your DIY solar cooking project.
How long does it take to build a solar oven?
Most people can build a basic homemade solar oven in about one to two hours. If you are a first-timer, give yourself extra time to get comfortable with the steps. Once you have built one, you can replicate the design much faster. Many builders create their second oven in under an hour.
Can children help build a solar oven?
Absolutely. Building a solar oven is a fantastic educational activity for children. It teaches them about renewable energy, heat transfer, and basic engineering. Adults should handle the cutting and tape tasks while children can help with foil wrapping, gluing paper, and positioning the oven in the sun. It is a wonderful hands-on science project for the whole family.
Conclusion
Learning how to make a solar oven with aluminum foil opens up a world of possibilities in your kitchen and beyond. This simple, affordable project lets you cook with the sun, save energy, and reduce your environmental impact. The step-by-step process is straightforward enough for beginners yet rewarding enough to keep you coming back for more experiments.
Your DIY solar oven is more than just a cooking tool. It is a gateway to sustainable living and renewable energy awareness. Every meal you prepare with sunlight is a small step toward a greener lifestyle. The satisfaction of eating food you cooked entirely with the power of the sun is truly unmatched.
So gather your materials, follow the steps in this guide, and start your solar cooking journey today. The sun is waiting to help you create delicious meals with nothing more than a cardboard box, some aluminum foil, and a little creativity. Happy cooking!