How Long To Cook Boneless Skinless Chicken Breast In Oven
Learning how long to cook boneless skinless chicken breast in oven is simple when you know the right temperature and time. This guide covers exact baking times for 350°F and 400°F, plus tips to keep the meat juicy. You’ll also find a step-by-step method, common mistakes, and flavor variations for perfect oven-baked chicken breast every time.
There’s something incredibly satisfying about pulling a perfectly baked chicken breast from the oven. The kitchen fills with a savory aroma, and you know you’re about to enjoy a healthy, protein-packed meal. But let’s be honest—cooking boneless skinless chicken breast can feel tricky. Too high a heat and it dries out. Too low and you’re waiting forever.
So, exactly how long to cook boneless skinless chicken breast in oven? The answer depends on a few key factors. The oven temperature, the thickness of the breast, and whether you pound it evenly all play a role. In this guide, I’ll walk you through everything you need to know. You’ll learn the ideal oven temperature, exact baking times, and simple tricks to keep your oven-baked chicken breast moist and tender.
By the end, you’ll have a foolproof method that works every single time. No more guessing, no more dry chicken. Just juicy, flavorful results that the whole family will love. Let’s dive in.
Key Takeaways
- Right Temperature Matters: Bake at 350°F for tenderness or 400°F for a crispier finish. Both are safe and effective.
- Time Depends on Thickness: A 1-inch breast takes 20–30 minutes. Always use a meat thermometer to confirm doneness.
- Keep It Moist: Pat the chicken dry, brine or pound it evenly, and let it rest for 5–10 minutes after baking.
- Avoid Common Mistakes: Never skip the thermometer, don’t cut into the chicken early, and always let it rest before slicing.
- Meal Prep Friendly: Baked chicken breast stores well for 4 days in the fridge and freezes for up to 3 months.
- Flavor Is Easy: Try herb butter, lemon herb, or spicy southwest marinades to keep meals exciting.
📑 Table of Contents
The Ideal Oven Temperature for Chicken Breast
Choosing the right chicken breast oven temperature is the single most important step. The temperature affects both cooking time and moisture retention. A lower temperature cooks more gently, while a higher temperature speeds things up but risks drying out the meat.
Why Temperature Matters
When you bake chicken breast, the proteins tighten as the heat rises. If the temperature is too high, the outside overcooks before the inside reaches the safe internal temperature chicken of 165°F (74°C). The result? A tough, dry exterior with a slightly underdone center. On the other hand, a moderate temperature allows the heat to penetrate evenly. This gives you a more uniform cooking chicken breast experience.
Most oven-baked chicken breast recipes call for either 350°F or 400°F. Both work well, but they produce different textures. I’ll break down the differences in the next section.
350°F vs 400°F: Which Is Better?
Here’s a quick comparison of the two popular chicken breast baking temperatures.
| Temperature | Bake Time (1-inch breast) | Texture | Best For |
|---|---|---|---|
| 350°F (175°C) | 25–30 minutes | Very tender, juicy | Beginners, extra-thick cuts |
| 400°F (200°C) | 20–25 minutes | Slightly crispier outside | Faster cook, meal prep |
350°F (175°C): This is the classic chicken breast baking temperature. It cooks the meat slowly and evenly. The result is a very tender, juicy oven chicken breast. However, the bake time is longer—typically 25 to 35 minutes depending on thickness.
400°F (200°C): This higher heat creates a slightly crispier exterior while keeping the inside moist. The chicken breast cooking time at 400°F is shorter, around 20 to 25 minutes. Many home cooks prefer this method for a boneless chicken breast recipe that has a bit more flavor on the outside.
Both temperatures are safe and effective. The choice comes down to your schedule and texture preference. If you’re short on time, go with 400°F. If you want maximum tenderness, 350°F is your friend.
Convection Oven Adjustments
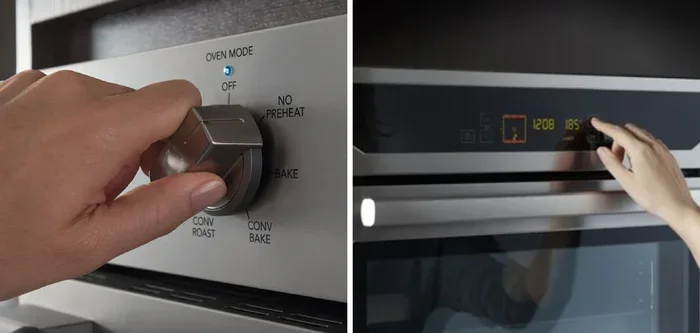
If you have a convection oven, reduce the temperature by 25°F. So bake at 325°F or 375°F. Convection fans circulate hot air, which cooks food faster and more evenly. This means your oven-baked chicken breast will be done a few minutes earlier. Check for doneness early to avoid overcooking.
- Always preheat your oven before placing the chicken inside.
- Use the middle rack for even heat distribution.
- If your oven runs hot, check the chicken 5 minutes early.
How Long To Cook Boneless Skinless Chicken Breast In Oven
Now for the main question: how long to cook boneless skinless chicken breast in oven. The answer varies with temperature and thickness. Here are the general guidelines.
Baking Time at 350°F
At 350°F, a standard boneless skinless chicken breast that is about 1 inch thick will take 25 to 30 minutes to cook. If the breast is thicker than 1.5 inches, it may need up to 35–40 minutes. The key is to use a meat thermometer. The chicken breast cooking temp should reach 165°F in the thickest part.
For a chicken breast at 350°F, the lower heat gives you a wider window. Even if you go a few minutes over, the meat is less likely to dry out. This makes 350°F a forgiving choice for beginners. Just remember that the chicken breast cooking time increases with thickness. A 2-inch breast could take 40–45 minutes at this temperature.
Baking Time at 400°F
At 400°F, the chicken breast bake time drops to 20 to 25 minutes for a 1-inch thick breast. Thicker cuts might need 28–32 minutes. The higher heat means less time in the oven, which helps preserve moisture. This is a popular choice for meal prep because it’s faster.
If you’re baking chicken breast at 400°F, keep a close eye on the clock. The difference between perfectly cooked and overcooked can be just a few minutes. Use the thermometer to confirm doneness at the 20-minute mark. If it’s not at 165°F yet, keep baking and check every 2–3 minutes.
Time Based on Thickness
The thickness of the chicken breast is the biggest variable. A thin cutlet (½ inch) will cook in about 15–18 minutes at 400°F. A very thick breast (2 inches) could take 35–40 minutes at 350°F. Here’s a simple reference:
- ½ inch thick: 15–18 minutes at 400°F, 20–22 minutes at 350°F
- 1 inch thick: 20–25 minutes at 400°F, 25–30 minutes at 350°F
- 1.5 inches thick: 25–30 minutes at 400°F, 30–35 minutes at 350°F
- 2 inches thick: 30–35 minutes at 400°F, 35–40 minutes at 350°F
These times assume you start with chicken straight from the refrigerator. If you use chicken breast at room temperature, it will cook a few minutes faster. Let the chicken sit out for 15–20 minutes before baking. This helps it cook more evenly and reduces the risk of a cold center.
- Cooking from frozen: Frozen chicken will take at least 50% longer. Always thaw it first for predictable chicken breast cooking time.
- Ignoring the shape: Unevenly shaped breasts cook unevenly. Pound them to a consistent thickness for best results.
- Opening the oven door too often: Each time you open the door, the temperature drops. This extends the chicken breast cooking time and can lead to uneven cooking.
Step-by-Step Guide to Perfectly Baked Chicken Breast
Follow this simple method for oven-baked chicken breast that turns out perfectly every time. I use this approach for my boneless chicken breast recipe week after week.
Prep and Seasoning
Start by preheating your oven to the desired temperature—either 350°F or 400°F. While the oven heats, prepare the chicken. Pat the breasts dry with paper towels. This step is crucial. Dry surface meat browns better and crisps up more evenly. Then, season both sides generously with salt, pepper, and any chicken breast seasoning you like. Garlic powder, paprika, and dried herbs work beautifully.
If you want extra flavor, drizzle a little olive oil or melted butter over the top. This helps the seasonings stick and adds a subtle richness. For a chicken breast recipe with a bit of zing, try a squeeze of lemon juice and a sprinkle of Italian herbs.
The Baking Process
Place the seasoned chicken breasts on a parchment-lined baking sheet or into a baking dish. If you’re baking multiple breasts, leave space between them so hot air circulates freely. Crowding the pan leads to uneven cooking and steaming instead of roasting.
Here’s a simple numbered process:
- Preheat oven to 350°F or 400°F.
- Pat chicken dry and season both sides.
- Place breasts on a lined baking sheet.
- Bake for the recommended time based on thickness.
- Check internal temperature at the minimum time.
- Remove when it reaches 165°F.
- Let rest for 5–10 minutes before slicing.
For a chicken breast at 400°F, bake for 20–25 minutes. For a chicken breast at 350°F, bake for 25–30 minutes. Halfway through, you can baste the tops with a little pan juice or olive oil. This adds moisture and flavor. However, it’s not strictly necessary. The chicken will still turn out great.
Checking Doneness
Never rely on color alone. The chicken breast doneness should be checked with an instant-read thermometer. Insert it into the thickest part of the breast, avoiding the bone if there is one. The internal temperature chicken should read 165°F (74°C). If it’s a few degrees below, keep baking for 2–3 minutes and check again.
Once the chicken reaches 165°F, remove it from the oven immediately. The carryover heat will raise the temperature another 3–5 degrees as it rests. This is perfectly normal and safe.
How to Keep Chicken Breast Moist and Juicy
The secret to a juicy chicken breast lies in a few simple techniques. Even a lean cut like skinless chicken breast can be incredibly tender when you handle it right.
Brining and Pounding
Brining is the process of soaking the chicken in a saltwater solution for 30 minutes to 2 hours. The salt penetrates the muscle fibers and helps them retain moisture during baking. You don’t need a heavy brine—just 1 teaspoon of salt per cup of warm water, stirred until dissolved. Add a tablespoon of sugar or honey if you like a subtle sweetness. Once brined, pat the chicken dry and season as usual.
Pounding the chicken to an even thickness is another game-changer. Use a meat mallet or a rolling pin wrapped in plastic. This ensures the chicken breast cooking time is consistent throughout. No more thin edges that overcook while the center stays raw. Pounding also tenderizes the meat by breaking down some of the tougher muscle fibers.
The Resting Period
After baking, let the chicken rest for 5–10 minutes before slicing. This chicken breast resting time allows the juices to redistribute. If you cut right away, the juices run out onto the cutting board, leaving you with a dry chicken breast. A simple rest makes a huge difference in texture.
During the rest, you can tent the chicken loosely with foil. This keeps it warm without trapping too much steam, which could make the skin soggy. The internal temperature will remain safely above 140°F during this short rest, so food safety is not a concern.
Using Foil or a Rack
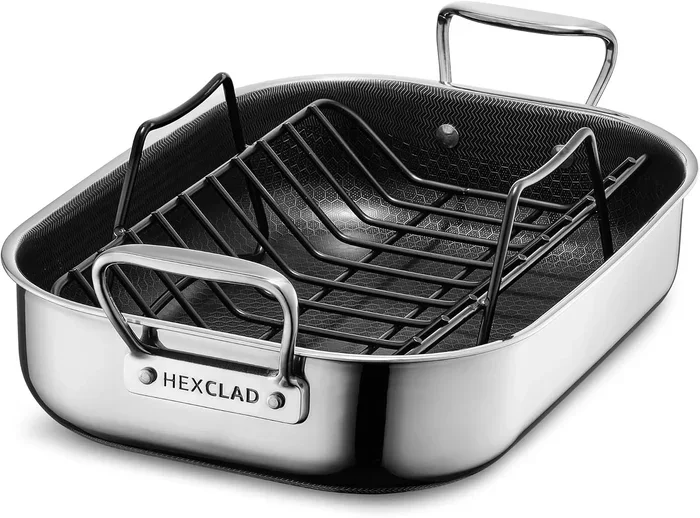
Some bakers swear by covering the chicken with foil for the first half of the bake. This traps steam and keeps the meat moist. Others prefer an uncovered bake for a crispier exterior. You can also use a wire rack set over a baking sheet. The rack allows air to circulate underneath, preventing the bottom from getting soggy. Both methods produce excellent oven-baked chicken breast.
Key Takeaways for Moist Chicken
- Always pat the chicken dry before seasoning.
- Brine for at least 30 minutes for best results.
- Pound to an even thickness for uniform cooking.
- Rest the chicken for 5–10 minutes after baking.
- Use a rack or foil to control moisture levels.
Common Mistakes That Ruin Chicken Breast
Even experienced cooks sometimes fall into traps that lead to overcooked chicken breast or undercooked chicken breast. Here are the most common errors and how to avoid them.
Overcooking and Undercooking
Overcooking is the number one enemy of oven chicken breast. It turns the meat tough and stringy. To avoid this, set a timer and check the temperature early. Undercooking is a food safety risk. Always ensure the internal temperature reaches 165°F. If you’re unsure, it’s better to add a few more minutes than to serve undercooked poultry.
The difference between a perfectly cooked chicken breast and a ruined one often comes down to just 2–3 minutes. That’s why a thermometer is so important. It removes the guesswork entirely.
Skipping the Thermometer
A meat thermometer is the single best tool for perfect chicken breast cooking time and doneness. Without it, you’re guessing. Even the best recipe can’t account for variations in oven accuracy, chicken thickness, and starting temperature. Invest in a reliable instant-read thermometer. It takes the guesswork out of baking chicken.
If you don’t have a thermometer, you can use the touch test. Press the thickest part of the chicken. If it feels firm and springs back, it’s likely done. If it feels soft or mushy, it needs more time. However, this method is less reliable than a thermometer, especially for beginners.
Not Letting It Rest
As mentioned, skipping the rest period leads to dry chicken. The juices need time to settle. Cutting too soon means losing all that moisture. Be patient. Five to ten minutes is all it takes.
Using a Cold Pan
Placing cold chicken on a cold baking dish slows down the start of cooking. The chicken sits in its own juices and can become unevenly cooked. Always use a room-temperature pan or a preheated baking sheet for better results.
Key Takeaways for Avoiding Mistakes
- Always use a meat thermometer to check doneness.
- Let the chicken rest for at least 5 minutes before slicing.
- Thaw frozen chicken before baking for predictable results.
- Avoid opening the oven door too often during baking.
- Use a room-temperature pan to promote even cooking.
Flavor Variations and Serving Ideas
Once you master the basic how long to cook boneless skinless chicken breast in oven method, you can get creative with flavors. Here are some ideas to keep things interesting.
Herb Butter and Marinades
A simple chicken breast seasoning of garlic, rosemary, and butter is hard to beat. Mix softened butter with minced garlic, chopped fresh rosemary, and a pinch of salt. Spread it over the chicken before baking. The butter melts into the meat, adding richness and flavor. For a Mediterranean twist, use lemon zest, oregano, and a drizzle of olive oil.
Marinades work well too, but keep them to 30 minutes or less for skinless chicken. Acidic marinades like vinegar or citrus can start to “cook” the surface if left too long, leading to a mushy texture. Stick to oil-based marinades with herbs and spices for longer soaks.
Here are three quick marinade ideas:
- Lemon Herb: Olive oil, lemon juice, garlic, thyme, salt, and pepper.
- Spicy Southwest: Olive oil, chili powder, cumin, smoked paprika, garlic powder, and a squeeze of lime.
- Asian Inspired: Soy sauce, sesame oil, ginger, garlic, and a touch of honey.
Meal Prep and Storage
Chicken breast meal prep is a huge time-saver. Bake a batch of oven-baked chicken breast on Sunday and use it throughout the week. Slice the cooked chicken and store it in an airtight container. It keeps in the refrigerator for up to 4 days. You can add it to salads, wraps, pasta, or grain bowls.
For longer storage, chicken breast freezes well for up to 3 months. Slice it before freezing so you can thaw only what you need. Reheat gently in the oven or microwave, adding a splash of broth to keep it moist.
Serving Suggestions
Baked chicken breast pairs beautifully with roasted vegetables, quinoa, or a simple green salad. For a low-carb option, serve it with steamed broccoli and a drizzle of lemon butter sauce. For a hearty meal, slice it over mashed potatoes or into a whole-grain wrap with avocado and greens.
Conclusion
Now you know exactly how long to cook boneless skinless chicken breast in oven. Whether you bake at 350°F or 400°F, the key is to monitor the chicken breast temperature and let the meat rest properly. With the right chicken breast baking temperature and a little attention, you’ll achieve juicy chicken breast every single time.
Remember the steps: dry the chicken, season it well, bake it at the right temperature, use a thermometer, and rest it before slicing. Avoid common mistakes like overcooking or skipping the rest. And don’t be afraid to experiment with chicken breast seasoning and flavor variations. Once you nail this boneless chicken breast recipe, you’ll have a go-to meal that’s healthy, delicious, and incredibly versatile.
So fire up your oven, grab some chicken breasts, and put these tips into action. You’ll be amazed at how simple and rewarding baked chicken breast can be. Happy cooking!
Frequently Asked Questions
How long does it take to bake boneless skinless chicken breast at 350°F?
A 1-inch thick breast takes about 25 to 30 minutes at 350°F. Thicker cuts may need up to 35–40 minutes. Always use a meat thermometer to confirm the internal temperature reaches 165°F.
Is it better to bake chicken breast at 350°F or 400°F?
It depends on your preference. 350°F yields a very tender, juicy result with a longer cook time. 400°F produces a slightly crispier exterior and cooks faster, in about 20–25 minutes for a 1-inch breast.
How can I keep my chicken breast from drying out in the oven?
Pat the chicken dry before seasoning, brine it for at least 30 minutes, pound it to an even thickness, and let it rest for 5–10 minutes after baking. Using a meat thermometer also helps prevent overcooking.
Can I cook frozen boneless skinless chicken breast in the oven?
Yes, but it will take at least 50% longer than thawed chicken. For best results and more predictable cooking time, thaw the chicken first in the refrigerator overnight.
What is the safe internal temperature for chicken breast?
The safe internal temperature for all poultry, including boneless skinless chicken breast, is 165°F (74°C). Always check with an instant-read thermometer in the thickest part of the meat.
How long can I store cooked chicken breast in the fridge?
Cooked chicken breast keeps in the refrigerator for up to 4 days when stored in an airtight container. For longer storage, freeze it for up to 3 months.