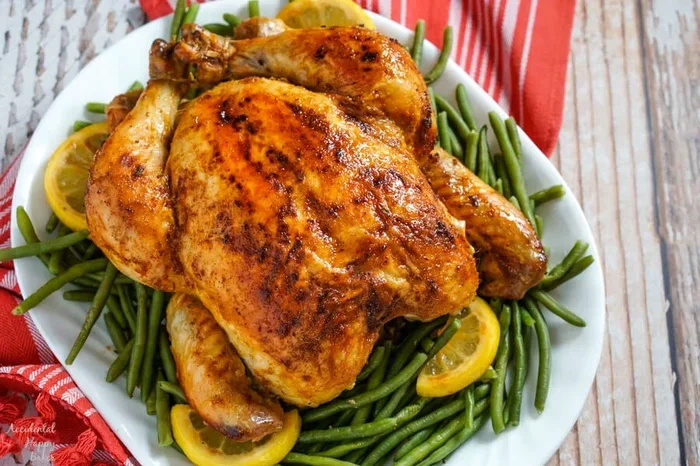
How To Cook Baby Back Ribs Oven To Grill Step By Step
Discover the easiest way to cook baby back ribs oven to grill for mouthwatering, fall-off-the-bone results. This step-by-step guide walks you through seasoning, oven baking, and finishing on the grill like a pro. You will learn insider tips, timing tricks, and sauce secrets that transform ordinary ribs into a backyard favorite. Whether you are a beginner or a seasoned griller, this method delivers consistent, juicy, and flavorful ribs every single time.
There is nothing quite like the smell of barbecue ribs filling up your kitchen and backyard. If you have ever wondered how to cook baby back ribs oven to grill, you are in the right place. This method combines the convenience of oven cooking with the unbeatable flavor of grilling. The result is ribs that are tender, juicy, and full of smoky goodness.
Many people think ribs are hard to make. They picture hours of standing over a hot grill, constantly flipping and spritzing. But the truth is, you can get amazing results with much less effort. By using your oven first and then finishing on the grill, you save time and still get incredible flavor. This approach is perfect for weeknights, weekend gatherings, and everything in between.
Baby back ribs are the perfect cut for this method. They are smaller, leaner, and cook faster than spare ribs. Their mild flavor also takes on rubs and sauces beautifully. Whether you are cooking for a family dinner or a backyard party, oven-to-grill ribs will impress everyone at the table.
Key Takeaways
- Two-Stage Cooking Method: Slow-cook ribs in the oven first, then finish them on the grill for the perfect balance of tenderness and smoky bark.
- Simple Prep Steps: Removing the membrane, applying a homemade rib rub, and wrapping in foil are the three keys to juicy ribs.
- Low and Slow Is the Way: Cooking at around 275°F ensures the meat becomes tender without drying out.
- Grill Finishing Adds Smoke Flavor: A quick sear on the grill gives ribs that classic BBQ crust and smoky aroma.
- Internal Temperature Matters: Aim for 195-205°F for perfectly done pork ribs that pull apart easily.
- Resting Is Essential: Letting ribs rest for 15-20 minutes locks in juices and improves texture.
📑 Table of Contents
- Why Cook Baby Back Ribs Oven to Grill?
- What You Will Need to Get Started
- Step-by-Step Guide to Cooking Baby Back Ribs Oven to Grill
- Tips for Perfect Ribs Every Time
- Common Mistakes to Avoid
- Comparing Oven-to-Grill vs. Other Cooking Methods
- How to Store and Reheat Leftover Ribs
- Frequently Asked Questions
- Final Thoughts on How To Cook Baby Back Ribs Oven To Grill
Why Cook Baby Back Ribs Oven to Grill?
The oven-to-grill method is one of the best ways to prepare pork ribs at home. It gives you control over the cooking process while adding that classic outdoor smoky flavor. Here is why this approach works so well.
Even Cooking Every Time
When you cook ribs in the oven, the heat surrounds the meat evenly. Unlike a grill where hot spots can cause uneven cooking, the oven provides consistent warmth. This means your ribs cook through without any dried-out edges or raw spots in the middle.
Perfect Tenderness
Slow cooking ribs in the oven at a low temperature breaks down the collagen in the meat. This is what makes ribs fall off the bone. The oven does the heavy lifting, giving you tender, melt-in-your-mouth texture before you even touch the grill.
Smoky Flavor Without a Smoker
Not everyone owns a smoker or has the time to babysit a charcoal fire. The grill finish adds a light smoky flavor and a beautiful caramelized crust. You get the best of both worlds without needing special equipment.
Great for Beginners
If you are new to cooking ribs, this method is forgiving. The oven does most of the work for you. You just need to watch the temperature and timing. Once you master this technique, you can experiment with different rubs, sauces, and wood chips.
What You Will Need to Get Started
Before you start, gather your ingredients and tools. Having everything ready makes the process smooth and enjoyable. Here is a simple list of what you need.
Ingredients for the Rib Rub
- 2 tablespoons brown sugar
- 1 tablespoon paprika
- 1 teaspoon garlic powder
- 1 teaspoon onion powder
- 1 teaspoon smoked paprika
- 1 teaspoon chili powder
- 1/2 teaspoon cumin
- Salt and black pepper to taste
Ingredients for the Braising Liquid
- 1 cup apple cider vinegar
- 1 cup apple juice or apple cider
- 2 tablespoons honey
- 2 tablespoons Worcestershire sauce
Ingredients for the BBQ Sauce
- 1 cup store-bought or homemade BBQ sauce
- 1 tablespoon butter
- 1 tablespoon apple cider vinegar
Tools You Will Need
- A rimmed baking sheet or roasting pan
- Aluminum foil
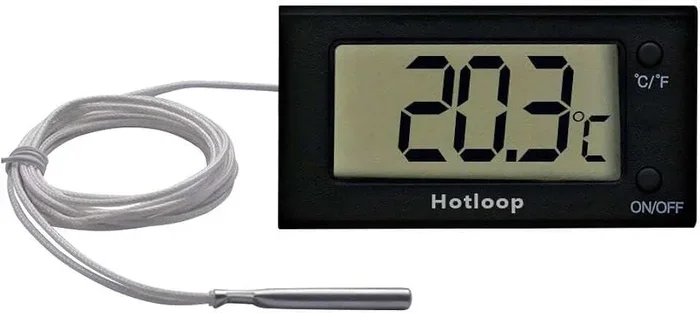
- A meat thermometer
- A rib rack (optional but helpful)
- A pair of tongs
- A basting brush
Step-by-Step Guide to Cooking Baby Back Ribs Oven to Grill
Now let us get into the fun part. Follow these steps carefully and you will have restaurant-quality ribs at home. Each step builds on the last to create the perfect dish.
Step 1: Prep the Ribs
Start by removing the silver skin from the back of the ribs. This membrane can be tough and chewy. Use a butter knife to loosen one corner, then grab it with a paper towel and pull it off. It should come away cleanly and easily.
Next, pat the ribs dry with paper towels. Dry meat absorbs the rub better and develops a nicer crust. Lay the ribs out on a cutting board and get ready to season.
Step 2: Apply the Rib Rub
Mix all your dry rub ingredients together in a small bowl. Sprinkle a generous amount over both sides of the ribs. Press the rub into the meat with your hands so it sticks well.
For the best flavor, let the seasoned ribs sit in the refrigerator for at least one hour. Overnight is even better. The rub will penetrate the meat and create a deep, complex flavor profile.
Step 3: Wrap in Foil with Braising Liquid
Preheat your oven to 275°F. Pour the apple cider vinegar, apple juice, honey, and Worcestershire sauce into the bottom of a baking dish. Place the ribs meat-side up in the liquid.
Wrap the ribs tightly in aluminum foil. This creates a sealed environment that traps moisture and steam. The ribs will braise gently in their own juices, becoming incredibly tender. Place the wrapped ribs in the oven and cook for about 2.5 to 3 hours.
Step 4: Unwrap and Check Doneness
After 2.5 hours, carefully remove the ribs from the oven. The foil will be hot and full of steam, so use oven mitts. Unwrap the ribs and check the internal temperature with a meat thermometer.
You are aiming for an internal temperature of 195 to 205°F. At this point, the meat should have pulled back from the bones by about a quarter inch. The ribs should feel tender and flexible. If they are not quite done yet, rewrap them and cook for another 30 minutes.
Step 5: Prepare the Grill
While the ribs finish in the oven, get your grill ready. Set up a two-zone fire if you are using charcoal. This means having hot coals on one side and no coals on the other. If you are using a gas grill, turn one burner to medium-high and leave the other off.
The goal is indirect heat. You do not want the ribs directly over the flame. You are just finishing them and adding a smoky crust. If you want extra smoke flavor, soak wood chips in water for 30 minutes and add them to the coals or smoker box.
Step 6: Sauce and Grill the Ribs
Brush a thin layer of BBQ sauce over both sides of the ribs. Place them on the cooler side of the grill, meat-side up. Close the lid and let them cook for about 10 to 15 minutes.
During this time, brush on another layer of sauce every 5 minutes. This builds up a sticky, caramelized glaze. The sugars in the sauce will brown slightly and create a beautiful lacquered finish.
Watch the ribs carefully during this stage. The sauce can burn quickly if the heat is too high. If the edges are browning too fast, move the ribs to a cooler part of the grill.
Step 7: Rest and Serve
Once the ribs are done, remove them from the grill. Let them rest for 15 to 20 minutes before cutting. This allows the juices to redistribute throughout the meat. If you cut too early, the juices will run out and the ribs will be dry.
Slice between the bones to separate individual ribs. Serve with extra sauce on the side and your favorite sides like coleslaw, cornbread, or baked beans.
Tips for Perfect Ribs Every Time
Cooking great ribs is about details. Small adjustments can make a big difference in the final result. Here are some expert tips to help you get the best ribs possible.
Choose the Right Ribs
Look for ribs that have a good amount of meat and a thin layer of fat. The meat should be pink and moist, not gray or dried out. Bone-in ribs tend to have more flavor than boneless cuts. Baby back ribs are ideal for this method because of their size and tenderness.
Do Not Skip the Foil Wrap
The foil wrap is what makes ribs so tender. It creates a mini steaming environment that breaks down tough connective tissue. Some people skip this step and try to cook ribs entirely on the grill, but that requires much more skill and attention.
Use a Meat Thermometer
guessing whether ribs are done is a mistake. A meat thermometer takes the guesswork out of cooking. Insert it into the thickest part of the meat, avoiding the bone. The 195 to 205°F range is the sweet spot for tender, juicy ribs.
Let the Ribs Rest
Resting is not just for steaks. Ribs benefit from resting too. The carryover cooking continues to gently cook the meat even after you remove it from the heat. This resting period also lets the fibers relax and reabsorb juices.
Experiment with Different Woods
If you are using a charcoal grill, try different wood chips for varied flavors. Hickory gives a strong, classic smoke taste. Applewood adds a mild, sweet flavor. Cherry wood creates a beautiful dark color and a subtle fruity note. Mesquite is bold and works great with beef but can overpower pork if you use too much.
Common Mistakes to Avoid
Even experienced cooks make mistakes when preparing ribs. Knowing what to avoid will save you time and disappointment.
Cooking at Too High a Temperature
The biggest mistake people make is cranking up the heat to speed things along. High heat dries out ribs and leaves them tough. Always cook low and slow. The 275°F oven temperature is ideal for breaking down collagen without drying out the meat.
Forgetting to Remove the Membrane
The silver skin on the back of ribs is tough and chewy. It does not soften during cooking and blocks rub and smoke from reaching the meat. Always remove it before seasoning. It only takes a minute and makes a noticeable difference.
Over-Saucing Too Early
Apply BBQ sauce only during the last stage of grilling. Sugary sauces burn easily and will turn bitter if they cook too long. A light coating during the final 10 to 15 minutes is all you need for a perfect glaze.
Not Letting the Ribs Rest
Cutting into ribs right off the grill is tempting but it is a mistake. The meat needs time to rest so the juices settle. Skipping this step results in drier, less flavorful ribs.
Using Too Much Rub
A heavy hand with the rub can overpower the natural flavor of the pork. Use enough to coat the meat evenly, but do not caked it on. About 2 to 3 tablespoons of rub per rack is usually plenty.
Comparing Oven-to-Grill vs. Other Cooking Methods
There are several ways to cook ribs at home. Each method has its pros and cons. Here is how oven-to-grill compares to other popular approaches.
| Method | Time | Difficulty | Flavor | Tenderness |
|---|---|---|---|---|
| Oven to Grill | 3.5-4 hours | Easy to Medium | Smoky and caramelized | Very tender |
| Oven Only | 3-3.5 hours | Easy | Rich and juicy | Very tender |
| Grill Only | 4-6 hours | Hard | Strong smoky flavor | Can be uneven |
| Slow Cooker | 6-8 hours | Easy | Mild, braised flavor | Very tender |
| Smoker | 5-6 hours | Medium to Hard | Deep smoky flavor | Excellent |
The oven-to-grill method strikes the best balance between ease and flavor. You get tender ribs from the oven and a smoky crust from the grill. It is faster than smoking and more flavorful than oven-only cooking. For most home cooks, this is the best approach.
How to Store and Reheat Leftover Ribs
Leftover ribs are a treat the next day. They often taste even better as the flavors meld together. Here is how to store and reheat them properly.
Let the ribs cool to room temperature before storing. Place them in an airtight container or wrap tightly in foil. Refrigerate within two hours of cooking. Properly stored ribs will keep in the fridge for up to 4 days.
To reheat, wrap the ribs in foil and place them in the oven at 250°F for about 20 minutes. This gentle reheating keeps the meat moist. You can also reheat them on the grill over indirect heat for a few minutes. Avoid microwaving if possible, as it tends to dry out the meat and make the edges tough.
Frequently Asked Questions
Can I use spare ribs instead of baby back ribs?
Yes, you can use spare ribs with this method. However, spare ribs are larger and fattier, so they will need a longer cooking time. Add an extra 30 to 60 minutes to the oven phase. Check the internal temperature to make sure they are fully tender before grilling.
Do I need to use a rib rack?
A rib rack is not required, but it is helpful. It lifts the ribs off the bottom of the pan, allowing air to circulate and the braising liquid to reach the meat evenly. If you do not have a rib rack, you can place the ribs directly in the baking dish. Just make sure they fit comfortably and are partially submerged in the liquid.
Can I skip the grill finish and just eat the ribs from the oven?
Absolutely. The ribs will be fully cooked and tender from the oven alone. The grill finish is optional and adds a smoky flavor and caramelized crust. If you are short on time or do not have access to a grill, oven-only ribs are still delicious.
How do I know when the ribs are done on the grill?
The ribs should reach an internal temperature of 195 to 205°F when fully done. You can also check by twisting a bone gently. If it wiggles and the meat has pulled back from the bone, the ribs are ready. The bark should be firm and lightly caramelized.
Can I make the rub ahead of time?
Yes, you can make the rub a few days in advance. Store it in an airtight container at room temperature. Pre-mixed rub saves time on the day you cook and allows the flavors to blend together nicely. Just make sure to label the container with the date.
What is the best BBQ sauce for oven-to-grill ribs?
A thick, tangy BBQ sauce works best for the grilling stage. Look for sauces that contain tomato, vinegar, and a touch of sweetness. Avoid very thin or watery sauces, as they will not adhere well to the ribs. You can also make a quick sauce by mixing store-bought BBQ sauce with a little butter and apple cider vinegar for extra richness.
Final Thoughts on How To Cook Baby Back Ribs Oven To Grill
Learning how to cook baby back ribs oven to grill is one of the most rewarding skills you can build in the kitchen. This method gives you tender, juicy ribs with a beautiful smoky crust without requiring a smoker or hours of constant attention at the grill.
The beauty of this approach is its simplicity. You season the ribs, slow-cook them in the oven, and finish them with a quick glaze on the grill. The result is ribs that taste like they came from a professional barbecue joint. Your family and friends will be impressed, and you will feel like a pitmaster.
Start with this recipe and make it your own. Try different rubs, experiment with various BBQ sauces, and play around with wood chips for smoke flavor. Once you master the basics, the possibilities are endless. The next time you are craving ribs, skip the takeout and fire up your oven and grill instead. You will not be disappointed.