How To Cook The Perfect Turkey In The Oven With Ease
How To Cook The Perfect Turkey In The Oven is an essential topic that provides valuable insights.
Key Takeaways
- Start with the right temperature: Roast your turkey at 325°F for even, reliable cooking every time.
- Use a meat thermometer: This is the only accurate way to check doneness. Target 165°F in the thigh and pull the bird out at 160°F.
- Dry the skin overnight: Uncovered refrigeration time removes moisture and leads to significantly crispier skin.
- Let the turkey rest: A 20 to 30 minute resting period redistributes juices and keeps the meat moist during carving.
- Save the drippings: Turkey pan drippings are the secret to making rich, flavorful homemade gravy.
- Brine for better results: Even a simple saltwater brine transforms the juiciness of both white meat and dark meat.
- Don’t wash the turkey: Skip rinsing raw turkey to avoid spreading bacteria in your kitchen. Cooking to the proper temperature handles food safety.
📑 Table of Contents
- How To Cook The Perfect Turkey In The Oven
- Preparing Your Turkey Before Cooking
- Setting The Right Oven Temperature
- Cooking Time And Temperature Guide
- Tips For Crispy Skin And Juicy Meat
- Making Gravy From Turkey Pan Drippings
- Serving And Carving Your Turkey
- Common Questions About Cooking Turkey In The Oven
How To Cook The Perfect Turkey In The Oven
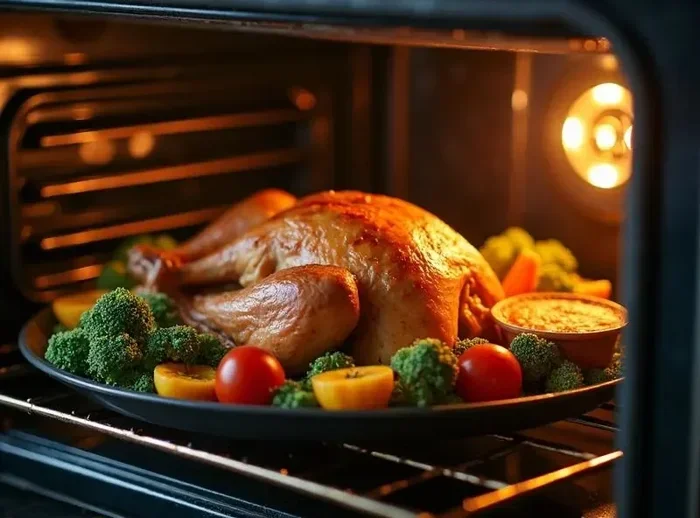
Roasting a turkey in the oven is an art, but it’s one anyone can master. The key is understanding a few basics before you start. Once you know the right oven temperature for turkey and timing, everything else falls into place.
A great oven roasted turkey starts with good preparation. You need to choose the right bird, bring it to room temperature, and season it well. Then you let the oven do the work. This method works for a whole turkey of any size, whether you’re cooking for four people or forty.
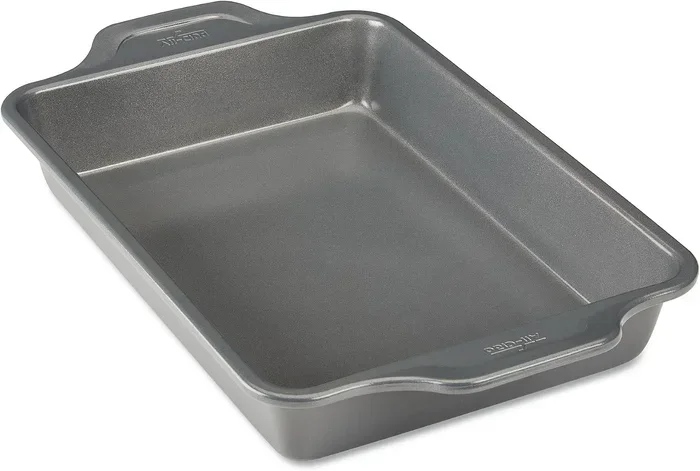
The beauty of this approach is that it’s hard to mess up. You’ll use simple ingredients and straightforward techniques. No fancy equipment needed. Just a good oven, a roasting pan, and a little patience.
Why Oven Roasting Is The Best Method
Oven roasting gives you the most control over the cooking process. You can monitor the turkey temperature easily and adjust as needed. Unlike deep frying or grilling, the oven provides even, consistent heat around the bird.
It also allows you to use a roasting rack, which lets hot air circulate underneath. This means your turkey cooks more evenly on all sides. The skin gets crispy while the meat stays moist and tender inside.
Another big plus is that oven roasting gives you turkey pan drippings. These drippings are liquid gold for making gravy. So you’re not just cooking a turkey, you’re building a whole meal from one bird.
Preparing Your Turkey Before Cooking
Proper preparation is the foundation of a great turkey roast recipe. Skip this step, and even the best oven can’t save you. Take your time here, and the rest of the process will be smooth.
Thawing Your Turkey Safely
If your turkey is frozen, you need to thaw it properly. The safest way is to place it in the refrigerator. Allow about 24 hours for every 4 to 5 pounds of bird. So a 12-pound turkey needs roughly three days in the fridge.
Never thaw a turkey on the counter. Room temperature lets bacteria grow on the outer layers while the inside is still frozen. This is a food safety risk you don’t want to take. If you’re short on time, you can thaw it in cold water. Change the water every 30 minutes, and allow about 30 minutes per pound.
Brining For Juicier Meat
Brining is one of the best turkey cooking tips you can follow. A brine is a saltwater solution that you soak the bird in for several hours. It helps the meat retain moisture during cooking.
The result is noticeably juicier white meat and dark meat. Even if you slightly overcook the turkey, brining gives you a buffer. The meat stays tender instead of drying out.
To make a simple brine, dissolve one cup of kosher salt in one gallon of water. You can add sugar, bay leaves, peppercorns, and herbs for extra flavor. Submerge the turkey in the brine for 12 to 24 hours in the refrigerator.
Seasoning And Flavoring Your Bird
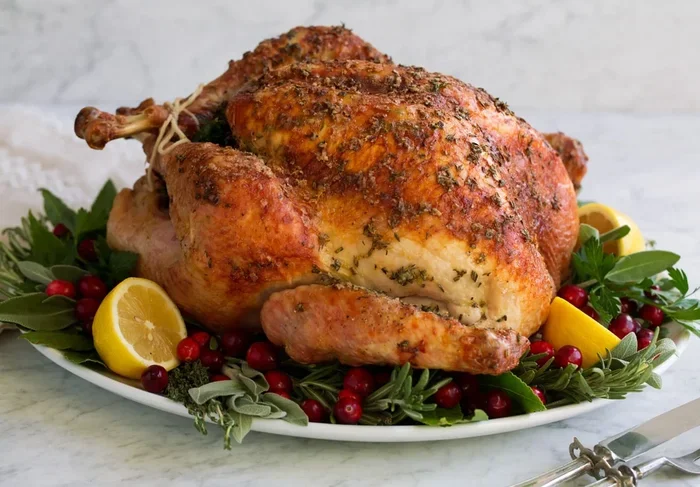
Seasoning is where you can get creative. A classic approach works every time. Mix softened butter with minced garlic, fresh herbs, salt, and pepper. Then carefully loosen the skin over the breast and rub the herb butter turkey mixture directly onto the meat.
This technique adds incredible flavor right to the meat, not just the surface. It also helps the skin become beautifully crispy during roasting. You can also place herb bundles inside the cavity for a subtle, fragrant flavor.
Some people like to add a whole onion, lemon, and fresh herbs inside the bird. This steams the turkey from the inside and adds a lovely aroma. It’s a simple trick that makes a real difference in the final flavor.
Quick Tip: Bring your turkey out of the refrigerator 1 to 2 hours before cooking. A bird that starts at room temperature cooks more evenly. This small step prevents a cold center and overcooked edges.
Setting The Right Oven Temperature
Getting the oven temperature for turkey right is the single most important factor. Too hot, and the outside burns before the inside cooks. Too low, and you end up waiting for hours with dry results.
The Ideal Temperature Range
Most experts agree that 325°F is the sweet spot for roasting a whole turkey. This temperature cooks the bird evenly without burning the skin. It gives you enough time for the heat to reach the center safely.
If you want faster cooking, you can go up to 350°F. But you’ll need to watch the turkey more closely. Higher temperatures increase the risk of drying out the breast meat. For beginners, stick with 325°F. It’s the safest and most reliable choice.
Some cooks start at a higher temperature, like 425°F, for the first 20 to 30 minutes. This kickstarts the browning process. Then they reduce the heat to 325°F for the rest of the cook. This two-stage method gives you crispy skin and even cooking.
Using A Meat Thermometer
A meat thermometer is non-negotiable for the perfect turkey. You cannot rely on pop-up timers alone. They are not always accurate, and they can ruin your bird if you trust them blindly.
Insert the thermometer into the thickest part of the thigh, without touching the bone. The internal temperature should reach 165°F for food safety. But here’s a pro tip, pull the turkey out at 160°F. The temperature will rise a few degrees as the bird rests.
This carryover cooking effect is essential to understand. It means your turkey continues to cook after you take it out of the oven. Accounting for this prevents you from overcooking the meat.
Cooking Time And Temperature Guide
Now let’s talk numbers. How long does it actually take to roast a turkey? The answer depends on the size of your bird and your oven’s performance.
Turkey Cooking Time By Weight
As a general rule, plan for about 13 minutes per pound at 325°F. But this is just a starting point. Every oven is different, and every bird is different.
| Turkey Weight | Approximate Cooking Time | Internal Temp Target |
|---|---|---|
| 8-10 lbs | 2.5 – 3 hours | 165°F (thigh) |
| 10-12 lbs | 3 – 3.5 hours | 165°F (thigh) |
| 12-14 lbs | 3.5 – 4 hours | 165°F (thigh) |
| 14-18 lbs | 4 – 4.5 hours | 165°F (thigh) |
| 18-20 lbs | 4.5 – 5 hours | 165°F (thigh) |
These times assume a stuffed turkey cooked at 325°F. If your turkey is unstuffed, it will cook slightly faster. Always use your meat thermometer to confirm doneness. The times above are estimates, not guarantees.
Should You Stuff Your Turkey?
Stuffing a turkey is a classic tradition, but it comes with risks. A stuffed turkey takes longer to cook, which means the outside can dry out before the stuffing reaches a safe temperature.
The stuffing must reach 165°F inside the cavity to be safe to eat. This is hard to achieve without overcooking the bird. Many experienced cooks now recommend cooking the stuffing separately. It tastes just as good and is much safer.
If you do choose to stuff your turkey, pack the stuffing loosely. Tight packing slows down heat penetration. Also, make sure the stuffing is at room temperature before you put it in the bird. Cold stuffing inside a hot oven extends cooking time dangerously.
Common Mistakes To Avoid:
- Cooking a frozen turkey without fully thawing it first.
- Using a too-high oven temperature that burns the outside.
- Skipping the meat thermometer and relying on time alone.
- Overcooking the turkey because you don’t let it rest.
- Not seasoning the bird enough, resulting in bland meat.
Tips For Crispy Skin And Juicy Meat
Everyone wants a turkey with crispy, golden skin and juicy, flavorful meat. These tips will help you get exactly that every single time.
Dry The Skin Before Roasting
Moisture is the enemy of crispy skin. After brining or rinsing your turkey, pat it completely dry with paper towels. Then leave it uncovered in the refrigerator overnight. This air-drying step removes surface moisture and leads to dramatically crispier skin.
It sounds like a small thing, but it makes a massive difference. The drier the skin, the more it crisps up in the oven. You’ll end up with crackling, golden-brown perfection on the outside.
Basting Vs. Not Basting
Basting means spooning hot pan juices over the turkey during cooking. It keeps the surface moist and builds flavor. However, basting also lets heat escape every time you open the oven door.
If you do baste, do it no more than once every 45 minutes. Frequent opening of the oven slows down cooking and creates uneven results. Some cooks skip basting entirely and get great results by simply rubbing butter on the bird before it goes in.
The butter method works because fat bastes the turkey from the inside out. It self-bastes as it melts during roasting. This is a low-effort way to get juicy meat without opening the oven repeatedly.
The Resting Period Is Essential
One of the biggest mistakes home cooks make is cutting into the turkey right away. The turkey resting time matters just as much as the cooking itself. When you remove the bird from the oven, the juices inside are under high pressure.
If you cut too soon, all those juices run out onto the cutting board instead of staying in the meat. The turkey ends up dry and less flavorful. Let the bird rest for at least 20 to 30 minutes before carving.
During this resting period, the internal temperature continues to rise slightly. The juices redistribute throughout the meat. This is when carryover cooking finishes the job. Cover the turkey loosely with foil during resting, but don’t wrap it tightly. Tight wrapping traps steam and can soften the crispy skin.
Expert Insight: “The resting period is where the magic happens,” says chef Michael Ruhlman. “A turkey that rests for 30 minutes will always be juicier than one carved immediately. Patience is the secret ingredient.”
Making Gravy From Turkey Pan Drippings
A perfect turkey deserves a perfect gravy. The good news is that you already have everything you need sitting in the roasting pan. Those golden turkey pan drippings are the base for an incredible homemade gravy.
After you remove the turkey to rest, pour the drippings into a fat separator or a clear measuring cup. Let the fat rise to the top and skim it off. You’ll be left with rich, flavorful liquid that forms the foundation of your gravy.
Heat the drippings in a saucepan, whisk in flour or cornstarch to thicken, and season with salt and pepper. Add a splash of turkey broth if needed to reach your desired consistency. The result is a silky, savory gravy that elevates the entire meal.
Pro tip, scrape any browned bits stuck to the roasting pan. These fond bits are packed with concentrated flavor. Deglaze the pan with a little broth or wine to lift them up and add them to your gravy. This small step adds tremendous depth of flavor.
Serving And Carving Your Turkey
Carving a turkey can feel like a ceremony, especially on Thanksgiving day. But it doesn’t have to be complicated. With the right technique, you’ll serve beautiful, juicy slices that impress everyone at the table.
Start by removing the twine and any stuffing from the cavity. Set the turkey on a large cutting board with a groove to catch juices. Use a sharp carving knife and a sturdy fork to hold the bird steady.
First, remove the legs by cutting through the joint between the thigh and the body. Then separate the drumstick from the thigh. Next, slice along the breast bone and cut the breast meat into even slices against the grain. Finally, carve the wings off and serve the dark meat pieces.
Serve the turkey on a warm platter so the meat stays at a good temperature. Arrange the pieces attractively and spoon some of the resting juices over the top. This keeps everything moist and adds extra flavor to every serving.
Quick Tips For Serving:
- Keep the turkey covered with foil while serving to retain heat.
- Carve just before serving for the best presentation.
- Offer extra gravy on the side for those who want more.
- Save the carcass for making homemade turkey stock the next day.
Common Questions About Cooking Turkey In The Oven
Even with all the guidance in this article, you might still have some questions. Here are answers to the most common concerns people have about roasting a turkey.
Can I Cook A Turkey In A Convection Oven?
Yes, convection ovens work great for turkey. The fan circulates hot air around the bird, which cooks it more evenly. You can reduce the temperature by about 25°F when using convection. So instead of 325°F, set it to 300°F. The cooking time will also be slightly shorter. Keep an eye on the turkey temperature with your thermometer and adjust as needed.
How Do I Know If My Turkey Is Done Without A Thermometer?
You really shouldn’t try. A meat thermometer is the only reliable way to check doneness. But if you absolutely don’t have one, you can check by piercing the thickest part of the thigh. The juices should run clear, not pink. However, this method is far less accurate and can lead to overcooking. Invest in a good instant-read thermometer. It’s inexpensive and will last for years.
What’s The Difference Between White Meat And Dark Meat?
White meat comes from the breast and wings. It’s leaner and cooks faster, which means it dries out more easily. Dark meat comes from the thighs and legs. It has more fat and connective tissue, making it more forgiving during cooking. Dark meat stays juicy longer and has a richer flavor. Most people prefer a mix of both on their plate.
Can I Cook A Turkey The Night Before?
You can roast the turkey a day ahead, but it’s not ideal for texture. The skin loses its crispiness when stored in the fridge overnight. If you do cook ahead, reheat the turkey in the oven at 325°F until it reaches 165°F internally. You can also store the turkey and gravy separately and reheat them just before serving. Freshly roasted turkey is always better, but life gets busy.
How Do I Store Leftover Turkey Safely?
Refrigerate leftover turkey within two hours of cooking. Remove the meat from the bone and store it in an airtight container. Cooked turkey keeps in the refrigerator for up to four days. You can also freeze it for up to three months. Reheat leftover turkey to 165°F before serving again. Turkey makes amazing sandwiches, soups, and casseroles the next day, so don’t waste a single bite.
Should I Wash My Turkey Before Cooking?
No. The USDA recommends not washing raw turkey. Washing spreads bacteria around your sink, countertops, and utensils through splashback. Cooking the turkey to the proper turkey temperature of 165°F kills any harmful bacteria. Just pat the bird dry with paper towels and season it. This simple change in habit keeps your kitchen safer and your turkey just as delicious.