What Oven Temp To Reverse Sear Steak For Perfect Results
The reverse sear method gives you a perfect steak crust while keeping the inside juicy. What oven temp to reverse sear steak is the key question, and the answer is a low oven temperature for steak between 200°F and 275°F. This guide shows you exactly how to reverse sear steak for edge-to-edge pink perfection.
You love a great steak. But when you cook it on the stovetop alone, you often get a gray band of meat just under the crust. The inside can go from perfectly pink to overcooked in a flash. That is why home cooks are falling in love with the reverse sear method. It flips the traditional approach upside down.
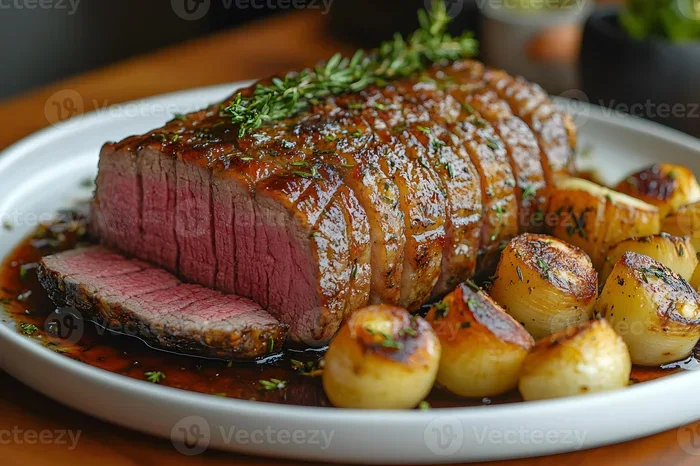
Instead of hitting the steak with high heat first, you start it in a low oven. The gentle warmth slowly brings the entire steak up to your target internal steak temperature. Then, a quick, hard sear in a cast iron pan creates a deep, flavorful steak crust. The result? A steak that is pink from edge to edge. What oven temp to reverse sear steak is the first thing you need to nail. Get that right, and the rest falls into place.
This guide breaks down everything you need to know. We will cover the best oven temperature for steak, step-by-step instructions, and the cuts that shine with this method. You will also learn how to avoid common mistakes. By the end, you will be cooking reverse sear steak like a pro in your own kitchen.
Key Takeaways
- Low and slow is the way: A gentle oven temp of 200°F to 275°F ensures even cooking from edge to edge.
- Resting matters: Always let your steak rest after the oven and before the sear for maximum juice retention.
- Thickness is key: Steaks at least 1.5 inches thick work best for the reverse sear technique.
- Cast iron delivers the crust: A screaming hot cast iron pan gives you that restaurant-quality sear in under two minutes.
- Use a thermometer: An oven-safe probe thermometer removes all guesswork and helps you hit your perfect steak doneness.
- Avoid common pitfalls: Skipping the rest, using a thin steak, or cranking the oven too high are the top mistakes to avoid.
📑 Table of Contents
- Why the Reverse Sear Method Wins for Thick Steaks
- The Best Oven Temperature to Reverse Sear Steak
- Step-by-Step: How to Reverse Sear Steak in the Oven
- Picking the Perfect Steak Cut for Reverse Searing
- Getting That Irresistible Steak Crust
- Avoiding Common Reverse Sear Mistakes
- Expert Insights for the Perfect Reverse Sear
- Conclusion
Why the Reverse Sear Method Wins for Thick Steaks
The reverse sear method is all about control. Traditional searing blasts the outside with intense heat. This can easily overcook the center before the crust forms. The low and slow approach solves that problem completely. It gives you a much more even perfect steak doneness throughout the entire piece of meat.
Think about it. A thick ribeye or strip steak needs time to cook gently. If you place it on a screaming hot pan, the outside chars while the inside struggles to catch up. You end up with a well-done exterior and a rare center. That is not the goal. The reverse sear lets you manage the heat from the inside out.
The Science Behind Low and Slow Cooking
When you cook a steak at a low oven temperature for steak, the heat penetrates slowly and evenly. The proteins relax gradually. The myosin in the meat denatures at a lower rate. This means less moisture is squeezed out during the process. Your steak stays juicy and tender. The oven-baked steak phase also allows the fat to render gently. This adds flavor and helps create a beautiful texture.
Another big plus is the steak carryover cooking. When you pull the steak from the oven, the internal temperature will continue to rise by about 5°F. This is crucial for hitting your exact steak doneness levels. You pull the steak just before it reaches your target temp. The carryover does the rest.
The Best Oven Temperature to Reverse Sear Steak
The heart of the whole process is the oven temp to reverse sear steak. You want a temperature that is low enough to cook the steak gently but high enough to make it time-efficient. There is a sweet spot that works for almost every thick cut.
The Sweet Spot: 200°F to 275°F
Most experts agree that the ideal range is between 200°F and 275°F. At the lower end, around 200°F, the cooking time is longer. This gives you maximum control and a very gentle cook. At the higher end, 275°F, the process is faster. Both work well, but 250°F is often the go-to choice. It balances time and precision perfectly.
Here is a simple comparison of what happens at different oven temperatures for steak:
| Oven Temp | Cook Time (1.5″ steak) | Result |
|---|---|---|
| 200°F | 45-60 minutes | Very gentle, almost no edge grayness |
| 225°F | 35-45 minutes | Great balance of time and control |
| 250°F | 25-35 minutes | Most popular for home cooks |
| 275°F | 20-30 minutes | Faster, good for thinner cuts |
Notice how the reverse sear steak method gives you a wide window. You do not need a precise number. You just need to stay within that low range. This flexibility is one of the reasons the technique is so forgiving.
Why This Range Works for Oven Temperature for Steak
A low oven temperature for steak prevents the outside from forming a crust too early. The meat surface stays dry and pale during the oven phase. This is exactly what you want. A dry surface is essential for a great sear later. If the steak is wet, it will steam instead of brown. The oven preheat should be set well before the steak goes in. Give the oven at least 20 minutes to stabilize.
Step-by-Step: How to Reverse Sear Steak in the Oven
The process is simple, but the details make the difference. Follow these steps to get consistent, amazing results every time. This is the core of searing steak in oven done right.
Step 1: Prep Your Steak
Take your steak out of the fridge at least 30 minutes before cooking. This brings it closer to room temperature. A cold steak will cook unevenly in the oven. Pat it completely dry with paper towels. Moisture is the enemy of a good crust. Season generously with steak seasoning or just salt and pepper. You can add a light brush of oil, but it is not always necessary.
Step 2: The Low Oven Phase
Place a wire rack over a baking sheet. Set the steak on the rack. This allows air to circulate around the meat. Insert an oven-safe thermometer into the thickest part of the steak. Now, place the sheet in the oven. Set a timer and let the oven-baked steak do its work. Do not open the door too often, as it drops the temperature.
Your goal is to pull the steak when the internal temp is about 10-15°F below your target doneness. Here is a quick reference for perfect steak doneness:
- Rare: Pull at 115°F (final 125°F)
- Medium Rare: Pull at 125°F (final 135°F)
- Medium: Pull at 135°F (final 145°F)
- Medium Well: Pull at 145°F (final 155°F)
Step 3: The Final Sear
While the steak is in the oven, place a cast iron skillet on the stove. Heat it over high heat until it is smoking hot. Add a high smoke point oil like avocado or grapeseed. Carefully lay the steak in the pan. Do not touch it for 60-90 seconds. You want a deep, dark brown crust. Flip once and repeat on the other side. Add a knob of butter, crushed garlic, and fresh thyme for extra flavor. Baste the steak with the melted butter for 30 seconds. Then remove it immediately.
Picking the Perfect Steak Cut for Reverse Searing
Not all steaks are created equal for the reverse sear steak method. The right cut and thickness make a huge difference. Thin steaks do not work well because they overcook before you can sear them.
Best Thickness for Reverse Sear
You want a steak that is at least 1.5 inches thick. Two inches is even better. Thicker cuts give you a larger window between the edge and the center. This is what creates that beautiful edge-to-edge pink steak. If your steak is too thin, the outside will overcook before the inside reaches a safe temperature.
Great Steak Cuts to Try
Ribeye is a favorite because of its marbling. The fat keeps the steak moist during the long oven phase. New York strip is another excellent choice. It has a firm texture that holds up well to the cast iron sear. Filet mignon works too, but it is leaner, so you must be careful not to overcook it. Even a thick-cut sirloin can shine with this method. The key is starting with a quality piece of meat and letting the low and slow cooking do the heavy lifting.
Getting That Irresistible Steak Crust
The sear is what makes a reverse sear steak truly special. The oven phase creates a perfectly cooked interior, but the crust adds the texture and flavor you crave. Achieving that deep brown, caramelized exterior is an art form.
Cast Iron vs Broiler Searing
The cast iron skillet method is the gold standard. It holds heat incredibly well and gives you direct contact with the meat. This creates the Maillard reaction, which is responsible for those complex, savory flavors. A broiler can work in a pinch, but it is less precise. The broiler heats from above, which can cause uneven browning. You also risk cooking the top of the steak too much. Stick with a hot cast iron pan for the best broiler finish alternative.
The Role of Fat and Seasoning
Make sure your steak is dry before it hits the pan. Use a paper towel to blot any moisture. A thin layer of oil on the steak itself helps conduct heat. Do not use olive oil for the sear, as it has a low smoke point. Avocado oil or vegetable oil works best. Salt draws out moisture, so season just before cooking. If you salt too early, the surface gets wet again. That will steam the meat and prevent a good crust.
Avoiding Common Reverse Sear Mistakes
The reverse sear method is forgiving, but you can still trip up. Knowing the pitfalls helps you avoid them and get better results every time.
Skipping the Rest
Never skip the rest period after the sear. When you pull the steak from the pan, the juices are pushed toward the center. If you cut in immediately, they will run all over your cutting board. Let the steak rest for 5-10 minutes on a warm plate. This is called resting steak, and it is just as important as the oven phase. The internal temperature will also stabilize during this time.
Overcooking the Edge
If your oven is too hot, the outer layer of the steak will overcook while waiting for the center to rise. This creates a thick gray band. Keep the oven temperature for steak low and be patient. Use a probe thermometer to monitor progress. You want the steak to rise slowly and evenly. Another tip is to not crowd the oven. Give the steak space on the rack for proper air flow.
Using a Thin Steak
A thin steak and the reverse sear are not a good match. The low oven temp will overcook a thin cut before you get a chance to sear it. Stick with thick steaks for this technique. If you only have a thin ribeye, go back to the traditional stovetop method. It is much better for cuts under 1 inch.
Expert Insights for the Perfect Reverse Sear
Professional chefs use the reverse sear steak technique for a reason. It gives them consistency and precision. Here are a few insights from the pros to elevate your home cooking.
First, always use an oven-safe thermometer. Do not rely on the oven dial alone. Ovens can be off by 25°F or more. A probe inserted into the steak gives you real-time data. Second, let the cast iron pan heat up for at least 5 minutes before the sear. The pan needs to be smoking hot. If it is not hot enough, the steak will stick and turn gray instead of brown. Third, do not be afraid of the butter baste. That final 30 seconds of basting adds richness and a nutty aroma that takes your oven-baked steak to the next level.
One more pro tip: if you are cooking multiple steaks, use a second cast iron pan. Searing one at a time keeps the heat high and prevents steaming. This is especially helpful when you are hosting a dinner party. The reverse sear method shines when you need to cook several thick steaks perfectly at once.
Conclusion
The reverse sear method transforms the way you cook steak at home. By starting with a low oven temperature for steak and finishing with a blazing hot sear, you achieve a level of perfection that is hard to match. What oven temp to reverse sear steak is no longer a mystery. Stick to the 200°F to 275°F range, use a probe thermometer, and always let your steak rest. The result is a juicy, tender steak with a stunning crust that will impress anyone at the table.
Now it is your turn. Pick up a thick-cut ribeye or strip steak. Preheat your oven to 250°F. Follow the steps in this guide. You will be amazed at how simple and rewarding the process is. The reverse sear steak technique is a game changer. It gives you control, consistency, and incredible flavor every single time. Happy cooking!
Frequently Asked Questions
What is the best oven temperature to reverse sear a 2-inch steak?
For a 2-inch steak, 250°F is the sweet spot. It cooks the meat evenly without drying out the edges. Use a probe thermometer and pull the steak when it is 10-15°F below your target doneness. The carryover heat will bring it up to the perfect level.
Can you reverse sear a thin steak?
Thin steaks under 1.5 inches are not ideal for the reverse sear. The low oven temp will overcook the meat before you get a good crust. Stick with thick cuts like ribeye or strip for the best results. Thin steaks are better cooked on a hot stovetop.
How long does the reverse sear take in the oven?
Cook time depends on the oven temp and steak thickness. At 250°F, a 1.5-inch steak takes about 25-35 minutes. A 2-inch steak may need 40-50 minutes. Always use a thermometer to check the internal temp rather than relying on the clock.
Do you need to sear the steak after the oven?
Yes, the final sear is essential. It creates the flavorful crust and adds texture. A cast iron pan heated to smoking hot gives you the best results. Sear for 60-90 seconds per side for a deep brown finish.
What is the difference between reverse sear and traditional sear?
The traditional sear starts on the stovetop and finishes in the oven or rest. The reverse sear starts in the low oven and finishes with a quick stovetop sear. This gives you more even doneness and a better crust on thick cuts.
Can you reverse sear steak on a grill?
Yes, you can use a grill with the lid closed and the heat turned low. Set up indirect heat on one side and place the steak on the other side. This mimics the oven method. The key is maintaining a low, steady temperature around 225°F to 275°F.