How To Make Percolator Coffee Taste Better Every Time
Making percolator coffee taste better is easier than you think. With the right coffee grounds, water temperature, and brewing technique, you can transform a bitter cup into a rich, smooth brew. This guide covers proven methods to improve your percolator coffee every single time.
There is nothing quite like a fresh cup of percolator coffee to start your morning. But let us be honest, sometimes that classic brewing method can produce a cup that tastes bitter or weak. If you have been struggling with your coffee maker, you are not alone. Many people love the ritual of percolator brewing but hate the results they keep getting. The good news is that a few simple changes can make your coffee taste dramatically better.
Whether you use a stovetop percolator or an electric model, the principles of great brewing remain the same. The type of beans you choose, the grind size, the water temperature, and even how often you clean your equipment all matter. This guide will walk you through every step to get the best possible cup from your percolator. Cleaning your coffee equipment properly is one of the most overlooked steps in making better coffee.
Percolator coffee has a long and rich history. Before drip machines and single-serve pods took over kitchens, the percolator was the go-to brewing method in homes across America. It works by cycling boiling water through coffee grounds repeatedly, creating a bold and robust cup. However, this same cycling process can also lead to over-extraction, which is the main culprit behind bitter, harsh coffee.
The key to great percolator coffee lies in controlling the brewing process. Once you understand how your percolator works and what affects the flavor, you can make adjustments that transform your daily cup. Let us dive into the specific steps you can take today.
Key Takeaways
- Use fresh, quality coffee beans: Freshly ground beans make a huge difference in flavor and aroma.
- Control water temperature: Avoid boiling water to prevent over-extraction and bitter coffee.
- Master the grind size: Medium-coarse grounds prevent clogging and ensure even coffee extraction.
- Clean your percolator regularly: Built-up oils and residues ruin the coffee taste over time.
- Use the right coffee-to-water ratio: The proper ratio ensures balanced, great-tasting coffee every brew.
- Brew for the right amount of time: Limiting brewing time to five to seven minutes prevents bitterness.
- Use filtered water: Quality water removes impurities that mask the natural coffee flavor.
📑 Table of Contents
Choose the Right Coffee Beans and Grind
The foundation of any great cup of coffee starts before you even turn on the percolator. The beans you select and how you grind them play a huge role in the final taste. Many people overlook this step, but it is arguably the most important one. The right combination of beans and grind size sets the stage for everything that follows in the brewing process.
Use Freshly Roasted Beans
Fresh coffee beans make a noticeable difference in flavor. Beans that have been roasted within the past two to four weeks deliver the best taste. Over time, coffee beans lose their natural oils and aromatic compounds. This means older beans produce flat, lifeless coffee that lacks the depth and complexity you are looking for.
When shopping for beans, look for a roast date on the bag rather than an expiration date. Whole beans also stay fresh longer than pre-ground coffee. If you can, invest in a simple burr grinder and grind your beans just before brewing. Freshly ground coffee releases more flavor and aroma, giving you a richer cup. Storing beans in an airtight container away from heat and light helps preserve their freshness for longer.
Pick the Right Grind Size
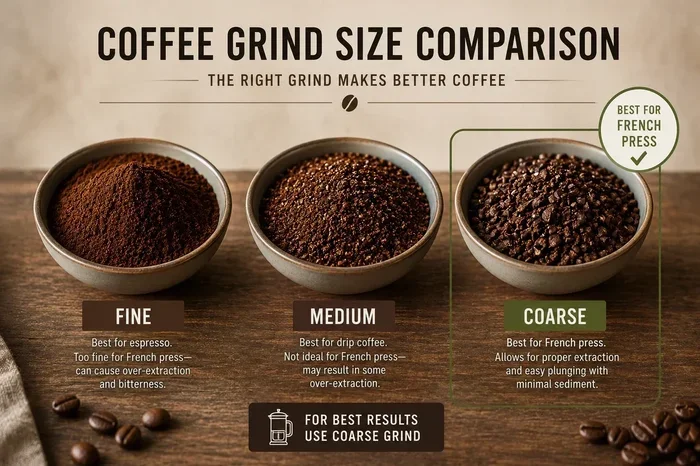
Grind size is critical for percolator brewing. Too fine, and the grounds can clog the basket and create a muddy, gritty cup. Too coarse, and the water passes through too quickly, leaving you with weak, watery coffee that lacks any real coffee taste.
For percolators, a medium-coarse grind works best. Think of the texture like coarse sea salt. This size allows for even extraction without clogging the filter basket. If you are using pre-ground coffee, look for a grind specifically labeled for percolators or French presses. These are typically coarser than standard drip coffee grinds and will serve you much better in a percolator.
Select the Right Roast Level
The roast level you choose affects the flavor profile of your coffee. Medium roasts offer a balanced taste with moderate acidity and body. Dark roasts bring out bold, smoky, and chocolatey notes that stand up well to the percolator process. Light roasts preserve more of the bean’s original flavors and floral notes.
For percolator coffee, medium to medium-dark roasts tend to work best. They hold up well to the extended brewing process without turning overly bitter. Experiment with different roasts to find your personal preference. Some people find that a medium roast gives them the perfect balance of flavor and strength for their coffee pot.
Master the Water Temperature and Ratio
Water is the main ingredient in coffee, making up over 98% of your cup. The quality and temperature of your water have a direct impact on the final taste. Getting these factors right is one of the easiest ways to improve your brew and enjoy a better coffee experience every morning.
Use Filtered Water
Tap water contains chlorine, minerals, and other impurities that can affect the taste of your coffee. Using filtered water removes these contaminants and lets the natural flavors of the beans shine through. If your tap water tastes bad on its own, it will taste even worse in your coffee.
Many coffee experts agree that filtered water is one of the simplest upgrades you can make. It costs very little and makes a significant difference in flavor. You will notice the difference immediately, especially if you have been using unfiltered tap water. Consider installing a simple filter on your tap or using a filtered water pitcher for your brewing needs.
Control the Water Temperature
One of the biggest mistakes people make is using boiling water in their percolator. Boiling water extracts too many compounds from the coffee grounds too quickly, leading to a bitter and harsh cup. The ideal water temperature for brewing coffee is between 195 and 205 degrees Fahrenheit.
If you do not have a thermometer, bring your water to a boil and then let it sit for about 30 seconds before pouring it into the percolator. This small wait allows the temperature to drop to the sweet spot for optimal extraction. Temperature control is important in many kitchen tasks, and brewing coffee is no different. Getting the heat right makes all the difference in the final cup.
Get the Coffee-to-Water Ratio Right
The ratio of coffee to water determines the strength and flavor of your brew. A good starting point is two tablespoons of ground coffee for every six ounces of water. This is a standard guideline, but you can adjust it based on your taste preferences.
If your coffee tastes too weak, add more grounds. If it tastes too strong or bitter, use less coffee or add a bit more water. Keeping a consistent ratio helps you reproduce great results every time. Many experienced coffee brewers recommend using a kitchen scale to measure both the coffee and water by weight. This gives you much more precise results than using volume alone and helps you dial in your perfect coffee recipe.
Perfect Your Brewing Technique
Even with the best beans and the right water, your brewing technique matters a great deal. How long you brew, how often you cycle the water, and what you do during the process all affect the final cup. Small adjustments to your technique can lead to big improvements in taste.
Watch the Brewing Time
Percolators work by cycling hot water through the coffee grounds multiple times. The longer you let this process run, the stronger and more extracted your coffee becomes. However, there is a fine line between a bold cup and an over-extracted, bitter one.
For the best results, limit your brewing cycle to about five to seven minutes. This gives the water enough time to extract the desirable flavors without pulling out too many bitter compounds. If your percolator has a clear knob or lid, watch the coffee as it bubbles. When the color reaches a rich amber, it is time to stop. Going beyond this point will only degrade the coffee flavor and turn your fresh brew into something unpleasant.
Avoid Repeated Cycling
Older percolators often lack a built-in timer or automatic shutoff. This means the water keeps cycling through the grounds as long as the heat source is on. This continuous cycling is the primary reason percolator coffee gets a bad reputation for being bitter.
To fix this, monitor your percolator closely. Once the coffee starts to bubble rapidly, remove it from the heat. Some people prefer to do a single pass through the grounds rather than multiple cycles. This method produces a cleaner, smoother cup of coffee with a more balanced coffee strength. It takes a little practice, but once you get the hang of it, you will never go back to over-brewing.
Preheat Your Percolator
Preheating your percolator before adding cold water and grounds helps maintain a more consistent brewing temperature. Simply rinse the inside with hot water before you start the brewing process. This small step prevents the cold metal from dropping the temperature of your water too quickly.
Consistent temperature throughout the brewing process leads to more even extraction and a better-tasting cup. It also reduces the total time the coffee spends on the heat, which helps prevent over-extraction. This is one of those small habits that separates a good cup from a great one.
Clean Your Percolator Regularly
This step cannot be overstated. A dirty percolator will always produce worse coffee than a clean one. Over time, oils, residues, and mineral deposits build up inside the machine. These contaminants create off-flavors that mask the natural taste of your beans and ruin the overall coffee experience.
Clean After Every Use
After each brewing session, discard the used grounds and rinse all removable parts with warm water. Use a soft brush or cloth to scrub away any stuck-on residue. Pay special attention to the basket and the tube that draws water up through the grounds. These areas collect the most buildup and are the biggest offenders when it comes to stale flavors.
Do not use harsh detergents, as they can leave a soapy taste that transfers to your next pot of coffee. Warm water and a gentle scrub are usually enough. Make sure all parts are completely dry before reassembling to prevent any mold or mildew growth.
Deep Clean Weekly
Once a week, give your percolator a more thorough cleaning. Mix a solution of equal parts water and white vinegar and run it through a full brewing cycle without coffee grounds. The vinegar breaks down mineral deposits and removes built-up oils that regular rinsing cannot reach.
After the vinegar cycle, run two to three cycles with plain water to rinse out any remaining taste. This keeps your percolator fresh and ensures nothing affects the flavor of your next brew. Burning off cleaner residues is a similar concept, where thorough rinsing ensures no cleaning agents affect the next use.
Descale Regularly
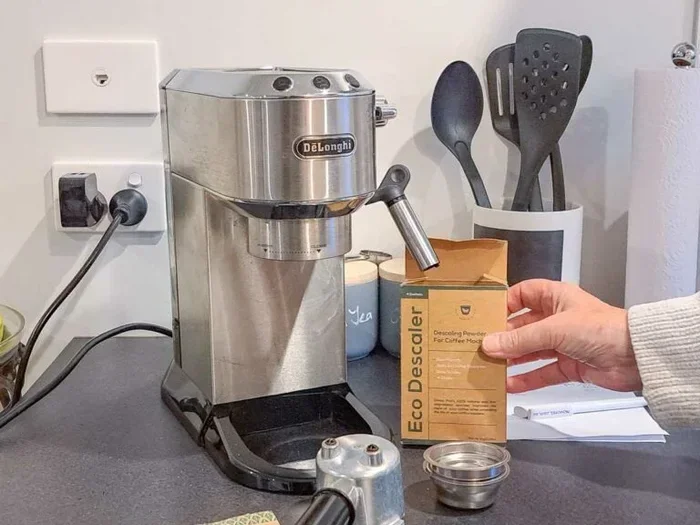
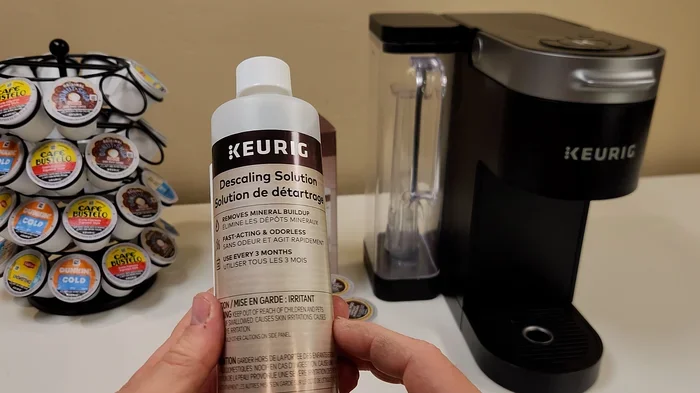
If you live in an area with hard water, mineral buildup can be a serious issue. Calcium and lime deposits can clog the tubes and affect the heating element of your percolator. Use a descaling solution or a mixture of vinegar and water to remove these deposits.
Descaling should be done every one to two months depending on how often you brew and how hard your water is. Signs that it is time to descale include slower brewing times and a metallic taste in your coffee. Regular descaling keeps your percolator running efficiently and ensures the best possible coffee taste from every brew.
Troubleshoot Common Percolator Coffee Problems
Even with the best techniques, you may run into issues from time to time. Understanding what causes common problems helps you fix them quickly and get back to enjoying great coffee without frustration.
Why Does My Percolator Coffee Taste Bitter?
Bitterness is the most common complaint about percolator coffee. It usually happens because the water is too hot, the brewing time is too long, or the grind is too fine. Try lowering the heat, shortening the brewing time, or using a coarser grind to reduce bitterness. Switching to a medium roast can also help if you find dark roasts too intense.
Why Is My Coffee Weak or Watery?
Weak coffee typically means too much water, too few grounds, or the water is passing through too quickly. Increase the amount of coffee, use a finer grind, or slow down the heat to let the water extract more flavor from the grounds. Check that your percolator is functioning properly and that the tube is not clogged, as this can reduce the efficiency of the brewing cycle.
Why Does My Coffee Taste Sour or Thin?
Sour or thin coffee often results from under-extraction. This happens when the water does not spend enough time with the grounds or the water temperature is too low. Try grinding your beans finer, increasing the brew time slightly, or using hotter water. A medium-dark roast can also add more body and richness to thin coffee.
Expert Tips for the Best Percolator Coffee
Here are some bonus tips from coffee enthusiasts and professionals who have perfected their percolator brewing game. These small additions can take your coffee from good to outstanding.
- Use a coffee timer: Set a timer so you do not forget to take the percolator off the heat. Five to seven minutes is the sweet spot for the perfect brew.
- Store beans properly: Keep your coffee beans in an airtight container away from heat and light. This preserves freshness and keeps the flavor locked in for longer.
- Do not reuse grounds: Always use fresh grounds for each brew. Reusing grounds produces weak, flavorless coffee that is not worth the effort.
- Experiment with ratios: Everyone’s taste is different. Keep a log of your ratios and adjust until you find your perfect cup of coffee.
- Use a kitchen scale: Measuring your coffee and water by weight gives you more precise results than using volume alone for consistent coffee strength every time.
- Let the coffee rest: After brewing, let the coffee sit for a minute before pouring. This allows the flavors to settle and the grounds to settle to the bottom.
The beauty of percolator coffee is that it is simple, satisfying, and deeply customizable. Once you find your perfect method, it becomes second nature. So grab your favorite beans, fire up your percolator, and enjoy a cup that tastes as good as it should.
Conclusion
Making percolator coffee taste better does not require expensive equipment or advanced skills. It comes down to a few key habits: using fresh beans, grinding them correctly, controlling water temperature, getting the ratio right, brewing for the proper amount of time, and keeping your equipment clean.
When you pay attention to these details, you will notice a remarkable difference in every cup. The rich, bold flavor that made percolators popular in the first place will come back to life. Start with one or two changes today and build from there. Each small improvement adds up to a significantly better coffee experience.
The right coffee grounds, the perfect water temperature, and a consistent brewing time are the three pillars of great percolator coffee. Master these, and you will never look back at your old bitter cups again. Your mornings will never be the same once you discover the full potential of your percolator.
Frequently Asked Questions
Can I use regular ground coffee in a percolator?
Yes, but the grind size matters a lot. Regular drip coffee grind is usually too fine for a percolator and can cause clogging and bitterness. Use a medium-coarse grind instead for the best results and a cleaner, smoother cup of coffee.
How long should I brew percolator coffee?
Aim for five to seven minutes of brewing time. Going beyond that risks over-extraction, which makes the coffee bitter. Watch the percolator and remove it from the heat once the coffee reaches a rich amber color.
Why does my percolator coffee keep tasting bitter?
Bitterness usually comes from water that is too hot, brewing for too long, or a grind that is too fine. Try lowering the heat, shortening the brew time, or switching to a coarser grind to fix the issue and enjoy a smoother coffee taste.
How often should I clean my percolator?
Rinse your percolator after every use and do a deep clean with vinegar at least once a week. If you have hard water, descale it every one to two months to prevent mineral buildup that affects the flavor of your fresh coffee.
What is the best coffee-to-water ratio for a percolator?
Start with two tablespoons of coffee for every six ounces of water. Adjust from there based on your preference. Using a kitchen scale helps you maintain a consistent ratio every time you brew and ensures the right coffee strength.
Can I use a percolator on an electric stove?
Yes, electric percolators are designed specifically for electric stoves and work great. If you use a stovetop percolator on an electric coil, use a medium heat setting to avoid overheating the water and pulling out bitter flavors from the coffee grounds.