How Do You Decalcify A Keurig Coffee Maker The Right Way
Decalcifying your Keurig removes calcium buildup that slows your machine and ruins coffee flavor. This guide walks you through every step using vinegar or a descaling solution. You will learn how often to decalcify, what supplies you need, and how to avoid common mistakes.
Key Takeaways
- Regular descaling keeps your Keurig brewing fast and tasting great.
- White vinegar and citric acid are affordable, effective options for decalcifying a Keurig.
- You should decalcify every 3 to 6 months depending on your water hardness.
- Running multiple rinse cycles after descaling is essential for removing any taste residue.
- Ignoring the descale light or buildup signs leads to poor performance and clogged needles.
📑 Table of Contents
Why Decalcifying Your Keurig Is Essential
Every Keurig owner eventually faces the same problem. Mineral deposits build up inside the machine over time. This buildup is called calcium buildup or limescale. It comes from the minerals in your tap water. Left untreated, it can slow your machine down and affect the taste of your coffee.
Decalcifying a Keurig means removing those mineral deposits from the internal tubing, heating element, and water reservoir. Think of it like cleaning the inside of a kettle. Over weeks and months, white or chalky deposits collect on the surfaces where water heats up. These deposits act as insulation. They make your machine work harder. That means slower brewing and weaker coffee.
Regular coffee maker maintenance is not just about taste. It also extends the life of your machine. A well-maintained Keurig can last for years. A neglected one might fail after just a couple of seasons. The good news is that decalcifying a Keurig is simple and inexpensive. You probably already have the supplies at home.
Some people ignore the descale light on their machine. That is a mistake. The light is there for a reason. It tells you when mineral buildup has reached a level that needs attention. If you see that light, do not dismiss it. Your machine is asking for help.
Hard water makes this problem worse. If you live in an area with hard water, you will need to decalcify more often. Hard water contains higher levels of calcium and magnesium. These minerals stick to surfaces and form scale. Even if you use a water filter, some minerals still get through. That is why regular maintenance matters for everyone.
How Often Should You Decalcify Your Keurig
The general rule is to decalcify your Keurig every three to six months. But the exact timing depends on a few factors. Your local water hardness is the biggest one. If you have very hard water, aim for every three months. If your water is soft, you might stretch it to six months.
Heavy daily use also speeds up mineral buildup. If you brew multiple cups every morning, your machine works harder. More water flowing through means more minerals depositing inside. In that case, you should check for buildup more often.
Here are some signs that tell you it is time to descale your Keurig:
- The descale light on your machine is on.
- Your coffee tastes off or has a slightly metallic flavor.
- Brewing takes longer than usual.
- You hear unusual gurgling or popping sounds during brewing.
- The water flow seems weaker than normal.
- You can see white or chalky deposits around the water reservoir or needles.
Do not wait until your machine stops working entirely. By then, the buildup could cause real damage. Catching it early makes the whole process much easier. Coffee machine cleaning should be part of your regular kitchen routine, just like wiping down counters.
What You Need Before You Start
Before you begin, gather your supplies. The good news is you do not need anything expensive or special. Most people already have these items in their kitchen.
Essential supplies for decalcifying a Keurig:
- White distilled vinegar or a Keurig descaling solution.
- Clean water (filtered water works best).
- A large mug or measuring cup.
- A soft cloth or sponge.
- A toothpick or paperclip (for cleaning needles).
Vinegar vs. Commercial Descaling Solution
You have two main options for descaling solution for Keurig. The first is plain white distilled vinegar. It is cheap and works very well. The acetic acid in vinegar dissolves mineral deposits effectively. Many coffee experts recommend this method.
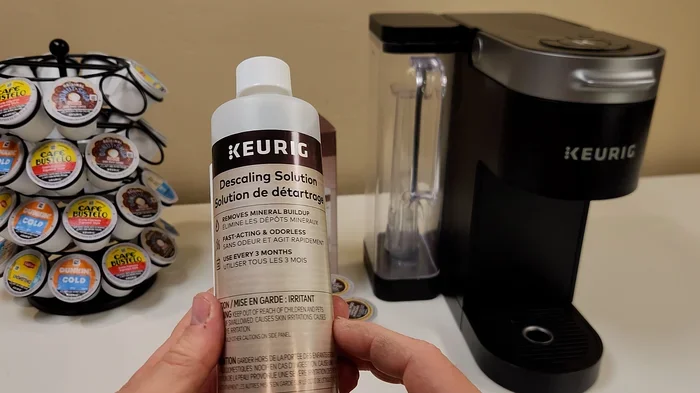
The second option is a commercial descaling solution. Products like Keurig’s own descaling solution or brands like Dezcal are formulated specifically for coffee machines. They work fast and leave less smell than vinegar. They also often include ingredients that protect your machine’s internal parts.
Some people prefer citric acid descaling as a third option. Citric acid powder is natural and effective. It does not leave a strong smell like vinegar. You can find it at most grocery stores or online. Mix about one to two tablespoons with water and use it the same way you would use vinegar.
If you care about Keurig maintenance long-term, having a descaling solution on hand is a smart move. It makes the process faster and easier. But vinegar works just as well if you want a budget-friendly option.
Step-by-Step Guide to Decalcifying Your Keurig
Now let us walk through the actual process. Follow these steps carefully for the best results. This guide works for most Keurig models including the K-Classic, K-Elite, and K-Supreme.
Step 1: Prepare Your Machine
Start by turning off your Keurig and unplugging it. Remove the water reservoir from the machine. Empty any remaining water. Take off the K-cup holder and the funnel. Wash all removable parts with warm soapy water. Rinse them thoroughly and dry them with a clean cloth.
While those parts are out, take a moment to wipe down the inside of the machine. Use a damp cloth to clean any visible buildup around the entrance needle. A paperclip or toothpick works well for clearing out the tiny holes. This step is part of good coffee maker maintenance.
Just as you would follow proper steps when setting up a new appliance, preparing your machine properly before maintenance makes everything smoother.
Step 2: Fill the Reservoir with Your Descaling Solution
Place the water reservoir back on the machine. Fill it with a mixture of white vinegar and water. The standard ratio is equal parts vinegar and water. For a 12-cup reservoir, use 6 cups of vinegar and 6 cups of water.
If you are using a commercial descaling solution, follow the instructions on the bottle. Most products call for one bottle mixed with water to fill the reservoir. For citric acid, dissolve two tablespoons of powder in the water inside the reservoir.
Make sure the reservoir is filled to the maximum line. You need enough solution to run through the entire system.
Step 3: Run the First Brew Cycle
Place a large mug on the drip tray. Power on the machine and start a brew cycle without inserting a K-cup. Let the machine run through a full brew size. The vinegar solution will flow through the internal tubing and help dissolve mineral deposits.
Discard the solution from the mug. Repeat this process. Keep running brew cycles with the vinegar solution until the reservoir is empty. This usually takes three to five cycles depending on your machine size.
You might notice some brownish or cloudy liquid coming out. That is normal. It means the solution is working and pulling out the calcium buildup and hard water deposits. Do not worry if the liquid looks discolored.
Step 4: Let the Solution Sit
This is a step many people skip. Once the reservoir is empty, let the vinegar solution sit inside the machine for 30 minutes to two hours. This soaking time allows the acid to break down stubborn deposits. Set a timer so you do not forget.
For heavy buildup, you can let it sit for up to four hours. But do not leave it overnight. The vinegar can damage rubber seals and tubing if left too long.
Step 5: Rinse Thoroughly
After the soaking period, fill the reservoir with fresh clean water. Run brew cycles without a K-cup to flush out the vinegar. Repeat this at least three to four times. Use fresh water each time.
You want to make sure all vinegar taste and smell is completely gone. If you still detect a vinegar odor or taste, keep rinsing. Run additional cycles until the water smells and tastes completely neutral.
Rinsing thoroughly is the most important part of the entire process. Skipping this step means your next cup of coffee will taste like vinegar. Nobody wants that.
Think of this like cleaning an oven. When you clean a Whirlpool oven, you always rinse away all cleaning residue afterward. The same principle applies here.
Step 6: Clean the Needles and External Parts
Now that the internal system is clean, give the needles some attention. Use a paperclip or the Keurig needle cleaning tool to poke through the entrance and exit needles. This clears out any coffee grounds or mineral gunk that has collected there.
Wipe down the exterior of the machine with a damp cloth. Clean the drip tray and pod holder. Wash them with warm soapy water and dry them completely before reassembling.
For a deeper clean, check out how steam cleaning works on ovens to understand why loosening mineral deposits with heat and moisture is so effective. The same principle applies to your Keurig.
Step 7: Run a Final Clean Water Cycle
Fill the reservoir with fresh water one more time. Run two to three full brew cycles. This final rinse ensures that every trace of vinegar or descaling solution is gone. Your machine is now ready to brew great-tasting coffee.
If your Keurig has a descale light, it should turn off after this process. If it does not, try turning the machine off and back on. Some models require you to hold the 8-ounce and 12-ounce buttons together for five seconds to reset the light. Check your specific model’s manual for exact instructions.
Common Mistakes to Avoid When Decalcifying
Even though decalcifying a Keurig is straightforward, people make mistakes that cause problems. Here are the most common ones to avoid.
Mistake 1: Using the Wrong Cleaning Product
Do not use dish soap, bleach, or other household cleaners inside your Keurig. These chemicals are not safe for consumption and can leave harmful residues. Only use white vinegar, citric acid, or a Keurig descaling solution. These are food-safe and designed for this purpose.
Mistake 2: Skipping the Rinse Cycles
This is the most common mistake. People rush through the process and do not rinse enough. Always run at least three to four full water cycles after descaling. Taste the water from each cycle. When it is completely neutral, you are done rinsing.
Mistake 3: Ignoring the Descale Light
Some people reset the light without actually descaling. This does not solve the problem. The light comes on because the machine has detected scale buildup through changes in heating time or water flow. If you reset the light without cleaning, you are just hiding the warning sign.
Mistake 4: Using Apple Cider Vinegar
Stick with white distilled vinegar. Apple cider vinegar contains sugar and other compounds that can leave residue inside your machine. White vinegar is pure acetic acid and water. It is the safest and most effective choice.
Mistake 5: Not Cleaning the Needles
Descaling the internal system is only half the job. The exit needle gets clogged with old coffee grounds and mineral deposits. If you do not clean it, your coffee will still taste bad even after descaling. Always clean both the entrance and exit needles.
If you run into issues after cleaning, similar troubleshooting principles apply to appliance maintenance as they do when you need to fix oven temperature problems. Sometimes machines need recalibration after deep cleaning.
Tips to Keep Your Keurig Running Like New
Decalcifying is the big maintenance job. But there are daily and weekly habits that keep your machine in great shape between deep cleans.
Use Filtered Water
If your tap water is hard, consider using filtered water in your Keurig. A simple carbon filter pitcher works well. Filtered water has fewer minerals, which means less buildup over time. This alone can extend the time between descaling sessions.
Empty the Reservoir Overnight
Do not leave water sitting in the reservoir for days. Stagnant water promotes mineral deposits and can also grow bacteria. Empty any leftover water each night. Refill with fresh water each morning.
Clean the External Parts Weekly
Wipe down the exterior, drip tray, and pod holder once a week. This prevents coffee oils and residue from building up. A quick wipe takes less than two minutes but keeps your machine looking and working great.
Run a Hot Water Flush
Once a week, run a full brew cycle with just hot water and no K-cup. This flushes out any residual coffee oils and keeps the tubing clear. It is a simple habit that pays off in long-term Keurig performance.
Replace Your Water Filter Regularly
If your Keurig model has a water filter, replace it every two months. A clogged or old filter does not remove minerals effectively. Fresh filters keep your water cleaner and your machine healthier.
Descale on a Schedule
Do not wait for the descale light or for problems to appear. Set a calendar reminder every three months. Consistent descaling frequency prevents heavy buildup and keeps your coffee tasting excellent. Think of it as preventive care for your machine.
Regular maintenance also improves Keurig troubleshooting outcomes. If something ever goes wrong, a well-maintained machine is easier to diagnose and fix.
Frequently Asked Questions
Can I Use Apple Cider Vinegar to Decalcify My Keurig?
It is best to avoid apple cider vinegar. It contains sugars and other compounds that can leave a sticky residue inside your machine. White distilled vinegar is the safest and most effective option because it is pure acetic acid and water. If you do not have white vinegar, a commercial descaling solution or citric acid works well too.
How Long Does It Take to Decalcify a Keurig?
The entire process takes about 45 minutes to one hour. This includes the brew cycles with vinegar or descaling solution, the soaking period, and the rinse cycles. If you have heavy buildup, it might take a little longer. But for most machines, under an hour is all you need.
Can I Use Lemon Juice Instead of Vinegar?
Yes, lemon juice is a natural acid that can help dissolve mineral deposits. However, it is not as strong as white vinegar. You would need to use more lemon juice and run additional cycles. White vinegar or citric acid powder are more reliable and consistent options for descaling a Keurig.
Why Does My Keurig Still Smell Like Vinegar After Rinsing?
This usually means you have not rinsed enough cycles. Run at least four to five full water cycles with fresh water. Let each cycle run completely. If the smell persists, fill the reservoir with water and a teaspoon of baking soda. Let it sit for 30 minutes, then run two more rinse cycles. The baking soda neutralizes the remaining vinegar odor.
How Do I Know if My Keurig Has Calcium Buildup?
Common signs include slower brewing, a metallic or off taste in your coffee, gurgling sounds during brewing, and the descale light being on. You might also see white chalky deposits around the water reservoir or around the needles. If you notice any of these signs, it is time to decalcify your Keurig right away.
Is It Safe to Decalcify a Keurig Every Month?
Monthly descaling is safe and will not harm your machine. However, for most people, every three to six months is sufficient. Descaling too frequently is unnecessary unless you have extremely hard water or use your machine heavily throughout the day. Always rinse thoroughly after each descaling session to protect internal seals and tubing.
Conclusion
Decalcifying a Keurig is one of the simplest and most important things you can do for your coffee machine. It takes less than an hour, costs almost nothing, and makes a huge difference in taste and performance. Whether you use white vinegar, a commercial descaling solution, or citric acid, the process is the same. Prepare your machine, run the solution through the system, let it soak, and rinse thoroughly.
Make Keurig maintenance a regular part of your routine. Set a reminder every three to six months. Pay attention to the signs that tell you it is time to descale. Clean your needles weekly and use filtered water when possible. These small habits add up to years of reliable, great-tasting coffee.
Your Keurig works hard every morning to give you that perfect cup. Taking care of it with regular decalcifying is the least you can do. Follow the steps in this guide, avoid the common mistakes, and your machine will keep brewing beautifully for a long time to come.