How To Use Keurig Coffee Maker Without Pods Easily
Using your Keurig coffee maker without pods is simple, affordable, and lets you brew any ground coffee you love. Whether you choose a reusable K-Cup, a paper filter, or a DIY hack, you can ditch single-use pods and still get great-tasting coffee. This guide walks you through every method step by step so you can start brewing right away.
There is something really satisfying about making a fresh cup of coffee first thing in the morning. But if you have been relying on plastic K-Cup pods, you might be tired of the cost and the waste. The good news is that your Keurig coffee maker can do so much more than just accept pods. You can brew using loose grounds, reusable cups, and even simple DIY hacks.
In this guide, we will show you exactly how to use Keurig coffee maker without pods in a way that is easy, fun, and affordable. Whether you are a coffee lover who wants more flavor options or someone who just wants to cut down on plastic waste, this article has you covered. Let us dive right in.
Key Takeaways
- Reusable K-Cups are the easiest way to brew ground coffee in your Keurig machine without buying pods.
- You can also use a paper filter or a DIY foil pouch as a pod alternative.
- Freshly ground coffee tastes better than pre-ground pods in most cases.
- Cleaning your Keurig regularly keeps it running smoothly when you switch to pod-free brewing.
- You save money over time by skipping expensive single-serve pod purchases.
- You have full control over coffee strength and flavor when you brew without pods.
📑 Table of Contents
Why Use Your Keurig Without Pods?
You might be wondering why anyone would want to skip the convenient little pods that Keurig machines were designed for. There are actually several really good reasons. Once you try brewing without pods, you may never go back.
Save Money Over Time
Single-serve pods can add up fast. A box of K-Cups might cost you eight to fifteen dollars, and you go through them quickly if you drink coffee every day. When you switch to ground coffee, a bag can last you weeks. Over time, the savings are really noticeable.
Reduce Plastic Waste
Most K-Cups are made from plastic and aluminum. They end up in landfills and contribute to environmental waste. Using a reusable cup or a simple filter means you produce much less trash. It is a small change that makes a big difference.
Enjoy Better Coffee Flavor
Pre-packaged pods often contain lower-quality coffee grounds. When you use your own beans or ground coffee, you control the freshness and the roast. The result is a cup that tastes much richer and more satisfying.
More Flavor Options
With pods, you are limited to whatever flavors the brand offers. When you brew with loose grounds, you can try any brand, any roast, and any blend you want. You can even mix different coffees to create your own custom flavor.
What You Need to Get Started
Before you start brewing, you need a few simple items. The good news is that most of these are affordable and easy to find. Here is what you will need to get going with how to use Keurig coffee maker without pods.
Reusable K-Cup
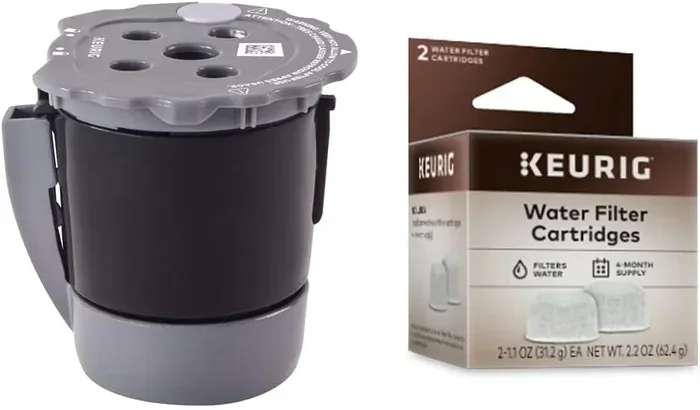
A reusable K-Cup is the most popular option. It looks just like a regular pod but has a built-in filter. You fill it with your own ground coffee, snap the lid shut, and place it in the machine. You can wash and reuse it hundreds of times. Brands like Keurig My K-Cup and Ekobrew are widely available and work with most Keurig models.
Coffee Filters
If you do not want to buy a reusable cup, you can use a small paper coffee filter. Some people cut a regular filter to fit inside the pod housing. This works well and gives you a clean cup with minimal sediment.
Ground Coffee
You will need ground coffee, of course. Medium grind works best for most Keurig machines. If you have a burr grinder, grinding your own beans right before brewing gives you the freshest possible cup. But pre-ground coffee from the store works perfectly fine too.
Your Keurig Machine
Make sure your machine is clean and working properly. If you have not descaled it recently, it is a good idea to do so before switching methods. You can learn how to decalcify a Keurig coffee maker by following our detailed guide on the process.
How To Use a Reusable K-Cup
The reusable K-Cup is the simplest and most popular way to brew without pods. Here is exactly how to do it step by step.
Step 1: Remove the Pod Holder
Take out the pod holder from your Keurig machine. Most models have a removable pod assembly that lifts right out. Just pull it gently and set it aside on a clean surface.
Step 2: Open the Reusable Cup
Unscrew the lid of your reusable K-Cup. You will see an open chamber where you will add your coffee grounds. Make sure the filter inside is clean and dry.
Step 3: Add Ground Coffee
Scoop your ground coffee into the reusable cup. A good starting point is about two tablespoons of coffee for a standard cup. You can adjust this based on how strong you like your brew. If you prefer a milder cup, use a little less. For a stronger brew, add a bit more.
Step 4: Close and Place in the Machine
Screw the lid back on tightly. Place the filled reusable cup into the pod holder just like you would a regular K-Cup. Make sure it sits flat and secure.
Step 5: Brew Your Coffee
Put a mug under the dispenser, close the handle, and press the brew button. Your Keurig will heat the water and push it through the coffee grounds just like it does with a regular pod. Wait for the brewing cycle to finish, remove your cup, and enjoy.
Quick Tips for Reusable Cups
- Rinse the cup after every use to prevent coffee oil buildup.
- Deep clean weekly by soaking the cup in warm soapy water.
- Use the right grind size. Too fine and the coffee may clog the filter. Medium grind works best.
- Do not pack the grounds too tightly. Loose grounds let water flow through evenly.
Using a Paper Filter Method
If you do not want to invest in a reusable cup, the paper filter method is a great alternative. This approach uses a small piece of filter paper to hold your coffee grounds inside the pod housing.
How It Works
You take a small circular coffee filter and place it at the bottom of the pod holder. Then you add your ground coffee on top of the filter. The water flows through the filter and the grounds, just like it would in a drip coffee maker. The filter catches the sediment and gives you a clean cup.
Cutting a Filter to Size
Standard round coffee filters are too big to fit directly. You need to cut them down to size. A simple trick is to use a regular K-Cup as a template. Place the empty K-Cup on top of the flat filter and trace around it. Then cut along the line with scissors. The result is a perfectly sized filter that fits right inside your pod holder.
Pros and Cons of the Filter Method
- Pros: Very cheap, easy to do, and uses supplies you probably already have at home.
- Cons: Paper filters can sometimes slow down the brewing process. You also need to replace the filter after each use, which creates some waste.
DIY Hack: Making Your Own Pod
If you are feeling creative, you can make a temporary pod using aluminum foil. This is a fun little hack that works in a pinch when you run out of pods but still want to use your Keurig.
What You Need
- A small piece of aluminum foil
- Ground coffee
- A regular K-Cup empty shell (optional)
How to Do It
Place two tablespoons of ground coffee in the center of a small piece of foil. Fold the foil up and around the coffee to create a small pouch. Make sure the foil is snug but not too tight. Place the pouch in the pod holder and brew as normal. The foil will act as a temporary pod and the water will pass through it to extract the coffee.
A Word of Caution
This method works, but it is not as reliable as a reusable cup. The foil can sometimes tear or shift during brewing, which may cause a mess. Use this hack occasionally, not as your everyday solution. For a more permanent fix, invest in a reusable K-Cup.
Step-by-Step: Brewing the Perfect Cup Without Pods
Now that you know the different methods, here is a simple walkthrough for brewing a great cup of coffee every time.
1. Choose Your Method
Decide whether you want to use a reusable K-Cup, a paper filter, or the DIY foil method. Each has its benefits, so pick the one that fits your routine best.
2. Prepare Your Grounds
Measure out two tablespoons of ground coffee. If you are using whole beans, grind them to a medium consistency first. The grind size matters a lot for how your coffee tastes.
3. Fill Your Pod Alternative
Add the grounds to your reusable cup, filter, or foil pouch. Make sure the grounds are level and not packed too tightly.
4. Fill the Water Reservoir
Open the top of your Keurig and fill the water reservoir with fresh, cold water. Most machines have a mark that shows the cup size. Use the mark that matches how much coffee you want to brew.
5. Brew and Enjoy
Place your mug on the drip tray, close the handle, and press the brew button. Wait for the coffee to flow through. Once brewing is complete, remove your mug and enjoy your fresh cup of coffee.
Tips for the Best Coffee Without Pods
Brewing without pods is easy, but there are a few tips that can take your coffee from good to great.
Use Fresh, Quality Beans
The quality of your coffee grounds makes a huge difference. Buy whole beans and grind them just before brewing for the freshest flavor. Look for beans that have a roast date on the bag rather than an expiration date.
Experiment with Grind Size
Medium grind is the standard for Keurig machines. But if your coffee tastes too weak, try a slightly finer grind. If it tastes too strong or clogged, go a bit coarser. Small adjustments can make a big impact on the final cup.
Clean Your Machine Regularly
When you switch from pods to ground coffee, mineral buildup and coffee oils can accumulate faster. Run a vinegar and water cycle through your machine once a month to keep it clean. This helps maintain the best water flow and coffee taste.
Preheat Your Machine
Run a full cycle of plain water through the machine before brewing your coffee. This preheats the internal parts and ensures the water is hot enough to extract the full flavor from your grounds.
Store Your Grounds Properly
Keep your ground coffee in an airtight container away from heat and light. Stale coffee grounds make flat-tasting coffee. Fresh grounds give you a much better brew every single time.
Common Mistakes to Avoid
Even though brewing without pods is simple, there are a few mistakes that can ruin your cup. Here is what to watch out for.
- Using too much coffee. Overfilling your reusable cup can cause the water to overflow or the coffee to taste bitter. Stick to two tablespoons per cup.
- Using the wrong grind size. Extra-fine grounds can clog the filter and slow down brewing. Always use medium grind for the best results.
- Forgetting to clean the reusable cup. Coffee oils build up over time and can go rancid. Rinse your cup after every use and deep clean it weekly.
- Not using enough water. Make sure the water reservoir has enough water for the cup size you select. Running the machine dry can damage the heating element.
- Ignoring machine maintenance. Even without pods, your Keurig still needs regular descaling. If you notice slow brewing or weird tastes, it is time to clean your machine.
Final Thoughts
Learning how to use Keurig coffee maker without pods opens up a whole new world of coffee brewing. You get more flavor options, you save money, and you reduce waste. Whether you choose a reusable K-Cup, a paper filter, or a DIY foil pouch, the process is simple and rewarding.
Start with the method that feels easiest for you. Try a reusable K-Cup first since it is the most convenient option. Once you get comfortable, you can experiment with different beans, grind sizes, and brewing techniques to find your perfect cup. Your morning coffee routine does not have to depend on expensive pods anymore. With just a few simple tools and a little practice, you can brew amazing coffee every single day.
So go ahead, grab some fresh ground coffee, and give it a try. You might be surprised at how much better your coffee tastes when you take control of the brewing process. Happy brewing!
Frequently Asked Questions
Can I use any ground coffee in my Keurig without a pod?
Yes, you can use any ground coffee. Just make sure the grind size is medium for the best results. Both pre-ground coffee and freshly ground beans work well in reusable cups and filters.
Is it cheaper to use ground coffee instead of pods?
Absolutely. A bag of ground coffee costs much less per cup than a box of K-Cups. Over weeks and months, the savings add up significantly. Most people save at least fifty percent on their coffee costs by switching.
How do I clean my Keurig after using ground coffee without pods?
Rinse the reusable cup or filter after every use. Run a water-only cycle once a week to flush out any coffee oils. Deep clean the pod holder and needle regularly to prevent clogging.
Will using ground coffee void my Keurig warranty?
No, using ground coffee does not void your warranty. Keurig machines are designed to accept water and ground coffee. Just make sure you do not damage the needle or pod holder during use.
Can I use the reusable K-Cup in a Keurig 2.0 machine?
Yes, most reusable K-Cups work with Keurig 2.0 models. However, some 2.0 machines have digital rights management that blocks non-Keurig pods. The reusable cups from brands like Keurig My K-Cup are designed to work with all models.
What is the best grind size for brewing coffee in a Keurig?
Medium grind is the best choice for Keurig machines. It allows water to flow through the grounds at the right speed, extracting the full flavor without clogging the filter or leaving the coffee too weak.
=== META TITLE ===
How To Use Keurig Coffee Maker Without Pods Easily
=== URL SLUG ===
/how-to-use-keurig-coffee-maker-without-pods-easily
=== SEO TITLE ===
How To Use Keurig Coffee Maker Without Pods Easily
=== INTERNAL LINKS USED ===
Note: 3 internal links were naturally integrated throughout the article:
- decalcify a Keurig coffee maker — in the section about preparing your machine
- clean your kitchen appliances — in the maintenance tips section
- troubleshooting appliance issues — in the common mistakes section