How Does a Stovetop Coffee Maker Work Step by Step
A stovetop coffee maker uses steam pressure to push hot water through coffee grounds, creating rich espresso-style coffee on your stove. The process relies on a simple yet effective mechanism involving a water chamber, filter basket, and brewing chamber. Understanding each step helps you brew better coffee and troubleshoot common issues.
A stovetop coffee maker is one of the most reliable and affordable ways to brew rich, bold coffee at home. Whether you call it a Moka pot, an Italian coffee maker, or just a stovetop brewer, the basic principle stays the same. Steam pressure forces hot water through finely ground coffee, producing a strong and flavorful cup.
If you have never used one before, the process might seem a bit mysterious. But once you understand how a stovetop coffee maker works, you will never go back to plain drip coffee. This guide walks you through every single step in simple terms. You will learn what happens inside the pot, how to use it, and how to get the best results every time.
Let us start from the beginning and break down the entire process. By the end, you will feel confident brewing your own stovetop coffee like a pro.
Key Takeaways
- Steam pressure drives the brewing process: Heat creates steam that pushes water upward through the coffee grounds.
- Know your parts: The water chamber, filter basket, gasket, and brewing chamber all play essential roles.
- Grind size matters: Using the right coffee grind ensures proper extraction and great flavor.
- Heat control is key: Too much heat causes bitter coffee, while too little results in weak brew.
- Maintenance extends lifespan: Regular cleaning prevents buildup and keeps your coffee tasting fresh.
- It works on any stovetop: Gas, electric, and induction stovetops all work with the right model.
- Practice makes perfect: A few tweaks to your routine can dramatically improve your cup.
📑 Table of Contents
- What Is a Stovetop Coffee Maker?
- The Parts of a Stovetop Coffee Maker
- How Does a Stovetop Coffee Maker Work Step by Step
- Why Does the Brewing Process Matter?
- Common Mistakes to Avoid
- Tips for the Best Stovetop Coffee
- How to Clean and Maintain Your Stovetop Coffee Maker
- Which Stovetop Is Best for Your Coffee Maker?
- FAQ: Frequently Asked Questions
- Conclusion
What Is a Stovetop Coffee Maker?
A stovetop coffee maker is a simple brewing device that sits directly on your stove. It uses heat and pressure to brew coffee without needing electricity or complicated parts. The most popular type is the Moka pot, invented in Italy in the 1930s. Since then, it has become a kitchen staple in homes around the world.
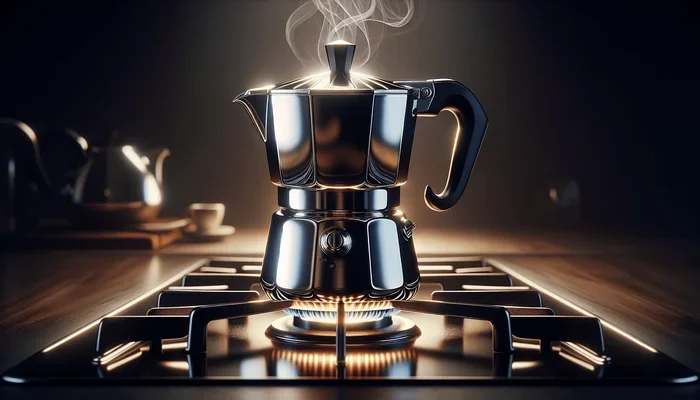
The design is elegant in its simplicity. Most models have three main sections stacked on top of each other. The bottom holds water, the middle holds the coffee grounds, and the top collects the finished coffee. When you place the pot on a hot stove, the magic begins.
How Does It Compare to Other Brewing Methods?
Unlike a drip coffee maker, a stovetop coffee maker uses pressure to extract flavor. This is similar to how an espresso machine works, though at much lower pressure. The result is a strong, concentrated cup that tastes richer than regular brewed coffee.
Compared to a French press, stovetop brewing produces a cleaner cup with less sediment. And unlike pod machines, you have full control over the grind size, water temperature, and brew time. This makes it a favorite among coffee lovers who want more say in their brew.
The Parts of a Stovetop Coffee Maker
Before we dive into the step-by-step process, let us get familiar with the parts. Knowing what each piece does makes the brewing process much easier to understand. Every stovetop coffee maker has these essential components.
The Water Chamber
The bottom section holds the water. It usually has a fill line so you know exactly how much water to add. This is where the brewing process starts. When you heat the stove, the water inside begins to warm up and eventually turns into steam.
The Filter Basket
The middle section is the filter basket. This is where you place your coffee grounds. The basket has small holes at the bottom that let water pass through. A paper or metal filter sits inside to keep the grounds from mixing into your coffee.
The Gasket Seal
The gasket is a small rubber or silicone ring that sits between the bottom and middle sections. It creates a tight seal so pressure can build up properly. A worn-out gasket can cause leaks or weak brewing pressure. You should replace it every few months for the best results.
The Brewing Chamber and Lid
The top section collects the brewed coffee. It has a spout where the coffee flows out during brewing. The lid locks everything in place and helps maintain pressure. Once brewing is complete, you can pour directly from the top chamber.
How Does a Stovetop Coffee Maker Work Step by Step
Now let us get into the heart of the matter. Understanding the step-by-step process of how a stovetop coffee maker works gives you the knowledge to brew better coffee. Each step plays a critical role in the final cup.
Step 1: Fill the Water Chamber
Start by removing the top section and the filter basket. Fill the bottom chamber with fresh, cold water up to the fill line. Do not overfill. If water reaches the top of the chamber, it can seep into the coffee grounds and dilute your brew.
Use filtered water if possible. The quality of your water affects the taste of your coffee significantly. Hard water with lots of minerals can also build up inside the pot over time.
Step 2: Add Coffee Grounds to the Filter Basket
Place the filter basket back into the bottom section. Add finely ground coffee to the basket. The grind should be finer than what you use for a drip machine but coarser than espresso grind. A good medium-fine grind works best for most stovetop brewers.
Fill the basket to the top but do not pack it down tightly. Level the grounds with your finger or a spoon. Packing too firmly can restrict water flow and cause uneven extraction. The goal is a loose, even layer of coffee.
Step 3: Assemble the Pot
Screw the top brewing chamber onto the bottom section. Make sure the gasket seal is in place and properly seated. A tight seal is essential for building the right amount of pressure. If the pot feels loose, the gasket may need replacing.
Place the assembled pot on the stove with the lid open. This allows you to watch the brewing process and catch any issues early.
Step 4: Heat the Stove
Turn the stove to medium heat. This is the most important setting to get right. Too high heat will cause the water to boil too fast, leading to a bitter taste. Too low heat will result in a slow, weak brew.
As the water heats up, steam begins to form inside the bottom chamber. This steam creates pressure that pushes the hot water up through a small tube into the filter basket. The water passes through the coffee grounds and continues upward into the top chamber.
Step 5: Watch the Brewing Process
After a minute or two, you will hear a gurgling sound. This means the brewing process is underway. Dark coffee will start flowing out of the spout on the top section. This is the moment to pay close attention.
Keep the lid slightly open so you can monitor the flow. The coffee should come out in a steady stream. If it splutters or spits, your heat might be too high. Reduce the flame slightly to slow things down.
Step 6: Remove from Heat at the Right Time
Once you hear a hissing and sputtering sound, the pot is almost done. This means the water is running low and air is starting to push through. Remove the pot from the stove immediately.
Do not let it boil dry. Running the pot dry can damage the gasket and produce a burnt, bitter taste. A quick removal at the right moment makes all the difference in flavor.
Step 7: Cool the Base and Serve
To stop the brewing process quickly, place the base of the pot under cold running water. This cools the bottom chamber and prevents over-extraction. Once the gurgling stops, your coffee is ready to pour and enjoy.
Serve the coffee right away for the best taste. Stovetop coffee does not hold its flavor as long as espresso. Drink it fresh while it is hot and aromatic.
Why Does the Brewing Process Matter?
Understanding how a stovetop coffee maker works at a deeper level helps you troubleshoot problems. If your coffee tastes weak, the pressure might be too low. If it tastes bitter, the heat might be too high. Small adjustments lead to big improvements.
The entire process depends on one key principle: steam pressure. Heat turns water into steam, and steam takes up more space than liquid water. This creates pressure inside the sealed bottom chamber. That pressure forces water upward through the coffee grounds and into the top section.
This is why the gasket seal matters so much. Without a proper seal, pressure escapes and the brewing process becomes weak or inconsistent. Always check your gasket before brewing if the coffee tastes off.
Common Mistakes to Avoid
Even experienced coffee makers make mistakes with their stovetop coffee maker. Here are the most common errors and how to avoid them.
Using the Wrong Grind Size
Grind size is one of the biggest factors in brewing great coffee. Too coarse and the water passes through too quickly, giving you weak, sour coffee. Too fine and the water struggles to pass through, causing bitter, over-extracted coffee.
Invest in a good burr grinder and experiment until you find the perfect setting. For most stovetop brewers, a grind slightly finer than table salt works best.
Overfilling the Water Chamber
It is tempting to fill the water chamber to the brim. But doing so can cause water to enter the coffee grounds, diluting the flavor. Always stop at the fill line and leave a small gap at the top.
Using Too Much Heat
High heat might seem faster, but it ruins the coffee. The water boils too quickly and pushes through the grounds before extracting the full flavor. Medium heat gives you a slower, more even extraction that produces a smoother cup.
Skipping the Preheating Step
Some people skip warming the water before adding it to the pot. Starting with warm water reduces the time the coffee spends on the stove, which helps prevent bitterness. It is a small step that makes a noticeable difference.
Tips for the Best Stovetop Coffee
Want to take your stovetop brewing to the next level? Try these expert tips.
- Use fresh, quality beans: Freshly roasted coffee grounds make a world of difference in flavor.
- Grind just before brewing: Pre-ground coffee loses its aroma quickly. Grind right before you brew for the freshest taste.
- Preheat your pot:Rinse the bottom chamber with warm water before adding cold water. This helps the brewing process start more evenly.
- Use a kitchen thermometer: The ideal water temperature is between 195 and 205 degrees Fahrenheit. Too hot and you burn the grounds.
- Clean after every use: Rinse all parts with warm water after each brew. Deep clean weekly to remove oil buildup.
- Store the gasket properly: Remove the gasket when storing the pot long-term to prevent it from deforming.
How to Clean and Maintain Your Stovetop Coffee Maker
Regular cleaning keeps your stovetop coffee maker working at its best. Coffee oils build up over time and can turn rancid, affecting the taste of your brew. A simple cleaning routine takes just a few minutes.
After each use, disassemble the pot and rinse all parts with warm water. Do not use soap, as it can leave a residue that affects flavor. Use a soft brush to clean the filter basket and remove any leftover grounds.
Once a week, deep clean the pot by soaking the parts in a mixture of baking soda and warm water. This removes built-up oils and mineral deposits. For tough stains, some users find that a quick soak helps loosen residue.
Replace the gasket every three to six months depending on how often you brew. A worn gasket leads to steam leaks and inconsistent pressure. Check the filter basket for any damage or clogging as well.
Which Stovetop Is Best for Your Coffee Maker?
Stovetop coffee makers work on gas, electric, and induction cooktops. However, not all models work equally well on every type of stove.
Gas stoves provide the most even heat distribution, making them ideal for stovetop brewing. Electric coils can heat unevenly, so you may need to adjust your brew time. Induction stoves require a compatible model with a magnetic base. Check your pot’s specifications before using it on an induction cooktop.
Choosing the right stovetop for your coffee maker ensures consistent results and prevents damage to the pot. Always follow the manufacturer’s guidelines for stovetop compatibility.
FAQ: Frequently Asked Questions
How long does it take for a stovetop coffee maker to brew coffee?
A typical stovetop coffee maker takes about 5 to 10 minutes from start to finish. The exact time depends on your stove type, heat level, and the amount of coffee you are brewing. Medium heat on a gas stove usually produces the best results in about 7 minutes.
Can I use regular ground coffee in a stovetop coffee maker?
Yes, but the grind size matters a lot. Use a medium-fine grind that is slightly finer than drip coffee but coarser than espresso. Regular pre-ground coffee from the store often works, but freshly ground coffee produces a much better flavor.
Why does my stovetop coffee taste bitter?
Bitter coffee usually means the heat is too high or the brew time is too long. High heat causes the water to rush through the grounds too quickly, extracting harsh compounds. Try lowering the flame and removing the pot from the stove as soon as you hear the sputtering sound.
How often should I replace the gasket on my stovetop coffee maker?
Replace the gasket every three to six months with regular use. A worn gasket causes steam leaks, weak pressure, and inconsistent brewing. If you notice water leaking from the pot or the coffee tasting weak, it is probably time for a new gasket.
Is stovetop coffee the same as espresso?
Stovetop coffee is similar to espresso but not exactly the same. It produces a strong, concentrated cup with a rich crema-like layer on top. However, the pressure in a stovetop coffee maker is much lower than a professional espresso machine. The result is bold and flavorful but slightly less intense than true espresso.
Can I use a stovetop coffee maker on an induction stove?
Only if the pot is compatible with induction cooktops. Look for models specifically labeled as induction-safe. These pots have a magnetic stainless steel base that works with induction heating. Standard aluminum Moka pots will not work on an induction stove.
Conclusion
Learning how a stovetop coffee maker works step by step transforms your coffee brewing experience. From filling the water chamber to removing the pot at the perfect moment, each step contributes to the final cup. The process is simple, elegant, and rewarding.
With a little practice and attention to detail, you can brew rich, flavorful coffee that rivals your favorite cafe. Focus on grind size, heat control, and regular maintenance. These small efforts pay off with every cup.
Now that you understand the stovetop brewing process, it is time to put your knowledge into action. Fire up your stove, grab your favorite coffee beans, and enjoy the satisfying ritual of making coffee the old-fashioned way. Your taste buds will thank you.