How Long To Pre Cook Ribs In Oven Before Grilling Tips
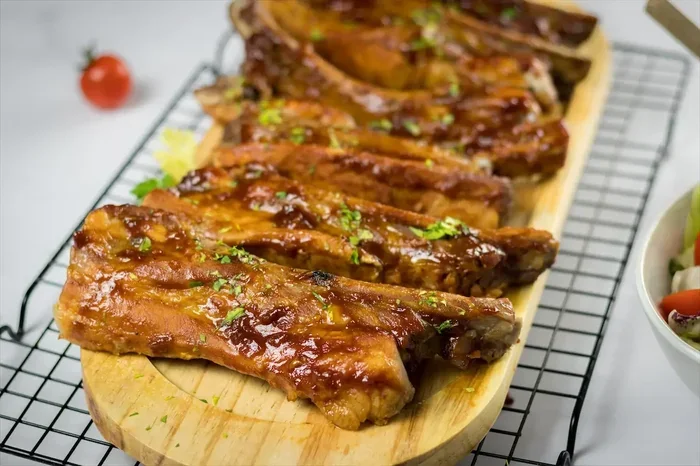
Pre cooking ribs in the oven before grilling is the best way to get tender, fall-off-the-bone meat with a perfect smoky crust. Most ribs need 2 to 3 hours in a low oven set between 225°F and 275°F. This guide covers the exact times, temperatures, and techniques for baby back ribs, spare ribs, and more.
There is nothing quite like a rack of ribs fresh off the grill. The bark is crispy. The meat pulls away from the bone with ease. And the flavor? Deep, smoky, and absolutely mouthwatering. But here is the secret that separates good ribs from legendary ribs: pre cooking them in the oven before they ever touch the grill.
If you have ever wondered how long to pre cook ribs in oven before grilling, you are in the right place. This guide walks you through everything you need to know. From oven temperatures and timing to the best types of ribs for this method. By the end, you will feel confident enough to tackle ribs like a pitmaster.
The idea of pre cooking ribs in the oven might feel unusual at first. Some people worry it takes away from the smoky flavor. But trust us, the results speak for themselves. Pre cooking gives you tender, juicy meat every single time. It also frees up your grill for other dishes and makes the whole process way less stressful. Let us dive in.
Key Takeaways
- 2 to 3 hours is the sweet spot: Most ribs need 2 to 3 hours of oven pre cooking at 225°F to 275°F before hitting the grill.
- Lower and slower is better: A low oven temperature breaks down collagen gently, making ribs tender without drying them out.
- Wrap halfway through: Wrapping ribs in foil or butcher paper partway through helps retain moisture and speeds up cooking.
- Different rib types need different times: Baby back ribs take less time than spare ribs or bone-in beef ribs.
- Always remove the membrane: Removing the rib membrane allows better smoke penetration and more tender results.
- Rest your ribs before grilling: Letting pre cooked ribs rest ensures juicier meat when you finish them on the grill.
- Finish with sauce on the grill: Apply your favorite BBQ sauce during the last few minutes on the grill for caramelized flavor.
📑 Table of Contents
- Why Pre Cook Ribs In The Oven Before Grilling
- The Best Oven Temperature For Pre Cooking Ribs
- How Long To Pre Cook Different Types Of Ribs
- Step By Step Guide To Pre Cooking Ribs In The Oven
- Tips For Perfect Grilled Ribs After Oven Pre Cooking
- Common Mistakes To Avoid When Pre Cooking Ribs
- Frequently Asked Questions
- Conclusion
Why Pre Cook Ribs In The Oven Before Grilling
Pre cooking ribs in the oven is one of the most popular techniques among home cooks and competition pitmasters alike. There are several strong reasons why this method works so well.
First, it gives you control. When you cook ribs entirely on the grill, you are at the mercy of the weather, the charcoal, and the flame. With oven pre cooking, the temperature stays steady and predictable. You do not have to worry about sudden temperature spikes or flare-ups.
Second, it saves time on the grill. Grilling is fun, but it also requires constant attention. By pre cooking the ribs in the oven, you shorten the time they spend over direct heat. This means less risk of burning and more time to enjoy your guests.
Third, oven pre cooking helps the meat stay moist. The low, even heat gently breaks down the connective tissue in the ribs. This turns tough collagen into gelatin, which keeps the meat juicy and tender. The result is ribs that are easy to bite through and incredibly satisfying.
Finally, pre cooking allows you to apply your dry rub earlier. The rub has more time to penetrate the meat when it cooks slowly in the oven. This builds deeper flavor from the inside out.
The Science Behind Pre Cooking Ribs
When you cook ribs low and slow, something magical happens. The collagen in the meat starts to break down at temperatures around 160°F to 180°F. This is the range where ribs become tender and juicy. The oven provides a consistent environment to reach this temperature without rushing the process.
Collagen is a tough protein found in connective tissue. In raw ribs, it makes the meat chewy and firm. But when heated slowly over several hours, it melts into a rich, silky gelatin. This is what gives great ribs that melt-in-your-mouth texture. Pre cooking in the oven ensures this transformation happens evenly throughout the meat.
The Best Oven Temperature For Pre Cooking Ribs
Getting the oven temperature right is the most important step in the process. Too hot and the ribs will dry out before the collagen has time to break down. Too low and you will be waiting all day for results.
The sweet spot for pre cooking ribs in the oven is between 225°F and 275°F. This low temperature range mimics the conditions of a traditional smoker. It allows the meat to cook gently and evenly, developing flavor and tenderness at the same time.
Most experts recommend 250°F as the ideal temperature. It strikes a perfect balance between cooking time and moisture retention. At this temperature, ribs typically need about 2.5 to 3 hours of oven time before they are ready for the grill.
If you are short on time, you can go up to 275°F. This will reduce the cooking time by about 30 minutes. Just keep a close eye on the internal temperature to avoid drying out the meat. If you have more time, stick with 225°F for the most tender results.
What Happens If The Oven Is Too Hot?
Cooking ribs at too high a temperature is one of the biggest mistakes people make. When the oven is above 300°F, the meat dries out quickly. The outside burns before the inside has a chance to become tender. The collagen does not have enough time to break down properly.
High heat also causes the fat to render too fast. This leaves the meat lean and tough instead of juicy and flavorful. Always stick to the low and slow approach for the best results.
How Long To Pre Cook Different Types Of Ribs
Not all ribs are created equal. Different cuts require different amounts of time in the oven. Here is a breakdown of how long to pre cook ribs in oven before grilling based on the type of rib.
Baby Back Ribs
Baby back ribs are the most popular choice for oven pre cooking. They are smaller and leaner than spare ribs. They also cook faster because of their size. A full rack of baby back ribs typically needs about 2 to 2.5 hours at 250°F.
These ribs have a mild pork flavor and a tender texture. They are perfect for beginners because they are forgiving and hard to mess up. Their shorter cooking time also makes them ideal for weeknight dinners or casual weekend gatherings.
Spare Ribs
Spare ribs are larger and fattier than baby backs. They need more time in the oven to become fully tender. Plan for about 2.5 to 3 hours at 250°F for a full rack of spare ribs.
The extra fat in spare ribs makes them incredibly flavorful. But it also means they benefit greatly from the low and slow cooking method. The long oven time renders the fat slowly, basting the meat from within. The result is rich, succulent ribs with a beautiful smoky crust.
St. Louis Style Ribs
St. Louis style ribs are spare ribs that have been trimmed into a rectangular shape. They cook more evenly than untrimmed spare ribs because of their uniform thickness. They typically need about 2.5 to 3 hours at 250°F.
The trimming process removes the cartilage and sternum bone. This creates a flat surface that absorbs rub and smoke more evenly. Many pitmasters prefer St. Louis style ribs for their consistent shape and reliable cooking results.
Bone-In Beef Ribs
Bone-in beef ribs are a completely different animal from pork ribs. They are much larger and thicker. They require significantly more time in the oven. Plan for 3 to 4 hours at 250°F for beef ribs.
Beef ribs have a rich, beefy flavor that pairs beautifully with bold rubs. The bones add extra depth to the cooking process. They act as a natural heat sink, keeping the meat warm and moist throughout the long cook.
Step By Step Guide To Pre Cooking Ribs In The Oven
Now that you understand the why and the when, let us walk through the how. Here is a simple, foolproof method for pre cooking ribs in the oven before grilling.
Step 1: Prep The Ribs
Start by removing the membrane from the back of the ribs. Use a butter knife to loosen one corner, then grip it with a paper towel and peel it off. This step is essential. The membrane blocks smoke and seasoning from penetrating the meat. Without removing it, your ribs will taste flat and chewy.
Next, pat the ribs dry with paper towels. This helps the dry rub stick better. Apply a generous layer of your favorite rib rub all over the meat. Press it in gently with your hands. Let the rubbed ribs sit at room temperature for about 30 minutes before cooking.
Step 2: Wrap In Foil
Place the ribs meat-side down on a large sheet of heavy-duty aluminum foil. Wrap them tightly, sealing the edges to trap moisture. The foil creates a steamy environment that keeps the ribs juicy during the oven phase.
Some cooks prefer the butcher paper method instead. Butcher paper is more breathable than foil. It allows some moisture to escape, which can create a firmer bark. Both methods work well. Choose the one that fits your preference.
Step 3: Place In The Oven
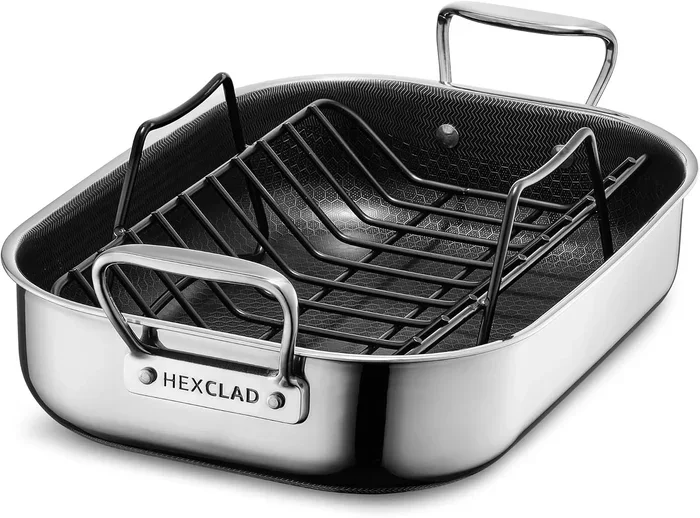
Preheat your oven to 250°F. Place the wrapped ribs on a baking sheet or in a deep roasting pan. Put them in the oven on the middle rack. The oven temperature should remain steady throughout the cook.
Set a timer for 2 hours for baby back ribs or 3 hours for spare ribs. Resist the urge to open the foil and check on them too often. Every time you open the foil, you release steam and heat. This slows down the cooking process and can dry out the meat.
Step 4: Check Internal Temperature
After the initial cooking time, carefully remove the ribs from the oven. Use a meat thermometer to check the internal temperature. The target temperature for pre cooked ribs is around 165°F to 170°F. At this point, the meat should pull back from the bones slightly.
If the ribs have not reached the target temperature yet, rewrap them and return them to the oven for another 30 to 60 minutes. Check again until they hit the right temperature.
Step 5: Unwrap And Finish On The Grill
Once the ribs reach the target internal temperature, it is time to move them to the grill. Unwrap the ribs carefully. Discard the foil or paper. You can now apply a thin layer of BBQ sauce if desired.
Place the ribs on a hot grill with indirect heat. Close the lid and let them cook for 15 to 20 minutes. This final step develops the smoky bark and caramelizes the sauce. Watch them closely to prevent burning.
Tips For Perfect Grilled Ribs After Oven Pre Cooking
The oven pre cooking phase does most of the heavy lifting. But the final grill finish is where the magic happens. Here are some tips to make sure your ribs come out perfect every time.
Use Indirect Heat On The Grill
Always use indirect heat for the final grilling stage. This means placing the ribs away from the direct flame or charcoal. Indirect heat gently finishes the ribs without burning the outside before the inside is warm.
For gas grills, turn off one side and place the ribs on the cooler side. For charcoal grills, push the coals to one side and set the ribs on the opposite side. This creates an even, gentle heat that finishes the ribs beautifully.
Apply Sauce At The Right Time
BBQ sauce contains sugar, which burns easily. Apply your sauce during the last 10 to 15 minutes of grilling. This gives the sauce time to caramelize without turning into a sticky, charred mess.
Brush on a thin layer of sauce. Let it cook for a few minutes. Then apply another layer. Two thin coats are better than one thick coat. This creates a glossy, flavorful finish without the risk of burning.
Let The Ribs Rest Before Serving
Once the ribs come off the grill, resist the urge to cut into them right away. Let them rest for 10 to 15 minutes. This allows the juices to redistribute throughout the meat. The result is juicier, more flavorful ribs with every bite.
Wrap the ribs loosely in foil during the resting phase. This keeps them warm without overcooking the meat. The resting period also gives the bark time to set, making it easier to slice and serve.
Experiment With Wood Chips For Extra Smoke
If you want to add a deeper smoky flavor to your ribs, try using wood chips during the final grill phase. Soak the chips in water for 30 minutes before using them. Place them directly on the charcoal or in a smoker box on a gas grill.
Hickory and applewood are popular choices for pork ribs. Hickory delivers a strong, classic smoke flavor. Applewood adds a sweeter, milder note. Cherry wood creates a beautiful dark bark with a subtle fruity flavor. Experiment with different woods to find your favorite combination.
Common Mistakes To Avoid When Pre Cooking Ribs
Even experienced cooks can make mistakes when pre cooking ribs in the oven. Here are the most common errors and how to avoid them.
Skipping The Membrane Removal
This is the number one mistake people make with ribs. The membrane on the back of the rack is tough and chewy. It blocks seasoning and smoke from reaching the meat. Always remove it before cooking. Your ribs will taste significantly better for the extra effort.
Cooking At Too High A Temperature
It can be tempting to crank up the oven to save time. But high heat dries out ribs and prevents the collagen from breaking down properly. Stick to 225°F to 275°F for the best results. Patience is the key to tender ribs.
Not Using A Meat Thermometer
Guessing when ribs are done leads to inconsistent results. A meat thermometer takes the guesswork out of the process. It tells you exactly when the ribs have reached the right internal temperature. Invest in a good instant-read thermometer and use it every time.
Over Saucing The Ribs
Too much sauce can mask the natural flavor of the meat. It can also burn easily on the grill. Use a light hand when applying sauce. A thin, even coat is all you need. Let the quality of the meat and the rub shine through.
Cutting Into The Ribs Too Early
It is tempting to peek at the ribs the moment they come off the grill. But cutting too early releases all the juices. The meat dries out quickly. Let the ribs rest for at least 10 minutes before slicing. This simple step makes a huge difference in texture and flavor.
Frequently Asked Questions
Can I pre cook ribs in the oven the night before grilling?
Yes, you can pre cook ribs in the oven the night before. Let them cool completely after pre cooking, then store them in the refrigerator overnight. Reheat them gently on the grill the next day, wrapping them in foil to retain moisture. This method works great for meal prep and entertaining guests.
Is it better to pre cook ribs in the oven or the microwave?
The oven is far superior to the microwave for pre cooking ribs. The microwave cooks unevenly and does not break down collagen properly. It also does not develop the smoky bark that oven pre cooking provides. Always use the oven for the best results.
How do I know when pre cooked ribs are ready for the grill?
Pre cooked ribs are ready for the grill when they reach an internal temperature of 165°F to 170°F. The meat should have pulled back from the bone tips by about a quarter inch. When you pick up a rack from one end, the other end should bend slightly and crack slightly. This is a reliable sign that the ribs are tender and ready for the final grill finish.
Can I freeze pre cooked ribs and grill them later?
Absolutely. Pre cooked ribs freeze very well. Let them cool completely, then wrap them tightly in plastic wrap and foil. Place them in a freezer-safe bag and freeze for up to 3 months. When ready to grill, thaw them in the refrigerator overnight and reheat on the grill with indirect heat.
Do I need to use charcoal or gas for the final grill phase?
You can use either charcoal or gas for the final grilling phase. Charcoal provides a more traditional smoky flavor. Gas grills offer more convenience and easier temperature control. Both work great for finishing pre cooked ribs. The key is to use indirect heat and monitor the temperature closely.
What is the 2-2-1 method and does it work for oven pre cooking?
The 2-2-1 method is a popular smoking technique where ribs smoke for 2 hours, wrap for 2 hours, then finish unwrapped for 1 hour. You can adapt this concept for oven pre cooking by wrapping the ribs after 2 hours and unwrapping them for the final 30 to 60 minutes. This helps build a great bark while keeping the meat moist.
Conclusion
Pre cooking ribs in the oven before grilling is a game changer. It takes the guesswork out of the process and delivers consistent, mouthwatering results every time. The key is to keep the oven temperature low, the cook time patient, and the technique simple.
Now you know exactly how long to pre cook ribs in oven before grilling. Baby back ribs need about 2 to 2.5 hours. Spare ribs need 2.5 to 3 hours. Beef ribs need 3 to 4 hours. All at a steady 250°F for the best outcome.
Remove the membrane, apply a great rub, wrap in foil, and let the oven do the work. Then finish on the grill with indirect heat and a light coat of sauce. Let the ribs rest before serving. Follow these steps and your ribs will be the star of any gathering.
The beauty of this method is that it works for cooks of all skill levels. Whether you are a beginner or a seasoned grill master, pre cooking ribs in the oven takes your results to the next level. So fire up that oven, grab a rack of ribs, and get ready to impress everyone at the table. Your perfect ribs are just a few hours away.