How Much Coffee To Put In Cold Brew For Perfect Taste
Knowing how much coffee to put in cold brew is the single most important step toward a perfect cup. The standard ratio is 1:4 for concentrate or 1:8 for ready-to-drink cold brew, but your ideal amount depends on your taste, the grind size, and the beans you choose. This guide walks you through every ratio, measurement method, and pro tip so you can brew smooth, bold cold brew at home with confidence.
Cold brew coffee has taken over kitchens and coffee shops alike. People love its smooth, low-acid taste and the convenience of making a big batch ahead of time. But one question keeps coming up again and again: how much coffee to put in cold brew to get the perfect cup?
The answer might surprise you. It is not just about throwing a handful of beans into a pitcher and hoping for the best. The right coffee-to-water ratio makes all the difference between a weak, watery sip and a rich, full-bodied concentrate that wakes you up just right. Whether you are a beginner or a seasoned home brewer, understanding the basics of cold brewing measurements will transform your results every single time.
In this guide, we break down everything you need to know about measuring coffee for cold brew. We cover ratios, grind sizes, common mistakes, and simple adjustments you can make to match your personal taste. By the end, you will feel confident brewing cold brew that tastes exactly the way you want it.
Key Takeaways
- The Golden Ratio: A 1:4 coffee-to-water ratio makes a concentrated cold brew, while 1:8 produces a ready-to-drink cup.
- Grind Size Matters: Always use coarse ground coffee for cold brew to avoid over-extraction and bitterness.
- Weight Over Volume: Measuring coffee by weight (grams) gives you a more consistent and accurate brew than using scoops.
- Steeping Time Affects Strength: 12 to 24 hours is the sweet spot, and longer steeping does not always mean stronger coffee.
- Adjust to Your Taste: Start with the standard ratio and tweak up or down based on your preferred brew strength and coffee taste.
- Storage Keeps It Fresh: Properly stored cold brew concentrate lasts up to two weeks in the refrigerator without losing flavor.
📑 Table of Contents
The Coffee-to-Water Ratio Explained
The coffee-to-water ratio is the foundation of any great cold brew. It tells you exactly how much ground coffee to use for a given amount of water. Without the right ratio, you risk ending up with a brew that is too weak or unpleasantly bitter.
What Is the Golden Ratio for Cold Brew?
The most widely recommended ratio for cold brew concentrate is 1:4. That means one part coarse ground coffee to four parts cold water. For example, one cup of coffee grounds to four cups of water. This produces a strong concentrate that you can dilute with water, milk, or ice to taste.
If you prefer a ready-to-drink iced coffee right out of the pitcher, a 1:8 ratio works well. One cup of coffee to eight cups of water gives you a lighter, smoother cup that does not need any dilution.
Here is a quick look at the most common ratios:
- 1:4 ratio — Cold brew concentrate. Rich and bold. Dilute before drinking.
- 1:6 ratio — Slightly lighter concentrate. Great for mixing with milk.
- 1:8 ratio — Ready-to-drink cold brew. Smooth and easy to enjoy straight.
These ratios give you a starting point. From there, you can adjust based on your personal preference for brew strength and coffee taste.
Why Ratio Matters So Much
The ratio controls the coffee extraction process. Too little coffee and the water pulls out only a fraction of the flavor, leaving you with a flat, disappointing cup. Too much coffee and you risk over-extraction, which brings out bitter and harsh notes that overpower the natural sweetness of the beans.
Getting the ratio right means you extract the pleasant compounds — the ones that give cold brew its signature smooth, chocolatey, and slightly sweet profile. This is why how much coffee to put in cold brew deserves your attention before anything else.
Choosing the Right Coffee Grounds
Not all coffee is created equal when it comes to cold brewing. The type of grounds you use directly affects the flavor, texture, and overall quality of your brew.
Coarse Grind Is Essential
Always reach for a coarse grind when making cold brew. Think of the texture of sea salt — that is what your grounds should look like. A coarse grind slows down the coffee extraction process, which is exactly what you want during the long steeping time.
If you use a fine grind, the water will extract too much too quickly. This leads to a muddy, bitter cup that is difficult to filter properly. The fine particles also slip through most filters, leaving you with a gritty sediment at the bottom of every glass.
Whole Beans vs. Pre-Ground
For the best results, buy whole coffee beans and grind them yourself right before brewing. Freshly ground coffee releases more aromatic oils and delivers a cleaner, more vibrant taste compared to pre-ground options that have been sitting on a shelf for weeks.
That said, pre-ground coffee works in a pinch. If you go this route, look for brands that specifically label their grind as “coarse” or “cold brew grind.” This small detail makes a big difference in your final cup.
Coffee Bean Selection
Medium to dark roast beans tend to work best for cold brew because they bring out chocolatey, nutty, and caramel notes that shine during the long steeping process. Light roasts can also work, but they often produce a more acidic and fruity cup that some people find less appealing in a cold brew format.
Experiment with different origins and roasts to find what suits your palate. Single-origin beans from Colombia, Ethiopia, or Brazil each bring unique flavor profiles that make your cold brew recipe feel truly special.
Step-by-Step: Measuring and Brewing Cold Brew
Now that you understand the ratio and the right grounds, let us walk through the actual process of measuring and brewing. This is where the theory meets practice, and getting the measurements right will set you up for success every time.
Step 1: Gather Your Tools
You do not need fancy equipment to make great cold brew. Here is what you will need:
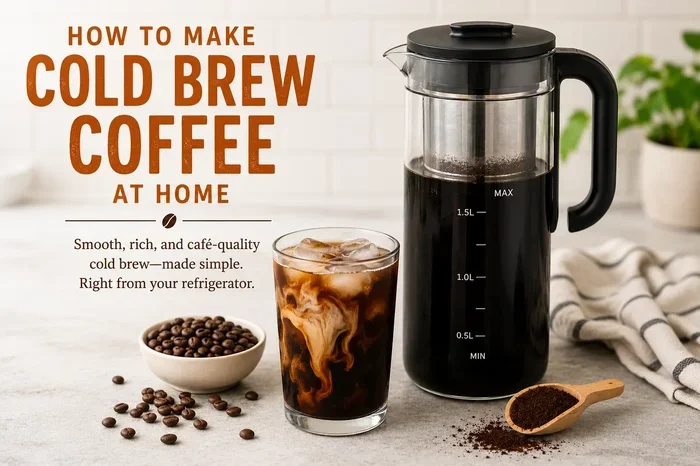
- A coffee pitcher or large glass jar with a lid
- A kitchen scale for weighing coffee by grams (highly recommended)
- Coarse ground coffee
- Cold, filtered water
- A coffee filter, fine mesh strainer, or cheesecloth for filtration
- A funnel (optional but helpful)
Step 2: Measure Your Coffee
Using a kitchen scale is the most accurate way to measure your coffee. For a standard batch using the 1:4 ratio, you would weigh out 200 grams of coarse ground coffee and add 800 grams of cold water.
If you do not have a scale, a standard coffee scoop holds about two tablespoons, which is roughly 10 grams of ground coffee. For the 1:4 ratio, use one scoop per cup of water. But honestly, a scale takes all the guesswork out and ensures consistent results batch after batch.
Remember, how much coffee to put in cold brew depends on the ratio you chose and the total volume of water you are using. Write down your measurements the first few times so you can replicate your perfect cup later.
Step 3: Combine and Steep
Add your measured coffee grounds to the pitcher. Pour in the cold water slowly, making sure all the grounds are fully saturated. Give it a gentle stir with a spoon to ensure even coffee extraction.
Cover the pitcher and place it in the refrigerator. The steeping time matters just as much as the ratio. For most batches, 12 to 24 hours is the ideal range.
Shorter steeping times (12 to 14 hours) produce a lighter, more nuanced cup. Longer steeping times (18 to 24 hours) yield a stronger, bolder concentrate. Beyond 24 hours, you risk over-extraction and a bitter taste that is hard to fix.
Step 4: Strain and Filter
Once the steeping time is up, it is time to separate the liquid from the grounds. Place a coffee filter inside a mesh strainer over a clean bowl or pitcher. Slowly pour the cold brew through the filter.
This process takes patience. Do not rush it. Let gravity do the work. If you are using cheesecloth, double or triple the layers to catch as many fine particles as possible.
The result should be a smooth, clear concentrate with no grit. Transfer it to a clean bottle or jar, seal it tight, and store it in the refrigerator.
Common Mistakes When Measuring Coffee for Cold Brew
Even experienced home brewers make mistakes. Knowing what to avoid saves you time, coffee grounds, and a lot of frustration.
Using the Wrong Grind Size
This is the number one mistake people make. A fine grind ruins cold brew. It creates a cloudy, bitter liquid that is nearly impossible to filter cleanly. Always stick with a coarse grind for the best results.
Eyeballing Measurements
Scooping coffee by eye might feel convenient, but it leads to inconsistent batches. One day your cold brew might taste perfect, and the next day it could be completely off. Using a scale or measuring spoons takes only a few extra seconds and guarantees reliable results every time.
Using Hot Water Instead of Cold
Cold brew is defined by its brewing method. Hot water creates a different extraction profile entirely, producing a more acidic and sharper taste. Always use cold, filtered water for true cold brew.
Skipping the Filtration Step
Some people skip proper filtration to save time. This is a mistake. Without a good coffee filter, you end up with grounds floating in your cup and a gritty texture that ruins the drinking experience. Take the extra few minutes to strain your brew properly.
Adjusting Strength and Flavor to Your Liking
The beauty of making cold brew at home is that you control everything. Once you master the basic ratio, you can tweak the process to create a cup that is uniquely yours.
Making It Stronger
If your cold brew tastes too weak, try one of these adjustments:
- Increase the amount of coffee grounds while keeping the water the same
- Extend the steeping time by a few hours
- Use a 1:3 ratio instead of 1:4 for a bolder concentrate
Just be careful not to overdo it. Adding too much coffee can lead to a bitter, harsh cup that masks the natural sweetness of the beans.
Making It Lighter
If your brew is too strong or intense, try these adjustments:
- Reduce the coffee grounds or increase the water
- Shorten the steeping time to 10 to 12 hours
- Use a 1:8 ratio for a ready-to-drink, lighter cup
- Dilute the concentrate with more water or milk when serving
The Role of Water Quality
Do not overlook the water you use. Filtered water produces a cleaner, crisper taste compared to tap water, which can contain chlorine and minerals that interfere with coffee extraction. Good water lets the true flavor of the beans shine through in every sip.
Think of it this way: the water is the main ingredient by volume, and its quality directly impacts the final taste. Using good filtered water is one of the simplest ways to improve your cold brew without changing anything else.
Storing Your Cold Brew for Maximum Freshness
Once you have brewed the perfect batch, proper storage keeps it tasting fresh for days.
Cold brew concentrate stored in a sealed container in the refrigerator stays fresh for up to two weeks. After that, the flavor starts to degrade and you may notice a stale or flat taste.
Always store your cold brew in an airtight glass jar or bottle. Avoid plastic containers for long-term storage, as they can absorb flavors over time and affect the taste of your brew.
When you are ready to serve, pour your desired amount into a glass filled with ice. Add water, milk, oat milk, or your favorite creamer to reach your preferred strength. A splash of milk transforms a bold concentrate into a creamy, refreshing drink perfect for any time of day.
If you enjoy pairing your cold brew with food, consider serving it alongside roasted almonds or a salmon dish for a brunch-style experience. The smooth, slightly sweet notes of cold brew complement savory and nutty flavors beautifully.
Key Takeaways
- The Golden Ratio: A 1:4 coffee-to-water ratio makes a concentrated cold brew, while 1:8 produces a ready-to-drink cup.
- Grind Size Matters: Always use coarse ground coffee for cold brew to avoid over-extraction and bitterness.
- Weight Over Volume: Measuring coffee by weight (grams) gives you a more consistent and accurate brew than using scoops.
- Steeping Time Affects Strength: 12 to 24 hours is the sweet spot, and longer steeping does not always mean stronger coffee.
- Adjust to Your Taste: Start with the standard ratio and tweak up or down based on your preferred brew strength and coffee taste.
- Storage Keeps It Fresh: Properly stored cold brew concentrate lasts up to two weeks in the refrigerator without losing flavor.
Frequently Asked Questions
How much coffee do I use for 1 cup of cold brew?
For a single cup of ready-to-drink cold brew using a 1:8 ratio, you need about 25 grams of coarse ground coffee and 200 grams of cold water. If you prefer a stronger concentrate using a 1:4 ratio, use 50 grams of coffee to 200 grams of water, then dilute to taste.
Can I use regular ground coffee for cold brew?
You can, but the results will not be as good. Regular pre-ground coffee is often too fine for cold brew, which leads to over-extraction, bitterness, and a gritty texture. If you must use regular grounds, look for a coarse option and strain your brew twice to remove excess sediment.
Does using more coffee make cold brew stronger?
Yes, but only up to a point. Increasing the coffee amount does produce a stronger brew, but going too far leads to over-extraction and bitterness. Stick to the recommended ratios and adjust gradually until you find your ideal brew strength.
How long should I steep cold brew for the best flavor?
12 to 24 hours is the recommended steeping range. Twelve hours gives you a lighter, smoother cup, while 18 to 24 hours produces a bolder, more concentrated flavor. Going beyond 24 hours risks pulling out bitter compounds that ruin the smooth taste cold brew is known for.
Is cold brew less acidic than hot coffee?
Yes, cold brew is generally about 60 to 70 percent less acidic than hot-brewed coffee. The long steeping process in cold water extracts fewer of the acidic compounds, resulting in a smoother, gentler cup that is easier on the stomach.
Can I reuse coffee grounds for a second batch of cold brew?
You can, but the second batch will be noticeably weaker and less flavorful. The first steep extracts the majority of the desirable compounds. If you do reuse grounds, use the same ratio but expect a much milder cup with less complexity and depth.
=== CONCLUSION ===
Mastering how much coffee to put in cold brew is the key to unlocking a smooth, rich, and perfectly balanced cup every single time. The 1:4 ratio for concentrate and the 1:8 ratio for ready-to-drink cold brew give you a reliable starting point, but the real magic happens when you start experimenting and adjusting to your own taste.
Use coarse ground coffee, measure by weight when possible, steep for 12 to 24 hours, and always filter your brew thoroughly. Avoid the common mistakes that ruin batches, and store your finished cold brew properly to keep it fresh for up to two weeks.
Cold brew is one of the most rewarding things you can make at home. It requires minimal equipment, a little patience, and the right measurements. Once you nail the ratio and find your preferred strength, you will never go back to store-bought cold brew again. Start with the basics, trust the process, and enjoy the journey of crafting your perfect cup.