How To Install A Commercial Coffee Machine Like A Pro
Installing a commercial coffee machine doesn’t have to be intimidating. This guide walks you through every step, from choosing the right machine and preparing your space to connecting water lines and powering up safely. You’ll learn practical tips that save time, money, and headaches.
Installing a commercial coffee machine is one of the most exciting steps in setting up a coffee shop, office break room, or café. But it’s also one of the most overlooked. Many people buy a great machine and then struggle with the setup. That’s where this guide comes in.
How To Install A Commercial Coffee Machine Like A Pro is more than just plugging in a big box. It involves planning, the right tools, and a clear understanding of your space. Whether you’re a first-time installer or refreshing an old setup, you’ll find everything you need right here.
Let’s be honest. The thought of installing a heavy, complex coffee machine can feel overwhelming. There are water lines to connect, electrical panels to understand, and dimensions to measure. But here’s the good news. When you break it down into simple steps, it becomes manageable. This guide gives you a clear path from unboxing to your first perfect cup.
We’ll cover every detail you need. From choosing the right spot in your kitchen to troubleshooting common issues after setup. You’ll also learn about maintenance tips that keep your machine running smoothly. By the end, you’ll feel confident and ready to tackle the installation yourself.
Key Takeaways
- Pick the right machine: Match your coffee machine to your business volume and space before you start.
- Prepare your space first: Proper electrical and plumbing setup prevents costly delays and safety risks.
- Follow each step carefully: Positioning, water connection, power hookup, and testing all matter for long-term performance.
- Avoid common mistakes: Skipping water filtration or ignoring ventilation are top errors that cause problems later.
- Maintain after installation: Regular cleaning and descaling keep your machine running smoothly for years.
📑 Table of Contents
Understanding Your Commercial Coffee Machine
Before you touch a single tool, you need to understand what you’re working with. Not all commercial coffee machines are the same. The type you choose affects everything from installation to daily use.
Types of Commercial Coffee Machines
There are several main types of commercial coffee machines on the market. Each one has different installation needs.
- Bean-to-cup machines: These grind beans fresh for every cup. They need a water line and a power outlet but are relatively simple to set up.
- Espresso machines: These require more pressure and precision. They often need a dedicated water line and a drain for wastewater.
- Brew-style machines: These work like large drip coffee makers. They’re simpler to install but still need proper water and power connections.
- Combination machines: These do it all — espresso, drip, and even cold brew. They need more space and utility connections.
Knowing which type you have helps you plan the installation correctly. Check your machine’s manual for specific requirements. If you’re still shopping, think about how much coffee you serve daily and how much space you have available.
What You’ll Need Before Starting
Gather everything before you begin. This saves trips back and forth and keeps the process smooth.
- Your commercial coffee machine
- A tape measure
- A level
- Adjustable wrench and pliers
- A power drill (if mounting is needed)
- Water filtration system (if required)
- Screwdriver set
- Electrical tester
- Your machine’s user manual
Having these ready means you won’t get stuck halfway through. It also keeps you safe because you won’t need to improvise with the wrong tools.
Preparing the Installation Space
The space where your machine lives matters a lot. A bad setup leads to poor performance, frequent repairs, and even safety hazards. Take time to prepare the area properly.
Electrical Requirements
Commercial coffee machines need serious power. Most require a dedicated 20-amp or 30-amp circuit. You cannot share that circuit with other equipment.
Before you install, check your electrical panel. Make sure there’s an open slot for a dedicated line. If there isn’t one, hire a licensed electrician to install it. This is not something to skip or DIY unless you’re qualified.
Also, check the voltage requirements on your machine’s label. Some machines run on 110V while others need 220V. Using the wrong voltage can damage the machine or create a fire hazard.
Pro tip: Always use a grounded outlet with the correct amperage. If your outlet looks old or worn, replace it before connecting the machine.
Plumbing and Water Supply
Most commercial coffee machines connect directly to a water line. This gives you a steady supply without constantly refilling a tank. Here’s what to think about.
- Water pressure: Most machines need between 40 and 60 PSI. Too low and the machine won’t function properly. Too high and you risk damaging internal parts.
- Water line placement: Plan for a cold water line near the back of the machine. Use shut-off valves so you can turn off the water easily for maintenance.
- Drain connection: Many machines produce wastewater. You’ll need a floor drain or a drain line connected to the machine’s waste outlet.
If you don’t have a water line in the right spot, you may need to hire a plumber. It’s worth the investment. A proper water connection makes daily operation much easier and keeps your machine running longer.
Ventilation and Space
Coffee machines generate heat. They need airflow around them to stay cool. Leave at least 4 to 6 inches of space on all sides. Don’t push the machine flush against a wall if it has vents on the back or sides.
The countertop or floor surface should also be level and sturdy. A wobbly machine can cause spills and uneven brewing. Use a level during setup and adjust the feet if needed.
Step-by-Step Installation Process
Now it’s time to get your hands dirty. Follow these steps in order for a smooth, safe installation.
Step 1: Positioning the Machine
Start by placing the machine in its final spot. Have a partner help you — these machines are heavy. Slide it into position and use a level to check that it sits evenly.
If the floor is uneven, adjust the machine’s leveling feet. Most commercial machines have adjustable legs at the bottom. Turn them clockwise or counterclockwise until the bubble on your level sits centered.
Once positioned, don’t move the machine again until installation is complete. Moving it mid-process can disconnect water lines or shift electrical connections.
Step 2: Connecting the Water Supply
Locate the water inlet on the back of the machine. Attach the water line using the connector that came with the machine. Use an adjustable wrench to tighten the fitting, but don’t over-tighten — you could crack the connector.
Next, turn on the water supply and check for leaks. Run your hand along every connection. If you feel moisture, turn off the water and tighten the fitting further.
After the connection is secure, run water through the machine for a few minutes. This flushes out any debris from the pipes. Discard the first few batches of water — they may contain sediment or taste off.
Step 3: Electrical Hookup
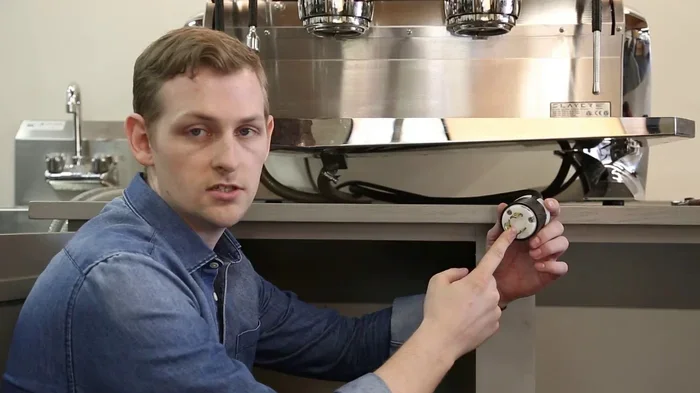
With the water connected, it’s time for the electrical hookup. Plug the machine into the dedicated outlet you prepared earlier. If the machine has a hardwire connection, follow the manual’s wiring diagram exactly.
Use an electrical tester to confirm the outlet is delivering the correct voltage. Turn the machine on and listen for any unusual sounds. A healthy machine should hum steadily without clicking, buzzing, or sparking.
If anything seems off, turn the machine off immediately and check your connections. When in doubt, consult a professional electrician.
Step 4: Testing the Machine
Run a full test cycle before serving anyone. Most machines have a cleaning or rinse cycle built in. Run this first to flush the internal system.
Then, brew a test cup. Check the temperature, flow rate, and taste. The coffee should be hot and consistent. If it tastes off, run another cycle or two. The first few brews often have residual oils or manufacturing dust.
Check every function — steam wand, hot water dispenser, drip tray — to make sure everything works. This is also a great time to adjust settings like grind size, brew strength, and temperature to your preferences.
Also, if you’re dealing with any other kitchen equipment nearby, you might want to check that everything is set up correctly too. For example, if you have a new oven in the same space, you may want to visit what to do when you get a new oven for general setup tips that apply to all large kitchen appliances.
Common Installation Mistakes to Avoid
Even with the best instructions, mistakes happen. Here are the most common ones and how to avoid them.
- Skipping the water filter: Many machines come with or require a water filter. Skip this and you’ll deal with scale buildup and poor-tasting coffee. Clean water is the foundation of great coffee.
- Ignoring electrical requirements: Using an existing outlet that’s already powering other appliances is a recipe for tripped breakers or electrical damage. Always use a dedicated circuit.
- Underestimating space needs: Don’t cram the machine into a tight corner. It needs ventilation and easy access for maintenance and cleaning.
- Forgetting the drain: Without a proper drain, wastewater pools under or around the machine. This creates a mess and can damage your floor.
- Not reading the manual: Every machine is different. The manual contains specific instructions that apply to your model. Skipping it can void your warranty.
One more thing to keep in mind: if you’re setting up a full commercial kitchen, your coffee machine is part of a bigger system. Just like you’d care for a commercial convection oven with regular cleaning and maintenance, your coffee machine needs the same attention. Treat all your kitchen equipment as part of one ecosystem and they’ll all perform better.
Maintaining Your Installed Coffee Machine
Installation is just the beginning. Proper maintenance keeps your machine running at its best for years. Think of it as an investment that pays off every single day.
Clean the group head and portafilter after every shift. Wipe down the steam wand and drip tray daily. These small habits prevent buildup and keep your coffee tasting fresh.
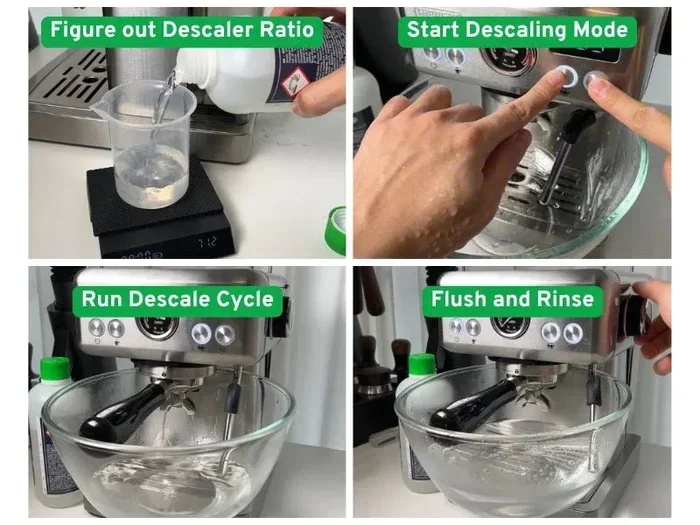
Descale the machine every 1 to 3 months depending on how hard your water is. Use a descaling solution recommended by the manufacturer. Run it through a full cycle, then flush with clean water.
Replace water filters on schedule. Most filters last 3 to 6 months. Set a reminder on your calendar so you don’t forget. A clogged filter reduces water flow and affects coffee quality.
Schedule professional maintenance at least once a year. A technician can spot problems early, deep clean internal parts, and keep your machine running efficiently. This is especially important for high-volume machines that see daily heavy use.
If you notice anything off — strange noises, inconsistent brewing, or leaking — address it right away. Ignoring small problems leads to bigger, more expensive repairs. Being proactive saves you time and money in the long run.
Similarly, maintaining your kitchen equipment overall creates a better work environment. If you’re also managing other appliances like a microwave or oven, understanding how to care for them helps. For instance, knowing how to properly handle a microwave oven when it’s no longer needed is just part of the broader kitchen management picture.
When to Call a Professional
Not every installation task is DIY-friendly. Some situations call for a professional installer or technician. Here’s when you should make that call.
- You need a new electrical circuit installed
- You need a new water line run to the machine location
- The machine requires a specific voltage or amperage you’re not comfortable handling
- You’ve installed the machine and it’s not working correctly despite following all steps
- The machine is very large or heavy and requires special handling
Hiring a professional for the complex parts doesn’t mean you failed. It means you’re being smart. A proper installation protects your investment and keeps everyone safe.
Think of it this way. Just as you’d trust a technician to handle oven temperature issues when they get tricky, it’s okay to call in an expert for the parts of coffee machine installation that feel beyond your comfort zone. The goal is a safe, working machine — not proving you can do everything alone.
Final Thoughts
Installing a commercial coffee machine is a rewarding project. When you do it right, you get a reliable machine that serves great coffee every single day. The key is preparation, patience, and attention to detail.
Start by understanding your machine and your space. Gather your tools. Follow each step carefully. Avoid the common mistakes that trip up most first-time installers. And don’t be afraid to call a professional when you need one.
Once your machine is up and running, keep it clean and well-maintained. A well-cared-for coffee machine lasts for years and delivers consistent, delicious results. You’ll be glad you put in the effort.
Now that you know how to install a commercial coffee machine like a pro, you’re ready to take on the project. Grab your tools, clear the space, and get started. Your first perfect cup of professionally brewed coffee is just a few steps away.
And as you build out your commercial kitchen or coffee setup, remember that every piece of equipment matters. If you ever need guidance on using other appliances in your space, resources like using an oven to reheat food can help you maximize efficiency across your entire kitchen.
Frequently Asked Questions
How long does it take to install a commercial coffee machine?
Most installations take between 2 and 4 hours depending on the machine type and your space setup. If you need new electrical wiring or plumbing, it could take longer. Planning ahead and having everything ready helps keep the process on schedule.
Do I need a professional to install a commercial coffee machine?
Not always. Simple machines with plug-and-play connections can often be installed by one or two people. However, if you need new electrical circuits or water lines, it’s best to hire a licensed professional for safety and code compliance.
What kind of water filter do I need for a commercial coffee machine?
This depends on your machine model and local water quality. Most commercial machines work with carbon or sediment filters. Check your machine’s manual for the recommended filter type and replacement schedule to ensure the best coffee quality.
Can I install a commercial coffee machine anywhere in my building?
Not anywhere. You need access to both a water line and a dedicated electrical outlet. The space must also have proper ventilation and a level surface. Measure your available space carefully before purchasing the machine.
How often should I descale my commercial coffee machine after installation?
Descaling every 1 to 3 months is recommended for most commercial machines. If you have hard water, you may need to descale more frequently. Regular descaling prevents mineral buildup and keeps your coffee tasting great.
What should I do if my coffee machine leaks after installation?
Turn off the water supply and power immediately. Check all connections for tightness and look for damaged fittings. If the leak persists, consult the machine’s manual or contact the manufacturer’s support team. Never operate a leaking machine.
=== SEO TITLE ===
How To Install A Commercial Coffee Machine Like A Pro
=== META TITLE ===
How To Install A Commercial Coffee Machine Like A Pro
=== URL SLUG ===
how-to-install-a-commercial-coffee-machine