How To Make Coffee From Coffee Beans In 5 Easy Steps
Making coffee from coffee beans at home is simpler than you think. With just five straightforward steps, you can transform raw beans into a rich, aromatic cup of fresh coffee. This guide walks you through everything from selecting the right beans to mastering your brew. You will learn practical tips that elevate your daily routine. By the end, you will brew coffee like a pro with confidence.
Key Takeaways
- Start with quality whole beans: Fresh coffee beans make a massive difference in flavor and aroma.
- Grind size matters: Matching your grind to your brewing method ensures the best extraction.
- Water temperature is critical: The right heat brings out the full flavor profile of your beans.
- Ratio is everything: Getting the coffee-to-water ratio right prevents weak or bitter coffee.
- Clean your equipment regularly: Proper maintenance keeps your coffee tasting fresh every time.
- Experiment and enjoy: Every bean variety offers a unique experience worth exploring.
📑 Table of Contents
Understanding Coffee Beans: The Foundation of Great Coffee
Every great cup of coffee starts with the beans. If you have ever wondered why coffee tastes different from shop to shop, the answer usually begins at the bean level. The type, roast, and freshness of your beans shape everything that follows. Understanding this foundation is the first real step toward better coffee at home.
There are two main species you will encounter: Arabica and Robusta. Arabica beans are known for their smooth, complex flavor profiles. They tend to be slightly sweeter with notes of fruit and sugar. Robusta beans, on the other hand, pack more caffeine and deliver a stronger, more bitter taste. Most specialty coffee lovers prefer Arabica for its nuanced character.
The roast level also plays a huge role. Light roasts preserve the original flavors of the bean. Medium roasts offer a balanced sweetness and acidity. Dark roasts bring out bold, smoky, and sometimes chocolatey notes. If you have ever tried roasting whole almonds in the oven, you know how heat transforms raw ingredients into something entirely new. Coffee roasting works on a similar principle, just with much more precision.
Freshness cannot be overlooked. Coffee beans start losing their aromatic oils within weeks of being roasted. For the best results, buy whole beans and grind them just before brewing. This simple habit alone will dramatically improve your cup. Look for roast dates on the bag rather than expiration dates. The closer to roast date, the better your coffee will taste.
Why Bean Quality Matters So Much
Think of coffee beans like ingredients in a recipe. Using stale or low-quality beans will never produce a great result no matter how skilled you are. High-quality beans come from specific regions with ideal growing conditions. Factors like altitude, soil, and climate all contribute to the final flavor. When you invest in good beans, you invest in a better coffee experience every single morning.
Gathering the Right Equipment for Your Brew
You do not need a fancy setup to make excellent coffee. However, having the right tools does make the process smoother and more consistent. The good news is that most essential equipment is affordable and easy to find. Let us walk through what you actually need.
Essential Tools You Need
Here is a simple list of the basics required for making coffee from coffee beans:
- A burr grinder: This is the most important tool. Burr grinders produce a consistent grind size, which leads to even extraction. Blade grinders chop beans unevenly and create a mix of fine and coarse particles.
- A kitchen scale: Measuring by weight ensures consistency. Volume measurements like scoops can be inaccurate.
- A kettle with temperature control: Being able to set the exact water temperature gives you precise control over your brew.
- A brewing device: Whether it is a pour over dripper, French press, or drip machine, choose one that suits your taste.
- Fresh, filtered water: Water makes up over 98 percent of your coffee. Its quality matters more than most people realize.
Optional Accessories That Elevate Your Experience
Once you have the essentials, you can explore accessories that add convenience. A vacuum storage container keeps beans fresh longer by removing air. A grinder cleaner helps maintain your equipment over time. Keeping your kitchen gear in good shape matters just as much as when you clean your Cosori air fryer toaster oven after a heavy cooking session. Regular maintenance extends the life of your tools and keeps your coffee tasting its best.
You might also enjoy a milk frother if you like lattes or cappuccinos. A timer helps you track brew times precisely. These extras are not necessary, but they do enhance the overall experience. Start with the basics and build from there as your coffee journey develops.
How To Make Coffee From Coffee Beans In 5 Easy Steps
Now we get to the heart of the matter. These five steps will guide you from raw beans to a beautiful cup of coffee. Follow them in order, and you will notice a huge improvement in taste and aroma. Each step builds on the one before it, so do not skip ahead.
Step 1: Measure the Right Amount of Beans
Start by deciding how much coffee you want to make. A standard cup is about six ounces. For one cup, use roughly 18 grams of whole beans. For a full pot, scale up accordingly. A kitchen scale makes this process quick and accurate every time.
The coffee-to-water ratio is generally 1:16. That means one part coffee to sixteen parts water. You can adjust this based on your personal preference. If you like stronger coffee, try a 1:15 ratio. For a lighter cup, go with 1:17. Writing down your ratios helps you replicate your perfect cup later.
Step 2: Grind Your Beans to the Perfect Consistency
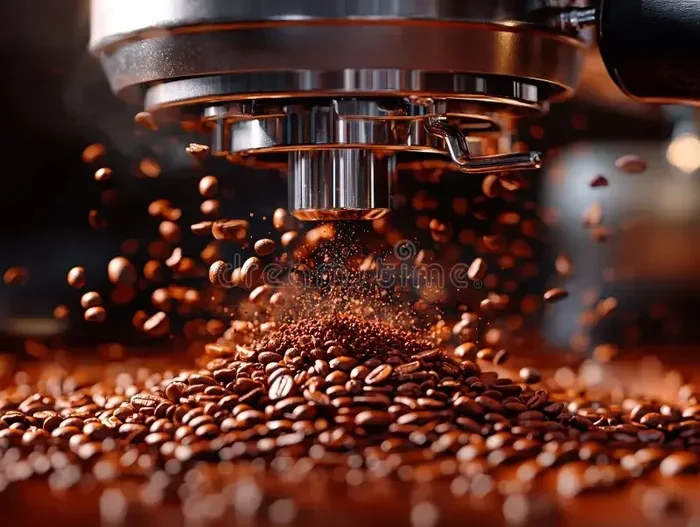
Grinding is where the magic really happens. When you break open whole beans, you release the aromatic oils trapped inside. These oils are responsible for the rich coffee aroma that fills your kitchen. Grinding just before brewing preserves these oils and maximizes flavor.
The grind size you choose depends on your brewing method. Here is a quick guide:
- Extra coarse: Best for cold brew. Looks like rough sea salt.
- Coarse: Ideal for French press. Similar to chunky sea salt.
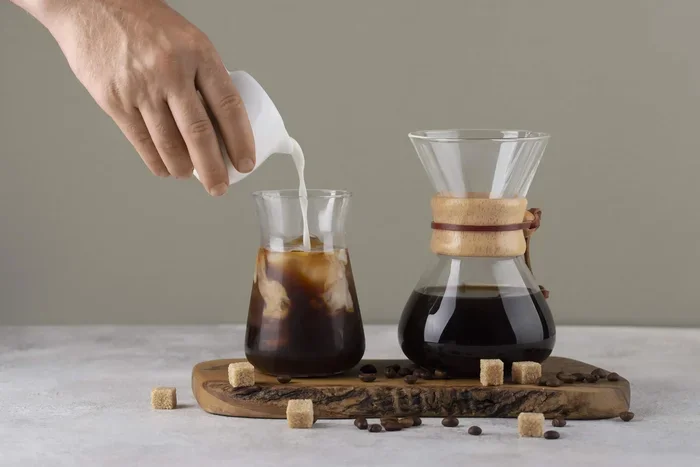
- Medium-coarse: Works well for Chemex and similar pour-over devices.
- Medium: Perfect for drip coffee makers and flat-bottom filters.
- Medium-fine: Great for pour-over cones like the Hario V60.
- Fine: Required for espresso machines. Resembles table salt.
If your grind is too fine, your coffee may turn out bitter and over-extracted. Too coarse, and it will taste weak and sour. Finding the sweet spot takes a bit of trial and error. But once you dial it in, the results are worth the effort. Think of it like adjusting oven temperature for different recipes. Getting the setting right changes everything, just as you would need to fix oven temperature for consistent baking results.
Step 3: Prepare Your Water Properly
Water might seem boring compared to beans, but it carries the flavor. Use filtered water for the cleanest taste. Avoid distilled water because it lacks the minerals that help extract flavor from the grounds. The ideal water temperature for coffee brewing falls between 195 and 205 degrees Fahrenheit.
If you do not have a temperature-controlled kettle, simply bring water to a boil and let it rest for 30 to 45 seconds. This cooling period brings it into the sweet spot. Water that is too hot will scorch the grounds and create bitterness. Water that is too cool will under-extract and leave your coffee tasting flat and sour.
The drying process used for herbs and ingredients shares some similarities with coffee bean processing. Just as you carefully dry lemon balm in the oven at low heat to preserve its delicate oils, coffee producers carefully control drying conditions to protect the beans’ natural flavors. Both processes require patience and attention to detail.
Step 4: Brew Your Coffee with Care
This is the step where everything comes together. Place your ground coffee into your brewing device and start the process. If you are using a pour-over method, pour the water in slow, circular motions. Start with a small amount and let the grounds bloom for about 30 seconds. This blooming phase releases carbon dioxide and prepares the beans for full extraction.
Continue pouring the remaining water steadily. The total brew time should be around three to four minutes for most methods. For a French press, let the coffee steep for four minutes before pressing the plunger down slowly and evenly. For espresso, the extraction should take about 25 to 30 seconds for a double shot.
Pay attention to the sound and smell during brewing. A rich aroma filling your kitchen is a great sign. The coffee grounds should be actively interacting with the water throughout the process. If you hear gurgling or see the water draining too fast, your grind may be too coarse. Adjust and try again next time.
Step 5: Serve and Savor the Results
Once brewing is complete, pour your coffee into a warm mug. Pre-warming your mug prevents the coffee from cooling too quickly. Take a moment to appreciate the aroma before your first sip. The smell is the first part of the coffee experience and sets the stage for the flavor.
Drink your coffee soon after brewing for the best taste. Coffee that sits on heat for too long develops a burnt, bitter flavor. If you are not drinking it right away, transfer it to a thermal carafe. Adding milk, cream, or sweetener is entirely up to you. But try sipping it black first to truly appreciate the flavor profile of the beans you chose.
The beauty of making coffee from scratch is that every cup is unique. The same beans can taste slightly different depending on the grind, water, and brew time. This is what makes the process so rewarding. You are not just making a beverage. You are crafting an experience tailored to your personal taste.
Comparing Popular Brewing Methods
Different brewing methods highlight different qualities in your coffee beans. Here is a comparison of the most popular options:
| Method | Brew Time | Grind Size | Flavor Profile |
|---|---|---|---|
| Pour Over | 3-4 minutes | Medium-fine | Clean, bright, and nuanced |
| French Press | 4 minutes | Coarse | Full-bodied and rich |
| Drip Machine | 5-7 minutes | Medium | Smooth and balanced |
| AeroPress | 1-2 minutes | Fine to medium | Clean yet bold |
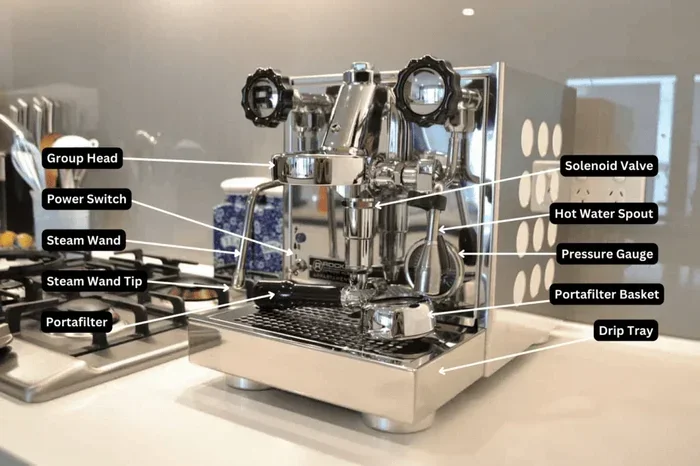
| Espresso Machine | 25-30 seconds | Fine | Intense and concentrated |
| Cold Brew | 12-24 hours | Extra coarse | Smooth and low-acid |
Each method brings something different to the table. Pour-over enthusiasts love the clarity and detail in each cup. French press fans enjoy the heavy body and natural oils that stay in the brew. If you are just starting out, a simple drip machine or AeroPress is the easiest to master. As you grow more confident, you can explore pour-over and espresso techniques. The journey of discovering your preferred method is one of the most enjoyable parts of making coffee at home.
Common Mistakes That Ruin Your Coffee
Even experienced home brewers make mistakes from time to time. Knowing what to avoid saves you from disappointing cups. Here are the most common errors people make when brewing coffee from beans:
- Using pre-ground coffee: Ground coffee loses freshness fast. The oils that create flavor and aroma evaporate within minutes of grinding. Always grind right before brewing for the best results.
- Ignoring water quality: Tap water contains chlorine and minerals that can alter the taste. Filtered water produces a cleaner, more accurate representation of your beans flavor.
- Using the wrong grind size: This single mistake can ruin an otherwise perfect brew. Match your grind to your method carefully.
- Skipping the bloom: When you skip the blooming phase, you miss out on even extraction. The gases trapped in fresh grounds need to escape before full brewing begins.
- Using boiling water: Water at a full boil is too hot and will scorch the grounds. Let it cool slightly before pouring.
- Not cleaning your equipment: Old oils and residue build up in grinders and brewers over time. This stale residue taints the flavor of fresh coffee. Just like maintaining any kitchen tool, regular cleaning keeps everything working properly.
Avoiding these mistakes will immediately improve your coffee. Most of them are easy to fix once you know what to look for. Start with one change at a time and build from there.
Expert Tips for the Best Cup Every Time
Here are some pro-level tips that separate a good cup from a great one:
- Store beans properly: Keep whole beans in an airtight container at room temperature. Avoid the freezer because moisture and odors can damage the beans. A cool, dark pantry works perfectly.
- Buy in small quantities: Purchase only what you will use within two to three weeks. This ensures you are always brewing with fresh coffee beans.
- Experiment with ratios: Do not be afraid to adjust the coffee-to-water ratio. Your personal preference is the ultimate guide. Some days you might want a stronger cup, and other days a lighter one.
- Keep a coffee journal: Write down what beans you used, the grind size, water temperature, and brew time. This helps you replicate your favorite cups and troubleshoot any issues.
- Clean your grinder regularly: Coffee oils build up inside the grinder and can go rancid over time. A quick cleaning once a week keeps the flavor pure.
- Try different bean origins: Ethiopian beans offer fruity and floral notes. Colombian beans tend to be nutty and caramel-like. Kenyan beans are bright and wine-like. Exploring different origins is like a never-ending flavor adventure.
The more you practice, the more your palate develops. You will start noticing subtle differences in aroma and flavor that you never picked up on before. This is what makes brewing coffee from whole beans such a rewarding hobby. Every cup teaches you something new.
Conclusion
Making coffee from coffee beans at home does not have to be complicated. With quality beans, the right equipment, and these five simple steps, you can enjoy café-quality coffee every morning. The process is meditative, rewarding, and endlessly customizable. Each batch gives you a chance to refine your technique and discover new flavors.
Start with the basics and build your confidence over time. Do not worry about being perfect from day one. Even the most skilled coffee lovers started somewhere. The key is to enjoy the process and savor the results. Your perfect cup is waiting for you, one bean at a time.
Frequently Asked Questions
Can I use any type of coffee beans for making coffee at home?
Yes, you can use any coffee beans you find. However, freshly roasted whole beans produce the best flavor. Look for beans with a roast date printed on the bag. Arabica beans are generally smoother and more complex, while Robusta beans are stronger and more bitter. Choose based on your personal taste preferences.
How long do coffee beans stay fresh after opening the bag?
Coffee beans stay fresh for about two to four weeks after opening the bag when stored properly. Keep them in an airtight container at room temperature away from direct sunlight. Avoid storing beans in the refrigerator or freezer because moisture and odors can degrade the quality quickly.
Do I really need a burr grinder, or can I use a blade grinder?
A burr grinder is strongly recommended for making coffee from beans. It produces a uniform grind size, which leads to even extraction and better flavor. Blade grinders chop beans inconsistently, creating a mix of fine and coarse particles. This unevenness results in a less balanced cup of coffee.
What is the best water temperature for brewing coffee?
The ideal water temperature for brewing coffee is between 195 and 205 degrees Fahrenheit. Water that is too hot will over-extract the grounds and create bitterness. Water that is too cool will under-extract and produce a weak, sour cup. If you do not have a temperature-controlled kettle, boil the water and let it sit for 30 to 45 seconds before using.
Can I reuse coffee grounds for a second brew?
You can reuse coffee grounds for a second brew, but the flavor will be significantly weaker. The first extraction pulls out the most desirable compounds, leaving very little flavor for a second round. It is better to use fresh grounds for each brew to get the full flavor profile and aroma from your beans.
How do I know if my coffee is over-extracted or under-extracted?
Over-extracted coffee tastes bitter, harsh, and hollow. Under-extracted coffee tastes sour, weak, and thin. If your coffee is bitter, try using a coarser grind or lowering the water temperature. If it tastes sour, go for a finer grind or hotter water. Adjusting these variables helps you find the sweet spot for the perfect cup.