Blender For Coffee Beans Why It Works and How to Use It
Using a blender for coffee beans is a simple, affordable way to grind fresh coffee at home. A standard blender can handle whole beans and produce a consistent grind for drip coffee, French press, and cold brew. You just need the right technique, the correct grind size, and a few key tips to get barista-quality results without a dedicated coffee grinder.
There is something deeply satisfying about brewing a cup of coffee made from freshly ground beans. The aroma fills your kitchen. The flavor is richer. And the whole process starts with one simple step: grinding your beans. Many people assume you need an expensive coffee grinder to do this. But here is the truth. A blender for coffee beans works surprisingly well. You probably already own one sitting on your countertop.
Whether you are a casual coffee drinker or someone who takes their morning brew seriously, this guide will show you exactly how to use a blender to grind coffee beans. You will learn the best techniques, the common mistakes to avoid, and how to get different grind sizes for every brewing method. Let us dive in.
Key Takeaways
- A blender works well for coffee beans: Most standard blenders can grind beans effectively with the right method.
- Grind size matters: Adjust blending time and technique to get coarse, medium, or fine grinds for different brewing methods.
- Pulse mode is your best friend: It prevents overheating and gives you more control over the texture.
- Fresh beans taste better: Grinding just before brewing releases more flavor and aroma.
- Clean your blender after use: Coffee oils can build up and affect the taste of future blends.
- Watch for common mistakes: Overfilling, over-blending, and using a cheap blade blender can hurt your results.
📑 Table of Contents
- Why a Blender for Coffee Beans Actually Works
- How to Use a Blender for Coffee Beans: Step by Step
- Grind Sizes for Different Brewing Methods
- Common Mistakes When Grinding Coffee Beans in a Blender
- Tips for the Best Blender-Ground Coffee
- Can You Roast Coffee Beans in the Oven Before Blending?
- Final Thoughts
Why a Blender for Coffee Beans Actually Works
You might be wondering whether a regular kitchen blender can really handle coffee beans. The short answer is yes. Most blenders come with powerful motors and sharp blades designed to crush hard ingredients. Coffee beans, while small, are dense and brittle. A blender breaks them apart quickly and efficiently.
The key is understanding how your blender works. The blades spin at high speed and create friction. This friction grinds the beans into smaller pieces. The result is freshly ground coffee that tastes far better than pre-ground options sitting on a store shelf.
Blade Blender vs. Burr Grinder
It is fair to compare a blade blender with a burr grinder. A burr grinder crushes beans between two surfaces, giving you a more even grind size. A blender uses spinning blades that chop beans unevenly. But here is the good news. For most home brewing methods, slight variations in grind size do not ruin your cup. A blender for coffee beans produces perfectly usable grounds for drip coffee, pour-over, and French press.
If you want the most consistent grind possible, a burr grinder is the better tool. But for everyday coffee at home, a blender gets the job done just fine. Many coffee lovers use both tools depending on their needs.
The Science Behind Grinding Coffee Beans
When you grind coffee beans, you increase the surface area exposed to water. This is what allows the flavors and oils to extract during brewing. The finer you grind, the more surface area you create. That means faster extraction and stronger flavor. Coarser grinds extract more slowly and produce a milder cup.
This is why grind size matters so much. Different brewing methods need different textures. A blender for coffee beans lets you control that texture by adjusting how long and how fast you blend. We will cover the exact techniques in the next section.
How to Use a Blender for Coffee Beans: Step by Step
Grinding coffee beans in a blender is straightforward. But doing it correctly makes a huge difference in the final taste. Follow these steps for the best results every time.
Step 1: Choose the Right Beans
Start with fresh, whole coffee beans. Look for beans that roast within the last two weeks. You can buy from local roasters or specialty shops. Whole bean coffee stays fresh longer than pre-ground. Store your beans in an airtight container away from light and heat.
Before grinding, decide what kind of coffee you want. Light roasts tend to be more brittle and grind easily. Dark roasts are oilier and can clump slightly. Both work well in a blender.
Step 2: Measure Your Beans
Do not overfill the blender. A good rule of thumb is to use no more than one-quarter cup of beans at a time for a standard home blender. This gives the blades room to move and ensures an even grind. If you need more coffee, grind in multiple batches.
For a single cup of coffee, use about two tablespoons of whole beans. Adjust based on your taste preferences and the number of cups you want to make.
Step 3: Set the Blender to Pulse Mode
This is the most important step. Never run the blender on a continuous setting. Use the pulse function instead. Pulse the blender in short bursts of three to five seconds. Then pause. Shake the container gently to redistribute the beans. Pulse again.
Repeat this process until you reach your desired grind size. Pulsing prevents the motor from overheating and gives you much better control. Continuous blending creates uneven grounds and can generate too much heat, which burns the coffee oils and ruins the flavor.
Step 4: Check the Grind Size
After a few pulses, stop and check the texture. Look through the blender contents. Are the pieces uniform? Do they match the texture your brewing method needs? If not, keep pulsing in short bursts until you get there.
You can also tap the blender container on the counter to help settle the grounds. This makes it easier to see the texture and avoid over-grinding.
Step 5: Brew Immediately
Once you have the right grind, brew your coffee right away. Freshly ground coffee starts to lose its flavor within minutes of grinding. The oils that give coffee its rich taste begin to evaporate quickly. For the best coffee flavor, grind only what you plan to brew.
Grind Sizes for Different Brewing Methods
Not all coffee needs the same grind size. Using the wrong texture can lead to bitter or weak coffee. Here is how to use your blender for coffee beans to match each brewing method.
Coarse Grind for French Press
A French press needs a chunky, coarse texture. Think of sea salt. To achieve this with a blender, use fewer pulses and shorter bursts. Three to four pulses of two seconds each usually works well. Shake the container between pulses to redistribute the beans.
Coarse grounds extract slowly. This prevents the coffee from becoming over-extracted and bitter. If your French press coffee tastes harsh, your grind is probably too fine.
Medium Grind for Drip Coffee Makers
Drip coffee makers work best with a medium grind, similar to sand. This is the most common texture for pre-ground supermarket coffee. To achieve it in a blender, pulse for slightly longer bursts, about five seconds each, for five to eight pulses.
Check the texture halfway through. You want most of the grounds to feel gritty but not powdery. A medium grind balances flavor and extraction speed perfectly for standard coffee makers.
Fine Grind for Espresso or Moka Pot
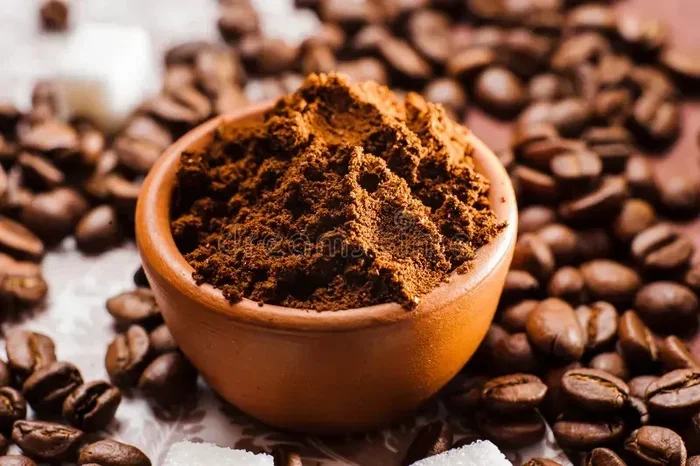
A fine grind looks and feels like powdered sugar. Getting this texture in a blender takes more effort. Use longer pulse sessions of five to seven seconds, but keep shaking the container between each pulse. You may need to blend for more rounds to get a truly fine texture.
Keep in mind that a blender will not produce the same ultra-fine, consistent grind as a dedicated espresso grinder. The results will be slightly uneven, which is fine for Moka pots and strong drip coffee. For true espresso, a burr grinder remains the better choice.
Extra Coarse for Cold Brew
Cold brew coffee needs the coarsest grind of all. The beans steep in water for hours, so a very chunky texture prevents over-extraction. Use the fewest pulses possible, just enough to crack the beans into large pieces. Think of the texture of rough breadcrumbs.
Cold brew made with a blender for coffee beans tastes incredibly fresh and smooth. The long steeping time compensates for the coarse texture, drawing out sweet, mild flavors without bitterness.
Common Mistakes When Grinding Coffee Beans in a Blender
Even though using a blender is simple, a few mistakes can hurt your coffee quality. Watch out for these common errors.
Overfilling the Blender
This is the number one mistake people make. Too many beans block the blades and create uneven grinding. The beans at the top stay whole while the ones at the bottom get pulverized. Stick to the one-quarter cup maximum per batch. Patience here pays off in a much better cup of coffee.
Running the Blender Continuously
Continuous blending generates heat. Heat destroys the delicate oils in coffee beans. Your coffee will taste burnt or flat. Always use pulse mode. Give the motor a break between bursts. This keeps the beans cool and preserves their natural coffee flavor.
Grinding Too Fine by Accident
It is easy to overdo it with the pulses. What starts as a medium grind can quickly turn into powder if you keep blending. This is especially true for fine grinds. Set a mental count for your pulses and stop when you reach it. Check the texture before continuing.
Not Cleaning the Blender Afterward
Coffee oils stick to the blender container and blades. Over time, these oils go rancid and taint the taste of future blends. Rinse the blender right after grinding. A quick wash with warm soapy water works well. For a deeper clean, blend a batch of warm water with a drop of dish soap.
Using Stale Beans
A blender for coffee beans cannot fix stale beans. If your beans have been sitting in the pantry for months, the flavor will be flat no matter how well you grind them. Always use fresh, quality beans. Check the roast date on the bag. For the best results, use beans within four weeks of roasting.
Tips for the Best Blender-Ground Coffee
Want to take your blender-ground coffee to the next level? Try these practical tips that experienced coffee lovers swear by.
Chill the Beans First
Cold beans grind more evenly. Before you start, place your beans in the freezer for ten to fifteen minutes. The cold makes them more brittle, which helps the blades break them apart more cleanly. This simple trick reduces dust and creates a more consistent texture.
Use the Pulse and Shake Method
This deserves repeating because it really works. Pulse for a few seconds, then shake the container to move the beans around. Pulse again. The shaking redistributes whole beans to the blades and prevents clumping. It is the single best technique for getting an even grind in a blender.
Experiment with Timing
Every blender is different. Some have powerful motors that grind quickly. Others struggle with hard beans. Pay attention to how your blender performs and adjust your technique accordingly. Keep a note of pulse counts and times that work best for you.
Consider the Type of Blender You Have
High-speed blenders like Vitamix or Blendtec handle coffee beans with ease. They have powerful motors and sharp blades designed for tough ingredients. Standard blenders work too, but they may need more pulses and shorter sessions. If you have a budget blender, be extra gentle with the motor and never run it continuously.
Some people wonder whether they should buy a dedicated coffee grinder instead. A commercial oven for baking might seem completely unrelated, but the same principle applies: purpose-built tools do a better job at their specific task. A burr grinder gives you more consistent results than any blender. However, for most people, a blender is perfectly adequate and saves counter space.
Store Ground Coffee Properly
If you grind more than you can brew right away, store the grounds in an airtight container. Use them within 24 hours for the best flavor. Do not keep ground coffee in the freezer for long periods. The moisture and odors in freezers can degrade the quality quickly.
Can You Roast Coffee Beans in the Oven Before Blending?
Some coffee enthusiasts like to roast their own beans at home. Roasting green coffee beans transforms them into the aromatic, flavorful beans we all know. You can roast beans in an oven before grinding them in your blender.
When roasting at home, you need to control the temperature carefully. Most home ovens work well for this. If you are interested in roasting, you might also explore using a commercial oven for baking for more even heat distribution and larger batches. The oven temperature for roasting coffee beans typically ranges between 400 and 450 degrees Fahrenheit.
After roasting, let the beans cool completely before blending. Hot beans can create steam inside the blender, which affects the grind and can be a safety concern. Wait at least 30 minutes before blending roasted beans.
Roasting your own beans and then grinding them fresh in a blender gives you the most control over your coffee. You choose the roast level, the bean origin, and the grind size. It is a rewarding process that produces incredibly fresh and personalized coffee.
Final Thoughts
A blender for coffee beans is one of the easiest and most affordable ways to enjoy fresh coffee at home. You do not need a fancy coffee grinder or expensive equipment. With the right technique, a standard kitchen blender produces excellent grounds for every brewing method.
Remember to use pulse mode, measure your beans, and clean your blender after each use. Pay attention to grind size for your preferred brewing method. And always start with fresh, quality beans. These simple steps will transform your daily coffee routine.
The beauty of using a blender is its versatility. Your blender handles more than just smoothies and soups. It becomes a coffee grinding tool that delivers real results. Once you try it, you may never go back to pre-ground coffee again.
Give it a try this morning. Measure out your beans, pulse a few times, and brew a cup. The difference in taste will speak for itself. Fresh coffee from a blender is a game changer, and once you start, you will wonder why you ever settled for store-bought grounds.
Frequently Asked Questions
Can any blender grind coffee beans?
Most standard blenders can grind coffee beans, but the results vary. High-speed blenders with sharp blades work best. Even budget blenders can handle the job if you use the pulse method and do not overfill the container.
How long should I pulse coffee beans in a blender?
Use short pulses of three to five seconds each. Pause between pulses, shake the container, and check the texture. Most blends need eight to fifteen total pulses for a medium grind, but this depends on your blender’s power and the desired texture.
Will grinding coffee beans in a blender dull the blades?
Coffee beans are hard but not hard enough to dull blender blades quickly. Regular use for grinding may wear blades over time, but most household blenders last for years of coffee grinding without any issues.
Is blender-ground coffee as good as grinder-ground coffee?
Blender-ground coffee is very good for most brewing methods. The grind is slightly less consistent than a burr grinder, but for drip coffee, French press, and cold brew, the difference is barely noticeable. For true espresso, a dedicated grinder produces better results.
Can I grind decaf coffee beans in a blender?
Yes, decaf beans grind exactly the same way as regular beans. The decaffeination process does not change the texture or hardness of the bean. Use the same pulse technique and timing you would use for regular coffee.
What is the best way to clean a blender after grinding coffee?
Rinse the blender container and blades with warm water immediately after use. For a deeper clean, add warm water and a drop of dish soap, then blend on low for ten seconds. This removes coffee oils that can affect the taste of your next blend.
=== CONCLUSION ===
A blender for coffee beans is a practical, accessible, and effective tool for anyone who loves fresh coffee. You have everything you need to know now. The right technique, the correct grind size, and a little patience will give you results that rival more expensive coffee grinders. Start with fresh beans, use pulse mode, and experiment until you find the perfect grind for your favorite brewing method. Your morning cup of coffee will never taste the same again.