How To Do Spare Ribs In The Oven For Perfect Results
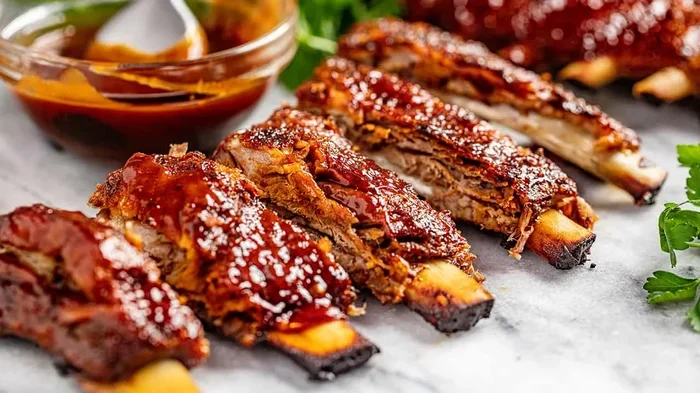
Learning how to do spare ribs in the oven is easier than you think. This guide walks you through every step from choosing the right rack to pulling perfectly cooked ribs out of your oven. You will discover the ideal oven temperature, timing tricks, and sauce secrets that turn ordinary pork ribs into restaurant-quality barbecue ribs at home.
There is nothing quite like pulling a tray of oven baked ribs out of the kitchen and smelling that rich, smoky aroma fill your home. Whether you are feeding a crowd on a weekend or treating yourself to a quiet dinner, how to do spare ribs in the oven is a skill that will change the way you cook forever.
Many people think ribs need a smoker or a grill to turn out right. But the truth is, your oven can deliver fall off the bone ribs that are just as tender and flavorful. The trick is knowing the right temperature, timing, and a few simple techniques that make all the difference. This guide covers everything you need to know about baking ribs in the oven with confidence.
In this article, you will learn how to pick the best rack, prepare it properly, cook it at the perfect heat, and finish it with a delicious glaze. By the end, you will feel ready to tackle pork ribs in your own kitchen every single time.
Key Takeaways
- Choose the right cut: baby back ribs and spare ribs each cook differently in the oven.
- Remove the membrane: peeling off the rib membrane is the secret to tender, juicy ribs.
- Low and slow is key: baking ribs at 275°F to 300°F gives you the best texture and flavor.
- Use foil wrapping: wrapping ribs in foil halfway through keeps moisture locked in.
- A meat thermometer is essential: internal temperature of 195°F to 203°F means perfectly done ribs.
- Glaze at the end: applying BBQ sauce in the last 15 to 20 minutes prevents burning and adds shine.
- Rest before serving: letting ribs rest for 10 minutes keeps the juices inside the meat.
📑 Table of Contents
- Choosing the Right Spare Ribs for Oven Baking
- Preparing Your Spare Ribs for the Oven
- The Best Oven Temperature and Timing for Ribs
- Wrapping and Cooking Techniques for Tender Ribs
- Saucing and Glazing Your Ribs
- Serving and Storing Your Oven Baked Ribs
- Common Mistakes to Avoid When Baking Ribs
- Expert Insights on Oven Baked Ribs
- Key Takeaways
- Frequently Asked Questions
- Conclusion
Choosing the Right Spare Ribs for Oven Baking
The first step in how to do spare ribs in the oven is selecting the right type of pork ribs. Not all ribs are the same, and different cuts behave differently when you bake them. Picking the wrong one can lead to dry or tough meat, which nobody wants.
Baby Back Ribs vs Spare Ribs
Baby back ribs come from the top of the rib cage, near the backbone. They are smaller, leaner, and cook faster than other cuts. These ribs are great for oven baking because they stay tender without needing a long cook time.
Spare ribs come from the lower belly area. They have more fat and more connective tissue, which makes them incredibly flavorful but also requires a longer cooking time. If you want big, meaty ribs with rich flavor, spare ribs are your best bet.
St. Louis style ribs are actually spare ribs that have been trimmed to remove the rib tips and the breastbone flap. This gives you a neat, rectangular rack that cooks more evenly. Many pitmasters prefer St. Louis style ribs for oven baking because of their uniform shape.
What to Look for When Buying
When you are shopping for pork ribs, look for a few key signs of quality:
- Color: The meat should be pink or light red with creamy white fat.
- Firmness: The rack should feel firm but not hard when you press it gently.
- Fat distribution: Even layers of fat between the meat help keep ribs moist during slow cooking.
- Size: A full rack usually has 10 to 13 bones and feeds about 2 to 3 people.
Avoid ribs that look gray or dry. Also, skip ribs with a strong smell, as that is a sign the meat is not fresh. If you buy from a trusted butcher or meat counter, you will set yourself up for success right from the start.
Preparing Your Spare Ribs for the Oven
Proper prep work is what separates good ribs from great ribs. Before you even think about setting the oven temperature, you need to prep your rack of ribs the right way. This step takes about 15 to 20 minutes but makes a huge difference in the final result.
Removing the Membrane
Every rack of ribs has a thin membrane on the back side, also called the silver skin. This membrane does not soften during cooking, and it can make your ribs chewy and tough. Removing it is one of the most important steps in how to do spare ribs in the oven.
Here is how to do it:
- Turn the rack over so the bone side faces up.
- Use a butter knife to gently lift one edge of the membrane near the narrow end of the rack.
- Grab the lifted edge with a paper towel for better grip.
- Pull the membrane slowly and steadily upward.
- It should come off in one piece most of the time.
If the membrane is stubborn, slide the knife underneath it a little more and try again. Do not worry if a small piece stays behind. Just do your best, and the ribs will still turn out wonderfully.
Trimming Excess Fat
While some fat is good for flavor and moisture, thick layers of hard fat can prevent your rub and sauce from reaching the meat. Use a sharp knife to trim away any large, solid chunks of fat on the meat side of the rack. Leave a thin layer so the ribs stay juicy during the long bake.
Applying the Rib Rub
The rib rub is what gives your ribs their signature flavor. You can buy a pre-made dry rub from the store, but making your own is simple and way more rewarding.
A basic rib rub includes:
- Brown sugar for sweetness and caramelization
- Paprika for color and mild smoky flavor
- Garlic powder for depth
- Onion powder for savory notes
- Cumin for a warm, earthy kick
- Black pepper for gentle heat
- Salt to bring everything together
Generously coat both sides of the ribs with your rub. Press it into the meat with your hands so it sticks well. For the best results, wrap the rubbed ribs in plastic wrap and let them rest in the refrigerator overnight. This gives the flavors time to penetrate deep into the meat.
The Best Oven Temperature and Timing for Ribs
Getting the oven temperature for ribs right is the single most important factor in achieving tender, juicy results. Too hot and the outside will burn before the inside is done. Too cool and the ribs will take forever and dry out.
Why Low and Slow Works
The magic of low and slow cooking is that it breaks down the connective tissue in pork ribs slowly and evenly. Collagen in the meat turns into gelatin over time, which is what gives ribs that melt-in-your-mouth texture. High heat does not give the collagen enough time to break down, which is why ribs end up tough and chewy.
For spare ribs, the ideal oven temperature is between 275°F and 300°F. This range allows the fat to render slowly and the meat to become incredibly tender without drying out. Baby back ribs can handle a slightly higher temperature of 325°F since they are leaner and thinner.
How Long to Bake Ribs in the Oven
Cooking time depends on the type of ribs and the oven temperature. Here is a general guide:
- Baby back ribs at 275°F: 2.5 to 3 hours
- Spare ribs at 275°F: 3.5 to 4 hours
- St. Louis style ribs at 300°F: 3 to 3.5 hours
- Baby back ribs at 325°F: 2 to 2.5 hours
These times are approximate. The real indicator of doneness is the internal temperature and the way the meat pulls back from the bones. A meat thermometer is your best friend here. When the internal temperature reaches 195°F to 203°F, your ribs are ready.
Wrapping and Cooking Techniques for Tender Ribs
Once your oven baked ribs are in the oven, the way you handle them during cooking makes a big difference. Two popular techniques can take your ribs from good to outstanding.
The Foil Wrap Method
Wrapping ribs in foil partway through the cook is called the Texas crutch. This technique traps steam and moisture, which speeds up the cooking process and keeps the meat from drying out. Here is how to do it:
- After the ribs have baked for about 2 hours, check the internal temperature.
- If the meat has pulled back from the bones by about a quarter inch, it is time to wrap.
- Lay out two sheets of heavy-duty foil on your counter.
- Place the ribs meat-side down on the foil.
- Add a splash of apple cider vinegar or a small amount of apple juice for extra moisture.
- Wrap the ribs tightly, sealing the edges so no steam escapes.
- Return the wrapped ribs to the oven and continue baking until tender.
The foil wrap method is especially helpful for thicker spare ribs that need extra time to become tender. It also prevents the rub from burning during the long bake.
The Unwrapped Method
Some rib lovers prefer not to wrap their ribs at all. The unwrapped method allows the outside to develop a better crust and bark, which is the caramelized, flavorful exterior that barbecue fans love. This method takes a bit more patience because the ribs cook a little slower without the steam boost.
If you go the unwrapped route, make sure your oven temperature stays steady and your ribs have enough liquid in the pan underneath. A shallow pan with a little water, apple juice, or beer placed under the rack helps create a humid environment that prevents drying.
Using a Rib Rack
A rib rack is a simple metal tool that holds the ribs upright or flat inside the oven pan. It allows hot air to circulate around the meat more evenly, which means no hot spots and more consistent cooking. If you bake ribs often, a rib rack is a small investment that pays off quickly.
Saucing and Glazing Your Ribs
The final step in how to do spare ribs in the oven is adding sauce. This is where you can get creative and make your ribs truly your own. But timing is everything when it comes to glazing.
When to Add the Sauce
Never add sauce too early. The sugars in most BBQ sauce will burn if they are on the ribs for the entire baking time. The best approach is to apply the sauce in the last 15 to 20 minutes of cooking.
Here is the process:
- Remove the ribs from the oven when they are nearly done.
- Increase the oven temperature to 400°F or turn on the broiler.
- Open the foil if you used it and pull back the edges slightly.
- Brush a generous layer of BBQ sauce on both sides of the ribs.
- Return the ribs to the oven uncovered for 15 to 20 minutes.
- The sauce will caramelize and form a sticky, glossy glaze.
Making a Simple Homemade BBQ Sauce
Store-bought sauce works fine, but a homemade BBQ sauce takes your ribs to the next level. A basic version includes ketchup, apple cider vinegar, brown sugar, Worcestershire sauce, mustard, garlic, and a pinch of cayenne pepper. Simmer it on the stove for 10 minutes, and you have a rich, tangy glaze that complements any rack of pork ribs perfectly.
Serving and Storing Your Oven Baked Ribs
You have put in the time and effort, and now your ribs are ready. But how you serve and store them matters just as much as the cooking process.
How to Serve Ribs Like a Pro
Always let your ribs rest for 10 minutes after pulling them out of the oven. This allows the juices to redistribute throughout the meat, which means every bite is moist and flavorful. Use a sharp knife or kitchen scissors to cut between the bones and serve individual portions.
Classic sides that pair well with oven baked ribs include coleslaw, cornbread, baked beans, mac and cheese, and grilled corn on the cob. These sides balance the richness of the pork ribs and round out the meal beautifully.
Storing Leftover Ribs
Leftover ribs keep well in the refrigerator for up to 4 days. Store them in an airtight container or wrap them tightly in foil. To reheat, place them in the oven at 250°F for about 15 to 20 minutes. This gentle reheating method keeps the meat moist without overcooking it.
You can also freeze cooked ribs for up to 3 months. Wrap them tightly in plastic wrap and then in foil, or place them in a freezer-safe bag. Thaw overnight in the refrigerator before reheating.
Quick Tips for Perfect Ribs Every Time
- Always remove the membrane before seasoning.
- Let rubbed ribs sit in the fridge overnight for deeper flavor.
- Use a meat thermometer to check doneness accurately.
- Do not rush the cook time. Patience is the secret ingredient.
- Add sauce only in the last 15 to 20 minutes to prevent burning.
- Rest your ribs for 10 minutes before cutting into them.
Common Mistakes to Avoid When Baking Ribs
Even experienced cooks make mistakes when baking ribs. Knowing what to avoid saves time, money, and a lot of frustration.
Skipping the Membrane Removal
This is the number one mistake people make. That tough membrane on the back of the rack will not soften during cooking, and it creates a chewy, unpleasant layer between you and the tender meat underneath. Always remove it.
Cooking at Too High a Temperature
It is tempting to crank up the oven to speed things along, but this is a recipe for disaster. High heat dries out the outside of the ribs long before the inside has a chance to become tender. Stick to 275°F to 300°F and let the oven do the work.
Adding Sauce Too Early
Sugar burns easily, and burnt sauce tastes bitter and acrid. If you add your BBQ sauce at the start of the bake, you will end up with a dark, caramelized crust that is more like candy than sauce. Always glaze at the end.
Not Using a Meat Thermometer
Guessing when ribs are done is risky. Without a meat thermometer, you might either undercook or overcook your ribs. The target internal temperature is 195°F to 203°F. This is the range where collagen has fully broken down and the meat is perfectly tender.
Expert Insights on Oven Baked Ribs
Professional pitmasters and barbecue competition winners agree on a few key principles when it comes to baking ribs. These insights come from years of experience and can elevate your home cooking significantly.
First, always start with room temperature ribs. Take your pork ribs out of the refrigerator about 30 minutes before baking. This helps the meat cook more evenly from edge to center.
Second, do not be afraid of the low and slow approach. Some people try to speed things up by raising the oven temperature, but this compromises texture and flavor. Trust the process and let time work its magic.
Third, keep a spray bottle with apple cider vinegar and water nearby. If your ribs are baking for a long time and the surface looks like it is drying out, a light spritz every 30 minutes keeps the exterior moist and helps the rub stay vibrant.
Finally, experiment with different rubs and sauces. Once you master the basic technique for how to do spare ribs in the oven, you can play with flavors. Try a honey chipotle rub, a Kansas City style sauce, or a Carolina mustard glaze. The possibilities are endless.
Key Takeaways
- Choose wisely: baby back ribs cook faster, spare ribs are meatier and more flavorful.
- Remove the membrane: this simple step transforms the texture of your ribs.
- Bake at 275°F to 300°F: low and slow cooking breaks down collagen for tender meat.
- Wrap in foil partway through: this traps moisture and speeds up the cook.
- Use a meat thermometer: aim for 195°F to 203°F internal temperature.
- Glaze at the end: sauce goes on during the last 15 to 20 minutes only.
- Rest before serving: 10 minutes of resting keeps the juices locked in.
Frequently Asked Questions
Can I bake ribs at 350°F instead of a lower temperature?
Yes, you can bake ribs at 350°F, but the results will be different. Higher temperatures cook ribs faster, but they are more likely to dry out or have a tougher texture. If you use 350°F, reduce the cooking time and check the internal temperature frequently. The lower temperature range of 275°F to 300°F is recommended for the most tender results.
How do I know when my ribs are done without a meat thermometer?
You can check doneness by pressing the meat gently with tongs or a fork. If the meat pulls back from the bones and the rack bends slightly when you lift it from one end with tongs, the ribs are likely done. Another test is to insert a toothpick between two bones. If it slides in easily, the ribs are tender and ready.
Should I wrap my ribs in foil while baking?
Wrapping ribs in foil is optional but highly recommended for beginners. The foil traps steam and moisture, which helps the meat cook faster and stay juicy. It is especially useful for thicker spare ribs that need more time to become tender. Some cooks skip the foil to get a better bark, but both methods produce delicious results.
Can I use frozen ribs for oven baking?
It is best to thaw ribs before baking them in the oven. Frozen ribs will cook unevenly, and the outside may dry out before the inside thaws completely. Thaw your pork ribs in the refrigerator overnight for the safest and most even results. If you must cook from frozen, add at least an extra hour to the cooking time and use a meat thermometer to check doneness.
What is the best BBQ sauce for oven baked ribs?
The best sauce is the one you enjoy most. Sweet, tangy, and smoky sauces work well with oven baked ribs because they complement the caramelized rub. A homemade sauce made with ketchup, apple cider vinegar, brown sugar, and Worcestershire sauce is a crowd favorite. Apply the sauce in the last 15 to 20 minutes of baking to prevent burning.
How long do cooked ribs last in the refrigerator?
Cooked ribs stay fresh in the refrigerator for up to 4 days when stored in an airtight container. Make sure the ribs have cooled to room temperature before sealing them. Reheat leftover ribs in the oven at 250°F for 15 to 20 minutes to keep the meat moist. Avoid reheating ribs in the microwave, as it can make the meat rubbery and tough.
Conclusion
Mastering how to do spare ribs in the oven is one of the most rewarding skills you can build in the kitchen. With the right cut of pork ribs, a simple but flavorful rub, the correct oven temperature, and a little patience, you can create fall off the bone ribs that rival any barbecue restaurant. The process is straightforward, the results are impressive, and the leftovers are even better the next day.
Remember to remove the membrane, use a meat thermometer, and apply your BBQ sauce at the right time. These small details make a massive difference in the final product. Whether you are cooking for a family dinner, a holiday gathering, or just treating yourself to a delicious meal, oven baked ribs are always a winning choice.
Now that you know the secrets, it is time to put them into practice. Grab a rack of ribs, fire up your oven, and enjoy the process of creating something truly special. Happy cooking, and here is to perfectly tender ribs every single time.