How To Move A Gas Oven Safely And Without Any Damage
Moving a gas oven requires careful planning and the right approach to avoid gas leaks, physical damage, or costly repairs. This guide walks you through every step of how to move a gas oven safely, from shutting off the gas supply to reinstalling it in its new spot. Whether you are relocating during a kitchen renovation or simply rearranging your space, these practical tips will help you protect your appliance and your home.
Moving a gas oven is not like shifting a bookshelf or a box of books. It is a heavy, awkward appliance that connects to a gas line, and getting it wrong can lead to serious safety hazards. If you are planning a kitchen renovation or simply need to relocate your gas stove transport, you need a clear plan. This guide covers everything you need to know about how to move a gas oven safely and without any damage.
The process involves several critical steps, from shutting off the gas supply to protecting your floors during the move. Every step matters. Skip one, and you could end up with a gas leak, a damaged appliance, or even a costly repair bill. But with the right preparation, relocating a gas oven can be straightforward and stress-free.
Whether you are a DIY enthusiast or someone who prefers to know what the pros do, this article has you covered. We will walk you through preparation, disconnection, transport, and reinstallation. You will also learn when it makes sense to call in a gas technician and what common mistakes to avoid.
Key Takeaways
- Always shut off the gas supply first: Safety comes before everything else when relocating a gas oven.
- Use proper equipment like an oven dolly and moving straps: These tools make handling a heavy appliance much easier and safer.
- Never lay a gas oven on its side during transport: This can damage internal components and cause gas line issues.
- Inspect the gas connection after reinstalling: A leak test is essential before you turn the gas back on.
- Hire a licensed gas technician when in doubt: Professional help ensures compliance with safety codes and peace of mind.
- Protect your floors and walls during the move: Simple precautions prevent expensive scratches and dents.
- Allow the oven to settle before use: Waiting at least an hour after reinstalling helps internal parts stabilize.
📑 Table of Contents
- Why Moving A Gas Oven Is Different From Other Appliances
- Preparing To Move Your Gas Oven
- Step-By-Step Guide To Disconnecting And Moving
- Transporting The Oven Safely
- Reinstalling And Setting Up Your Gas Oven
- When To Call A Professional
- Common Mistakes To Avoid When Moving A Gas Oven
- Quick Tips For A Smooth Gas Oven Move
- Conclusion
Why Moving A Gas Oven Is Different From Other Appliances
Not all appliances are created equal when it comes to moving. A microwave or a toaster is light and easy to relocate. A gas oven is a completely different story. Understanding why this appliance needs special attention is the first step toward a safe move.
The Weight Factor
Most standard gas ovens weigh between 100 and 250 pounds. That is a lot of weight to maneuver through doorways, hallways, and tight corners. Without the right moving heavy appliances technique, you risk injury or damage to your home.
The weight also means you cannot just lift it casually. You need proper lifting form, a sturdy oven dolly, and ideally a second person to help. Trying to carry a gas oven by yourself is one of the most common mistakes people make.
The Gas Connection
This is what sets a gas oven apart from an electric one. A gas connection means there is a live fuel source involved. If you do not handle this correctly, you could face gas leaks, fire hazards, or even explosions.
Before you even think about moving the oven, you must shut off the gas supply completely. This is non-negotiable. Gas line safety should always be your top priority during any appliance relocation.
Internal Components
Gas ovens contain sensitive internal parts. The burner assembly, gas valves, and ignition systems can all be damaged if the oven is handled roughly. Laying the oven on its side during transport is a big no-no because it can cause gas to leak from internal lines or damage the oven floor.
Taking care of these components during gas oven weight management is essential for a smooth move and a fully functional appliance afterward.
Preparing To Move Your Gas Oven
Preparation is where most people skip steps, and that is where things go wrong. Taking the time to plan properly will save you hours of stress and potentially hundreds of dollars in repairs.
Gather Your Tools and Supplies
Before you start, make sure you have everything you need. Here is a checklist of essential items:
- Adjustable wrench for disconnecting the gas line
- Oven dolly rated for heavy appliances
- Moving straps for secure lifting
- Furniture blankets or moving pads for protection
- Duct tape to secure blankets and loose parts
- Protective floor coverings like cardboard or moving blankets
- Gloves and safety glasses for personal protection
- Gas leak detection solution or a soap-and-water mixture
Having all of these items ready before you begin makes the entire process smoother. You do not want to be halfway through the job and realize you are missing a key tool.
Measure Everything
Measure your oven dimensions and compare them to the width of doorways, hallways, and staircases you will need to navigate. A gas oven that fits perfectly in the kitchen may not fit through a narrow doorway or around a sharp corner.
Measure both the oven and the path. This simple step prevents frustrating situations where you are stuck halfway through a doorway with a heavy appliance.
Clear the Path
Remove any obstacles from your planned route. This includes rugs, furniture, trash cans, and anything else that could get in your way. A clear path means fewer chances for accidents or scratches to your flooring.
Lay down protective floor coverings along the entire route. This protects both your floors and the oven from damage during the move.
Step-By-Step Guide To Disconnecting And Moving
Now that you are prepared, it is time to start the actual move. Follow these steps carefully and in order.
Step 1: Turn Off The Gas Supply
Locate the gas shut-off valve, usually found behind or near the oven. Turn it to the off position. You should hear the gas flow stop. This is the most important step in the entire process.
After turning off the valve, leave the oven open for a few minutes to let any residual gas dissipate. Open windows if possible to ventilate the area. Gas leak detection should be on your mind throughout this process.
Step 2: Disconnect The Gas Line
Using your adjustable wrench, carefully disconnect the gas line from the oven. Place a towel or bucket underneath to catch any residual gas or drips. Do not rush this step. Tight fittings can be stubborn, but forcing them can damage the connection.
Once disconnected, cap the gas line immediately. Use a proper gas line cap to seal the end. This prevents any gas from escaping and keeps your home safe.
Step 3: Disconnect The Power
Even though gas ovens run primarily on gas, many models have electronic ignitions and clocks that require electricity. Unplug the oven from the wall outlet. If the outlet is behind the oven and hard to reach, turn off the corresponding circuit breaker first.
This step is often overlooked but is important for safety during the move.
Step 4: Remove The Oven From Its Nest
Most built-in gas ovens sit in a recessed space. You may need to remove screws or clips that hold the oven in place. Check the manufacturer manual for specific instructions on how to release the oven from its housing.
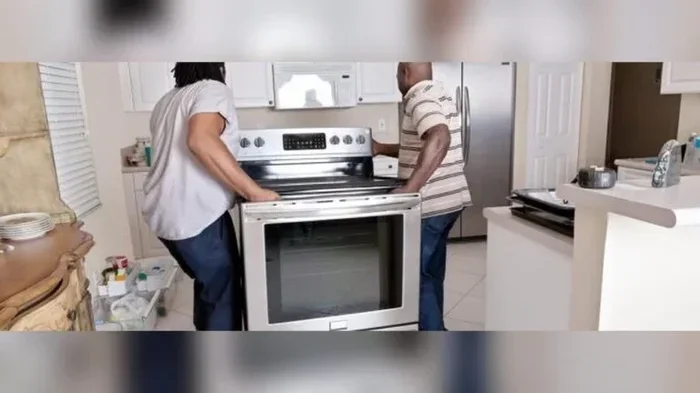
Once released, carefully slide the oven out. Have your partner support the back of the oven while you guide the front. Move slowly and steadily.
Step 5: Secure The Oven For Transport
Wrap the oven in protective packing using furniture blankets. Secure the blankets with duct tape, but avoid tape that could leave residue on the oven surface. Use moving straps to hold the door closed firmly.
Place the oven upright on the oven dolly. Never lay a gas oven on its side. The upright position prevents internal damage and keeps gas lines intact.
Transporting The Oven Safely
Getting the oven from point A to point B is where most damage occurs. Taking a few precautions during gas stove transport can save you a lot of headaches.
Using An Oven Dolly
An oven dolly is a specialized hand truck designed for heavy appliances. It has straps that secure the oven in place and wheels that make rolling it much easier.
When using a dolly, tilt the oven back slowly and secure it with the straps. Always have one person at the front and one at the back when moving over uneven surfaces. Go slowly and watch for obstacles.
Navigating Doorways And Corners
Tight spaces are your biggest challenge during transport. Take your time when going through doorways. If the oven is too wide for a doorway, remove the door from its hinges temporarily to create extra clearance.
When turning corners, pivot the oven slowly. Sharp turns can cause the oven to tip, so communicate clearly with your partner and move one step at a time.
Protecting The Oven During Transit
Once the oven is loaded into a vehicle, make sure it is secured upright against a wall or with ratchet straps. It should not shift during transport. Any movement can cause internal damage to the gas valves or burner assembly.
Avoid placing heavy items on top of the oven. The glass door and control panel are fragile and can crack under pressure.
Reinstalling And Setting Up Your Gas Oven
You have made it to the new location. Now comes the part where people often rush and make mistakes. Proper reinstallation is just as important as the move itself.
Positioning The Oven
Slide the oven into place carefully. Make sure it is level and stable. An unlevel oven can cause cooking problems and put stress on the internal components.
Use a spirit level to check the balance. If the floor is uneven, adjust the oven feet accordingly. Proper oven leveling ensures even cooking and extends the life of your appliance.
Reconnecting The Gas Line
This is the step where precision matters most. Reconnect the gas line using your adjustable wrench. Hand-tighten first, then give it a quarter turn with the wrench. Do not overtighten, as this can crack the fitting.
After reconnecting, perform a gas leak detection test. Mix dish soap with water and apply the solution to all gas connections. If you see bubbles forming, you have a leak. Tighten the connection or replace the washer and test again.
Never use an open flame to check for gas leaks. This is extremely dangerous and should never be attempted.
Restoring Power And Testing
Plug the oven back in or turn the circuit breaker back on. Turn on the gas supply valve and listen for the sound of gas flowing. Most modern gas ovens have an electronic ignition that will spark when you turn the dial.
Set the oven to a low temperature first and let it run for about 15 minutes. Check for any unusual smells, sounds, or behavior. If everything looks and smells normal, your oven is ready for regular use.
Allow The Oven To Settle
Give the oven at least one hour to settle after reinstallation. Internal components, especially the gas valve and burner, need time to stabilize after being moved. This simple waiting period can prevent performance issues down the line.
When To Call A Professional
There are times when how to move a gas oven is best left to the experts. Knowing when to call a professional saves you from potential danger and expensive mistakes.
You should hire a professional appliance moving company if any of the following apply:
- The oven is extremely heavy and you do not have enough help
- You are uncomfortable working with gas connections
- The gas line shows signs of wear or damage
- You are moving the oven to a location with a different gas line setup
- Local codes require a licensed gas technician for reinstallation
A licensed professional will handle the gas connection safely and ensure everything meets local building codes. The cost of hiring a pro is small compared to the potential cost of a gas leak or an improperly installed oven.
Common Mistakes To Avoid When Moving A Gas Oven
Learning from others mistakes can save you a lot of trouble. Here are the most common errors people make during a gas oven move:
- Skipping the gas shut-off. This is the number one mistake and the most dangerous. Always turn off the gas before moving.
- Laying the oven on its side. This can cause internal gas leaks and damage the oven floor. Keep it upright at all times.
- Not using a dolly. Trying to carry a heavy gas oven by hand is a recipe for injury and damage.
- Rushing the gas leak test. Never skip the soap-and-water test after reinstalling. It takes five minutes and could save your life.
- Ignoring floor protection. Dragging a heavy oven across a floor can cause deep scratches and damage to both the floor and the appliance.
- Forgetting to measure doorways. Getting stuck halfway through a doorway with a heavy oven is a frustrating and potentially dangerous situation.
Quick Tips For A Smooth Gas Oven Move
Here are some quick tips to keep in mind throughout the process:
- Take photos of the gas connections before disconnecting anything. This makes reinstallation much easier.
- Keep the oven manual handy. It contains model-specific instructions that can be very helpful.
- Have a helper at all times. A gas oven is not a one-person job.
- Keep children and pets away from the moving area entirely.
- Have a fire extinguisher nearby just in case.
- Label the gas line and power cord clearly so you know which is which during reinstallation.
- Do not rush. Patience is your best friend when moving a heavy gas appliance.
Following these tips will make your kitchen appliance relocation smoother and safer. Every small precaution adds up to a successful move.
Conclusion
How to move a gas oven safely comes down to preparation, patience, and proper technique. From shutting off the gas supply to protecting your floors and testing every connection, each step plays a vital role in ensuring a damage-free move. A gas oven is a valuable and heavy appliance, and treating it with the care it deserves will pay off in the long run.
Remember that safety always comes first. If you ever feel unsure about any step, do not hesitate to call a gas technician or a professional appliance moving company. There is no shame in getting expert help, especially when gas is involved.
Take your time, follow the steps in this guide, and you will have your gas oven safely in its new location in no time. A well-executed move means years of reliable cooking ahead of you. Now go out there and make it happen.
Frequently Asked Questions
Can I move a gas oven by myself?
It is possible but not recommended. Gas ovens are heavy and awkward, and moving them alone increases the risk of injury and damage. Always have at least one helper, and use an oven dolly and moving straps for safety.
How long should I wait to use the oven after moving it?
Wait at least one hour after reinstalling before using the oven. This allows internal components, especially the gas valve and burner, to settle and stabilize after the move.
Do I need a professional to reconnect the gas line?
It depends on your comfort level and local codes. If you are confident and follow proper safety steps, you can reconnect it yourself. However, hiring a licensed gas technician ensures the connection is safe and code-compliant.
What should I do if I smell gas after reinstalling the oven?
If you smell gas, do not turn on any electrical switches or flames. Open windows immediately, leave the area, and call your gas utility company or emergency services. Do not attempt to use the oven until the leak is resolved.
Can I lay a gas oven on its side to fit through a doorway?
No. Laying a gas oven on its side can damage internal components and cause gas leaks. Always keep the oven upright during transport. If a doorway is too narrow, consider removing the door or finding an alternate route.
How do I protect my floors when moving a heavy gas oven?
Lay down moving blankets, cardboard, or protective floor coverings along the entire route. This prevents scratches and dents on both your floors and the oven. Go slowly and avoid dragging the appliance across the surface.