How To Dry Salt Dough In The Oven A Step By Step Guide
Drying salt dough in the oven is the fastest and most reliable way to create durable crafts, ornaments, and keepsakes at home. This step by step guide walks you through everything from preparing your dough to finishing your dried creations. You will learn the right oven temperature, drying times, and pro tips that prevent cracks and warping. Whether you are making decorations or gifts, this method delivers consistent, beautiful results every single time.
Salt dough crafting is one of the most fun and affordable hobbies you can pick up at home. With just three simple ingredients, you can create beautiful ornaments, decorations, gifts, and keepsakes that last for years. But here is the thing that trips up so many beginners: how to dry salt dough in the oven properly.
If you have ever baked a batch of salt dough only to find cracks, warping, or soggy centers, you know how frustrating that can be. The good news is that drying salt dough in the oven is actually very simple once you know the right steps. This guide gives you every detail you need to get perfect results every single time. Let us dive in and make your next salt dough project a total success.
Key Takeaways
- Low and slow is the way to go: Drying salt dough in the oven at 200°F to 250°F ensures even results without cracking or browning.
- Thickness matters: Keep your dough between ¼ inch and ½ inch thick for the best drying outcome and shortest bake time.
- Flip your pieces halfway: This simple step prevents warping and helps both sides dry evenly throughout the process.
- Seal your finished creations: Using a clear sealant protects your oven dried salt dough projects from moisture and extends their life significantly.
- Patience pays off: Rushing the drying process leads to soggy centers and cracked surfaces, so allow enough time for thorough drying.
- Oven drying beats air drying for speed: You can dry salt dough ornaments and crafts in just a few hours instead of waiting days.
- Storage is simple: Once sealed, your dried salt dough creations can last for years with proper care and storage.
📑 Table of Contents
- What Is Salt Dough And Why Dry It In The Oven?
- How To Prepare Your Salt Dough Before Baking
- The Step By Step Drying Process
- Tips For Perfectly Dried Salt Dough
- Common Mistakes To Avoid When Drying Salt Dough
- How To Tell When Salt Dough Is Fully Dry
- Finishing And Sealing Your Dried Salt Dough Creations
- Storing And Displaying Your Oven Dried Salt Dough Projects
- Frequently Asked Questions
- Conclusion
What Is Salt Dough And Why Dry It In The Oven?
Salt dough is a simple mixture of salt, flour, and water. It has been used for crafts and decorations for generations. People love it because it is cheap, easy to work with, and safe for kids. You can shape it into almost anything your imagination dreams up.
Once you have shaped your creation, the next critical step is drying. Drying removes all the moisture from the dough, leaving behind a hard, solid piece that can be painted, sealed, and displayed. While you can air dry salt dough, oven drying is faster and more reliable. It gives you control over temperature and airflow, which means fewer surprises and much better results.
When you dry salt dough in the oven, the gentle heat evaporates moisture evenly throughout the piece. This prevents the common problems of air drying, like mold growth, uneven hardness, and long waiting times. For anyone who wants to finish their salt dough crafts quickly and beautifully, the oven method is hands down the best choice.
How To Prepare Your Salt Dough Before Baking
Preparation is the secret to great dried salt dough. Skipping this step or rushing through it will cause problems later. Take your time here, and the rest of the process will go smoothly.
Choosing The Right Recipe
A basic salt dough recipe uses equal parts flour and salt with half the part water. A standard batch works great for most projects. Mix the ingredients until you get a smooth, elastic dough. If the dough feels too sticky, add a little more flour. If it is too dry and crumbly, sprinkle in a bit of water.
Some crafters add a splash of cream of tartar to improve flexibility. Others mix in a few drops of essential oil for a pleasant scent while working. These small additions can make a big difference in how your finished pieces turn out. The key is a dough that is soft and pliable but not sticky.
Kneading And Rolling Tips
Knead your dough for at least five minutes before shaping. This develops the gluten and makes the dough smooth and easy to work with. Use a clean, flat surface and dust it lightly with flour to prevent sticking.
When rolling out your dough, aim for a consistent thickness. Use wooden spacers or rolling pin rings to keep things even. Uniform thickness is one of the most important factors in getting your pieces to dry evenly. Uneven dough leads to thin spots that burn and thick spots that stay soft in the middle.
The Step By Step Drying Process
Now we get to the heart of the process: how to dry salt dough in the oven. Follow these steps carefully, and your creations will come out perfectly dry and ready for decorating.
Setting Your Oven Temperature
The most important rule for drying salt dough in the oven is keeping the temperature low. Set your oven to somewhere between 200°F and 250°F. Higher temperatures will brown the outside while leaving the inside soft and damp. This creates a terrible texture and can cause your pieces to crack as they cool.
Preheat your oven before placing your dough inside. A stable, consistent temperature is essential for even drying. If your oven runs hot, use an oven thermometer to verify the actual temperature inside. Many home ovens can be off by 25 degrees or more, and that small difference matters when working with salt dough.
How Long To Dry Salt Dough
Drying time depends on the thickness of your pieces and the humidity in your kitchen. As a general rule, plan for one to three hours at 200°F to 250°F. Thinner pieces around a quarter inch thick may be done in just one hour. Thicker pieces up to half an inch might need the full three hours or even a bit longer.
Here is a helpful reference for typical drying times:
- Quarter inch thick: About 1 to 1.5 hours
- Third inch thick: About 1.5 to 2 hours
- Half inch thick: About 2 to 3 hours
- Three quarters inch or thicker: Consider flipping and extending drying time
These times are guidelines, not strict rules. Always check your pieces for dryness before removing them from the oven. The goal is a completely hard, dry piece that does not feel soft or cool to the touch in the center.
Positioning Your Dough In The Oven
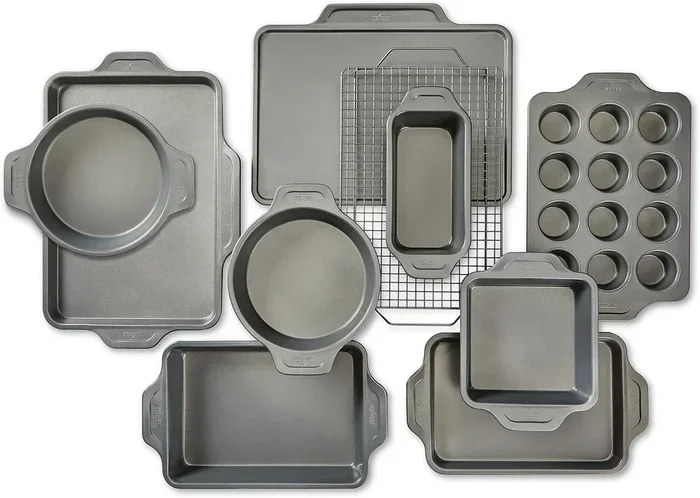
Place your shaped pieces on a lined baking sheet. Leave space between each piece so hot air can circulate freely. Overcrowding the tray blocks airflow and leads to uneven drying. If you have a lot of pieces, use multiple trays and rotate them during the drying process.
Line your baking sheet with parchment paper or a silicone mat. This prevents sticking and makes cleanup a breeze. Avoid using wax paper, as it can stick to the dough and ruin your finished piece.
Tips For Perfectly Dried Salt Dough
Getting the basics right is important, but these extra tips will take your results from good to excellent. Professional crafters use these techniques to consistently produce beautiful, durable salt dough pieces.
Controlling Thickness For Even Drying
One of the biggest challenges in baking salt dough is keeping everything the same thickness. Even a small difference can cause one part of a piece to dry faster than another. This leads to warping and uneven texture.
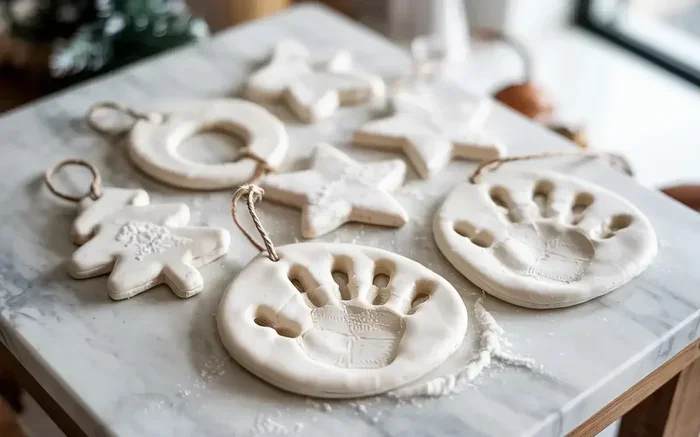
Use cookie cutters or stencils to create uniform shapes. For ornaments, a quarter inch thickness is the sweet spot. It is thick enough to hold detail but thin enough to dry completely in a reasonable time. If you are making larger decorative pieces, consider building them up in layers rather than rolling one very thick piece.
Flipping Pieces Midway Through
This is a game changing tip that many beginners overlook. About halfway through the drying time, carefully flip each piece over. The bottom side tends to stay damp because it rests against the baking sheet. Flipping ensures both sides get equal exposure to the oven’s heat.
Use a thin spatula to flip delicate pieces without breaking them. If your creation has a flat back, you can also prop it up on a small piece of foil to allow air circulation underneath. This simple adjustment dramatically reduces warping and speeds up the overall drying process.
Using A Wire Rack For Better Airflow
Instead of placing your dough directly on the baking sheet, try using a wire cooling rack. This allows hot air to flow underneath the piece, promoting even drying on all sides. It is especially helpful for thicker pieces that tend to trap moisture in the center.
Place the wire rack on top of your baking sheet and put the whole setup in the oven. This setup also makes it easier to flip your pieces halfway through without disturbing them too much. A small investment in a few wire racks can improve your results significantly.
Common Mistakes To Avoid When Drying Salt Dough
Even experienced crafters make mistakes sometimes. Knowing what to avoid saves you time, ingredients, and frustration. Here are the most common errors people make when drying salt dough in the oven.
Setting the temperature too high. It is tempting to crank up the heat to speed things along. Resist this urge. High heat causes the outside to harden too quickly while trapping moisture inside. The result is a cracked, uneven piece that may still be soft in the center.
Skipping the flipping step. As mentioned above, not flipping your pieces leads to one side drying faster than the other. This causes warping and can make your ornaments or decorations look lopsided and unprofessional.
Making pieces too thick. While salt dough can handle some thickness, going beyond half an inch creates serious drying challenges. The center may never dry completely, leaving you with a soft, vulnerable piece that is prone to mold and breakage.
Not checking for dryness. Every oven is different, and humidity levels vary from day to day. Always check your pieces by pressing gently on the thickest area. If it feels cool or soft, it needs more time. A fully dried piece should feel hard and light throughout.
Forgetting to seal the finished piece. Drying is only half the process. Without a proper sealant, your dried salt dough is vulnerable to moisture from the air. Over time, it can absorb humidity and become soft again. Always finish your pieces with a clear sealant for lasting protection.
How To Tell When Salt Dough Is Fully Dry
Knowing when your salt dough is done is crucial. Under-dried pieces are weak and prone to cracking. Over-dried pieces become brittle and can crumble. You want that perfect middle ground where the dough is completely hard but not fragile.
Here is how to check if your oven dried salt dough is ready:
- Lift and tap test: Pick up the piece and tap it gently with your fingernail. A fully dried piece will sound hollow and hard. If it sounds dull or feels heavy, it still has moisture inside.
- Touch test: Press the thickest part of the piece with your fingertip. It should feel completely hard and cool to the touch. Any softness or coolness means it needs more time.
- Visual inspection: Look closely at the edges and surfaces. Fully dried salt dough has a matte, uniform appearance. Shiny or darker spots often indicate trapped moisture.
- Weight check: A dried piece feels noticeably lighter than a wet one. If your piece still feels heavy for its size, give it more drying time.
When in doubt, give your piece an extra 30 minutes in the oven. It is always better to dry a little longer than to risk moisture remaining inside. Remember, once you seal and display your piece, any trapped moisture can cause problems later.
Finishing And Sealing Your Dried Salt Dough Creations
Once your pieces are completely dry, it is time to bring them to life with color and protection. This step transforms a plain dried piece into a beautiful finished craft that you can proudly display or gift to someone special.
Start by painting your dried salt dough with acrylic paints. These adhere well to the surface and come in every color imaginable. You can create simple designs or intricate patterns depending on your skill level and the project. Let the paint dry completely before moving on to the sealing step.
Sealing is essential for protecting your work. A clear acrylic sealant spray or brush-on varnish creates a barrier against moisture and dust. Apply thin, even coats and allow each coat to dry before adding the next. Two to three coats usually provide excellent protection.
For ornaments that will be handled frequently, consider using a food-safe sealant. This adds an extra layer of durability without introducing harmful chemicals. You can also add a ribbon or hook before sealing to create a finished look right away.
Storing And Displaying Your Oven Dried Salt Dough Projects
Your dried and sealed salt dough creations deserve to be shown off, but proper storage ensures they last for years. Whether you are keeping them for yourself or giving them as gifts, a little care goes a long way.
Display your pieces away from direct sunlight and moisture. UV rays can fade painted surfaces over time, and humidity can undo all your hard work by softening the dough. A shelf in a living room or bedroom is usually the perfect spot.
For storage, wrap each piece individually in acid-free tissue paper. Place them in a sturdy box with some padding to prevent bumping and breakage. Avoid plastic bags for long-term storage, as they can trap moisture and promote mold growth. A cool, dry closet or storage bin works wonderfully for keeping your salt dough keepsakes safe between seasons.
If you have made a large batch of ornaments for the holidays, consider making a small display stand or hanging arrangement. This keeps them organized and adds a festive touch to your home decor. Your handmade creations make wonderful centerpieces and conversation starters.
Frequently Asked Questions
Can I use any type of salt for my salt dough?
Regular table salt works perfectly fine for most salt dough recipes. Some crafters prefer kosher salt because it dissolves a bit more slowly, giving you extra working time. Avoid using coarse sea salt or rock salt, as these do not dissolve well and can create a gritty texture in your finished pieces. Stick with fine table salt for the smoothest results.
How do I prevent my salt dough from cracking while drying?
Cracking usually happens when the drying temperature is too high or the dough is too thick. Keep your oven between 200°F and 250°F and maintain a consistent thickness of about a quarter inch. Also, make sure your dough is kneaded well and does not have dry patches. If you notice small cracks forming while drying, you can smooth them with a damp finger before the piece hardens completely.
Is it better to air dry or oven dry salt dough?
Both methods produce great results, but oven drying is faster and more consistent. Air drying can take anywhere from one to three days depending on humidity and thickness. Oven drying typically takes just one to three hours. Air drying works well for very thin pieces or in dry climates, but for most crafters, drying salt dough in the oven is the more reliable and efficient choice.
Can I put painted salt dough in the oven to dry?
No, you should always dry your salt dough before painting. Putting painted dough in the oven can cause the paint to bubble, peel, or change color. The heat can also trap moisture under the paint layer, leading to mold. Always complete the drying process first, then paint and seal your cooled, dried pieces.
How long do oven dried salt dough creations last?
With proper sealing and care, oven dried salt dough pieces can last for several years. They are not waterproof, so keep them away from excessive moisture and direct sunlight. Sealed pieces stored in a dry environment hold up beautifully and make wonderful keepsakes that can be passed down through generations.
What can I do if my salt dough came out too thick and is still soft in the middle?
If your piece is too thick and not fully dry, you can return it to the oven for additional time. Flip the piece and increase the drying time by 30 to 60 minutes at the same low temperature. You can also try slicing the thick piece in half after it has partially dried, then drying each half separately. This trick works well for larger decorative pieces that were accidentally rolled too thick.
Conclusion
Learning how to dry salt dough in the oven opens up a world of creative possibilities right in your own kitchen. With the right temperature, proper thickness, and a little patience, you can create stunning ornaments, decorations, and gifts that people will treasure. The process is simple, affordable, and incredibly rewarding.
Remember to keep your oven temperature low, flip your pieces halfway through, and always check for complete dryness before sealing and displaying. Avoid the common mistakes we covered, and your salt dough crafts will turn out beautifully every time. Whether you are a complete beginner or a seasoned crafter, these techniques will help you get the best possible results from every batch you make.
Now that you have all the knowledge you need, it is time to get creative. Mix up a batch of dough, shape something wonderful, and let your oven do the hard work. Happy crafting, and enjoy the satisfying feeling of holding a finished piece you created with your own hands.