How To Clean A Whirlpool Oven With These Simple Steps
Learn how to clean a Whirlpool oven with these simple, effective steps. Whether you have a self-clean model or prefer DIY methods, this guide covers everything from interior grease to stubborn baked-on grime. You will find easy tips for oven racks, door glass, and natural cleaning solutions that keep your oven sparkling and odor-free.
If your Whirlpool oven looks greasy and smells burnt, you are not alone. A dirty oven affects cooking performance and even the taste of your food. The good news is that how to clean a Whirlpool oven is easier than you think. With the right tools and a little patience, you can restore your oven to sparkling condition. This guide will walk you through every step, from quick daily wipes to deep cleaning methods.
Many people avoid oven cleaning because it seems like a huge task. But breaking it into small steps makes it manageable. You will learn how to handle interior grease, remove baked-on residue, and shine the door glass. I will also share safe DIY solutions that avoid harsh chemicals. By the end, you will know exactly how to keep your oven spotless. Regular cleaning does more than just make your oven look nice. It helps the appliance run efficiently and reduces smoke while cooking. A clean oven also prevents bad odors from lingering in your kitchen. So let us dive into the simple process of making your Whirlpool oven shine again.
Key Takeaways
- Regular cleaning prevents grease buildup and keeps your Whirlpool oven performing efficiently.
- Use baking soda and vinegar for a safe, natural deep clean that tackles tough stains.
- Soak oven racks in hot soapy water to remove baked-on food easily.
- Run the self-clean cycle correctly by removing racks and wiping down after cooling.
- Clean the door glass with a non-abrasive sponge to avoid scratches.
- Maintain your oven after each use with quick wipe-downs to reduce deep cleaning frequency.
📑 Table of Contents
How To Clean A Whirlpool Oven: Why Regular Cleaning Matters
Your oven works hard every day. It cooks meals, bakes desserts, and roasts meats. Over time, grease and food particles build up inside. This layer of grime can cause several problems. First, it affects the taste of your food. Burnt residue can transfer to your dishes and create off-flavors. Second, built-up grease can produce smoke and unpleasant odors. Third, a dirty oven may heat unevenly, leading to poorly cooked meals. Regular oven grease removal is essential for safety too. Heavy grease buildup near the heating elements can become a fire hazard. By cleaning your oven often, you reduce this risk. It also extends the life of your appliance. A well-maintained Whirlpool oven can serve you for many years. Think of cleaning as a small investment that pays off in performance and safety.
The Hidden Dangers of Built-Up Grease
Grease does not just sit on the surface. It drips down and coats the bottom of the oven. During cooking, this residue can burn and create smoke. Even a small amount of burnt food residue can trigger your smoke alarm. Worse, it can leave a sticky film on your cookware. Regular interior cleaning prevents these issues. A quick wipe after each use can save you from a deep clean later. Grease also attracts pests like cockroaches, which are drawn to food particles. Keeping the interior clean removes their food source. This simple habit protects both your health and your appliance.
How Often Should You Clean Your Oven?
You should do a light wipe-down after every use. This means removing any spills right away. For a deeper clean, aim for every three months. If you use your oven frequently, you might need to clean it more often. The self-clean cycle can help, but it does not replace manual cleaning. A combination of both keeps your oven in top shape. Pay attention to signs like smoke during cooking or a persistent odor. These are clear signals that it is time for a thorough cleaning session.
Gathering Your Cleaning Supplies and Safety Tips
Before you start, gather everything you need. Having your supplies ready makes the process smooth. You do not want to stop halfway to find a sponge. Here is what you will need for a thorough Whirlpool oven cleaning session. I also include safety tips so you protect yourself and your appliance.
Essential Tools for Oven Cleaning
- Microfiber cloths – These are gentle and leave no lint behind.
- Soft sponge or non-abrasive scrubber – Avoid steel wool, which can scratch surfaces.
- Baking soda – A natural degreaser that is safe and effective.
- White vinegar – Helps dissolve grease and deodorize.
- Warm water – For mixing solutions and wiping.
- Dish soap – A few drops add cleaning power.
- Oven cleaner spray – Use only if needed and choose a non-toxic option.
- Rubber gloves – Protect your hands from chemicals and hot water.
- Old toothbrush – Great for scrubbing corners and hinges.
Safety First: Protecting Yourself and Your Oven
Safety should always come first. Make sure the oven is completely cool before you start cleaning. Never spray cleaner on a hot surface. Open a window or turn on the ventilation fan to keep air fresh. If you use commercial oven cleaner spray, follow the label instructions carefully. Avoid harsh chemicals that can damage the oven’s interior coating. Always rinse surfaces thoroughly after using any product. Reading your Whirlpool oven manual is also a good idea. It will tell you which cleaning methods are safe for your specific model. Some manuals warn against certain types of degreaser that can strip the porcelain finish.
Step-by-Step Guide to Clean the Interior
The interior of your oven collects the most grime. Food spills, grease splashes, and burnt bits build up over time. Follow these steps to clean the inside thoroughly. I will walk you through each stage so you do not miss a spot.
Removing Loose Debris and Food Particles
Start by removing any loose food particles. Use a wooden spoon or a soft brush to scrape off dried bits. Do not use metal utensils, as they can scratch the interior. Next, wipe down the surfaces with a damp microfiber cloth. This removes crumbs and loose grease. For sticky spots, a little warm water helps. Getting rid of loose debris first makes the deep clean much easier. Quick Tip: Keep a small handheld vacuum nearby to suck up crumbs from the bottom of the oven. This simple trick saves time during your next deep clean.
Making a Baking Soda Paste for Deep Cleaning
Baking soda is a powerhouse for grease removal. Mix three parts baking soda with one part water to form a thick paste. Spread this paste evenly over the interior walls, floor, and ceiling of the oven. Avoid the heating elements. Let the paste sit for at least four hours or overnight. The baking soda will break down the grime and neutralize odors. This is one of the best natural methods for interior cleaning. The paste also absorbs lingering smells, so your oven smells fresh after rinsing.
Using Vinegar to Lift Stubborn Stains
After the baking soda paste has had time to work, it is time to activate it. Spray a mixture of equal parts water and white vinegar over the paste. The vinegar will fizz and bubble, which helps lift stubborn stains. This steam cleaning effect loosens baked-on residue. Use a sponge to gently wipe away the paste and grime. The fizzing action does most of the hard work for you. For tough spots, let the vinegar sit for a few more minutes before wiping. This simple chemical reaction is safe, effective, and leaves no toxic fumes behind.
Wiping Down and Drying the Interior
Once all the paste and grime are removed, wipe the interior with a clean, damp cloth. Rinse the cloth often to avoid spreading grease. Dry the surfaces completely with a dry microfiber cloth. Leaving moisture behind can lead to odors or rust. Your oven interior should now look clean and smell fresh. If any lingering odor remains, place a bowl of lemon water inside and heat it for 10 minutes. This natural deodorizer leaves a pleasant scent. Quick Tip: For a heavy-duty odor removal, add a cup of coffee grounds to the lemon water bowl before heating. The grounds absorb unwanted smells effectively.
Cleaning the Oven Racks and Door Glass
The racks and door glass often get overlooked. But they play a big role in how your oven looks and performs. Grease and food splatter on racks can drip back onto your dishes. Streaky door glass makes your whole kitchen feel dirty. Here is how to handle both parts like a pro.
How to Remove and Soak the Racks
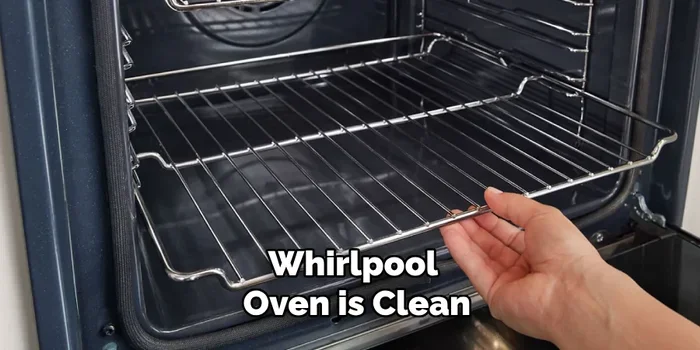
Most Whirlpool ovens have removable racks. Slide them out gently. Fill your bathtub or a large sink with hot water and add a squirt of dish soap. Submerge the racks and let them soak for at least an hour. The hot water softens baked-on food. After soaking, use a non-abrasive scrubber to remove any remaining grime. For stubborn spots, make a paste of baking soda and water, apply it, and scrub gently. Rinse the racks thoroughly and dry them completely before reinserting. Never put racks back in while they are damp, as this can cause rust. Quick Tip: If your racks are extremely greasy, add a tablespoon of dish soap directly to the soaking water and let them sit overnight. This extra step breaks down heavy grease removal without harsh scrubbing.
Tackling Greasy Door Glass
The door glass can become coated with grease and food splatter. To clean oven door glass, make a paste of baking soda and water. Apply it to the glass and let it sit for 15 minutes. Use a soft, damp sponge to wipe it away. Avoid abrasive pads, which can scratch the glass. For hard-to-reach corners, use a cotton swab dipped in vinegar. Rinse with a clean damp cloth and dry with a microfiber towel. A clean door glass lets you watch your food cook without distractions. Quick Tip: Use a soft-bristled toothbrush to scrub the edges of the glass where the frame meets the pane. This area often traps grime that a sponge misses.
Reassembling and Checking for Residue
After drying the racks and glass, reinsert the racks carefully. Check that they slide in smoothly. Wipe any drips or residue from the oven door frame. A final inspection ensures no cleaning solution is left behind. Your oven is now ready for action. Taking a few extra minutes to inspect your work prevents streaks and spots from becoming baked on during your next cooking session.
Using the Self-Clean Cycle the Right Way
Many modern Whirlpool ovens come with a self-clean feature. This function uses high heat to burn off food residue. While it is convenient, it is important to use it correctly. Here is everything you need to know about the self-clean cycle for effective oven grease removal.
What the Self-Clean Feature Actually Does
The self-clean cycle heats the oven to very high temperatures, usually around 900°F. This extreme heat turns food particles into ash. The process can take two to four hours. It is a great way to reduce oven grease removal without chemicals. However, it does not replace regular manual cleaning. The self-clean cycle works best on light to moderate grime. Heavy buildup may require a manual clean first. The cycle also uses a lot of energy, so reserve it for times when you truly need a deep clean.
Step-by-Step for the Self-Clean Function
- Remove all oven racks before starting the cycle. Racks can warp under extreme heat.
- Wipe out any large food debris with a damp cloth.
- Close the oven door securely.
- Select the self-clean setting and set the timer.
- Ventilate your kitchen by opening windows or turning on the range hood.
- Once the cycle ends and the oven cools completely, wipe away the ash with a damp sponge.
Never use oven cleaner spray during the self-clean cycle. The high heat can cause dangerous fumes. Always wait for the oven to cool before wiping out the ash. This step ensures a safe and effective clean. Quick Tip: After the self-clean cycle, place a bowl of vanilla extract inside and heat it for 5 minutes. This simple trick masks any lingering smoke odor and leaves a pleasant scent.
When to Avoid the Self-Clean Cycle
There are times when you should skip the self-clean feature. If your oven has heavy grease buildup, the self-clean may not be enough. It can also produce smoke and odors, especially if there is a lot of residue. If you have pets, keep them out of the kitchen during the cycle, as the fumes can be irritating. Always check your owner’s manual. Some Whirlpool models have specific warnings about using the self-clean function. For example, certain older models may not have a self-clean option at all. Knowing your model’s capabilities helps you choose the right cleaning method.
Natural DIY Solutions and Maintenance Tips
You do not need harsh chemicals to keep your oven clean. Many household items work wonders. Natural solutions are safer for your family and the environment. They are also budget-friendly. Here are some of the best DIY methods and daily habits that keep your oven sparkling.
Lemon Water for a Fresh Scent
Lemon is a natural deodorizer and cleaner. Fill a heat-safe bowl with water and squeeze in the juice of one lemon. Place the bowl inside the oven and heat it on 250°F for 10 minutes. The steam will loosen grime and leave a fresh citrus scent. After the steam cycle, wipe down the interior with a damp cloth. This is a great way to do a quick odor removal and light cleaning. The steam also softens baked-on residue, making it easier to wipe away. You can use this method once a month to maintain cleanliness between deep cleans.
Daily Habits to Keep Your Oven Sparkling
Prevention is the best maintenance strategy. Use a baking sheet or aluminum foil under dishes that may bubble over. This catches spills before they become baked-on residue. Wipe up any spills immediately after the oven cools. A quick wipe-down with a damp cloth takes only a minute. Over time, these small habits reduce the need for deep cleaning. Your oven will stay cleaner for longer. Quick Tip: Keep a small spray bottle of equal parts water and vinegar in your kitchen. A quick spritz and wipe after cooking can prevent grease from hardening.
How to Prevent Future Buildup
Consider using an oven liner on the bottom floor. These liners catch drips and are easy to wash. Avoid using too much oil or grease in your recipes. When cooking, use lids on dishes to prevent splatter. Regularly inspect the oven door seal for food particles. A clean seal improves energy efficiency. By staying on top of small messes, you make the big cleaning sessions much easier. Quick Tip: Every few months, check the condition of the door seal. If it is cracked or damaged, replace it. A good seal keeps heat inside and prevents grease from escaping onto the oven exterior.
How To Clean A Whirlpool Oven does not have to be a daunting chore. With the right approach, you can keep your oven in excellent condition. Regular cleaning improves cooking performance, reduces odors, and extends the life of your appliance. Start with the simple steps in this guide and you will see the difference. A sparkling oven makes every meal feel a little more special. Enjoy the process and the results of a truly clean kitchen. Remember, consistency is the key. A little effort after each use saves you hours of deep cleaning later. Your Whirlpool oven will reward you with even heating and better-tasting food for years to come.
Frequently Asked Questions
Can I use oven cleaner spray on my Whirlpool oven?
Yes, you can use a commercial oven cleaner spray, but only if it is safe for self-cleaning ovens. Always check the product label and your Whirlpool oven manual. Spray only on the interior surfaces, never on the heating elements. Rinse thoroughly after use to avoid chemical residue. For a safer option, stick to baking soda and vinegar solutions.
How long does the self-clean cycle take?
The self-clean cycle typically takes between two and four hours. The exact time depends on your Whirlpool oven model and the level of grime. The cycle includes a high-heat burn phase and a cool-down phase. Do not open the door during the cycle, as it releases heat and smoke. After it finishes, wait for the oven to cool completely before wiping out the ash.
What is the best way to remove baked-on grease?
The best way is to use a baking soda paste. Mix baking soda with water to form a thick consistency, apply it to the greasy area, and let it sit for several hours. The paste breaks down the grease naturally. For stubborn spots, add a little white vinegar to activate the cleaning action. Scrub gently with a non-abrasive sponge and wipe clean.
How often should I clean my oven racks?
You should clean your oven racks every one to two months, depending on how often you cook. If you notice drips or spills, clean them right away. Soaking the racks in hot soapy water for an hour makes the job much easier. Regular cleaning prevents heavy grease buildup and keeps your oven running efficiently.
Is it safe to clean the oven door glass with vinegar?
Yes, vinegar is safe and effective for cleaning oven door glass. Mix equal parts vinegar and water in a spray bottle. Spray the glass, let it sit for a few minutes, and wipe with a soft sponge. Avoid using abrasive pads that can scratch the glass. Vinegar cuts through grease and leaves the glass streak-free.
Can I use lemon to clean my oven?
Absolutely. Lemon is a natural cleaner and deodorizer. Boil lemon water in the oven to loosen grime and remove odors. The steam helps lift dirt, making it easier to wipe away. This method is perfect for a quick refresh between deep cleans. It leaves a fresh, citrus scent behind.