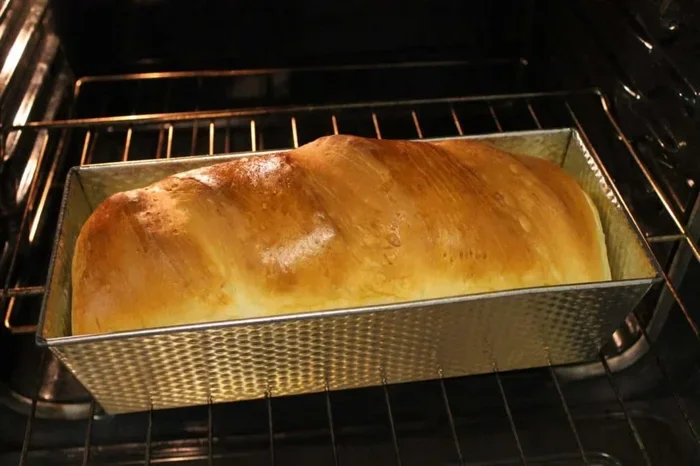
How To Bake Bread In An Oven With Foolproof Results
This guide shows you exactly how to bake bread in an oven with simple, reliable steps. You’ll master dough preparation, rising times, and baking temperature for a perfect loaf every time. Follow along for a delicious homemade bread that rivals any bakery.
Many people think how to bake bread in an oven is a task for professionals. They imagine a complicated process with fancy equipment. The truth is, you can make a beautiful loaf right in your kitchen. A basic oven, a few simple ingredients, and a little patience are all you need. This guide walks you through every single step. You’ll bake a golden, fragrant homemade bread that tastes amazing. Whether you want a crusty bread for sandwiches or a soft loaf for toast, this method works. You’ll learn the secrets behind a perfect rise and a tender crumb. Let’s get started with the basics.
Before you even turn on the oven, you need the right ingredients. Flour, water, yeast, and salt form the foundation of most yeast bread. Bread flour gives you the best structure because it has more protein. All-purpose flour works too, but the crumb might be a bit denser. I always keep a can of active dry yeast on hand. It’s reliable and easy to find. You’ll also need a bread pan or a baking stone. A Dutch oven is a fantastic option for crusty bread. It traps steam and creates a professional bakery finish. Gather these items, and you’re ready to go.
Key Takeaways
- Simple Process: Follow clear steps to mix, knead, rise, and bake without stress.
- Perfect Temperature: Learn the ideal baking temperature for a golden crust.
- Essential Tools: A basic kitchen setup is all you need for great bread.
- Patience Pays Off: Proper dough rising makes the texture light and airy.
- Freshness Matters: Cooling and storing correctly keeps your loaf soft for days.
- Versatile Recipe: Adapt the method for crusty bread, soft bread, whole wheat, or plain white.
📑 Table of Contents
Why Baking Bread In An Oven Is Worth It
There’s something magical about oven-baked bread. The smell fills your entire home. You control every ingredient, so you know exactly what’s in your food. Store-bought bread often contains preservatives and added sugars. Homemade bread lets you choose whole wheat bread or classic white. The baking temperature and baking time are in your hands. You can adjust the crust to your liking. Some people love a thick, dark crust. Others prefer a soft, golden finish. Either way, a fresh loaf straight from the oven is unbeatable. It’s a skill that saves money and impresses guests.
Freshness You Can Taste
Nothing compares to the flavor of bread baked that morning. The oven spring—the final puff up in the oven—creates a light texture. When you slice into a warm loaf, the bread crumbs are soft and inviting. You’ll notice the difference immediately. This freshness also means your bread stays moist longer. I often make a loaf on Sunday, and it’s still perfect by Wednesday.
Saving Money and Reducing Waste
Baking at home is surprisingly affordable. A basic loaf costs pennies in ingredients. You avoid the plastic wrapping and packaging of store-bought loaves. If you have a cooling rack, you can cool the bread properly and keep it fresh. It’s a simple step that makes a big difference. Plus, you can bake exactly the size you need. No more half-eaten, stale loaves sitting on the counter.
Gathering Your Ingredients And Tools
Having everything ready before you start makes the process smooth. This is called mise en place, a French term that means “everything in its place.” For a basic homemade bread, you’ll need a few staples. I list them below so you can check your pantry.
Core Ingredients for Basic Bread
- Bread flour – 3 to 4 cups. This gives the dough strength.
- Active dry yeast – 1 packet or 2 1/4 teaspoons. Make sure it’s not expired.
- Warm water – 1 to 1 1/4 cups. The water should feel warm, not hot.
- Salt – 1 1/2 teaspoons. It enhances flavor and controls yeast.
- Sugar or honey – 1 tablespoon. This feeds the yeast and helps browning.
- Olive oil or melted butter – 2 tablespoons. This adds softness.
Essential Tools You’ll Need
- Large mixing bowl – for combining and rising the dough.
- Measuring cups and spoons – accuracy matters in baking.
- Wooden spoon or dough whisk – for mixing.
- Clean kitchen towel – to cover the dough while it rises.
- Bread pan – a 9×5 inch loaf pan is standard.
- Baking stone or Dutch oven – for free-form loaves.
- Parchment paper – makes cleanup easy.
- Cooling rack – prevents the bottom from getting soggy.
Mastering The Dough: Mixing And Kneading
The dough is the heart of your bread. Getting it right means the difference between a dense brick and a fluffy loaf. I’ll walk you through the kneading dough process step by step. This part takes about 10 minutes by hand. If you have a stand mixer with a dough hook, it’s even easier.
Mixing the Ingredients
Start by combining warm water and sugar in a large bowl. Sprinkle the yeast over the top. Let it sit for 5 to 10 minutes until it becomes foamy. This foam means the yeast is alive and active. Next, add the salt and oil. Then, begin adding flour one cup at a time. Stir with a wooden spoon until a shaggy dough forms. It will look messy, but that’s perfectly normal.
The Kneading Process
Turn the dough out onto a lightly floured surface. Use the heel of your hand to push the dough away from you. Then, fold it back over itself. Rotate the dough a quarter turn. Repeat this motion for 8 to 10 minutes. The dough should become smooth and elastic. You’ll know it’s ready when you poke it gently and it springs back slowly. This gluten development is what gives bread its structure. Don’t rush this step. Proper kneading leads to great oven spring later.
Quick Tips for Perfect Dough
- If the dough is too sticky, add a little more flour, one tablespoon at a time.
- If it’s too dry and crumbly, wet your hands slightly and work the moisture in.
- Use a bench scraper to clean the surface and collect the dough.
- Don’t add too much flour; this can make the bread tough.
The Rising Process: Patience Is Key
After kneading, the dough needs time to rest and rise. This is called proofing. During this time, the yeast ferments and creates tiny air bubbles. These bubbles expand in the oven, giving you that light, airy texture. Rushing this step is a common mistake. I’ll explain the ideal conditions for dough rising.
First Rise: Bulk Fermentation
Place the dough in a lightly oiled bowl. Cover it with a damp towel or plastic wrap. Put it in a warm, draft-free spot. The ideal temperature is around 75°F to 80°F. Let it rise for 1 to 2 hours, or until it has doubled in size. You can tell it’s ready by pressing a floured finger into the dough. If the indentation stays, it’s proofed. If it springs back, it needs more time.
Shaping the Loaf
Once the dough has risen, gently punch it down to release the air. Turn it out onto a floured surface. Shape it into a tight log that fits your bread pan. To shape, fold the edges into the center and roll it up. Pinch the seam closed. Place the dough seam-side down in a greased pan. Cover it again and let it rise for a second time, about 30 to 45 minutes. It should puff up and crest just above the rim of the pan.
Common Mistakes to Avoid
- Letting the dough rise in a cold drafty spot. This slows yeast activity.
- Skipping the second rise. This results in a denser, smaller loaf.
- Over-proofing the dough. If it rises too much, it can collapse in the oven.
- Using water that’s too hot. It will kill the yeast and the dough won’t rise.
Baking Your Bread To Perfection
Now comes the exciting part. You’re about to transform that soft dough into a golden, fragrant loaf. Baking temperature and baking time are critical. Most yeast bread bakes at a high heat initially, then lowers slightly. This creates a strong crust and a fully baked interior.
Preheating the Oven
Always preheat your oven before the second rise is complete. For a standard loaf, set the oven to 375°F (190°C). If you’re using a Dutch oven, preheat it in the oven as it heats up. A hot Dutch oven mimics a professional steam-injected oven. It gives you that impressive crusty bread with a crackly shell. For a baking stone, place it on the lower-middle rack while the oven preheats. This delivers even heat from the bottom.
The Baking Process Step by Step
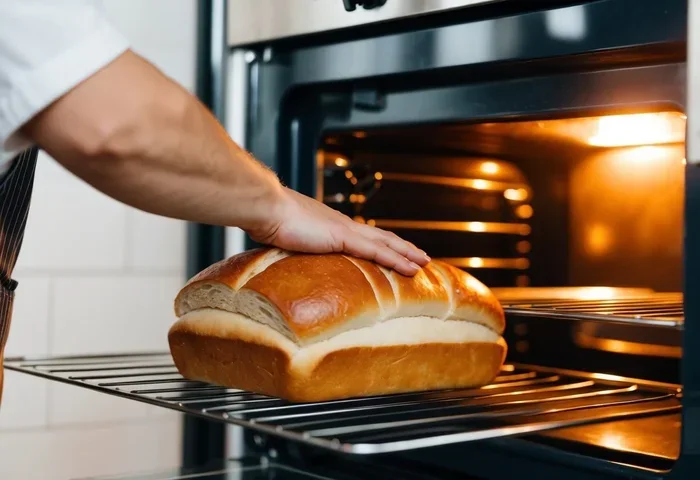
- Place the risen loaf in the preheated oven. If using a Dutch oven, lower the hot pot carefully.
- Bake for 20 minutes with the lid on (if using a Dutch oven). This traps steam and helps the bread rise.
- Remove the lid and continue baking for another 20 to 25 minutes. The top should turn deep golden brown.
- For a bread pan without a lid, bake for 30 to 35 minutes total at 375°F.
- To check doneness, tap the bottom of the loaf. It should sound hollow. You can also use a food thermometer; the internal temperature should reach 190°F to 200°F.
Bread Scoring for a Professional Look
Before you put the dough in the oven, use a sharp knife or a razor blade to score the top. This is called bread scoring. Make a slash about 1/2 inch deep. The score gives the bread a controlled place to expand. It prevents random bursting and looks beautiful. This step is especially important for free-form loaves baked on a stone.
Comparing Baking Methods
Different tools give you different results. Here’s a quick comparison to help you choose the right method for your homemade bread.
| Method | Best For | Crust Type | Ease of Use |
|---|---|---|---|
| Bread Pan | Soft, sandwich-style loaves | Soft, golden | Very easy |
| Dutch Oven | Crusty bread with a crackly shell | Thick, dark crust | Moderate |
| Baking Stone | Free-form artisan loaves | Crisp, even crust | Moderate |
Each method produces excellent results. The bread pan is the most forgiving for beginners. A Dutch oven creates a professional steam environment that mimics a bakery oven. A baking stone gives you the flexibility to shape any loaf you like. Choose the one that fits your kitchen and your goals.
Expert Insights on Oven Spring
Oven spring is the final burst of rising that happens in the first few minutes of baking. It’s what gives bread its height. To maximize oven spring, make sure your oven is fully preheated. The hot air immediately sets the outside of the loaf, trapping the gases inside. Spraying the dough with water right before baking can also help create steam, which keeps the crust soft and allows maximum expansion. A spray bottle works perfectly for this trick.
Cooling And Storing Your Homemade Loaf
You might be tempted to slice into that hot loaf right away. Resist the urge! Cooling is a vital final step. Cutting too soon releases steam and can make the inside gummy. I always let my bread rest on a cooling rack for at least 30 minutes. This allows the crumb to set and the crust to firm up.
Why Cooling Matters
As the bread cools, the interior continues to cook slightly. The starches set, giving you a clean slice. If you place a hot loaf directly on a countertop, the bottom can become soggy from trapped steam. A wire rack promotes airflow all around. Your homemade bread will have a consistent texture from crust to crumb.
Storing for Freshness
Once completely cool, you have a few storage options. For short-term keeping, wrap the loaf in a clean kitchen towel or place it in a paper bag. This keeps the crust at the right texture. For longer storage, slice the bread and freeze it. I slice my loaf before freezing so I can pull out just a few slices as needed. Toast them straight from frozen. They taste almost as fresh as the day you baked them. Avoid storing bread in the refrigerator. The cold temperatures actually make bread stale faster.
Repurposing Day-Old Bread
Even if your loaf has gone slightly stale, it’s not wasted. Stale bread makes excellent bread crumbs. Simply toast the slices, pulse them in a food processor, and store them in a jar. You can also make French toast, bread pudding, or croutons for salads. Nothing goes to waste when you bake your own oven-baked bread.
Conclusion
Baking how to bake bread in an oven is a rewarding skill anyone can learn. You’ve seen the full journey, from mixing simple ingredients to pulling a golden loaf from the heat. The key is patience and attention to detail. Follow the steps for mixing, kneading, rising, and baking, and you’ll get consistent, delicious results. Remember to use a cooling rack and store your bread properly. Each loaf you bake builds your confidence and improves your technique. Soon, you’ll be experimenting with different flours, shapes, and flavors. The smell of fresh homemade bread in your kitchen is a joy you’ll never tire of. So preheat that oven, gather your ingredients, and start baking today. You’ll be glad you did.
Frequently Asked Questions
What is the best oven temperature for baking bread?
Most breads bake well at 375°F (190°C). This temperature creates a nice balance between a golden crust and a fully baked interior. If you prefer a very crusty bread, you can start at 425°F for the first 15 minutes and then reduce to 375°F. Always use an oven thermometer to ensure accuracy.
Can I use all-purpose flour instead of bread flour?
Yes, you can. All-purpose flour works fine for a softer loaf. Bread flour has more protein, which gives a chewier texture and better rise. If you use all-purpose, your bread might be a bit denser, but it will still taste great. I recommend trying both to see your preference.
How do I know when my bread is fully baked?
Look for a deep golden brown color on top. Tap the bottom of the loaf; it should sound hollow. The most reliable method is using a food thermometer inserted into the center. The internal temperature should read between 190°F and 200°F. This ensures the inside is cooked through and the crumb is set.
Do I need a Dutch oven to bake good bread?
No, a Dutch oven is not essential. It’s a fantastic tool that creates steam and a beautiful crust, but a standard bread pan works perfectly well. A baking stone or even an inverted baking sheet can also improve your results. The most important factors are proper kneading, good dough rising, and the right baking temperature.
Why did my bread turn out dense and heavy?
Dense bread usually comes from one of a few issues. The yeast might be old or inactive. The dough might not have risen long enough. Over-kneading can also make bread tough. Another common mistake is not letting the dough rise a second time in the pan. Check your yeast’s expiration date and be patient with the rising process.
How long should I let my bread dough rise?
The first rise typically takes 1 to 2 hours at room temperature, until the dough doubles in size. The second rise after shaping takes about 30 to 45 minutes. Cold environments slow down rising significantly. If your kitchen is cool, place the dough in the oven with just the light on to create a warm, draft-free spot. This helps the dough rising process move along steadily.