How To Brew Coffee Pour Over And Master The Method
Pour over coffee is a simple yet rewarding brewing method that gives you full control over flavor, strength, and aroma. This guide walks you through every step, from choosing the right equipment to perfecting your pour. Whether you are a beginner or want to refine your skills, you will find practical tips to make pour over coffee at home that rivals your favorite café.
Key Takeaways
- Choose the right gear: a dripper, gooseneck kettle, grinder, and paper filter make all the difference.
- Master the bloom: letting coffee grounds sit with a small amount of water releases trapped gases for better extraction.
- Pour slowly and steadily: a controlled pour ensures even saturation and balanced flavor.
- Use the correct water temperature: between 195°F and 205°F is the sweet spot for optimal extraction.
- Clean your equipment regularly: just like you would maintain other kitchen tools, keeping your dripper clean improves taste.
- Experiment with ratios: the standard 1:15 coffee-to-water ratio is a great starting point, but you can adjust to your liking.
- Practice makes perfect: every brew teaches you something new about your preferences and technique.
📑 Table of Contents
What Is Pour Over Coffee And Why It Is Worth Learning
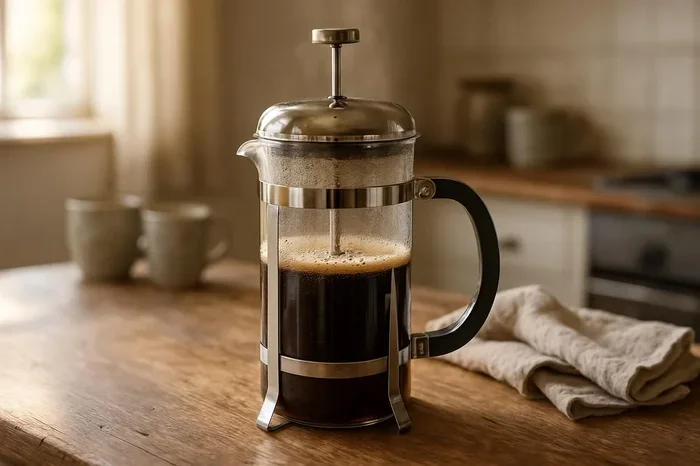
Pour over coffee is a manual brewing method where you slowly pour hot water over coffee grounds placed in a filter. The water drips through the grounds and filter into a cup or carafe below. The result is a clean, bright, and flavorful cup of coffee that highlights the unique notes of the beans you choose.
People love this method because it gives them complete control. You decide the water temperature, the pour speed, the grind size, and the brew time. No machines do the work for you. Every choice you make shapes the final cup. This is why many coffee lovers consider pour over brewing one of the best ways to enjoy coffee at home.
The process is also surprisingly simple. You do not need expensive equipment or years of experience. With a few basic tools and a little patience, anyone can learn to brew a great cup. Once you get the hang of it, you will wonder how you ever settled for less.
If you have ever tasted a beautifully crafted cup of pour over coffee at a café and thought, “I wish I could make that at home,” this guide is for you. We will cover everything you need to know, from equipment to technique, so you can start brewing with confidence today.
Equipment You Need For Pour Over Brewing
The Dripper
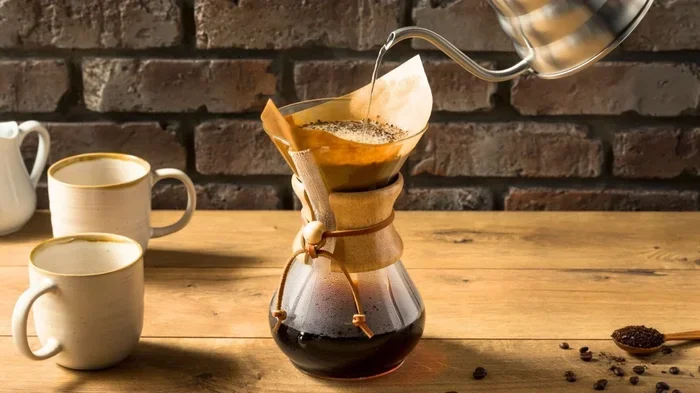
The dripper is the centerpiece of your setup. It holds the filter and coffee grounds while the water passes through. Popular options include the Hario V60, the Kalita Wave, and the Chemex. Each dripper has a slightly different design that affects how the water flows through the grounds. The Hario V60 has spiral ridges that promote even extraction. The Kalita Wave uses a flat bottom for a smoother, more balanced cup. The Chemex uses a thick cloth or paper filter that produces a very clean brew.
You do not need to spend a fortune. A basic ceramic or plastic dripper works perfectly well when you are starting out. What matters most is that you use it consistently so you can learn how it behaves.
The Gooseneck Kettle
A gooseneck kettle is almost essential for pour over coffee. The long, narrow spout gives you precise control over the flow of water. You can pour slowly and steadily, which is critical for even saturation. Without a gooseneck kettle, it is very easy to pour too fast or unevenly, which leads to inconsistent extraction.
Electric gooseneck kettles let you set the exact water temperature. This is a huge advantage because temperature control is one of the most important factors in brewing great coffee. If you want to dive deeper into temperature precision in your kitchen tools, you might also enjoy learning about how to fix oven temperature for baking, since the same principle of accuracy applies across all cooking methods.
The Grinder
Freshly ground coffee makes a noticeable difference in flavor. A burr grinder is the best choice because it produces a consistent grind size. Blade grinders chop the beans unevenly, which can lead to over-extraction or under-extraction. For pour over brewing, you want a medium grind size. It should look and feel like coarse sand or sea salt.
If you do not have a grinder yet, many coffee shops will grind beans for you if you ask. Just be sure to use the grounds within a few hours of grinding for the best flavor.
The Filter And Water
Paper filters are the most common choice for pour over coffee. They remove oils and fine particles, resulting in a clean and clear cup. Cloth filters are reusable and allow more oils through, giving a richer body. Metal filters are also reusable but let the most oils and sediment pass, creating a heavier cup.
Always use filtered or bottled water if possible. Tap water can contain chlorine and minerals that affect the taste of your coffee. Clean, fresh water is one of the simplest ways to improve your brew.
The Step-By-Step Pour Over Process
Now that you have your equipment ready, let us walk through the actual brewing process. Follow these steps and you will be well on your way to a perfect cup every time.
Step 1: Heat Your Water
Heat your water to between 195°F and 205°F. If you do not have a thermometer, bring the water to a boil and then let it sit for about 30 seconds. This brings it into the ideal range. Water that is too hot will over-extract the coffee and make it bitter. Water that is too cool will under-extract it and leave it tasting sour or weak.
Step 2: Grind Your Coffee
Measure out your coffee beans. A good starting ratio is 1 gram of coffee for every 15 to 17 grams of water. For a single cup, that is about 15 grams of coffee and 250 grams of water. Grind the beans to a medium consistency, similar to sea salt.
Step 3: Place The Filter And Rinse It
Put the paper filter in the dripper and place it on top of your mug or carafe. Pour a small amount of hot water through the filter to rinse it. This removes any papery taste and preheats the dripper and mug. Discard the rinse water before adding your coffee grounds.
Step 4: Add The Grounds And Bloom
Add the ground coffee to the filter and gently shake it to level the surface. Start a timer. Pour just enough water to saturate all the grounds, about twice the weight of the coffee. Let it sit for 30 to 45 seconds. This step is called the bloom. During the bloom, carbon dioxide escapes from the freshly roasted coffee, which allows for better extraction in the following steps.
Watch the grounds puff up and bubble. This is a sign of fresh coffee, and it is a satisfying part of the process.
Step 5: Pour The Remaining Water
After the bloom, begin pouring the remaining water slowly in a circular motion. Start from the center and work your way outward. Avoid pouring directly on the filter paper. Keep the pour steady and gentle. The total brew time should be around 3 to 4 minutes. If it finishes too quickly, try a finer grind. If it takes too long, go a bit coarser.
Step 6: Serve And Enjoy
Once all the water has passed through, remove the dripper and give your coffee a gentle swirl. Pour it into your favorite mug and enjoy it while it is hot. Pour over coffee tastes best when it is fresh, so try to drink it within 15 to 20 minutes of brewing.
Purfecting Your Pour Over Technique
Getting the perfect cup takes a little practice, but the basics are easy to master once you understand a few key principles.
Control Your Pour Speed
The speed of your pour directly affects the brew time and extraction. A slow, steady pour gives the water more time to interact with the coffee grounds, leading to a fuller flavor. A fast pour reduces brew time and can result in a lighter, more delicate cup. Try different speeds and see which one you prefer.
Master The Circular Motion
Pouring in a slow circle helps distribute the water evenly across all the grounds. This prevents channeling, which happens when water finds one path through the coffee and bypasses other areas. Uneven extraction leads to a cup that tastes both bitter and sour at the same time. A steady circular pour solves this problem.
Pay Attention To The Ratio
The coffee-to-water ratio is the foundation of a great cup. The standard starting point is 1:15, which means 1 gram of coffee for every 15 grams of water. If your coffee tastes too strong, add a little more water. If it tastes too weak, use a bit more coffee. Small adjustments make a big difference.
Keep Your Equipment Clean
Clean equipment is essential for consistent flavor. Oils and residue from previous brews can build up and affect the taste of your coffee. Just like you would properly clean a kitchen appliance to keep it working well, you should rinse your dripper and filter after every use. For deeper cleaning, wash all parts with warm water and mild soap. Regular maintenance keeps your coffee tasting fresh and pure.
Common Mistakes To Avoid
Even experienced home brewers make mistakes sometimes. Here are a few common ones to watch out for.
- Using boiling water: Water straight off the boil is too hot and will scorch the coffee, making it bitter. Let it cool for 30 seconds after boiling.
- Grinding too fine or too coarse: A grind that is too fine slows the water down and causes over-extraction. A grind that is too coarse lets water rush through and under-extracts the coffee.
- Pouring too fast: Rushing the pour leads to uneven saturation and uneven extraction. Take your time and enjoy the process.
- Skipping the bloom: The bloom is an important step that allows gases to escape. Skipping it can result in a flat or sour cup.
- Using stale coffee beans: Coffee beans lose their freshness over time. For the best flavor, use beans that were roasted within the past two to four weeks.
- Not preheating your equipment: Cold drippers and mugs absorb heat from the brewing process, which drops the water temperature and affects extraction. Always rinse with hot water first.
Expert Tips To Elevate Your Brew
Once you have the basics down, these tips will help you take your pour over coffee to the next level.
- Weigh everything: Use a digital scale to measure your coffee and water by weight. Volume measurements like scoops are inconsistent and less accurate.
- Experiment with beans: Try different roasts and origins to discover what flavors you enjoy most. Light roasts tend to be bright and fruity. Medium roasts are balanced and nutty. Dark roasts are bold and smoky.
- Keep a brewing journal: Write down your ratios, grind sizes, pour patterns, and brew times. This helps you replicate what works and troubleshoot what does not.
- Store beans properly: Keep your coffee beans in an airtight container away from light and heat. Do not store them in the freezer, as moisture can damage the beans.
- Preheat your cup: A warm mug keeps your coffee at the right temperature longer. Simply rinse it with hot water before you start brewing.
If you ever find yourself reheating leftover coffee, keep in mind that reheating coffee in the oven can alter its flavor significantly. It is always better to brew a fresh cup. But if you need to warm up a beverage, using an oven for reheating is a gentler option than microwaving, which can create hot spots and change the taste.
Why Pour Over Coffee Tastes So Good
The secret behind the great taste of pour over coffee lies in the extraction process. When hot water passes through the coffee grounds, it dissolves hundreds of flavor compounds. The filter catches the grounds and most of the oils, letting only the dissolved flavors pass through. This creates a cup that is clean, nuanced, and full of character.
Because you control every variable, you can tailor each cup to your exact preferences. Want a lighter, tea-like brew? Use a coarser grind and pour faster. Want a bold, rich cup? Use a finer grind and pour slower. The flexibility is what makes pour over brewing so rewarding and enjoyable.
Compared to drip machines, pour over coffee gives you a cleaner and more flavorful result. Drip machines often use lower-quality filters and less precise temperature control. With pour over brewing, you are in the driver’s seat from start to finish.
Conclusion
Learning how to brew coffee pour over is one of the most satisfying skills you can develop in the kitchen. It is simple, affordable, and incredibly rewarding. With the right equipment, the correct technique, and a little practice, you can brew a cup of coffee that is clean, flavorful, and perfectly tailored to your taste.
Start with the basics. Get a dripper, a gooseneck kettle, a grinder, and some quality beans. Follow the steps in this guide, and do not be afraid to experiment. Every brew teaches you something new. Over time, you will develop your own style and preferences that make each cup uniquely yours.
The beauty of pour over coffee is that it is more than just a method. It is a ritual. It is a moment of calm in a busy day. It is a chance to slow down, savor the process, and enjoy something truly handmade. So grab your dripper, heat up some water, and start brewing. Your perfect cup is waiting.
Frequently Asked Questions
What is the best coffee-to-water ratio for pour over brewing?
The standard ratio is 1:15, meaning 1 gram of coffee for every 15 grams of water. This produces a balanced and flavorful cup. You can adjust the ratio to 1:16 or 1:17 if you prefer a lighter brew, or use 1:14 for a stronger cup. Using a digital scale ensures accuracy every time.
Can I use a regular kettle instead of a gooseneck kettle?
You can, but a gooseneck kettle makes a big difference. The narrow spout gives you much better control over the pour speed and direction. If you do not have one yet, you can still make great pour over coffee by pouring slowly and carefully from any kettle. A gooseneck kettle is a worthwhile investment as you get more serious about brewing.
How long should the total brew time be for pour over coffee?
Aim for a total brew time of 3 to 4 minutes. This includes the bloom phase, which lasts 30 to 45 seconds. If your brew finishes too quickly, try using a finer grind. If it takes longer than 4 minutes, go a bit coarser. Adjusting grind size is the easiest way to control brew time.
What type of coffee beans work best for pour over?
Medium roast beans are a great starting point because they offer a balanced flavor profile. Light roasts highlight fruity and floral notes, while dark roasts bring out bold and smoky characteristics. Freshly roasted beans, roasted within the past two to four weeks, give the best results. Experiment with different origins to find your favorite.
Do I need to rinse the paper filter before brewing?
Yes, rinsing the paper filter is an important step. It removes any papery taste and preheats the dripper and mug. Simply pour hot water through the filter and discard the rinse water before adding your coffee grounds. This small step makes a noticeable difference in the cleanliness and flavor of your cup.
Can I reuse coffee grounds for a second pour over brew?
You can, but the second brew will be much weaker and less flavorful. The first extraction draws out the majority of the desirable compounds. A second brew is sometimes called a “second pass” and it produces a thin, watery cup. For the best flavor, always use fresh grounds for each brew.
=== ANALYTICS SUMMARY ===
Primary keyword: “How To Brew Coffee Pour Over”
LSI Keywords used: pour over coffee, coffee brewing method, pour over dripper, coffee grinder, water temperature, coffee-to-water ratio, bloom coffee, gooseneck kettle, paper filter, coffee extraction, brew time, medium grind coffee, coffee grounds, hot water, coffee flavor, manual brewing, coffee skills, brewing technique, coffee maker, pour over technique, coffee ritual, even extraction, circular motion, clean cup, flavor compounds, digital scale, brewing journal, fresh coffee beans, bloom phase, over-extraction, under-extraction
Internal Links used: 3 (how-to-fix-oven-temperature, how-to-clean-cosori-air-fryer-toaster-oven, how-to-use-oven-to-reheat-food)
Word Count Target: ~2700 words