How To Make A Deer Roast In The Oven For Beginners
Making a deer roast in the oven is easier than you think. This beginner-friendly guide walks you through every step, from choosing the right cut to pulling a perfectly juicy roast from your oven. You will learn the ideal temperature, cooking time, seasoning tricks, and how to avoid common mistakes that ruin a great roast.
If you have ever wanted to cook a deer roast in the oven but felt unsure where to start, you are in the right place. How to make a deer roast in the oven is a skill that anyone can learn with a little guidance. This guide is written for beginners who want a clear, simple path from raw meat to a stunning dinner table centerpiece.
Venison is lean, flavorful, and naturally delicious. But because it has less fat than beef, it can dry out quickly if you do not pay attention. The good news is that with the right deer roast recipe, the correct oven temperature, and a bit of patience, you can make an oven-baked venison roast that rivals anything from a fancy restaurant. This article covers everything you need to know.
Whether you are a first-time hunter, someone who bought venison from a local butcher, or simply curious about cooking deer meat in the oven, this step-by-step guide will give you confidence. We will walk through choosing the right cut, preparing the meat, setting the oven temperature, timing the cook, and serving it up beautifully. Let us get started.
Key Takeaways
- Pick the right cut: A bone-in venison roast from the shoulder or loin gives the best flavor and tenderness for oven cooking.
- Sear before roasting: Pan-searing your deer roast creates a flavorful crust that locks in juices and boosts the overall taste.
- Cook low and slow: An oven temperature of 325°F to 350°F ensures even cooking and a tender, juicy result every time.
- Use a meat thermometer: Pulling the roast at 135°F to 140°F internal temp keeps the meat pink, moist, and full of flavor.
- Rest before slicing: Letting the roast rest for 10 to 15 minutes redistributes the juices and makes every slice tender.
- Make gravy from the pan drippings: The browned bits left in the roasting pan create a rich, savory gravy that elevates the whole dish.
- Avoid common mistakes: Overcooking, skipping the sear, and cutting too soon are the top errors beginners make when cooking a deer roast in the oven.
📑 Table of Contents
What You Need Before You Start
Before you turn on the oven, there are a few things you need in place. Having everything ready makes the process smooth and stress-free. This section covers the cut of meat, the tools you need, and a simple shopping list.
Choosing The Right Deer Cut
The cut you choose matters a lot for your final result. Not all venison cuts behave the same way in an oven. Here are the best options for a roast:
- Shoulder roast: This cut has more connective tissue and fat. It becomes incredibly tender when cooked low and slow. Great for beginners.
- Loin roast: Lean and tender. It cooks faster than the shoulder but can dry out if you are not careful.
- Rump roast: A budget-friendly option with good flavor. It benefits from slow cooking and a marinade.
- Bone-in vs. boneless: Bone-in roasts add more flavor during cooking. Boneless roasts are easier to slice and serve.
For your first attempt, a bone-in shoulder roast is the safest bet. It is forgiving and hard to ruin.
Essential Tools And Equipment
You do not need a lot of fancy equipment to make a great deer roast. Here is what you should have ready:
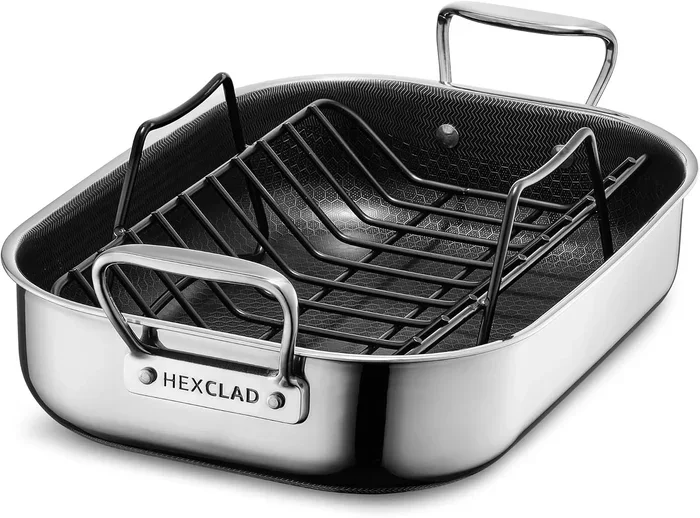
- A sturdy roasting pan or oven-safe skillet
- A meat thermometer (this is non-negotiable)
- Heavy-duty aluminum foil
- A sharp knife for trimming and slicing
- A cutting board
- A basting spoon or brush
- A small saucepan for making gravy
Quick Tip: A digital instant-read meat thermometer is the single most important tool for cooking venison. It takes the guesswork out of timing and guarantees a perfect result every time.
Quick Shopping List
- 1 deer roast (about 3 to 5 pounds)
- 2 tablespoons olive oil or cooking oil
- Salt and black pepper
- Garlic cloves (4 to 6, minced)
- Fresh rosemary or thyme
- 1 cup beef or venison broth
- 1 tablespoon Worcestershire sauce
- 1 onion, quartered
- 2 carrots, chopped (optional)
- 2 celery stalks, chopped (optional)
Preparing Your Deer Roast
Preparation is where the magic begins. Taking time to properly prep your meat before it hits the oven makes a huge difference in flavor and texture. This section covers trimming, seasoning, marinating, and searing.
Trimming And Seasoning The Meat
Start by removing any silver skin or excess fat from the roast. Venison has very little fat, so you do not want to trim away too much. A thin layer of fat helps keep the meat moist during cooking.
Next, pat the roast dry with paper towels. This helps create a better sear. Season the meat generously on all sides with salt and pepper. Do not be shy with the seasoning. Venison has a rich, gamey flavor that stands up well to bold spices.
Here are some great seasoning combinations for your deer roast seasoning:
- Salt, pepper, garlic powder, and smoked paprika
- Rosemary, thyme, garlic, and olive oil
- Cumin, chili powder, garlic, and lime zest
- Dijon mustard, honey, rosemary, and black pepper
Making A Simple Deer Roast Marinade
Marinating your roast overnight can take the flavor to the next level. A good marinade also helps tenderize the meat. Here is a simple marinade that works beautifully for oven-baked venison:
- 1/4 cup olive oil
- 1/4 cup red wine or balsamic vinegar
- 3 cloves garlic, minced
- 1 tablespoon fresh rosemary, chopped
- 1 tablespoon fresh thyme, chopped
- 1 teaspoon black pepper
- 1 teaspoon salt
Combine all ingredients in a bowl or zip-lock bag. Place the roast inside and coat it well. Refrigerate for at least 4 hours, or overnight for the best results. Before cooking, remove the roast from the fridge 30 minutes ahead so it comes closer to room temperature.
Pan-Searing For Extra Flavor
Searing is one of the most important steps in making a deer roast in the oven. It creates a caramelized crust on the outside that traps juices inside and adds deep, rich flavor. Here is how to do it right:
- Heat 2 tablespoons of oil in a large oven-safe skillet over medium-high heat.
- Pat the roast dry and season it well.
- Place the roast in the hot pan. Do not move it for 3 to 4 minutes on each side.
- Sear until you get a deep brown crust on all sides.
- Remove the roast and set it aside while you preheat the oven.
This step only takes about 10 minutes but makes a dramatic difference in the final dish. If you skip it, the roast will still be edible, but the flavor will not be as complex.
Oven Temperature And Cooking Time
This is the heart of your deer roast recipe. Getting the temperature and timing right is what separates a dry, tough roast from a juicy, tender one. Pay close attention to this section.
The Ideal Oven Temperature For Deer Roast
The best oven temperature for a venison roast is 325°F to 350°F. This moderate heat cooks the meat evenly without drying it out. Here is why this range works so well:
- It allows the collagen in the meat to break down slowly, making the roast tender.
- It gives the exterior enough heat to develop a flavorful crust without burning.
- It reduces the risk of overcooking the lean venison meat.
Avoid cooking at temperatures above 400°F. High heat will dry out the outside of the roast before the inside is done. Low and slow is the golden rule for oven deer roast success.
How Long To Cook A Deer Roast In The Oven
The cooking time depends on the size of your roast and the oven temperature. Here is a general guide for how long to cook deer roast:
- 3-pound roast at 325°F: About 2 to 2.5 hours
- 4-pound roast at 325°F: About 2.5 to 3 hours
- 5-pound roast at 350°F: About 2.5 to 3 hours
- 3-pound roast at 350°F: About 1.5 to 2 hours
These are estimates. The only way to know for sure is to use a meat thermometer. Always check the internal temperature, not just the clock.
Using A Meat Thermometer Correctly
A meat thermometer is the most reliable tool you own for this recipe. Insert it into the thickest part of the roast, away from the bone if there is one. Here are the target temperatures for different levels of doneness:
- 125°F: Rare (very red, very juicy)
- 135°F: Medium-rare (pink center, tender and juicy)
- 145°F: Medium (slightly pink, still moist)
- 155°F and above: Well done (starts to dry out)
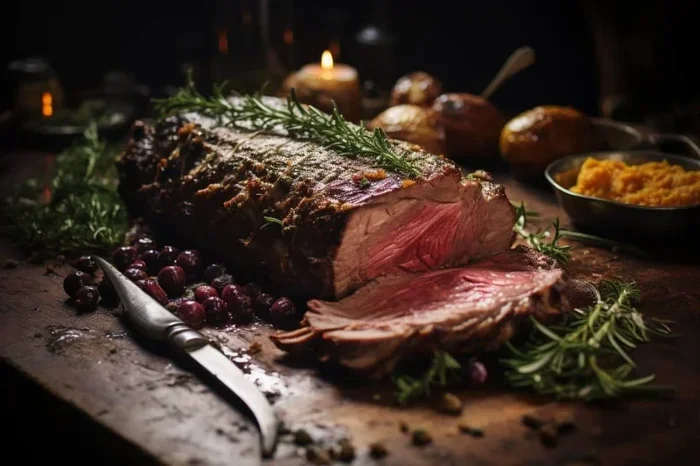
For the best results, pull your venison roast at 135°F to 140°F. The temperature will rise by about 5 degrees as the meat rests. This gives you a perfect medium-rare center that is moist and flavorful.
Quick Tip: Never rely solely on cooking time. Every oven is different, and every roast varies in shape and thickness. The thermometer never lies.
Making A Delicious Deer Roast
Now that you understand the basics of temperature and timing, let us talk about ways to elevate your roast from good to outstanding. These extra steps take very little effort but add tremendous flavor.
Adding Aromatics And Vegetables
One of the easiest ways to add flavor to your deer meat oven recipe is to surround the roast with vegetables and aromatics. Place the following around the roast in your roasting pan before cooking:
- Quartered onions
- Chopped carrots
- Celery stalks
- Crushed garlic cloves
- Fresh rosemary sprigs
- Fresh thyme sprigs
As the roast cooks, the juices drip down onto the vegetables. The vegetables absorb that flavor and become a delicious side dish on their own. You can also toss them in a little olive oil and salt before roasting.
Making A Rich Gravy From The Pan Drippings
Do you throw away the pan drippings? Stop right there. Those browned bits are pure flavor gold. Making a simple gravy from the roasting pan is one of the best parts of cooking a deer roast with gravy. Here is how:
- Remove the roast and set it on a cutting board to rest.
- Place the roasting pan on the stovetop over medium heat.
- Add 1 cup of beef or venison broth and scrape up all the browned bits from the bottom of the pan.
- Let the liquid simmer for 5 to 7 minutes until it reduces by about half.
- Mix 1 tablespoon of cornstarch with 2 tablespoons of cold water and stir it into the liquid.
- Cook for another 2 to 3 minutes until the gravy thickens.
- Season with salt and pepper to taste.
That is it. A simple, rich, homemade gravy that pairs perfectly with the roast. Your guests will think you spent hours in the kitchen.
Adjusting For Different Deer Roast Sizes
Not every deer roast is the same size. Here is how to adjust your approach based on the weight of your cut:
| Roast Size | Oven Temp | Approximate Cook Time | Target Internal Temp |
|---|---|---|---|
| 2 to 3 pounds | 325°F | 1.5 to 2 hours | 135°F to 140°F |
| 3 to 4 pounds | 325°F | 2 to 2.5 hours | 135°F to 140°F |
| 4 to 5 pounds | 325°F | 2.5 to 3 hours | 135°F to 140°F |
| 5 to 7 pounds | 300°F | 3 to 4 hours | 135°F to 140°F |
For larger roasts, consider dropping the oven temperature to 300°F and extending the cook time. This gives the heat more time to penetrate to the center without drying out the outer layers.
Resting And Serving Your Roast
You have pulled your deer roast from the oven. Now what? The way you handle the roast after it comes out of the oven is just as important as the cooking process itself.
Why Resting Time Matters
Resting is not just waiting around. It is a critical step that affects the final texture and juiciness of your roast. When the meat is cooking, the juices are pushed toward the center. If you cut into it immediately, those juices run out onto the cutting board and the meat turns dry.
Here is what to do:
- Remove the roast from the oven and place it on a cutting board.
- Loosely tent it with aluminum foil. Do not wrap it tightly, or you will trap steam and soften the crust.
- Let it rest for 10 to 15 minutes.
- The internal temperature will rise by 5 to 10 degrees during this time.
This resting period allows the juices to redistribute throughout the meat. When you finally slice it, every piece will be moist and tender. The deer roast rest time is one of the most overlooked steps in cooking venison.
Best Sides To Serve With Deer Roast
A great roast deserves great sides. Here are some classic pairings that complement the rich flavor of venison:
- Mashed potatoes: The creamy texture and mild flavor are a perfect match for gamey venison.
- Roasted root vegetables: Carrots, parsnips, and turnips roasted in the same pan as the roast.
- Green beans almondine: A light, nutty side that balances the richness of the meat.
- Cranberry sauce: A classic pairing that cuts through the richness with a touch of sweetness.
- Crusty bread: Perfect for soaking up the delicious gravy.
- Wild rice pilaf: A nutty, earthy side that complements the gamey flavor of deer meat.
Expert Insight: Venison has a slightly gamey flavor that pairs best with earthy, savory sides. Avoid heavy, overly sweet sauces. Let the natural flavor of the meat shine through with simple, well-seasoned accompaniments.
Common Mistakes To Avoid
Even with the best recipe, mistakes can happen. Knowing what to avoid will save you from a dry, tough roast. Here are the most common errors beginners make when cooking a venison roast in the oven.
Overcooking The Roast
This is the number one mistake. Venison is extremely lean compared to beef. It has very little intramuscular fat to keep it moist. Overcooking by even 10 or 15 minutes can turn a tender roast into a dry, shoe-leather nightmare.
To avoid this, pull the roast early. Trust the thermometer. Remember that the temperature will continue to rise during the resting period. Taking the roast off at 135°F to 140°F will give you a perfect medium-rare result after resting.
Skipping The Sear
Some beginners skip searing to save time. While the roast will still cook, you will lose a significant amount of flavor. The Maillard reaction that happens during searing creates hundreds of complex flavor compounds that make your roast taste rich and deep.
Take the extra 10 minutes to sear your roast. It is worth it.
Cutting Into The Roast Too Soon
Impatience is the enemy of a good roast. Cutting into the meat right away releases all those precious juices onto the board instead of keeping them inside the meat. Wait the full 10 to 15 minutes. Use that time to make the gravy and warm up your sides.
Using The Wrong Pan
A thin, flimsy roasting pan will cause uneven cooking. Invest in a heavy-duty roasting pan or use a cast-iron skillet. These hold heat evenly and help create a consistent sear and roast.
Not Letting The Meat Come To Room Temperature
Placing a cold roast straight into a hot oven creates uneven cooking. The outside will overcook while the inside is still cold. Take the roast out of the refrigerator 30 minutes before cooking to let it temper slightly.
Frequently Asked Questions
Can I use frozen deer meat for this roast?
Yes, you can, but it is not ideal. Frozen meat takes longer to cook and may cook unevenly. If you must use frozen meat, thaw it completely in the refrigerator overnight first. Pat it dry before seasoning and searing. Thawed meat will give you much better results than meat cooked from frozen.
What is the best internal temperature for a deer roast?
The best internal temperature for a deer roast is 135°F to 140°F for medium-rare. This keeps the meat juicy and pink in the center. Venison is best enjoyed at medium-rare or medium. Cooking it to well-done will dry it out significantly. Always let the roast rest after cooking, as the temperature will rise a few degrees.
How do I keep a deer roast from drying out?
The key to keeping your roast moist is to not overcook it. Use a meat thermometer and pull the roast at 135°F to 140°F. Marinating the meat before cooking also helps. Adding broth or wine to the roasting pan creates steam that keeps the environment moist. And always let the roast rest for 10 to 15 minutes before slicing.
Can I cook a deer roast in a Dutch oven?
Absolutely. A Dutch oven is one of the best tools for making a deer roast. It retains heat evenly and traps moisture, which is perfect for lean venison. You can sear the roast on the stovetop and then transfer the entire Dutch oven into the oven. The results are outstanding and the cleanup is easy.
What is the difference between venison roast and beef roast cooking times?
Venison cooks faster than beef because it is much leaner. It also has less connective tissue, so it does not need as long to break down. A venison roast at 325°F typically takes about 20 to 25 minutes per pound, while a beef roast can take 30 to 35 minutes per pound. Always rely on the internal temperature rather than the clock.
What can I do with leftover deer roast?
Leftover venison roast is incredibly versatile. Slice it thin and use it for sandwiches. Chop it up for tacos or burritos. Add it to soups or stews for extra protein. You can also sauté leftover slices with onions and peppers for a quick stir-fry. Venison reheats well and tastes great the next day.
Conclusion
How to make a deer roast in the oven is a rewarding skill that anyone can master with the right guidance. From choosing the perfect cut to searing, roasting at the right temperature, and letting the meat rest, every step matters. The result is a tender, flavorful roast that will impress your family and friends.
Remember the key points. Use a bone-in shoulder roast for the best results. Sear it well before placing it in the oven. Cook at 325°F to 350°F and use a meat thermometer to check for doneness at 135°F to 140°F. Let the roast rest for 10 to 15 minutes before slicing. And do not forget to make gravy from those beautiful pan drippings.
Now that you have all the tools and knowledge, it is time to put them into practice. Pick up a deer roast from your local butcher or butcher shop, gather your ingredients, and get cooking. The first time may feel a little intimidating, but by the second or third try, this oven-baked venison recipe will feel like second nature. Happy cooking.