How To Make Biscuits In Dutch Oven With Easy Steps
Discover the easiest way to make biscuits in Dutch oven with our simple step-by-step guide. This method delivers flaky, golden biscuits using a cast iron Dutch oven, whether you are baking at home or over a campfire. You will learn the right ingredients, techniques, and tricks to get bakery-quality biscuits every single time.
There is something magical about pulling a batch of warm Dutch oven biscuits out of a cast iron pot. The smell alone can fill a kitchen or campsite with comfort. Whether you are a seasoned baker or a total beginner, making biscuits in a Dutch oven is easier than you think.
This guide walks you through every step of the process. You will learn how to mix the dough, get the heat just right, and pull out biscuits that are golden on top and soft inside. No fancy equipment needed. Just a Dutch oven, a few simple ingredients, and a little patience.
So grab your cast iron pot and let us get started. By the end of this article, you will feel confident enough to bake homemade biscuits anytime you want. Let us dive in.
Key Takeaways
- Dutch oven biscuits are simple: You only need a few pantry staples and a cast iron pot.
- Cast iron baking gives great results: The even heat distribution creates perfectly golden biscuit tops.
- Cold butter is the secret: It creates those flaky layers everyone loves.
- You can bake indoors or outdoors: A Dutch oven works on a stovetop, in an oven, or over a campfire.
- Avoid common mistakes: Overworking the dough and wrong oven temperature are the top culprits.
- Serving ideas are endless: From honey butter to savory toppings, Dutch oven biscuits pair with everything.
📑 Table of Contents
- Why Use a Dutch Oven for Biscuits
- What You Will Need: Ingredients and Tools
- Step-by-Step Guide to Making Biscuits in a Dutch Oven
- Tips for Perfect Flaky Biscuits Every Time
- Common Mistakes to Avoid When Baking Biscuits
- Creative Ways to Serve Dutch Oven Biscuits
- Dutch Oven Biscuits for Camping and Outdoor Cooking
- Storing and Reheating Your Biscuits
- Frequently Asked Questions
- Conclusion
Why Use a Dutch Oven for Biscuits
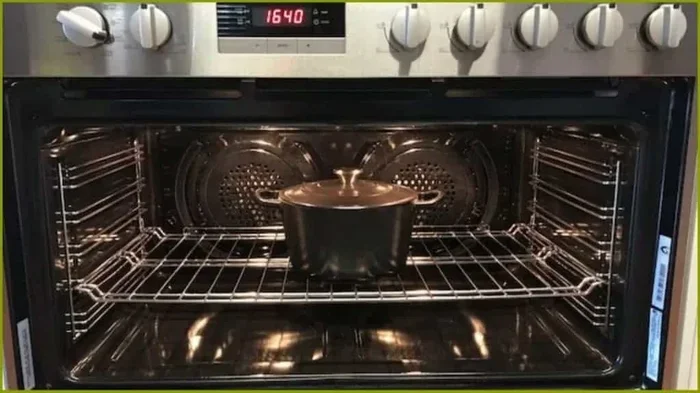
A Dutch oven is one of the most versatile tools in any kitchen. It works on a stovetop, inside a regular oven, or even over an open fire. This makes it a go-to choice for cast iron baking of all kinds.
But why specifically use it for biscuits? Here are a few reasons:
- Even heat distribution: Cast iron spreads heat evenly, so your biscuits bake uniformly without hot spots.
- Great heat retention: Once your Dutch oven reaches the right temperature, it holds that heat steady.
- Versatility: You can bake, roast, fry, and simmer all with the same pot.
- Portability: A Dutch oven is perfect for outdoor cooking, camping trips, and tailgating.
- Classic flavor: Biscuits baked in cast iron develop a slightly crisp exterior and tender interior.
Many people think of a Dutch oven as a heavy, old-fashioned pot. But modern versions are lightweight, well-seasoned, and built to last. If you have one sitting in your kitchen cabinet, it is time to put it to good use.
The Dutch oven baking method is also forgiving. If you are new to bread baking or biscuit making, this is a forgiving starting point. The pot does a lot of the work for you.
Cast Iron vs. Other Baking Methods
You might wonder how Dutch oven biscuits compare to those made in a regular oven or on a baking sheet. The difference is subtle but real. Cast iron gives biscuits a slightly different texture on the bottom. It creates a gentle crispness that you do not always get from a metal baking sheet.
When you bake biscuit dough in a Dutch oven, the lid traps moisture. This keeps the inside soft while the top turns golden brown. It is almost like the pot creates its own little oven environment.
For outdoor cooking and campfire meals, there is simply no better tool. A Dutch oven biscuit recipe works beautifully whether you are at home or in the woods.
What You Will Need: Ingredients and Tools
Before you start mixing, gather everything you need. Having your ingredients measured and ready makes the whole process smoother. Here is a simple list.
Ingredients for Dutch Oven Biscuits
- All-purpose flour: 2 cups (you can also use self-rising flour for even simpler prep)
- Baking powder: 1 tablespoon (this is what makes the biscuits rise)
- Salt: 1/2 teaspoon
- Cold butter: 6 tablespoons, cut into small cubes
- Cold milk: 3/4 cup (whole milk works best)
- Butter for topping: 2 tablespoons, melted
The key to flaky biscuits is keeping everything cold. Cold butter creates little pockets of steam in the dough. Those pockets are what give you that beautiful flaky texture.
Tools You Will Need
- A 10-inch or 12-inch Dutch oven: This size works perfectly for a batch of 8 to 12 biscuits
- A mixing bowl
- A pastry cutter or fork
- A rolling pin (optional)
- A biscuit cutter or round glass
- Oven mitts or pot holders
- Charcoal briquettes (if cooking outdoors)
You do not need a fancy stand mixer or special baking tools. A basic mixing bowl and a fork are all you need to combine the biscuit ingredients. The Dutch oven does the rest.
Step-by-Step Guide to Making Biscuits in a Dutch Oven
Now comes the fun part. Follow these steps carefully and you will have perfect biscuits every time. This Dutch oven biscuit recipe is straightforward and hard to mess up.
Step 1: Preheat Your Dutch Oven
If you are using a regular oven, preheat it to 425°F. If you are cooking over a campfire or on a stovetop, place the Dutch oven on medium heat for a few minutes first.
For campfire cooking, you will want to set up your charcoal arrangement. Place about 8 to 10 briquettes under the oven and 14 to 16 on the lid. This creates the right balance of top and bottom heat.
Preheating matters because it ensures the biscuits start rising the moment they go in. A cold pot leads to flat, dense biscuits.
Step 2: Mix the Dry Ingredients
In a large mixing bowl, whisk together the flour, baking powder, and salt. Use a fork or a whisk to combine them evenly.
Make sure there are no lumps in the baking powder. Even distribution helps the biscuits rise uniformly. This is a small step that makes a big difference in your biscuit bake results.
Step 3: Cut in the Cold Butter
Add your cold, cubed butter to the flour mixture. Use a pastry cutter or fork to work the butter into the flour until it looks like coarse crumbs.
Do not skip this step or rush it. The butter pieces should range from pea-sized to smaller crumbs. These pieces are what create the flaky layers in your finished biscuits.
If you do not have a pastry cutter, you can use two forks or even your fingertips. Just work quickly so the butter does not melt from the warmth of your hands.
Step 4: Add the Milk
Pour the cold milk into the butter and flour mixture. Stir gently with a fork until the dough just comes together.
Do not overmix! This is the most common mistake people make. Overmixing develops gluten, which makes biscuits tough instead of tender. Mix just until you no longer see dry flour.
The dough should look a little shaggy and rough. That is perfectly fine. It is supposed to look like that.
Step 5: Shape the Dough
Turn the dough out onto a lightly floured surface. Gently pat it into a rectangle about 1 inch thick.
Do not use a rolling pin aggressively. You want to keep those butter pockets intact. A gentle pat and fold works best. Fold the dough in half, pat it out again, and repeat this 3 to 4 times.
This folding technique creates layers. Layers are what make baking powder biscuits rise tall and fluffy.
Step 6: Cut the Biscuits
Use a biscuit cutter or the rim of a glass to cut out rounds. Press straight down and do not twist the cutter. Twisting seals the edges and prevents the biscuits from rising properly.
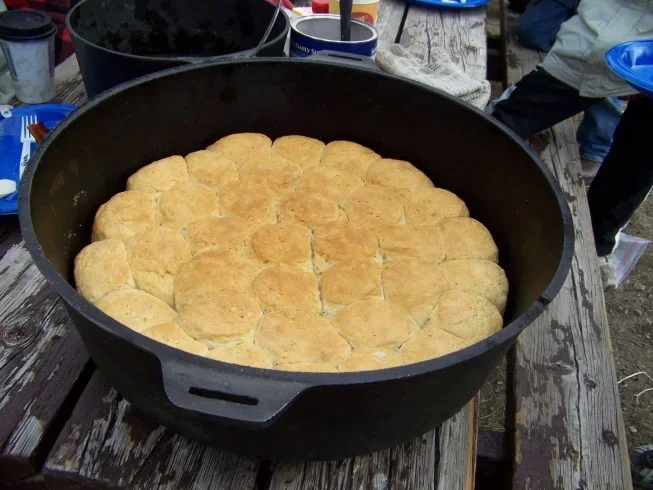
Place the cut biscuits into your preheated Dutch oven. Arrange them so they are touching slightly. This helps them rise upward instead of spreading out.
You can re-roll the scraps once to get a few extra biscuits. But try not to re-roll more than once, as this can make them tough.
Step 7: Brush with Butter and Bake
Brush the tops of the biscuits with melted butter. This gives them a beautiful golden color and a rich flavor.
Cover the Dutch oven with the lid and bake for 12 to 15 minutes. The biscuits are done when the tops are golden brown and they feel firm on the surface.
For indoor oven baking, 425°F for 12 to 15 minutes is the sweet spot. For campfire cooking, check after 12 minutes and rotate the pot if needed.
Step 8: Serve and Enjoy
Remove the biscuits from the Dutch oven and let them cool for a few minutes. Serve them warm with butter, honey, jam, or gravy.
Fresh Dutch oven biscuits are best enjoyed right away. They do not last long on the table, so make enough for everyone!
Tips for Perfect Flaky Biscuits Every Time
Even with a great recipe, small details can make or break your biscuits. Here are some expert tips to help you get the best results.
Keep Everything Cold
This is the number one rule for flaky biscuits. Cold butter, cold milk, and even a cold mixing bowl all help. When cold butter hits the hot oven, it creates steam. That steam forms the flaky layers you love.
If your kitchen is warm, chill the butter and milk in the freezer for 10 to 15 minutes before you start. This simple trick can elevate your homemade biscuits from good to amazing.
Do Not Overwork the Dough
Mixing too much develops gluten, which makes biscuits chewy instead of tender. Stir just until the dough comes together. Handle it as little as possible.
Think of it like this: you want the dough to look a little rough and imperfect. That roughness is what creates a light, airy texture inside.
Use a Sharp Cutter
A sharp biscuit cutter gives clean edges and allows the biscuits to rise properly. A dull cutter drags the dough and seals the edges.
If you do not have a biscuit cutter, a round glass works just as well. Just dip it in flour so the dough does not stick.
Place Biscuits Close Together
When you arrange the biscuits in the Dutch oven, place them so they are touching or nearly touching. This forces them to rise upward instead of spreading out.
The result is taller, fluffier biscuits with soft sides. This is a trick that many experienced bakers swear by for cast iron baking.
Rotate the Pot Halfway Through
Heat in a Dutch oven is not always perfectly even. Rotating the pot halfway through baking ensures all sides of the biscuits get the same exposure.
For campfire cooking, this is especially important because the coals may burn down unevenly. A simple rotation makes a noticeable difference in biscuit making.
Brush the Tops with Butter
Melted butter brushed on top before baking gives biscuits a golden, glossy finish. It also adds flavor and helps the tops brown evenly.
Do not skip this step. It takes just a few seconds and makes a big visual and taste difference in your Dutch oven recipes.
Common Mistakes to Avoid When Baking Biscuits
Even experienced bakers sometimes make mistakes. Knowing what to avoid saves you time and wasted ingredients. Here are the most common pitfalls.
Using Warm Butter
Butter that is room temperature or warm will not create flaky layers. It will just blend into the flour and disappear. The result is a dense, flat biscuit.
Always use butter straight from the refrigerator. If it starts to soften while you are working, pop the dough back in the fridge for a few minutes.
Overmixing the Dough
It is tempting to keep stirring until the dough looks smooth. But that is exactly what you should not do. Overmixing creates a tough, chewy texture.
Stop mixing as soon as the dough comes together. A few dry spots are okay. They will hydrate during the gentle pat and fold process.
Opening the Lid Too Often
Every time you lift the lid, you release heat and steam. This can slow down or stop the biscuits from rising properly.
Resist the urge to peek. Trust the process and check the biscuits only once, halfway through the baking time.
Wrong Oven Temperature
Too low and the biscuits spread out instead of rising. Too high and the tops burn before the inside cooks through.
425°F is the ideal temperature for most biscuit recipes. Use an oven thermometer if you are unsure about your oven’s accuracy.
Skipping the Resting Step
While biscuit dough does not need a long rest like bread dough, letting it sit for 5 to 10 minutes in the fridge helps the butter re-firm up.
This small rest makes a noticeable difference in the texture of your homemade biscuits. It keeps the butter cold and the layers defined.
Creative Ways to Serve Dutch Oven Biscuits
Once you master the basic recipe, you can get creative with how you serve and flavor your biscuits. Here are some ideas to try.
Honey Butter Biscuits
Mix honey and softened butter together and spread it on warm biscuits. This classic combination is simple but incredibly satisfying. It works perfectly for breakfast or as a snack.
Cheese and Herb Biscuits
Add 1/2 cup of shredded cheddar cheese and a teaspoon of dried herbs like rosemary or thyme to the dough. These savory biscuits pair well with soup, stew, or salad.
Jam and Cream Biscuits
Split a warm biscuit in half, add a dollop of jam, and top with fresh whipped cream. This is a fun twist that kids and adults both love.
Biscuits and Gravy
No list of biscuit serving ideas would be complete without sausage gravy. Split the biscuits, pour the warm gravy over the top, and enjoy a hearty comfort meal.
Garlic Butter Biscuits
Brush the tops with garlic-infused melted butter right out of the oven. Add a sprinkle of parsley for color. These are perfect as a side for pasta or roasted meats.
The beauty of Dutch oven biscuits is that you can customize them to match any meal or occasion. Once you have the base recipe down, the possibilities are endless.
Dutch Oven Biscuits for Camping and Outdoor Cooking
One of the best things about making biscuits in a Dutch oven is that you can do it anywhere. Campfire biscuit recipes are a staple of outdoor cooking for good reason.
When you are camping, a Dutch oven biscuit recipe gives you a taste of home in the middle of nature. You do not need electricity or a fancy setup. Just coals, your pot, and a few simple ingredients.
Here is a quick campfire setup guide:
- Place 8 to 10 briquettes under the Dutch oven for bottom heat
- Place 14 to 16 briquettes on the lid for top heat
- Bake for 12 to 15 minutes, rotating once halfway through
- Check for golden brown tops before removing from the fire
Outdoor cooking with a Dutch oven is a skill that pays off in comfort and flavor. There is nothing quite like fresh warm biscuits in the great outdoors.
Many people also use their Dutch oven for one-pot cooking and bread baking on trips. The pot doubles as a cooking vessel and a serving dish, which makes cleanup easy too.
Storing and Reheating Your Biscuits
If you have leftovers (which is rare), here is how to keep them fresh.
- Room temperature: Store in an airtight container for up to 2 days
- Refrigerator: Wrap tightly in foil or plastic wrap and keep for up to 4 days
- Freezer: Place in a freezer bag and freeze for up to 2 months
To reheat, wrap the biscuit in foil and place it in a 350°F oven for 5 to 8 minutes. For campfire reheating, warm it near the coals for a couple of minutes. The biscuit will taste almost as fresh as the day you baked it.
Proper storage helps you enjoy biscuit dough leftovers without wasting food. It also makes meal prep easier for the week ahead.
Frequently Asked Questions
Can I use self-rising flour instead of all-purpose flour for Dutch oven biscuits?
Yes, absolutely. Self-rising flour already contains baking powder and salt, so you can skip those ingredients. Just use 2 cups of self-rising flour and 6 tablespoons of cold butter and 3/4 cup of cold milk. The results will be slightly different in texture but still delicious and easy to make.
Can I make Dutch oven biscuits without a campfire or outdoor setup?
Of course. A Dutch oven works perfectly in a regular home oven at 425°F. You can also use it on a stovetop over low to medium heat with a heat diffuser. The beauty of a Dutch oven is its versatility. You can bake biscuits indoors, outdoors, or anywhere in between.
Why are my Dutch oven biscuits flat and not fluffy?
Flat biscuits usually come from one of a few issues. The butter might have been too warm, the dough was overmixed, or the oven temperature was too low. Make sure your butter is cold, mix gently, and preheat your Dutch oven properly. These small changes make a big difference in how well your biscuits rise.
How long do Dutch oven biscuits take to bake?
In a preheated oven at 425°F, biscuits typically bake for 12 to 15 minutes. For campfire cooking, the same timeframe applies, but you should check them at the 10-minute mark. The biscuits are done when the tops are golden brown and they sound hollow when tapped on the bottom.
Can I add other ingredients to the biscuit dough?
Yes, you can customize your biscuit dough in many ways. Shredded cheese, herbs, garlic powder, and even small pieces of cooked bacon all work well. Just be careful not to add too much extra moisture, as it can change the texture of the dough. Keep add-ins to about 1/2 cup total for best results.
What is the best way to get a golden top on my Dutch oven biscuits?
Brushing the tops with melted butter before baking is the simplest way to achieve a golden finish. You can also brush them with a little bit of cream or egg wash for extra browning. Make sure your Dutch oven is properly preheated and that you have enough coals or heat on the lid for even top browning.
Conclusion
Making biscuits in a Dutch oven is one of the most rewarding and satisfying things you can do in the kitchen or out in the wild. The process is simple, the ingredients are few, and the results are incredible.
You now have everything you need to bake flaky biscuits at home or on your next camping trip. From keeping the butter cold to mastering the gentle fold, each step matters. Follow the guide, avoid the common mistakes, and you will be pulling out golden batches of biscuits every single time.
Dutch oven baking opens up a world of possibilities. Once you get comfortable with this basic recipe, you will start experimenting with flavors, shapes, and serving styles. The versatility of the Dutch oven makes it an essential tool for anyone who loves homemade biscuits and cast iron cooking.
So the next time you want fresh, warm biscuits, reach for your Dutch oven. You will be glad you did. Happy baking!