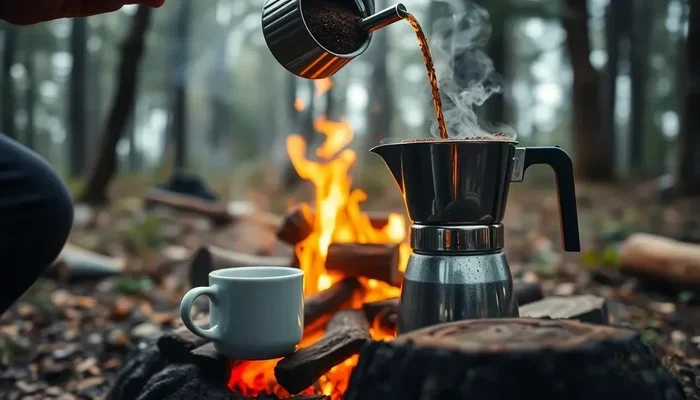
How To Make Perfect Camp Coffee With One Simple Trick
Making perfect camp coffee is easier than you think with one simple trick that transforms your outdoor brewing game. Whether you use a campfire, a camp stove, or a portable percolator, this guide covers the method, tools, and tips you need for rich, flavorful coffee in the wild. You will learn the best beans, the right water temperature, and the secret step most campers miss entirely.
There is something magical about waking up in the woods, the air cool and crisp, and brewing a hot cup of coffee over a campfire. Camp coffee has a way of tasting better than any cup you make at home, and most people do not know why. The truth is, it is not just the fresh mountain air or the crackling fire. There is one simple trick that makes all the difference between a mediocre cup and a truly perfect brew.
Whether you are a seasoned backpacker or a weekend camper, making great coffee outdoors does not require expensive gear or fancy techniques. In this guide, we will walk you through everything you need to know. You will learn the right beans, the best brewing methods, water temperature secrets, and the one trick that elevates your coffee game every single time. By the end, you will never settle for bad camp coffee again.
The beauty of perfect camp coffee is that it is simple. You do not need a camping coffee maker that costs a fortune. You do not need electricity or a complex setup. All you need is a handful of supplies, a heat source, and the knowledge to pull it all together. Let us get into it.
Key Takeaways
- Use coarse grounds: Coarse coffee grounds prevent over-extraction and keep your camp coffee smooth and full-bodied.
- Heat water just below boiling: Water around 200°F extracts the best flavors without turning your coffee bitter.
- The one simple trick: Let your coffee sit for 4 minutes after pouring hot water over the grounds for a cleaner, richer cup.
- Bring the right gear: A simple pour-over setup, French press, or cowboy coffee method all work great outdoors.
- Store beans properly: Keep coffee beans in a sealed, airtight bag to preserve freshness during your trip.
- Clean your equipment: Regular cleaning prevents stale oils from ruining the taste of your next brew.
- Experiment with ratios: A 1:15 coffee-to-water ratio is a great starting point for a balanced cup.
📑 Table of Contents
Why Camp Coffee Tastes So Good
Have you ever noticed that coffee brewed at a campsite just hits different? There are real reasons for this, and understanding them helps you replicate that magic every time.
The Atmosphere Factor
There is a strong connection between our senses and taste. When you are surrounded by nature, breathing fresh air, and hearing birds or a gentle breeze, your brain is in a relaxed state. This relaxation actually enhances your perception of flavor. Studies in sensory science show that a calm, pleasant environment makes food and drink taste better. So part of why outdoor coffee feels so special is simply because of where you are.
The Ritual of Brewing Outdoors
Making coffee at home can feel rushed. You grab a pod, press a button, and gulp it down while checking your phone. Camp coffee, on the other hand, demands your attention. You boil water over a fire. You measure your grounds. You wait and watch. This slow, intentional process creates a deeper appreciation for the cup in your hands. The ritual itself adds to the flavor experience.
Fresh Air and Better Breathing
When you breathe clean outdoor air, your senses are sharper. Your taste buds and nose work better in fresh environments compared to stale indoor air. This means the subtle notes in your coffee beans, like chocolate, nuttiness, or fruit undertones, come through more clearly. That is why a simple campfire coffee recipe can taste so complex and satisfying.
The One Simple Trick That Changes Everything
Here it is. The trick that separates good camp coffee from great camp coffee. Ready?
Let your coffee rest for 4 minutes after pouring hot water over the grounds. That is it. Most people rush this step. They pour boiling water, stir once, and immediately grab the cup. This leads to over-extraction, which makes coffee taste harsh, bitter, and thin. By letting the grounds steep for a full 4 minutes, you allow the water to pull out the sweet, balanced flavors without grabbing the bitter compounds that ruin the taste.
This trick works with every brewing method. Whether you are making cowboy coffee directly in your pot, using a pour-over cone, or even brewing with a French press at camp, the 4-minute rest is the game-changer. It is simple, free, and requires zero extra equipment.
Why This Trick Works
Coffee extraction is a science, but you do not need a degree to understand it. When hot water meets coffee grounds, it pulls out oils, acids, and sugars. If you give it too little time, the coffee tastes sour and weak. If you give it too much time, bitter compounds dominate. Four minutes is the sweet spot for most brewing methods, especially at the higher altitudes and cooler temperatures you often find while camping.
Think of it like steeping tea. You would not dunk a tea bag and immediately drink it. You let it sit. The same principle applies to brewed coffee outdoors. Give it time, and it rewards you with a smoother, richer cup.
What You Need for Perfect Camp Coffee
Before you head out on your next trip, make sure you have the right supplies. The gear does not need to be fancy, but having the right tools makes a big difference.
Coffee Beans and Grounds
Start with fresh, whole beans. Grind them yourself just before brewing if possible. Pre-ground coffee loses its flavor fast, especially in the heat and humidity of a campsite. If you must use pre-ground, store it in a sealed container and use it within a week of opening.
For camp coffee, use a coarse grind. This is similar to the texture of sea salt. Coarse grounds work best for most outdoor brewing methods because they slow down extraction and reduce bitterness. A fine grind, like what you use for espresso, will create a gritty, over-extracted mess in your cup.
Water and Temperature
Water makes up over 98% of your cup of coffee, so its quality matters. Use filtered water or, at minimum, clean drinking water. Avoid water from streams or lakes unless you have purified it first.
Temperature is another key factor. The ideal brewing temperature is between 195°F and 205°F. If you boil water and let it sit for 30 seconds, it will naturally cool to this range. Boiling water at 212°F is too hot and can scorch the grounds, leading to a burnt, bitter taste. This is one of the most common coffee brewing tips that even experienced campers overlook.
Brewing Equipment
You have several great options for making coffee at camp:
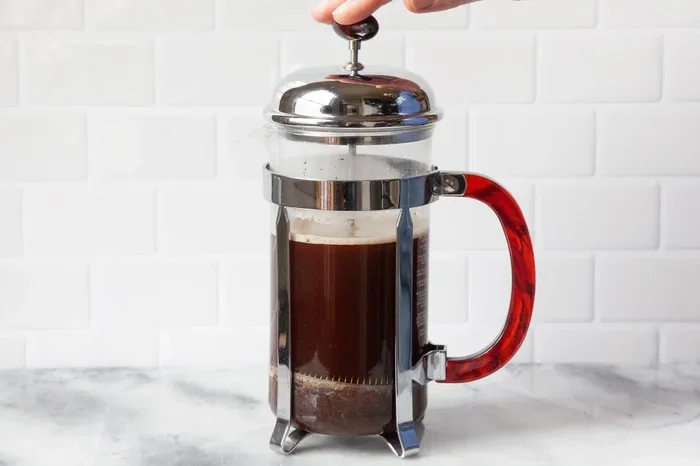
- French Press: Compact, durable, and produces a rich, full-bodied cup. Just add grounds, pour hot water, wait 4 minutes, and press down.
- Pour-Over Cone: Lightweight and simple. Works great with a paper or metal filter for a clean, bright cup.
- Cowboy Method: The classic outdoor approach. Boil water, add grounds directly, let them settle, and scoop carefully.
- AeroPress: Compact and versatile. Great for making espresso-style coffee at camp with minimal cleanup.
Each method has its fans, and all of them work well when you apply the 4-minute rest trick. Choose the one that fits your style and gear setup.
Step-by-Step Camp Coffee Method
Here is a simple, reliable method you can use at any campsite. This works whether you have a camp stove, a fire pit, or even a portable electric burner.
- Boil your water. Bring 12 ounces of water to a boil over your heat source.
- Remove from heat. Let the water sit for 30 seconds to cool slightly to the ideal range.
- Add your grounds. Use 2 tablespoons of coarsely ground coffee for every 6 ounces of water.
- Stir gently. Give it one slow stir to make sure all the grounds are wet.
- Wait 4 minutes. This is the magic step. Let the coffee steep without disturbing it.
- Pour carefully. If using the cowboy method, pour slowly to avoid stirring up the grounds at the bottom.
- Enjoy. Add cream, sugar, or drink it black. Sip and savor the moment.
This method produces a clean, balanced cup every time. It is the best camp coffee recipe for beginners and veterans alike. Once you try it, you will never go back to rushing the process.
Adjusting for Altitude
One thing many campers do not consider is altitude. At higher elevations, water boils at a lower temperature. This means your brewing water may not be hot enough to extract flavors properly. If you are camping above 5,000 feet, try extending your steeping time to 5 minutes. You may also need to use slightly more coffee grounds to compensate for the lower extraction temperature.
For those who like to reheat food or drinks at camp, keep in mind that reheating coffee on a stove can overcook it and ruin the flavor. It is always better to brew a fresh cup than to reheat an old one. If you must warm up leftover coffee, do it gently and slowly.
Common Mistakes That Ruin Camp Coffee
Even with the best intentions, it is easy to make mistakes when brewing coffee outdoors. Here are the most common ones and how to avoid them.
Using the Wrong Grind Size
Too fine a grind is the number one enemy of camp coffee. Fine grounds slip through filters, create sludge at the bottom of your cup, and over-extract quickly. Always go with a coarse grind for outdoor brewing. If you do not have a grinder at camp, buy pre-ground coarse coffee before your trip.
Using Water That Is Too Hot
Pouring boiling water directly onto coffee grounds is a quick way to burn them. Burnt grounds taste bitter and flat. Let your water cool for at least 30 seconds after boiling before you add the coffee.
Skipping the Rest
This is the mistake the 4-minute trick is designed to fix. Rushing the brew means you get sour, weak, or bitter coffee. Be patient. The wait is worth it.
Not Cleaning Your Gear
Old coffee oils build up in your French press, pour-over cone, or pot. These stale oils turn rancid and taint the flavor of your next cup. Clean your equipment thoroughly after every use. If you are using a Cosori Air Fryer Toaster Oven or other multi-use kitchen gear at your base camp, make sure you keep your coffee tools separate and clean.
Using Stale Beans
Coffee beans start losing their freshness within two weeks of roasting. If you are carrying beans on a multi-day trip, store them in a sealed bag with as much air removed as possible. For longer trips, consider vacuum-sealed packets or a small airtight container.
Wrong Coffee-to-Water Ratio
Too much water and your coffee tastes like dishwater. Too little water and it is syrupy and overpowering. Stick with the 1:15 ratio for a balanced cup. That means 15 parts water to 1 part coffee. Adjust to your taste from there.
Expert Tips for Better Camp Coffee
Once you have the basics down, these expert tips will take your outdoor coffee to the next level.
Pre-Measure Your Grounds
Before you leave home, pre-measure your coffee grounds into small zip-lock bags. This saves time at camp and ensures consistency. Each bag gets you one perfect cup. No guesswork, no mess.
Bring a Small Scale
A compact digital scale weighs just a few ounces and fits in any pack. It helps you nail the coffee-to-water ratio every time. Consistency is the secret to great coffee, and a scale removes the variability.
Use a Metal Filter for Rustic Flavor
Paper filters remove oils and give you a cleaner cup. Metal filters keep more of the natural oils in the coffee, giving you a richer, more full-bodied flavor. Choose based on your preference. Both work great outdoors.
Add a Pinch of Salt
This is an old cowboy trick. A tiny pinch of salt added to the grounds before brewing neutralizes bitterness and enhances sweetness. It sounds strange, but it works. Try it once and you will be hooked.
Keep Your Water Source Clean
If you are drawing water from a natural source, always filter or purify it first. Even clear mountain stream water can contain bacteria and minerals that affect the taste of your coffee. Use a portable water filter or purification tablets.
Store Your Coffee Gear Separately
Keep your coffee equipment in its own small bag or pouch. This prevents it from getting contaminated by food smells or residue from other cooking gear. A dedicated coffee kit also makes setup and cleanup faster.
Maintain Your Equipment
Just like you would decalcify a Keurig coffee maker at home, you should regularly clean and maintain your camp coffee gear. Remove mineral buildup from hard water, scrub out old grounds, and dry everything thoroughly before packing it away. Well-maintained equipment brews better coffee for years.
Best Coffee Styles for Camping
Not all coffee styles travel well. Here are the best options for your next outdoor adventure:
- French Roast: Bold and smoky, French roast holds up well in cold morning air and pairs perfectly with the campfire atmosphere.
- Medium Roast: Balanced and smooth, a medium roast is a safe bet for most campers. It does not overpower or underwhelm.
- Light Roast: If you enjoy bright, fruity, or floral notes, a light roast can shine at camp. Just make sure your water temperature is right.
- Cold Brew Concentrate: For hot-weather camping, pre-made cold brew concentrate is a game-changer. Just add cold water or milk and enjoy.
- Instant Coffee (Premium): Do not count out instant coffee. High-quality instant options like Wacaco or Sudden Coffee deliver surprisingly good flavor with zero cleanup.
Each style brings something different to the campsite. Experiment with what you enjoy most, and do not be afraid to try something new.
Conclusion
Making perfect camp coffee does not require expensive gear or years of experience. It requires the right beans, clean water, proper temperature, and the one simple trick of letting your coffee rest for 4 minutes after brewing. This single step transforms your outdoor coffee from ordinary to extraordinary.
Pair this method with coarse grounds, a good brewing setup, and the expert tips in this guide, and you will have a coffee routine that rivals your best morning at home. The outdoors already gives you something special. Your morning coffee should match that feeling.
Next time you head out on a trip, skip the instant packets and bring proper gear. Use the 4-minute trick. Taste the difference. Once you experience perfect camp coffee, you will never settle for less again. The trail is calling, and so is your next great cup.
Frequently Asked Questions
What is the best coffee for camping?
Coarsely ground medium or dark roast beans work best for most camping setups. They extract evenly, taste great at different temperatures, and are forgiving of imperfect brewing conditions. French roast and medium roast are popular choices among outdoor enthusiasts.
Can I make camp coffee without a French press?
Absolutely. You can use the cowboy method by boiling water and adding grounds directly to the pot. A pour-over cone or even a clean cloth filter works well too. The key is using coarse grounds and letting the coffee steep for 4 minutes before serving.
How do I keep my coffee hot while camping?
A simple insulated thermos keeps coffee hot for hours. Brew your coffee as normal, pour it into the thermos immediately, and seal it tight. If you do not have a thermos, wrap your cup in a towel and nestle it inside your sleeping bag for a short time.
What is cowboy coffee and how do I make it?
Cowboy coffee is the classic outdoor brewing method where you boil water, add coarsely ground coffee directly, let it steep for 4 minutes, and pour carefully to avoid the grounds at the bottom. It requires no special equipment and produces a bold, rich cup.
How do I clean my camp coffee gear?
Rinse your French press, pour-over cone, or pot with hot water after every use. For deeper cleaning, scrub with a small amount of biodegradable soap and warm water. Let everything dry completely before packing it away to prevent mold and stale oil buildup.
Does altitude affect camp coffee brewing?
Yes, altitude affects boiling point and extraction. At higher elevations, water boils at a lower temperature, which can under-extract your coffee. To compensate, extend your steeping time to 5 minutes and consider using slightly more coffee grounds for a fuller extraction.