How To Make Your Own Nitro Coffee at Home Right Now
Making nitro coffee at home is easier than you think. This guide shows you how to create rich, creamy nitro cold brew using just a few simple tools and ingredients. You’ll learn the brewing process, the equipment you need, and pro tips for café-quality results every time.
There is something magical about a glass of nitro coffee. The creamy bubbles cascade down like a dark waterfall, and the first sip feels smooth, rich, and completely indulgent. For years, you had to visit a specialty coffee shop to enjoy this drink. But now, you can learn how to make your own nitro coffee right in your kitchen.
The process might sound intimidating, but it really is not that complicated. With a few simple tools and some patience, you can brew café-quality nitro cold brew at home. Whether you are a coffee lover looking to upgrade your morning routine or someone who wants to impress guests, this guide covers everything you need to know.
—
Key Takeaways
- Nitro coffee uses nitrogen gas to create a creamy, beer-like texture in your cold brew.
- You only need basic equipment like a keg, cream charger, or a whipped cream dispenser to get started.
- Cold brew concentrate is the base for the best nitro coffee at home.
- The cascading effect comes from tiny nitrogen bubbles rising through the coffee.
- You can customize flavors like vanilla, caramel, or chocolate to suit your taste.
- Making nitro coffee saves money compared to buying it from cafés every day.
📑 Table of Contents
What Is Nitro Coffee and Why Is It So Popular?
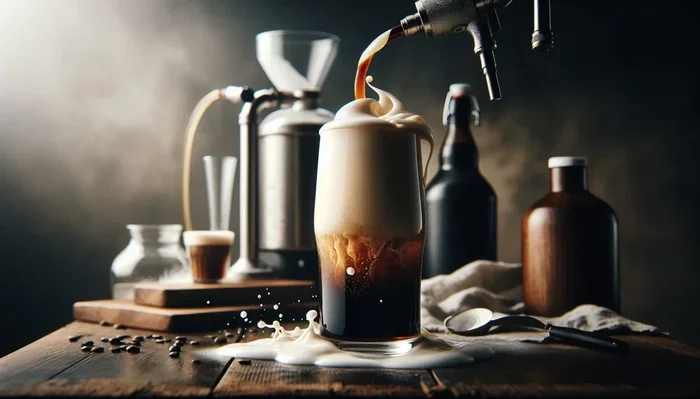
Nitro coffee is cold brew coffee that has been infused with nitrogen gas. The nitrogen creates tiny microbubbles that give the coffee a creamy, velvety texture. When you pour it from a tap or a special dispenser, the coffee cascades down in a beautiful swirling motion, much like a pint of stout beer.
The drink originated in specialty coffee shops around 2012 and quickly became a favorite among coffee enthusiasts. Unlike regular iced coffee, nitro coffee does not need any added sweeteners or cream to taste amazing. The nitrogen naturally gives it a smooth, slightly sweet flavor profile that feels luxurious on the palate.
How Nitrogen Creates That Creamy Texture
When nitrogen is dissolved into cold brew coffee under pressure, it forms very small bubbles. These tiny bubbles are what give the coffee its thick, creamy mouthfeel. The bubbles are much smaller than the ones you find in carbonated drinks, which is why nitro coffee feels so smooth rather than fizzy.
The cascading effect you see when pouring nitro coffee happens because the nitrogen bubbles rise to the top. This creates a visual show that is just as enjoyable as the drink itself. The head of foam on top looks similar to a freshly poured beer, and it adds to the overall experience of enjoying a glass of nitro coffee.
Why Nitro Coffee Has Gone So Popular
Nitro coffee has taken the coffee world by storm for a few key reasons. First, it tastes incredible without any additions. The nitrogen brings out natural sweetness and smoothness. Second, it looks stunning. People love posting photos and videos of the cascading pour. Third, it feels like a treat that you can enjoy at home without spending money at a café every single day.
Many people who try nitro coffee for the first time become hooked. The texture is unlike anything you get from regular hot or iced coffee. It is no wonder that home brewing setups for nitro coffee have become increasingly popular in recent years.
—
What You Need to Make Nitro Coffee at Home
Before you start brewing, you need to gather the right equipment and ingredients. The good news is that you do not need a fancy or expensive setup to get started. There are a few different approaches depending on your budget and how much effort you want to put in.
Just like knowing how to use an LG oven properly makes cooking better, having the right equipment makes all the difference when you are brewing nitro coffee at home.
Essential Equipment for Nitro Coffee
Here is a list of the basic equipment you will need. You do not need everything on day one, but these are the tools that will give you the best results.
- Cold brew coffee maker or large jar — for brewing the concentrate
- Fine mesh strainer or cheesecloth — for filtering the coffee
- Nitrogen cream charger — small cartridges filled with nitrogen gas
- Whipped cream dispenser (N2O charger compatible) — this is the key tool for infusing nitrogen
- Tap or nitro coffee dispenser — for serving the coffee with that beautiful cascade
- Glassware — a pint glass or clear mug works great for showcasing the cascading effect
If you are serious about making nitro coffee regularly, consider investing in a dedicated nitro coffee keg. These kegs are designed specifically for coffee and come with everything you need to serve nitro coffee on tap. Some people even repurpose equipment they already have, such as keeping their Cosori Air Fryer Toaster Oven clean and their kitchen gear organized to make room for their new coffee setup.
Ingredients You Will Need
The ingredients for nitro coffee are simple and straightforward. Here is what you need to get started:
- Coarsely ground coffee beans — use fresh, high-quality beans for the best flavor
- Filtered water — clean water makes a big difference in taste
- Nitrogen gas cartridges — these are the small chargers that infuse the coffee
- Optional flavor additions — vanilla extract, caramel syrup, or cocoa powder for customization
You do not need any special coffee beans, but medium to dark roasts tend to work best for nitro coffee. The roasting process brings out flavors that pair beautifully with the creamy nitrogen texture. Light roasts can also work, but they may produce a more acidic taste that some people find less appealing in a cold brew format.
—
Step-by-Step Guide to Making Nitro Coffee at Home
Now for the fun part. Here is a detailed, step-by-step guide to making your own nitro coffee at home. Follow these steps carefully, and you will be enjoying a perfect glass of creamy nitro cold brew in no time.
Step 1: Brew Your Cold Brew Concentrate
Start by making a strong cold brew concentrate. This is the foundation of your nitro coffee, so take your time with this step.
- Combine coarse ground coffee and filtered water in a large jar or cold brew maker. Use a ratio of about 1 part coffee to 4 parts water for a concentrate.
- Stir the mixture gently to make sure all the grounds are saturated.
- Cover the jar and place it in the refrigerator.
- Let it steep for 12 to 24 hours. Longer steeping times produce a stronger, more concentrated brew.
After the steeping time is up, you should have a rich, dark cold brew concentrate that is ready for the next step. The longer you steep, the stronger and more flavorful your nitro coffee will be.
Step 2: Strain and Filter Your Coffee
Straining your cold brew is an important step that should not be skipped. Proper filtering removes all the grounds and gives you a smooth, clean cup of coffee.
- Place a fine mesh strainer over a large bowl or pitcher.
- Line the strainer with cheesecloth or a coffee filter for extra smoothness.
- Pour the cold brew concentrate through the strainer slowly.
- Let it drip through naturally. Do not squeeze the grounds, as this can make the coffee bitter.
- Discard the used grounds and keep the filtered concentrate in the refrigerator.
Your filtered cold brew concentrate can be stored in the refrigerator for up to two weeks. This means you can brew a big batch and have nitro coffee ready whenever you want it.
Step 3: Charge with Nitrogen
This is the step that transforms regular cold brew into nitro coffee. The nitrogen infusion is what creates the creamy texture and cascading effect.
- Pour your cold brew concentrate into a whipped cream dispenser. Fill it about two-thirds full to leave room for the nitrogen.
- Screw the lid on tightly and make sure the seal is secure.
- Insert a nitrogen cream charger into the dispenser.
- Give the dispenser a firm shake for about 10 to 15 seconds.
- Let the dispenser sit in the refrigerator for about 1 to 2 hours. This allows the nitrogen to dissolve into the coffee.
After charging, your nitro coffee is ready to serve. The nitrogen will stay dissolved in the cold coffee as long as the dispenser remains sealed. Once you dispense it, the cascading effect will begin immediately.
Step 4: Pour and Enjoy the Cascading Effect
Pouring nitro coffee is an experience in itself. Here is how to do it right:
- Remove the dispenser from the refrigerator.
- Attach the tap or nitro nozzle to the dispenser.
- Hold a clear glass at a 45-degree angle.
- Dispense the coffee slowly down the side of the glass.
- As the glass fills, gradually straighten it to let the nitrogen bubbles rise.
- Watch the cascading effect happen right before your eyes.
The coffee will separate as it pours, with a creamy white head forming on top and a dark body below. This is completely normal and is the signature look of nitro coffee. Let the glass sit for a moment so the bubbles settle, then enjoy it through a straw for the full creamy experience.
—
Tips for Perfect Nitro Coffee Every Time
Making nitro coffee is a skill, and like any skill, it gets better with practice. Here are some tips and common mistakes to help you nail it from the start.
Common Mistakes to Avoid
Even experienced home brewers make mistakes when they first start making nitro coffee. Here are the most common ones to watch out for.
- Using beans that are too finely ground. Fine grounds clog filters and make the coffee gritty. Always use a coarse grind.
- Not steeping long enough. Short steeping times result in weak, watery coffee. Give it at least 12 hours.
- Skipping the filtering step. Unfiltered cold brew will have sediment and an unpleasant texture.
- Using warm coffee instead of cold. Nitro coffee must be cold for the nitrogen to dissolve properly.
- Over-shaking the dispenser. Too much shaking can create large bubbles instead of the smooth microbubbles you want.
If you are also thinking about clearing out kitchen counter space, you might consider how you would get rid of a microwave oven to free up room for your new nitro coffee station. Having a dedicated space for your coffee equipment makes the whole process more enjoyable.
Quick Tips for Better Results
- Use filtered water for both brewing and charging. Chlorine and minerals can affect the flavor.
- Keep your nitrogen chargers refrigerated before use. Cold chargers work better.
- Experiment with brew times. Try 12, 18, and 24-hour steeps to find your perfect strength.
- Clean your equipment thoroughly between uses. Residual oils can go rancid and affect taste.
- Use freshly roasted beans for the best flavor. Coffee beans start losing their freshness after about two weeks of opening the bag.
- Store your cold brew concentrate properly. It lasts up to two weeks in the refrigerator when stored in an airtight container.
—
Customizing Your Nitro Coffee at Home
One of the best things about making nitro coffee at home is that you can customize it to your exact taste. Once you master the basic recipe, you can experiment with different flavors, sweetness levels, and serving styles.
Flavor Add-Ins to Try
Here are some popular flavor additions that pair beautifully with nitro coffee:
- Vanilla extract — a few drops add a sweet, warm flavor that complements the creamy texture
- Caramel syrup — gives your nitro coffee a rich, buttery sweetness
- Cocoa powder — sprinkle a little on top for a mocha-inspired twist
- Cinnamon — a dash of cinnamon adds warmth and complexity
- Oat milk or almond milk — a splash adds creaminess without dairy
- Mint extract — for a refreshing, minty twist on classic nitro coffee
Start with small amounts and adjust to your preference. Because nitro coffee already has a naturally smooth and slightly sweet profile, you may find that you need less add-in than you think.
Temperature and Serving Tips
Nitro coffee is best served cold. The cold temperature keeps the nitrogen dissolved and maintains that creamy mouthfeel. Serve it immediately after dispensing for the best cascading effect and the smoothest texture.
If you want to serve nitro coffee to guests, consider setting up a small nitro coffee bar. You can have the dispenser ready with a tap, a selection of flavor add-ins, and clear glasses so everyone can enjoy the visual spectacle of the pour. It makes for a fun and impressive addition to any gathering.
—
Why Making Nitro Coffee at Home Is Worth It
There are several great reasons to start making nitro coffee at home. First, it saves a significant amount of money over time. A single nitro coffee from a café can cost anywhere from four to seven dollars. If you drink one every day, that adds up fast. Making it at home costs a fraction of that amount per cup.
Second, you have complete control over the ingredients. You can choose the beans, the roast level, the strength, and any flavor additions. This means you can tailor every cup to your exact preferences. No more settling for whatever a café happens to have on the menu.
Third, it is genuinely fun. The process of brewing, charging, and pouring nitro coffee is a rewarding experience. It turns your morning coffee routine into something special. Once you start making nitro coffee at home, you will wonder how you ever settled for regular iced coffee.
Finally, it is a great way to impress your friends and family. Setting up a nitro coffee station and serving cascading nitro cold brew is a conversation starter every single time. It shows that you take your coffee seriously and that you are willing to put in the effort to create something truly special.
—
Final Thoughts
Making your own nitro coffee at home is more accessible than most people think. With a few simple tools, quality beans, and a little patience, you can create a coffee drink that rivals anything you would find in a specialty café. The creamy texture, the beautiful cascading pour, and the rich, smooth flavor all come together to make nitro coffee a truly special experience.
Start with the basic recipe, practice your technique, and then get creative with flavors and serving styles. Before long, you will be brewing perfect nitro coffee every single time. Your morning routine will never be the same again.
—
Frequently Asked Questions
Can I use regular coffee instead of cold brew for nitro coffee?
You can, but cold brew concentrate works best because it is stronger and less acidic. Regular hot coffee does not hold nitrogen as well and will not produce the same creamy texture or cascading effect. Cold brew is the recommended base for the best results.
How long does nitro coffee last in the dispenser?
Nitro coffee stays fresh in a sealed dispenser for up to 2 to 3 days in the refrigerator. Once you dispense it, you should drink it within a few hours for the best flavor and texture. The nitrogen will gradually escape from an opened container.
Is a whipped cream dispenser the only way to make nitro coffee at home?
No, there are other methods. You can use a nitro coffee keg, a soda siphon, or even a DIY setup with a water ballon and a nitrogen charger. However, a whipped cream dispenser is the most affordable and beginner-friendly option for making nitro coffee at home.
Is nitro coffee stronger than regular coffee?
Nitro coffee is not necessarily stronger in caffeine content, but it often tastes stronger because it is made from cold brew concentrate. The concentration of coffee grounds used is typically higher than regular brewing methods, which results in a more bold and intense flavor.
Can I use nitrogen instead of cream chargers for nitro coffee?
Cream chargers are the standard and safest way to infuse nitrogen into coffee at home. They are small, pressurized cartridges that are designed for culinary use. You should never try to use industrial nitrogen tanks or improvised methods, as this can be dangerous.
Why does my nitro coffee not have a cascading effect?
If your nitro coffee is not cascading, it usually means the nitrogen was not properly infused or the coffee was not cold enough. Make sure you shake the dispenser well and let it sit in the refrigerator for at least 1 to 2 hours after charging. Also, check that you are using a fine mesh or champagne strainer when pouring to encourage the bubbles to rise.