How To Use Breville Coffee Machine Milk Frother Like A Pro
Mastering your Breville coffee machine milk frother is easier than you think. This guide walks you through every step, from preparing your milk to creating stunning latte art. You will learn pro techniques, cleaning routines, and troubleshooting tips to get the best results every time.
There is nothing quite like a perfectly frothed milk drink to start your morning. Whether you love a creamy latte or a bold cappuccino, your Breville coffee machine milk frother is the tool that makes it all happen. But if you have never used one before, the process can feel a little intimidating.
The good news is that once you understand the basics, frothing milk becomes second nature. This guide will show you exactly how to use your Breville frother like a professional barista. You will learn the right techniques, the common pitfalls, and how to keep your machine running smoothly for years to come.
Let us be honest, most of us rush through our morning coffee routine. We want great results without the hassle. That is exactly what this guide delivers. By the end, you will know your Breville frother inside and out, and your coffee drinks will never taste the same again.
Key Takeaways
- Step-by-step frothing: Learn the exact process for hot and cold milk frothing with your Breville machine.
- Perfect milk temperature: Discover the ideal range for silky, creamy microfoam every time.
- Cleaning matters: Regular maintenance keeps your frother performing at its best for years.
- Avoid common mistakes: Skip these errors that ruin your froth consistency and taste.
- Pro techniques: Elevate your coffee game with barista-level latte art and texture control.
- Troubleshooting made easy: Fix common frother issues quickly without calling a technician.
📑 Table of Contents
Getting To Know Your Breville Milk Frother
Before you start frothing, it helps to understand what you are working with. Breville machines are known for their sleek design and powerful performance. The milk frother on these machines is no exception. It uses steam and air to create that velvety, creamy texture we all love in coffee drinks.
What Makes The Breville Frother Special
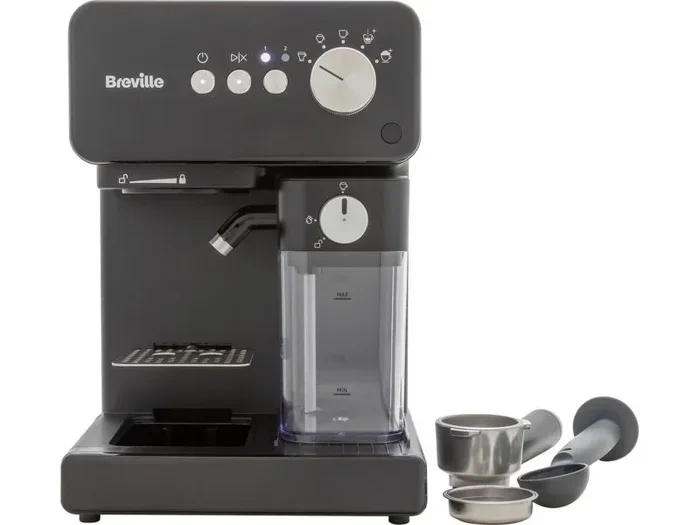
Breville coffee machines come with a built-in steam wand or an automatic milk frother, depending on your model. The steam wand gives you more control over the process. You can adjust the angle, depth, and steam intensity to get exactly the froth you want. This is what makes Breville machines so popular among home baristas.
The automatic frother models take the guesswork out entirely. You simply select your preference, and the machine does the work. But even with automatic models, understanding the basics helps you get better results every single time.
Key Parts Of The Frothing System
Here are the main components you should know about:
- Steam wand: The metal nozzle that releases steam to heat and froth milk.
- Frothing pitcher: The container you pour milk into before frothing.
- Steam valve: Controls the release of steam from the machine.
- Milk temperature sensor: Helps the machine detect when the milk is at the right heat.
- Drip tray: Catches any spills during the frothing process.
Knowing these parts makes it much easier to follow along with the steps below. Each component plays a role in creating that perfect milk foam that turns a simple espresso into a café-quality drink.
How To Use The Milk Frother Step By Step
Now let us get into the hands-on part. Using your Breville frother correctly makes a huge difference in the final result. Follow these steps carefully, and you will notice the improvement right away.
Step 1: Prepare Your Milk
Start with cold, fresh milk. Cold milk froths better because it has more time to incorporate air. Whole milk produces the creamiest froth, but you can use any type you prefer. Skim milk creates more volume but less creaminess. Oat milk and other plant-based milks also work well with Breville frothers.
Pour your milk into the frothing pitcher. Do not fill it more than halfway. The milk needs room to expand as it froths. A good rule of thumb is to fill the pitcher no more than one-third full for a smaller drink or half full for a larger one.
Step 2: Purge The Steam Wand
Before you insert the steam wand into the milk, always purge it first. This means turning on the steam for a few seconds to release any trapped water. You want pure steam, not a mix of water and steam. This step ensures your milk heats evenly and stays clean.
Hold the pitcher slightly off the counter and place the steam wand tip just below the milk surface. Turn on the steam valve. You should hear a gentle hissing sound. That is the air being introduced into the milk.
Step 3: Froth Hot Milk
For a hot froth, position the steam wand tip near the surface of the milk. You want to hear a soft, rhythmic sound. This is the air bubbles forming. Keep the pitcher at a slight angle so the milk swirls gently.
Once the milk has expanded and you have enough foam, lower the pitcher slightly so the wand tip goes deeper. This phase heats the milk without adding more air. The goal is to reach a temperature between 140 and 160 degrees Fahrenheit. If the pitcher feels too hot to touch, it is too hot. Pull the wand out and wipe it clean with a damp cloth.
Step 4: Create Cold Froth
Some Breville models allow you to froth cold milk as well. Cold froth works beautifully for iced lattes and cold brew drinks. Simply pour cold milk into the pitcher, place the steam wand tip near the surface, and froth without applying heat.
The process takes a bit longer for cold froth because you are relying solely on air incorporation. Keep the pitcher steady and watch the milk expand. Once you have the desired volume, stop and serve immediately over ice.
Tips For Perfect Froth Every Time
Getting great froth is part art, part science. A few small adjustments can take your results from good to amazing. Here are some tips that experienced baristas swear by.
Milk Temperature Matters
The temperature of your milk before frothing affects the final result. Cold milk from the fridge gives you the best texture. If you use room-temperature milk, you risk overheating it before you even start. Always start with cold milk for the most control.
During frothing, aim for that sweet spot between 140 and 160 degrees. Milk that is too hot loses its sweetness and develops a burnt taste. Milk that is too cold will not froth properly. Using a simple milk thermometer can help you nail the temperature every time.
Getting The Right Consistency
The best froth has a silky, smooth texture called microfoam. It should look like wet paint with tiny, uniform bubbles. If your froth has large bubbles, you are introducing too much air too quickly. Lower the pitcher or move the steam wand tip deeper into the milk.
Swirling the pitcher gently during frothing helps create an even texture. After frothing, give the pitcher a few taps on the counter and swirl it in a circular motion. This breaks up any large bubbles and creates that smooth, glossy finish perfect for latte art.
Experiment With Different Milk Types
Do not be afraid to try different milks. Each type creates a different froth profile:
- Whole milk: Creamy, rich, and easy to froth. Best for beginners.
- Skim milk: Produces more volume but lighter texture.
- Oat milk: Creates a creamy froth that works well for lattes.
- Almond milk: Froths well but can be less stable.
- Coconut milk: Adds a subtle flavor and decent foam.
Finding your favorite milk takes some trial and error. But once you do, your morning coffee routine will feel like a trip to your favorite café.
Cleaning And Maintenance
A clean frother makes better froth. This is not just a nice-to-have, it is essential. Milk residue builds up quickly and can affect the taste and performance of your machine. Regular cleaning keeps everything running smoothly.
Daily Cleaning Routine
After every use, wipe the steam wand with a damp cloth. Milk residue dries quickly and can clog the wand over time. Run steam through the wand for a few seconds after cleaning to flush out any remaining milk inside.
Rinse your frothing pitcher immediately after use. Do not let milk sit in the pitcher for hours. A quick rinse with warm water and mild soap keeps it fresh and ready for the next use.
Deep Cleaning And Descaling
Beyond daily wiping, your Breville machine needs deeper cleaning on a regular basis. Descaling removes mineral buildup from the internal components. This is especially important if you live in an area with hard water.
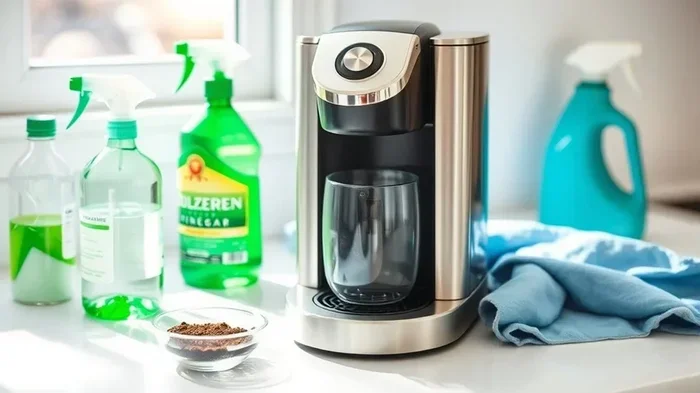
You can follow a similar process to how you would decalcify a Keurig coffee maker, which involves running a descaling solution through the machine’s water system. Check your Breville manual for the recommended descaling frequency and solution.
For the exterior and steam wand area, a quick wipe-down after each use goes a long way. If grease or milk splatter builds up around the machine, a gentle cleaner works wonders. Just like you would remove grease from a toaster oven, a soft cloth with a mild cleaning solution handles most surface buildup on your Breville machine.
Proper appliance maintenance not only keeps your machine looking good but also ensures consistent performance. A well-maintained frother produces better froth and lasts much longer.
Common Mistakes To Avoid
Even experienced coffee lovers make mistakes when frothing milk. Here are the most common ones and how to avoid them.
- Overfilling the pitcher: Milk expands during frothing. Leave plenty of room to avoid a mess.
- Using warm milk: Cold milk froths better. Always start from the refrigerator.
- Placing the wand too deep: This prevents air from entering the milk, resulting in flat froth.
- Not purging the wand: Trapped water dilutes the steam and affects milk temperature.
- Ignoring the temperature: Overheated milk tastes burnt and loses its sweetness.
- Skipping regular cleaning: Residue buildup leads to clogs and off-flavors in your drinks.
Avoiding these simple mistakes will save you a lot of frustration. And trust me, once you get the technique down, you will wonder how you ever drank bad coffee at home.
Troubleshooting Common Frother Issues
Sometimes things do not go as planned. Here is how to handle the most common issues with your Breville milk frother.
Frother Is Not Producing Enough Foam
This usually happens when the steam wand is too deep in the milk. Try raising the pitcher so the wand tip sits just below the surface. You should hear a consistent hissing sound. If the sound is too loud or sputtering, lower the pitcher slightly.
Also check that the steam wand is not clogged. Milk residue can block the small holes. Clean the wand thoroughly with a pin or needle to clear any blockages.
Milk Is Not Heating Properly
If your milk stays cold despite running the steam, the machine may need more time to build pressure. Make sure the machine has fully heated up before you start frothing. This usually takes about 15 to 30 seconds after turning it on.
If the problem persists, it could be a sign that your machine needs descaling. Mineral buildup can block steam pathways and reduce heating efficiency. Running a descaling cycle, similar to how you would fix oven temperature issues by checking calibration, can restore proper function.
Frother Makes Unusual Noises
A slight hissing is normal during frothing. But grinding, rattling, or loud banging sounds are not. These noises often indicate a blockage or a loose component. Turn off the machine, check the steam wand for debris, and make sure all parts are securely attached.
If the noise continues, consult your Breville manual or contact customer support. Most issues are simple to fix and do not require professional repair.
Final Thoughts
Using your Breville coffee machine milk frother like a pro is all about technique, practice, and care. Start with cold milk, master the steam wand angle, and always clean your machine after each use. These small habits make a world of difference in the quality of your coffee drinks.
Do not be discouraged if your first few attempts are not perfect. Frothing milk is a skill that improves with practice. Within a week or two, you will notice a significant improvement in the texture and taste of your drinks. Soon enough, you will be making latte art and impressing your friends with café-quality beverages right at home.
Remember, the best coffee is the one you enjoy making. Take your time, experiment with different milks and techniques, and most importantly, have fun with it. Your Breville machine is built to deliver amazing results. Now go ahead and make your perfect cup of coffee.
Frequently Asked Questions
Can I use any type of milk with the Breville frother?
Yes, you can use whole milk, skim milk, oat milk, almond milk, and most other milk varieties. Each type produces a slightly different froth texture. Whole milk gives the creamiest results, while plant-based milks may require a bit more experimentation to find your preferred consistency.
How often should I clean my Breville milk frother?
You should wipe down the steam wand and frothing pitcher after every single use. For a deeper clean and descaling, aim to do this at least once a month or more often if you use the machine daily. Regular maintenance keeps the frother performing at its best and prevents buildup that can affect taste.
What is the ideal milk temperature for frothing?
The ideal range is between 140 and 160 degrees Fahrenheit. Milk that is too hot loses its natural sweetness and can taste burnt. If the pitcher becomes too hot to touch comfortably, the milk has likely overheated. Using a thermometer helps you hit the sweet spot every time.
Why is my froth not creamy enough?
This usually happens when the steam wand is positioned too deep in the milk, preventing enough air from being incorporated. Try raising the pitcher so the wand tip sits just below the milk surface. Also make sure you are using cold milk, as it froths much better than warm milk.
Can I froth milk for iced drinks using the Breville machine?
Yes, you can create cold froth by frothing milk without applying steam heat. Simply pour cold milk into the pitcher and position the steam wand tip near the surface to incorporate air. The result is a light, airy cold foam perfect for iced lattes and cold brew drinks.
How do I get started with latte art using the Breville frother?
Start by creating smooth microfoam with tiny, uniform bubbles. After frothing, tap the pitcher on the counter and swirl the milk gently. Pour the frothed milk slowly into your espresso, starting from a higher position and moving closer as the cup fills. Practice makes perfect, and the silky texture from your Breville frother gives you the best canvas for latte art.