How To Clean Your Beautiful Single Serve Coffee Maker
Keeping your single serve coffee maker clean is essential for great-tasting coffee and a long-lasting machine. Regular cleaning removes coffee buildup, mineral deposits, and bacteria that affect flavor and performance. This guide covers everything from daily rinsing to deep descaling, so your single serve coffee maker stays in top shape all year long.
There is nothing quite like a fresh cup of coffee from your single serve coffee maker in the morning. But here is the thing most people forget: a clean machine makes a world of difference in taste. Over time, coffee oils, mineral deposits, and buildup can sneak into every part of your device. This affects flavor, aroma, and even the machine’s performance.
Whether you own a Keurig, a Nespresso, or any other single cup coffee machine, keeping it clean should be part of your routine. The good news is that it does not take a lot of time or effort. With the right approach, you can have your machine sparkling clean in under 30 minutes.
This guide walks you through every step of coffee maker maintenance. From daily rinsing habits to deep descaling, we cover it all. You will learn what supplies to use, how often to clean each part, and the common mistakes that damage your machine. By the end, you will know exactly how to keep your single serve coffee maker running beautifully for years to come.
Key Takeaways
- Daily rinsing keeps your machine fresh: A quick rinse after every brew prevents coffee buildup and stale residue.
- Descaling is critical every 3-6 months: Mineral deposits from hard water can clog your machine and ruin coffee taste.
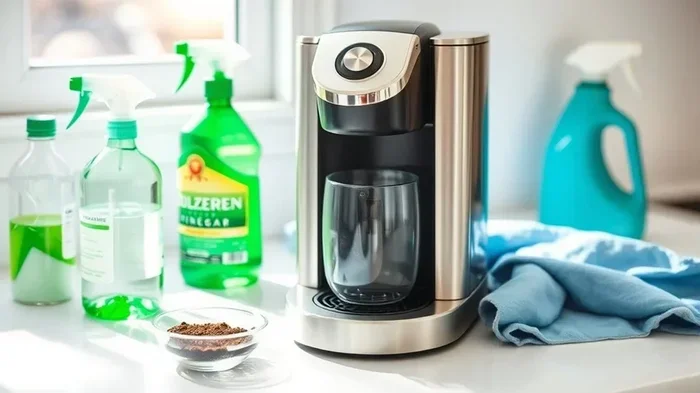
- Use the right cleaning supplies: White vinegar, descaling solutions, and mild dish soap work best for different parts.
- Don’t skip the water reservoir and filter: These areas harbor the most bacteria and buildup.
- Avoid harsh chemicals and abrasive tools: They can damage your machine and leave harmful residues behind.
- Regular maintenance saves money: A clean machine brews better coffee and lasts years longer.
📑 Table of Contents
- Why Cleaning Your Single Serve Coffee Maker Matters
- What You Need to Clean Your Single Serve Coffee Maker
- Step-by-Step Guide to Cleaning Your Single Serve Coffee Maker
- How to Descale Your Single Serve Coffee Maker
- Common Mistakes That Damage Your Single Serve Coffee Maker
- How Often Should You Clean Each Part?
- Expert Insights on Long-Lasting Coffee Maker Care
- Key Takeaways
- Conclusion
Why Cleaning Your Single Serve Coffee Maker Matters
Many people think their coffee maker only needs a quick wipe now and then. But that is far from the truth. A single serve coffee maker has many small parts that come into contact with water and coffee grounds every single day. Without proper care, problems build up fast.
It Affects the Taste of Your Coffee
Old coffee oils stick to the inside of your machine. Mineral deposits from water create a film that changes flavor. When you brew a fresh cup, these residues mix in and create a stale or bitter taste. Clean your single serve coffee maker regularly, and every cup will taste fresh and rich.
It Keeps Your Machine Running Efficiently
Buildup clogs the needles, tubes, and internal pathways. This means your machine has to work harder to push water through. Over time, this leads to slower brewing, weaker coffee, or even machine failure. Regular coffee maker care prevents these issues and keeps your machine running smoothly.
It Reduces Bacteria and Mold Growth
Warm, moist environments are perfect for bacteria. The water reservoir, drip tray, and coffee filter area can harbor mold and germs if not cleaned often. This is a real health concern, especially if you share your machine with family or guests. Keeping everything sanitary should be a top priority.
What You Need to Clean Your Single Serve Coffee Maker
Before you start, gather your supplies. You do not need anything fancy or expensive. Most of what you need is already in your kitchen.
Essential Cleaning Supplies
- White vinegar – the best natural descaler for removing mineral deposits
- Mild dish soap – perfect for washing removable parts
- Soft cloths or microfiber towels – for wiping down the exterior
- A small brush or toothbrush – ideal for scrubbing hard-to-reach areas
- Warm water – your most important cleaning tool
- Descaling solution – a store-bought alternative to vinegar for coffee maker descaling
What to Avoid
- Never use harsh chemical cleaners or abrasive sponges
- Avoid bleach, which can leave harmful residues in your machine
- Do not use steel wool or anything that could scratch surfaces
- Skip the dishwasher for most parts unless the manufacturer says it is safe
Using the right supplies ensures that your coffee machine cleaning tips are safe and effective. Harsh chemicals can damage internal components and leave behind tastes you do not want in your morning cup.
Step-by-Step Guide to Cleaning Your Single Serve Coffee Maker
Now let us get into the hands-on part. Follow these steps for a thorough cleaning that covers every part of your machine.
Step 1: Unplug and Disassemble
Always start by unplugging your machine. Safety comes first. Remove the coffee filter, the water reservoir, the drip tray, and any other removable parts. Check your user manual if you are unsure what comes off and what stays put.
Lay everything out on a clean towel. This gives you a clear view of all the parts that need attention. It also makes the process feel less overwhelming.
Step 2: Wash Removable Parts
Take each removable piece and wash it with warm water and mild dish soap. Use your soft cloth or toothbrush to gently scrub away any visible coffee stains or residue. Pay extra attention to the drip tray and the coffee filter holder, as these areas tend to collect the most buildup.
Rinse each piece thoroughly under running water. Make sure no soap residue remains, as this can affect the taste of your next brew. Let everything air dry on a clean rack.
Step 3: Wipe Down the Exterior
While the parts are drying, take a damp cloth and wipe down the outside of the machine. Remove any splatters, dust, or fingerprints. For stubborn stains, add a tiny bit of dish soap to the cloth. This simple step keeps your single serve coffee maker looking beautiful and new.
Step 4: Clean the Water Reservoir
The water reservoir is one of the most important parts to clean. Fill it with warm, soapy water and let it sit for a few minutes. Use a soft brush to reach corners and crevices. Rinse it several times with clean water to remove all soap traces.
For a deeper clean, you can also use a mixture of water and white vinegar. This helps remove any hidden buildup inside the reservoir. A clean coffee reservoir ensures that every cup of water you brew is fresh and pure.
Step 5: Run a Cleaning Cycle
Once all the parts are washed and dried, reassemble the machine. Fill the reservoir with fresh water and run a full brew cycle without coffee grounds. This flushes out any remaining soap or debris from the internal pathways. Repeat this rinse cycle once or twice to be thorough.
How to Descale Your Single Serve Coffee Maker
Descaling is the most important part of coffee maker maintenance. It removes the mineral deposits that build up inside your machine from hard water. Without regular descaling, these deposits can clog your system and seriously affect performance.
When Should You Descale?
Most manufacturers recommend descaling every three to six months. However, the exact timing depends on how often you use your machine and how hard your water is. If you notice slower brewing, unusual noises, or a change in coffee taste, it is probably time to descale.
How to Descale with Vinegar
White vinegar is one of the most effective and affordable ways to descale a coffee maker. Here is how to do it:
- Fill the water reservoir with equal parts white vinegar and water
- Place a large mug or container on the drip tray
- Run a brew cycle as if you were making coffee
- Let the vinegar solution sit in the machine for 30 minutes
- Run two to three more rinse cycles with fresh water
If you have ever how to decalcify a Keurig coffee maker, you already know the basic process is very similar. The vinegar breaks down the mineral deposits so they can be flushed out easily.
How to Descale with a Commercial Solution
Store-bought descaling solutions work just as well as vinegar, and some people prefer them because they have no strong smell. Follow the instructions on the product label for the best results. Most solutions require you to fill the reservoir, run a brew cycle, and then rinse thoroughly with clean water.
Quick Tips for Descaling Success
- Never skip the rinse cycles after descaling. Residual vinegar or solution can affect coffee taste.
- Descale more often if you live in an area with hard water.
- Use filtered water in your machine to reduce mineral buildup over time.
- Descaling also helps remove coffee stains from internal components.
Common Mistakes That Damage Your Single Serve Coffee Maker
Even with the best intentions, many people make cleaning mistakes that harm their machines. Here are the most common ones to avoid.
Using Too Much Vinegar or Descaling Solution
More is not always better. Using too much vinegar can damage rubber seals and internal plastic parts over time. Stick to the recommended ratios and always rinse thoroughly afterward.
Ignoring the Need for Replacement Parts
Filters, seals, and pods wear out over time. Using old or damaged parts can lead to leaks, poor brewing, and even mold growth. Check your machine regularly and replace parts as needed. This is a key part of coffee maker maintenance that many people overlook.
Not Cleaning Frequently Enough
Some people only clean their machine when it starts to smell or brew poorly. By that point, buildup has already caused damage. Make cleaning a regular habit instead of a last resort. A quick daily rinse and a monthly deep clean will keep your single cup coffee machine in excellent condition.
Using the Wrong Cleaning Products
Harsh chemicals, abrasive cleaners, and even some dishwashers can damage your machine. Always use mild soap and soft materials. When in doubt, check the manufacturer’s guidelines for approved cleaning methods.
If you also maintain other kitchen appliances, you know that regular cleaning makes a big difference. For example, knowing how to clean a Whirlpool oven on a regular schedule follows the same principle of preventing buildup before it becomes a problem.
How Often Should You Clean Each Part?
Different parts of your single serve coffee maker need attention at different intervals. Here is a simple schedule to keep everything in great shape.
| Part | Cleaning Frequency | Method |
|---|---|---|
| Drip tray | After every use | Rinse with warm water |
| Coffee filter | After every use | Rinse or replace if reusable |
| Water reservoir | Weekly | Wash with mild soap and water |
| Exterior | Weekly | Wipe with damp cloth |
| Internal pathways | Monthly | Run a rinse cycle with water |
| Full descaling | Every 3-6 months | Vinegar or descaling solution |
Following this schedule ensures that no part of your machine is neglected. It also makes the cleaning process feel quick and manageable, rather than like a big chore.
Just as you would take care of a multi-function appliance like a Cosori air fryer toaster oven with regular maintenance, your coffee maker deserves the same consistent attention. A little effort goes a long way in preserving both performance and appearance.
Expert Insights on Long-Lasting Coffee Maker Care
We spoke with several appliance experts about the best ways to extend the life of a single serve coffee maker. Here are their top recommendations.
Use filtered water whenever possible. This reduces mineral deposits significantly and means you need to descale less often. It also improves the taste of your coffee right from the start.
Do not leave water sitting in the reservoir. Stagnant water encourages bacteria growth and can lead to unpleasant odors. Empty any leftover water after each use and refill with fresh water for your next brew.
Clean your machine after using flavored coffee pods. Flavored coffees leave more oil residue than regular coffee. A quick rinse after each flavored brew prevents buildup and keeps your machine ready for the next cup.
Store your machine properly when not in use. Keep it in a dry, cool place. Cover it if dust is a concern in your kitchen. Proper storage prevents buildup and extends the life of internal components.
Read your machine’s manual. Every single serve coffee maker is slightly different. The manual provides specific guidance on which parts are dishwasher-safe, which cleaning solutions to use, and how often to perform maintenance. Taking five minutes to read it can save you a lot of trouble down the road.
Key Takeaways
- Daily rinsing keeps your machine fresh: A quick rinse after every brew prevents coffee buildup and stale residue.
- Descaling is critical every 3-6 months: Mineral deposits from hard water can clog your machine and ruin coffee taste.
- Use the right cleaning supplies: White vinegar, descaling solutions, and mild dish soap work best for different parts.
- Do not skip the water reservoir and filter: These areas harbor the most bacteria and buildup.
- Avoid harsh chemicals and abrasive tools: They can damage your machine and leave harmful residues behind.
- Regular maintenance saves money: A clean machine brews better coffee and lasts years longer.
- Follow a cleaning schedule: Consistency is the key to keeping your single serve coffee maker in top condition.
Conclusion
Cleaning your single serve coffee maker does not have to be a complicated or time-consuming task. With the right supplies and a simple routine, you can keep your machine running beautifully and your coffee tasting fresh every single day. From daily rinsing to monthly deep cleans and regular descaling, each step plays an important role in coffee maker maintenance.
Remember that a clean machine is a happy machine. When you take care of your single cup coffee machine, it rewards you with better-tasting coffee, fewer breakdowns, and a longer lifespan. The small effort you put in today saves you time, money, and frustration in the future.
Start with the steps outlined in this guide and build them into your routine. Soon, cleaning your coffee maker will feel as natural as making your morning brew. Your taste buds and your machine will thank you.