Everything You Need to Know About the Milk Frother Pitcher
The milk frother pitcher is an essential tool for anyone who loves frothy milk at home. This guide covers everything from types and sizes to frothing techniques and maintenance tips. Whether you are a beginner or a home barista, you will learn how to choose the right pitcher and use it like a pro.
A milk frother pitcher might look like a simple kitchen tool, but it is the secret weapon behind every great latte and cappuccino. If you have ever wondered why coffee shop drinks taste so much better than what you make at home, the answer often comes down to the pitcher. The right milk frothing pitcher helps you create silky, velvety foam that transforms your daily coffee routine.
In this guide, we will walk you through everything you need to know about the milk frother pitcher. We will cover the different types, sizes, and materials available. You will also learn practical tips on how to use one, clean it, and get the best results every single time. Whether you are just starting out or you have been making coffee at home for years, this article has something valuable for you.
The world of frothing milk is more interesting than most people think. There is a science to it. The way you position the steam wand, the temperature of the milk, and even the type of milk you use all play a role. By the end of this guide, you will understand all of this and more. You will feel confident enough to try latte art and impress your friends with coffee drinks that rival any café.
Key Takeaways
- Choose the right size: Match your pitcher size to how many drinks you make at once.
- Material matters: Stainless steel pitchers offer durability and heat retention.
- Technique is key: Proper milk texturing makes all the difference in foam quality.
- Temperature control: Heat milk to the right range for the best froth consistency.
- Easy maintenance: Regular cleaning keeps your milk frothing pitcher performing well.
📑 Table of Contents
- What Is a Milk Frother Pitcher?
- Types of Milk Frother Pitchers
- How to Choose the Right Milk Frother Pitcher
- How to Use a Milk Frother Pitcher Like a Pro
- Cleaning and Maintaining Your Milk Frother Pitcher
- Benefits of Using a Milk Frother Pitcher at Home
- Common Mistakes People Make with Milk Frother Pitchers
- Milk Frother Pitcher vs. Other Frothing Methods
- Final Thoughts
What Is a Milk Frother Pitcher?
A milk frother pitcher is a specially designed container used to heat and froth milk for coffee drinks. It is the vessel where milk frothing happens, and its shape and size are built to help you create the best possible foam. Most milk frothing pitchers have a pointed spout, which makes pouring easy and precise. This design is especially helpful when you want to try latte art.
The pitcher works with a steam wand, which is found on most espresso machines. You pour cold milk into the pitcher, insert the steam wand, and the steam heats and aerates the milk at the same time. The result is a smooth, creamy foam that sits beautifully on top of espresso. Some people also use a coffee milk frother as a standalone device, but the classic pitcher remains the favorite among home baristas.
Why the Shape Matters
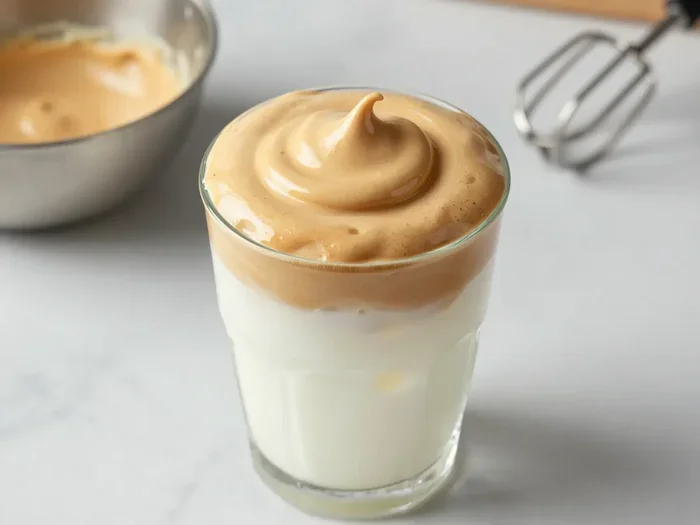
The shape of a milk frother pitcher is not random. The tapered bottom helps create a whirlpool effect inside the milk. This whirlpool pulls air into the milk and creates tiny, even bubbles. That is what gives frothy milk its smooth, glossy texture. A flat-bottomed container would not create the same effect. The pointed spout also gives you more control when pouring, which is essential for latte art designs like rosettas and hearts.
Types of Milk Frother Pitchers
Not all milk frother pitchers are the same. There are several types to choose from, and each one has its own strengths. Let us break them down so you can find the best fit for your needs.
Stainless Steel Pitchers
The most popular option is the stainless steel milk frother pitcher. These pitchers are durable, long-lasting, and excellent at retaining heat. They feel solid in your hand and look great on any countertop. Most baristas prefer stainless steel because it is easy to clean and does not absorb odors or stains. If you want a reliable barista milk pitcher, stainless steel is the way to go.
Plastic Pitchers
Plastic milk frothing pitchers are lightweight and affordable. They are a good option if you are just starting out or if you want a pitcher for a second machine. However, plastic does not retain heat as well as steel. Over time, plastic can also stain or retain odors, especially if you use chocolate-flavored or sweetened milks. They work fine for basic frothing milk, but they do not last as long.
Glass Pitchers
Glass pitchers are less common but have a certain charm. They let you watch the milk as it froths, which can be fun and helpful. The downside is that glass breaks more easily and does not insulate heat well. If you are making a single drink and want to monitor the process closely, a glass milk frother pitcher can work. But for everyday use, most people prefer metal or sturdy plastic.
Electric Pitchers with Built-In Frothing
Some electric milk frother pitchers come with a built-in heating element and frothing mechanism. You do not need a separate steam wand or espresso machine. These are great for people who want simplicity. You just pour in the milk, press a button, and the pitcher does the work. However, they may not produce the same quality of foam as a traditional pitcher paired with a steam wand. If you are serious about milk texturing, a separate pitcher and steam wand setup is usually better.
How to Choose the Right Milk Frother Pitcher
Choosing the right milk frother pitcher depends on a few key factors. Let us go through them one by one so you can make a confident decision.
Consider the Size
Milk frother pitcher sizes typically range from 12 ounces to 36 ounces. The size you need depends on how many drinks you make at once and what kind of drinks you prefer.
- 12 oz pitcher: Best for single drinks. Great for a solo latte or cappuccino.
- 20 oz pitcher: A versatile size. Works well for most home setups.
- 32 oz pitcher: Ideal for making multiple drinks at once or for large lattes.
Choosing the right frothing milk pitcher size matters because overfilling can cause spills and uneven frothing. You should always leave some room at the top for the milk to expand as it froths.
Think About the Material
As we covered earlier, stainless steel is the most popular choice. It is durable, heats well, and looks professional. If you are on a budget, plastic is fine for getting started. Glass is a nice option for visual appeal. Consider what matters most to you — durability, cost, or aesthetics — and choose accordingly.
Check the Spout Design
A pointed spout is essential if you want to practice latte art. The narrow tip gives you precision when pouring foam into your coffee. Some pitchers have a slightly wider spout, which is fine for basic frothing but not ideal for art. If latte art is a goal, look for a latte art pitcher with a sharp, narrow point.
Handle and Pour Comfort
Hold the pitcher before you buy it if possible. The handle should feel comfortable in your hand and give you a good grip. A well-designed handle makes pouring easier and reduces the risk of spills. Since you will be using this pitcher daily, comfort matters more than you might think.
How to Use a Milk Frother Pitcher Like a Pro
Using a milk frother pitcher correctly makes a huge difference in the quality of your foam. Here is a step-by-step guide to help you get the best results every time.
Step 1: Start with Cold Milk
Always pour cold milk into your milk frothing pitcher. Cold milk gives you more time to work with it before it overheats. Fill the pitcher to about one-third full for a single drink. The milk will expand as it froths, so do not fill it too much.
Step 2: Position the Steam Wand Correctly
Place the steam wand just below the surface of the milk, slightly off-center. This position pulls air into the milk and creates small, consistent bubbles. If the wand is too deep, you will not get enough air. If it is too shallow, you will create large, messy bubbles. Getting this milk frothing technique right is the most important step.
Step 3: Steam and Texture the Milk
Turn on the steam wand and let the milk heat up. You should hear a gentle hissing sound as air is pulled in. Once the milk feels slightly warm to the touch, lower the pitcher so the wand is just below the surface. This phase is called milk texturing. It helps create a smooth, glossy finish without large bubbles.
Step 4: Check the Temperature
The ideal milk temperature for frothing is between 140°F and 155°F. If you go above 160°F, the milk can scald and lose its sweet, creamy flavor. Use the pitcher itself as a guide — if it feels too hot to hold comfortably, the milk is probably too hot. Experienced baristas use a thermometer, but over time you will learn to judge by touch.
Step 5: Tap and Swirl
Once your milk is ready, tap the pitcher gently on the counter a few times. This pops any large bubbles on the surface. Then, swirl the milk in a circular motion. This creates a smooth, velvety texture that is perfect for pouring into coffee. Your froth consistency should look like wet paint — glossy and uniform.
Quick Tips for Better Foam
- Use whole milk for the creamiest foam. It froths more easily than skim milk.
- Practice with the same type of milk each time so you can refine your technique.
- Do not rush the process. Take your time to get the wand position right.
- Clean your pitcher immediately after use to prevent milk residue from building up.
- Experiment with different milks like oat milk or almond milk if you prefer non-dairy options.
Cleaning and Maintaining Your Milk Frother Pitcher
Proper care keeps your milk frother pitcher in great shape and ensures your drinks taste good every time. Milk residue can build up quickly, and if you do not clean it properly, it can affect the flavor of your foam.
Daily Cleaning Routine
After every use, rinse your milk frothing pitcher with warm water. Do not let milk sit in the pitcher for more than a few minutes. Use a soft brush or a bottle brush to reach inside the spout and the bottom. If you notice any stubborn residue, a small amount of dish soap and warm water will do the trick. Dry the pitcher thoroughly before storing it.
Deep Cleaning Tips
Once a week, give your pitcher a deeper clean. You can soak it in a mixture of warm water and baking soda to remove any lingering odors. For stainless steel pitchers, a paste made of baking soda and water works well for removing stains. Avoid using harsh abrasive cleaners, as they can scratch the surface and make it harder to clean over time.
Common Mistakes to Avoid
- Soaking in hot water for too long: This can warp plastic pitchers and damage the finish on some stainless steel models.
- Using a steel wool pad: This scratches the surface and creates grooves where bacteria can hide.
- Putting it in the dishwasher: While some pitchers are dishwasher-safe, hand washing is always better for longevity.
- Leaving milk residue overnight: This makes cleaning much harder and can cause odors.
Expert Insight on Maintenance
Professional baristas recommend rinsing your barista milk pitcher immediately after steaming. The steam residue can bond with the milk proteins and create a film that is hard to remove. A quick rinse and gentle wash after each use takes only a few seconds but saves you a lot of effort in the long run.
Benefits of Using a Milk Frother Pitcher at Home
Investing in a quality milk frother pitcher brings several benefits to your daily coffee routine. Let us look at why so many people are making the switch.
Save Money on Coffee Shop Drinks
A good latte at a coffee shop can cost four to six dollars or more. With a milk frother pitcher and an espresso machine at home, you can make the same drinks for a fraction of the cost. Over time, the savings add up significantly. Even a basic setup pays for itself within a few weeks if you drink coffee daily.
Complete Control Over Your Drinks
When you make coffee at home, you control every aspect of the drink. You choose the type of milk, the sweetness level, the temperature, and the foam thickness. You can experiment with different frothing milk techniques and find what works best for your taste. This level of customization is hard to get at most coffee shops.
Improve Your Coffee Skills
Using a milk frother pitcher regularly helps you develop real coffee skills. You learn about milk texturing, temperature control, and pouring techniques. Many people who start at home eventually feel confident enough to try more advanced drinks and even compete in local latte art events. It is a rewarding hobby that also makes your morning routine more enjoyable.
Impress Your Guests
There is something special about serving a beautifully crafted latte at home. Whether you are hosting friends or just treating yourself, a well-frothed drink with latte art always makes an impression. A good milk frothing pitcher gives you the tools to create café-quality drinks right in your own kitchen.
Versatility and Convenience
A milk frother pitcher is not just for lattes and cappuccinos. You can use it to froth milk for hot chocolate, chai lattes, or even matcha drinks. The pitcher also works as a measuring tool, since most have measurement markings on the side. This makes it a versatile addition to any kitchen, not just a coffee station.
Common Mistakes People Make with Milk Frother Pitchers
Even experienced home baristas make mistakes sometimes. Here are some common errors to watch out for so you can get the best results from your milk frother pitcher.
Overheating the Milk
One of the most common mistakes is overheating the milk. When milk gets too hot, it loses its sweetness and the foam becomes stiff and bubbly. Always aim for the 140°F to 155°F range. If you are not sure, err on the side of cooler rather than hotter. You can always heat it a little more, but you cannot undo scorched milk.
Using the Wrong Size Pitcher
Using a pitcher that is too large or too small for the amount of milk you need leads to poor results. An oversized pitcher gives the steam wand too much room, making it hard to create a proper whirlpool. An undersized pitcher can overflow. Match your pitcher size to your drink size for the best froth consistency.
Skipping the Tap and Swirl
Many people skip the tapping and swirling steps after steaming. This is a mistake. Large bubbles on the surface of the foam will make your drink look and taste less polished. Tapping and swirling smooths out the foam and creates that glossy, professional look that makes your drink taste better and look beautiful.
Not Cleaning Immediately
Letting milk sit in the pitcher after use is a bad habit. It makes cleaning harder and can affect the taste of your next batch of foam. Make it a routine to rinse and wash your coffee milk frother right after every use. Your future self will thank you.
Milk Frother Pitcher vs. Other Frothing Methods
There are several ways to froth milk at home. Let us compare the milk frother pitcher with other popular methods to help you understand what makes it special.
Comparison Table
A milk frother pitcher paired with a steam wand offers the most control and the best foam quality. Handheld frothers are convenient but produce less consistent results. Automatic frothers are easy to use but limit your options. The table below summarizes the key differences.
| Method | Foam Quality | Control | Ease of Use | Price Range |
|---|---|---|---|---|
| Steam Wand + Pitcher | Excellent | High | Moderate | $$$ |
| Handheld Frother | Good | Low | Easy | $ |
| Automatic Frother | Very Good | Low | Very Easy | $$ |
| French Press | Fair | Medium | Moderate | $$ |
As you can see, the steam wand and pitcher combination gives you the best control and foam quality. It is the method used by professional baristas in coffee shops around the world. If you are serious about making great coffee at home, this is the way to go.
Final Thoughts
The milk frother pitcher is more than just a kitchen gadget. It is a gateway to better coffee at home. When you use the right pitcher with the proper technique, you can create drinks that taste just as good — if not better — than what you get at your favorite café. The key is to practice, be patient, and enjoy the process.
Start by choosing a pitcher that fits your needs. Pick the right size, material, and spout design. Then focus on mastering your frothing milk technique. Pay attention to temperature, wand position, and the tap-and-swirl step. With a little practice, you will notice a big improvement in the quality of your foam.
Remember to clean your milk frothing pitcher after every use and store it properly. A well-maintained pitcher will serve you well for years. And do not be afraid to experiment with different types of milk and different drink recipes. The beauty of making coffee at home is that you can make it exactly how you like it.
The milk frother pitcher is a small investment that pays off in big ways. Better-tasting drinks, more coffee skills, and the satisfaction of creating something beautiful in your own kitchen. So grab your pitcher, pour some cold milk, and start frothing. Your perfect cup of coffee is waiting.
Frequently Asked Questions
What size milk frother pitcher should I buy?
For a single drink, a 12 oz pitcher works well. If you make two or more drinks at once, go for a 20 oz or 32 oz pitcher. The size you choose should match how many drinks you typically make in one session.
Can I use a milk frother pitcher with non-dairy milk?
Yes, you can use oat milk, almond milk, soy milk, and other non-dairy options. Some non-dairy milks froth just as well as whole milk, while others may need a bit more practice. Look for barista-style non-dairy milks for the best results.
How do I get the best foam with a milk frother pitcher?
Start with cold milk, position the steam wand just below the surface, and create a gentle whirlpool. Tap the pitcher to pop large bubbles and swirl the milk before pouring. These steps make a big difference in foam quality.
Is a stainless steel milk frother pitcher better than plastic?
Stainless steel is generally better. It retains heat longer, is more durable, and does not stain or hold odors. Plastic pitchers are lighter and cheaper, but they do not last as long and are harder to keep clean.
How often should I deep clean my milk frother pitcher?
You should deep clean your pitcher at least once a week. Rinse it after every use and wash it with warm soapy water. A weekly deep clean with baking soda helps remove stains and odors.
Can I use a milk frother pitcher without an espresso machine?
Yes, if you have a separate steam wand or a handheld milk frother. The pitcher itself is just a container — the frothing happens with the steam source. Some electric frothers also come with built-in pitchers that work without an espresso machine.