Oven Ribs Bone Up Or Down The Ultimate Guide To Perfect Ribs
Wondering whether to place ribs bone up or bone down in the oven? The answer depends on your cooking method, the type of ribs you are using, and the texture you want. This guide breaks down everything you need to know about oven ribs bone up or down, including step-by-step instructions, expert tips, and common mistakes that ruin a good rack of ribs. You will learn how to get tender, fall-off-the-bone ribs with a perfect glaze every single time.
Key Takeaways
- Bone-down cooking: Protects the meat from direct heat and keeps ribs moist and juicy throughout the cooking process.
- Bone-up cooking: Allows the rub and glaze to penetrate more evenly and gives a crispier exterior on the meat.
- Low and slow is key: Cooking ribs at 275°F to 300°F ensures tender results regardless of bone position.
- Foil wrapping: Wrapping ribs in foil during the middle of cooking locks in moisture and speeds up the process.
- Remove the membrane: Always peel off the thin membrane on the back of the rib rack for better flavor absorption and texture.
- Rest your ribs: Letting ribs rest for 10 to 15 minutes after cooking allows juices to redistribute for a better bite.
- Use a meat thermometer: Internal temperature of 195°F to 205°F is the sweet spot for perfectly cooked pork ribs.
📑 Table of Contents
- Why Rib Positioning Matters When Cooking in the Oven
- Cooking Ribs Bone Up: Benefits and Best Practices
- Cooking Ribs Bone Down: Benefits and Best Practices
- Step-by-Step Guide to Oven Ribs Bone Up or Down
- Common Mistakes to Avoid When Cooking Ribs in the Oven
- Expert Tips for Perfect Oven Ribs Every Time
- Comparison: Bone Up vs. Bone Down
- Conclusion
Why Rib Positioning Matters When Cooking in the Oven
Cooking ribs in the oven is one of the most reliable ways to get restaurant-quality results at home. But here is a question that trips up many home cooks: should you place the ribs bone up or bone down? It might seem like a small detail, but the position of the bones affects how heat reaches the meat, how the fat renders, and how the flavor develops over time.
When you cook ribs bone down, the bones act as a natural shield. They protect the meat from sitting directly on the hot oven surface. This means the meat stays more evenly moist. The fat also melts and drips around the bones, basting the meat as it cooks.
On the other hand, placing ribs bone up exposes more of the meat surface to the heat. This can create a nicer crust on the outside. It also lets your dry rub and glaze coat the meat more directly. Both methods have real benefits, and the right choice depends on what kind of result you are going for.
In this guide, we will walk through every angle of oven ribs bone up or down. You will learn the science behind each position, get step-by-step instructions, and discover the mistakes that cause tough or dry ribs. By the end, you will know exactly how to position your rack of ribs for the best outcome every time.
The Science Behind Bone Position and Heat Distribution
Your oven heats food using a combination of radiant heat and convection. When ribs sit bone down, the bones absorb and distribute heat more evenly across the meat. This prevents hot spots that can burn one section while leaving another undercooked. The bones also slow down how quickly the surface dries out.
When ribs are placed bone up, the meat sits closer to the top heat source. This creates more direct exposure to oven heat. The result is a more pronounced bark, which is that delicious, caramelized crust that barbecue lovers crave. However, bone-up cooking can dry out the edges if you are not careful.
Understanding this simple science helps you make better decisions. It also explains why many pitmasters switch between positions depending on the cut of meat and the type of ribs they are preparing.
Cooking Ribs Bone Up: Benefits and Best Practices
Placing ribs bone up in the oven has a few distinct advantages. This method works especially well when you want a deeply flavored crust and even spice coverage on every bite.
Why Choose Bone Up for Your Ribs
One of the biggest benefits of bone-up cooking is that the rub and glaze sit directly on the meat surface. There is no barrier between your seasoning and the protein. This means every bite carries a bold, even flavor. The spices also toast more evenly when they are not shielded by the bone.
Bone-up positioning is also great for pork ribs that have been trimmed close to the bone. When there is less meat between the bone and the surface, the heat reaches the meat more uniformly. This reduces the risk of undercooked spots near the bone.
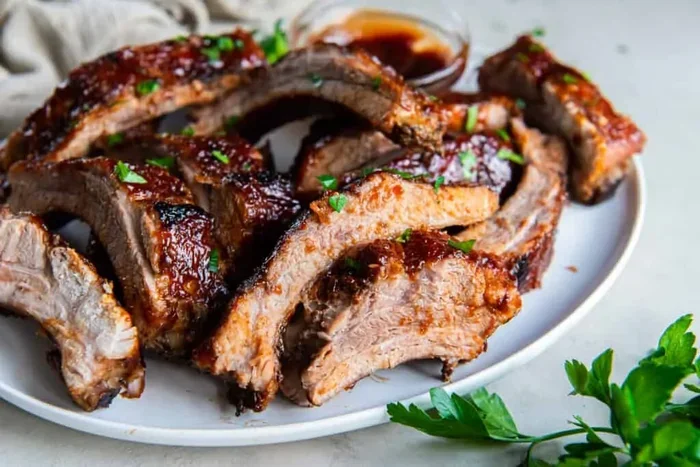
Another advantage is visual appeal. When you serve ribs bone up, they look like a beautiful rack on the plate. The glaze glistens on the meat surface, and the bones stick up neatly. This makes bone-up ribs a popular choice for dinner parties and backyard gatherings.
Best Practices for Bone-Up Ribs
If you decide to go bone up, follow these tips for the best results:
- Apply a thick layer of dry rub: Since the rub sits directly on the meat, use enough seasoning to build a flavorful crust. A good ratio is about one tablespoon of rub per pound of ribs.
- Use a rib rack: A rib rack holds the ribs upright and saves oven space. It also keeps the bones steady so the meat cooks evenly.
- Monitor the internal temperature: Bone-up ribs can cook faster on the surface. Use a probe thermometer to check that the internal temperature reaches 195°F to 205°F.
- Brush on glaze in the last 30 minutes: Because the meat surface is fully exposed, add your BBQ sauce or glaze during the final half hour of cooking. This prevents the sugar from burning.
- Keep oven temperature steady: Set your oven to 275°F and avoid opening the door too often. Temperature swings cause the meat to dry out.
Cooking Ribs Bone Down: Benefits and Best Practices
Bone-down cooking is the traditional method favored by many barbecue experts. It focuses on moisture retention and slow, even cooking that produces incredibly tender meat.
Why Choose Bone Down for Your Ribs
The biggest advantage of bone-down cooking is moisture. The bones form a natural barrier between the meat and the hot baking dish or oven rack. This shields the meat from direct heat and slows evaporation. The result is ribs that are juicy and succulent from edge to edge.
Bone-down positioning also allows the fat to render slowly. As the fat melts, it pools around the bones and bastes the meat continuously. This self-basting effect is hard to replicate with any other cooking method. It gives fall-off-the-bone ribs that practically melt in your mouth.
This method also works well for beef ribs, which are larger and fattier than pork ribs. The extra fat needs time to break down, and bone-down cooking provides the gentle, steady heat required for this process.
Best Practices for Bone-Down Ribs
Follow these tips to get the most out of bone-down rib cooking:
- Place ribs meat-side down first: This sears the fat side and starts the rendering process. Flip the ribs meat-side up halfway through cooking for even browning.
- Use a deep baking dish: A deep dish catches rendered fat and prevents it from pooling around the oven. It also keeps the ribs stable during long cooking times.
- Wrap in foil partway through: After the first two hours, wrap the ribs tightly in aluminum foil. This traps steam and speeds up the tenderizing process.
- Add liquid to the pan: A splash of apple cider vinegar, beef broth, or beer in the baking dish adds moisture and flavor to the cooking environment.
- Let the ribs rest before serving: Remove the ribs from the oven and let them sit for 10 to 15 minutes. This allows the juices to settle back into the meat.
Step-by-Step Guide to Oven Ribs Bone Up or Down
Now that you understand the benefits of each position, let us walk through the full cooking process. Whether you choose bone up or bone down, these steps will help you achieve perfect results.
Step 1: Prep the Ribs
Start by removing the thin membrane from the back of the rib rack. Use a butter knife to loosen one corner, then grab it with a paper towel and peel it off. This membrane blocks seasoning from reaching the meat and creates a chewy texture that nobody wants.
Next, pat the ribs dry with paper towels. Dry meat absorbs rub better and develops a superior bark. Trim any excess fat if the slab is particularly thick, but leave enough to keep the meat moist during cooking.
Step 2: Apply the Dry Rub
Generously coat all sides of the ribs with your favorite dry rub. A classic blend includes brown sugar, paprika, garlic powder, onion powder, salt, and black pepper. Massage the rub into the meat and let it sit for at least 30 minutes, or overnight in the refrigerator for deeper flavor.
Step 3: Position the Ribs
Place the ribs in the oven according to your chosen position. For bone down, lay the ribs meat-side down on a lined baking sheet or in a deep dish. For bone up, stand the ribs upright using a rib rack or lay them flat with the bones facing up.
Step 4: Cook Low and Slow
Set your oven to 275°F. Cook the ribs for about 3 to 4 hours for pork ribs and 4 to 5 hours for beef ribs. The low temperature slowly breaks down collagen and fat, creating that tender texture we all love. Resist the urge to raise the heat to speed things up, as this will dry out the meat.
Step 5: Wrap and Continue Cooking
After about two hours, check the ribs. If they are not yet tender, wrap them tightly in foil. Add a small amount of liquid like apple juice or broth to the foil packet. This creates steam that accelerates the tenderizing process. Continue cooking for another 1 to 2 hours unwrapped.
Step 6: Glaze and Finish
In the final 30 minutes, remove the foil and brush the ribs with your favorite BBQ sauce or glaze. Place them back in the oven uncovered. This lets the sauce caramelize and form a sticky, sweet outer layer. Watch carefully to prevent burning, as the sugar in the sauce can scorch quickly.
Step 7: Rest and Serve
Take the ribs out of the oven and let them rest for 10 to 15 minutes. This resting period is just as important as the cooking itself. It allows the juices to redistribute, so every slice stays moist and flavorful. Cut between the bones to serve individual ribs.
Common Mistakes to Avoid When Cooking Ribs in the Oven
Even experienced cooks make mistakes when preparing ribs. Here are the most common errors and how to avoid them.
Skipping the Membrane Removal
Many people forget to remove the membrane on the back of the rib rack. This thin layer of tissue blocks rub from reaching the meat and creates a rubbery texture. Always peel it off before seasoning. It takes just a few seconds and makes a huge difference.
Cooking at Too High a Temperature
It is tempting to crank up the oven to get ribs done faster. But high heat dries out the meat before the collagen has time to break down. Stick to 275°F to 300°F for the best results. Patience is the secret ingredient in any great rack of ribs.
Not Using a Thermometer
Guessing when ribs are done leads to inconsistent results. Invest in a reliable meat thermometer and check the internal temperature. Pork ribs are done at 195°F to 205°F. Beef ribs may need to reach 205°F or slightly higher for optimal tenderness.
Applying Sauce Too Early
Putting BBQ sauce on ribs too soon causes it to burn and turn bitter. The sugar content in most sauces scorches at high temperatures. Always apply sauce in the last 20 to 30 minutes of cooking, and keep the oven temperature steady.
Cutting Into Ribs Too Soon
It is hard to wait, but cutting into ribs right out of the oven releases all the juices. Let them rest for at least 10 minutes. This small act of patience pays off with juicier, more flavorful meat.
Expert Tips for Perfect Oven Ribs Every Time
Take your rib game to the next level with these pro tips that seasoned pitmasters swear by.
Use the 3-2-1 Method for Pork Ribs
The 3-2-1 method is a tried-and-true technique for smoked or oven-baked pork ribs. Smoke or bake the ribs uncovered for 3 hours, wrap in foil and cook for 2 more hours, then unwrap and glaze for the final hour. This method produces ribs with a perfect balance of bark, tenderness, and glaze.
Try a Mustard Binder
Before applying your dry rub, coat the ribs with a thin layer of yellow mustard. It acts as a binder and helps the rub stick to the meat. Do not worry, the mustard flavor cooks off completely and leaves only the spice behind.
Experiment with Wood Chips
If you want to add a smoky flavor to your oven ribs, soak wood chips in water for 30 minutes and place them in a foil packet on the oven floor. Applewood and hickory chips pair beautifully with pork ribs and add a rich, smoky aroma.
Let Ribs Come to Room Temperature
Take the ribs out of the refrigerator 30 to 45 minutes before cooking. Room-temperature meat cooks more evenly than cold meat straight from the fridge. This simple step reduces cooking time and improves texture.
Store and Reheat Leftover Ribs Properly
Leftover ribs can be just as delicious as fresh ones. Store them in an airtight container in the refrigerator for up to 3 days. Reheat gently in the oven at 250°F wrapped in foil to keep them moist. Avoid microwaving, which tends to dry out the meat.
Comparison: Bone Up vs. Bone Down
To help you decide which method works best for your next cooking session, here is a side-by-side comparison of bone-up and bone-down cooking.
- Moisture retention: Bone down wins. The bones protect the meat and retain more juices throughout the long cooking process.
- Crust and bark: Bone up wins. The exposed meat surface develops a thicker, more flavorful crust when directly exposed to oven heat.
- Seasoning coverage: Bone up provides more even coverage of rub and glaze across the entire meat surface.
- Fat rendering: Bone down allows fat to render slowly and baste the meat naturally throughout cooking.
- Cooking time: Both methods take about the same time at the same temperature. The difference is in texture and flavor profile.
- Best for: Bone down is ideal for beginners who want foolproof moisture. Bone up is better for experienced cooks who want a pronounced bark and glaze.
Ultimately, the best method is the one that produces the texture and flavor you enjoy most. Try both approaches and see which one becomes your go-to technique for oven ribs bone up or down.
Conclusion
Cooking ribs in the oven is a rewarding experience that fills your kitchen with incredible aromas and delivers a meal everyone will love. The decision between oven ribs bone up or down comes down to personal preference and the kind of texture you want. Bone-down cooking gives you moist, tender ribs with a rich, self-basted flavor. Bone-up cooking delivers a bold crust and even seasoning on every piece.
Remember to remove the membrane, use a quality dry rub, cook low and slow, and never skip the resting period. These simple steps make all the difference between average ribs and ribs that earn a standing ovation. Whether you are preparing a weekend family dinner or a casual gathering with friends, perfectly cooked ribs always steal the show.
Now that you have all the knowledge and techniques, it is time to fire up your oven and put them to work. Grab a rack of ribs, pick your favorite position, and enjoy the process of creating something truly delicious. Happy cooking.
Frequently Asked Questions
Can I cook ribs bone up and bone down in the same session?
Yes, you can cook two racks of ribs at the same time, one bone up and one bone down. This is a great way to compare both methods side by side. Just make sure each rack has enough space for air to circulate properly in the oven.
How long does it take to cook ribs in the oven?
Pork ribs typically take 3 to 4 hours at 275°F, while beef ribs may need 4 to 5 hours. The exact time depends on the thickness of the meat and whether you wrap them in foil partway through. Always use a meat thermometer to check for doneness.
Is it better to wrap ribs in foil during cooking?
Wrapping ribs in foil halfway through cooking helps lock in moisture and speeds up the tenderizing process. This technique, often called the Texas crutch, produces very tender ribs. However, skipping the foil wrap gives you a crispier bark on the outside.
What temperature should ribs reach internally?
Pork ribs are done when the internal temperature reaches 195°F to 205°F. At this range, the collagen in the meat has broken down enough to create a tender, juicy texture. Beef ribs may need to reach the same range or slightly higher for optimal tenderness.
Can I use frozen ribs in the oven?
It is best to thaw ribs before cooking them in the oven. Frozen ribs cook unevenly and may develop a mushy texture on the outside while remaining raw near the bone. Thaw them in the refrigerator overnight for the safest and most even results.
What is the best dry rub for oven ribs?
A classic dry rub with brown sugar, paprika, garlic powder, onion powder, salt, and black pepper works beautifully for most rib types. You can also add cayenne pepper for heat or mustard powder for a tangy kick. The key is to apply enough rub and let it sit for at least 30 minutes before cooking.