What Oven Temp For Chicken Legs To Get Perfectly Crispy
Finding the right oven temp for chicken legs is the single most important step to getting crispy, juicy results every time. The ideal temperature ranges from 400°F to 450°F depending on how crispy you want the skin. This guide covers exact temperatures, cooking times, and proven techniques so you can bake chicken legs like a pro.
There is nothing quite like a tray of crispy baked chicken legs coming out of the oven. The golden-brown skin crackles, the smell fills the kitchen, and you know you are about to eat something amazing. But getting that perfect result every single time comes down to one thing: the right oven temperature.
Many home cooks struggle with chicken legs that come out dry or soggy. The problem is almost always the same. They either set the oven too low, cook for too long, or skip a few simple steps that make all the difference. This guide will walk you through everything you need to know about what oven temp for chicken legs to get the best results possible.
Whether you are a beginner in the kitchen or someone who cooks often but wants to level up your oven-baked chicken game, you will find practical advice here. We will cover exact temperatures, cooking times, common mistakes, and expert tips that separate good chicken from great chicken.
Key Takeaways
- 425°F is the sweet spot: This temperature delivers the perfect balance of crispy skin and juicy meat for most chicken leg recipes.
- Higher heat equals crispier skin: Baking at 450°F gives you faster browning and crunchier results in less time.
- Always check internal temperature: Chicken legs must reach 165°F internally to be safe to eat, regardless of oven temp.
- Bone-in legs need more time: Expect 35 to 45 minutes at 425°F, while boneless pieces cook faster.
- Patting dry is essential: Removing moisture from the skin before baking is the #1 trick for crispy chicken legs.
- Resting matters: Letting chicken legs rest for 5 to 10 minutes after baking keeps the juices locked in.
📑 Table of Contents
- The Best Oven Temperature for Chicken Legs
- Why Temperature Matters for Crispy Skin
- How Long to Bake Chicken Legs at Each Temperature
- Step-by-Step Guide to Perfectly Baked Chicken Legs
- Common Mistakes That Ruin Crispy Chicken Legs
- Pro Tips for Extra Crispy Chicken Legs
- Expert Insights on Baking Chicken Legs
- Quick Tips for Success
- Frequently Asked Questions
- Conclusion
The Best Oven Temperature for Chicken Legs
When it comes to what oven temp for chicken legs, there is no single magic number. The right temperature depends on what you value most. Do you want super crispy skin? Or do you want tender, juicy meat with a slightly softer crust? Let us break it down.
425°F: The Gold Standard
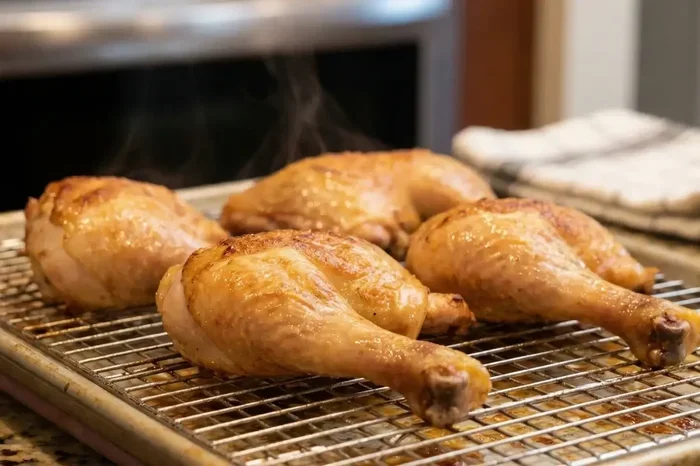
Most chefs and home cooking experts agree that 425°F is the best all-around temperature for chicken legs. At this heat, the skin renders fat slowly and evenly. The chicken cooks through without drying out. And you get a beautiful golden-brown finish that looks and tastes incredible.
At 425°F, bone-in chicken legs typically need about 35 to 45 minutes of baking time. Boneless chicken leg pieces take less time, usually around 25 to 30 minutes. This temperature gives you a forgiving window. If you forget about the chicken for a few extra minutes, it is less likely to burn compared to higher temperatures.
400°F: The Gentle Approach
Baking chicken legs at 400°F is a great option if you prefer a more gentle cook. The skin gets crispy, but it takes a bit longer. You will need about 40 to 50 minutes for bone-in legs at this temperature.
The advantage of 400°F is that it allows more even cooking throughout the meat. The outside does not brown too quickly before the inside is fully cooked. This is a solid choice for beginners who want reliable results without much monitoring.
450°F: The High-Heat Crunch Method
If your goal is maximum crispiness, 450°F is your go-to temperature. The high heat rapidly renders the fat under the skin and creates an intensely crunchy exterior. Cooking time drops to about 25 to 35 minutes for bone-in chicken legs.
However, there is a tradeoff. Higher temperatures mean less margin for error. Chicken legs can go from perfectly crispy to burnt in just a few minutes. You need to watch them closely during the last 10 minutes of cooking. This method works best for experienced cooks who trust their instincts and their oven.
Why Temperature Matters for Crispy Skin
Understanding why temperature affects crispy skin helps you make better decisions every time you bake chicken legs. It is not just about setting a number on the dial. The science behind crispy chicken skin is actually quite simple and fascinating.
The Role of Fat Rendering
Chicken legs have a thick layer of fat just beneath the skin. When you bake them at the right chicken leg temperature, that fat slowly melts and renders out. As it drips away, the skin shrinks and tightens. This creates the crispy texture we all love.
If the oven is too cool, the fat does not render properly. The skin stays soft and flabby. If the oven is too hot, the skin burns before the fat has a chance to escape. This is why getting the oven temp for chicken legs right is so important.
Moisture and Crispiness
Water is the enemy of crispy skin. The more moisture on the surface of the chicken, the longer it takes to crisp up. At higher temperatures, water evaporates faster, which speeds up the crisping process.
This is why professional cooks always tell you to pat your chicken legs completely dry before seasoning and baking. Removing surface moisture is one of the easiest ways to improve your results. It works at any temperature, but it matters even more at lower heats where every minute of moisture evaporation counts.
How Long to Bake Chicken Legs at Each Temperature
Temperature and time go hand in hand. The higher the heat, the shorter the cook time. But the relationship is not always perfectly linear. Let us look at some concrete numbers so you can plan your meals with confidence.
Bone-In Chicken Legs: Time and Temperature Guide
Bone-in chicken legs are the most common cut people buy. The bone acts as an insulator, so these take longer to cook through than boneless pieces. Here is a quick reference guide:
- 400°F: 40 to 50 minutes
- 425°F: 35 to 45 minutes
- 450°F: 25 to 35 minutes
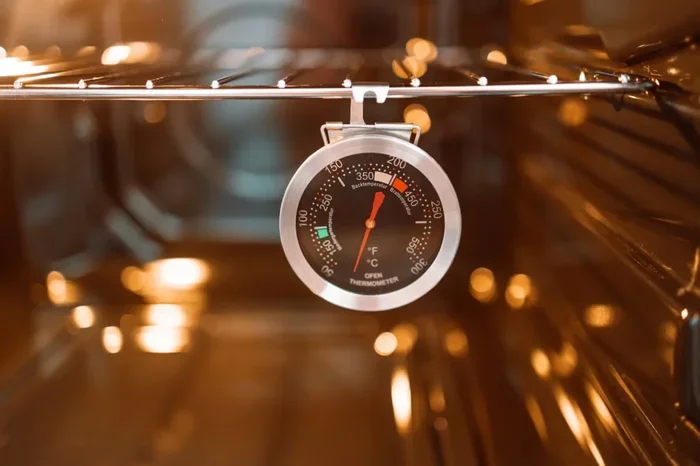
No matter which temperature you choose, always use a meat thermometer. The internal temperature of chicken legs should reach 165°F in the thickest part near the bone. This is the food safety standard set by the USDA and it is non-negotiable.
Boneless Chicken Leg Pieces
Boneless chicken leg pieces cook faster because there is no bone to heat through. At 425°F, they usually need about 25 to 30 minutes. At 400°F, add about 5 to 10 minutes. At 450°F, check them at 20 minutes and adjust from there.
Comparison Table: Temperature vs. Time
| Oven Temperature | Bone-In Time | Boneless Time | Crispiness Level |
|---|---|---|---|
| 400°F | 40 to 50 min | 30 to 40 min | Moderate |
| 425°F | 35 to 45 min | 25 to 30 min | High |
| 450°F | 25 to 35 min | 20 to 25 min | Very High |
This table makes it easy to decide based on how much time you have and how crispy you want your chicken. 425°F hits the sweet spot for most home cooks because it balances crispiness with convenience.
Step-by-Step Guide to Perfectly Baked Chicken Legs
Now that you know the right oven temp for chicken legs, let us walk through the full process. Following these steps will dramatically improve your results every time you bake chicken legs.
Step 1: Prep the Chicken Legs
Start by removing the chicken legs from any packaging. Pat them thoroughly dry with paper towels. This step is more important than most people realize. The drier the surface, the crispier the skin will be. Do not skip it.
Next, trim off any excess fat around the edges. You do not need to remove all of it, but trimming large pockets helps the skin render more evenly. This small step makes a big difference in the final texture.
Step 2: Season Generously
Seasoning is where you can get creative. A basic blend of salt, pepper, garlic powder, and paprika works beautifully for crispy chicken legs. But do not be afraid to experiment with different flavor profiles.
Some people love a spicy kick with cayenne pepper and smoked paprika. Others prefer a herby approach with rosemary, thyme, and oregano. Whatever your style, make sure you season both sides generously. The salt draws out moisture initially, but as it bakes, it enhances flavor and helps the skin crisp up.
Step 3: Let the Chicken Come to Room Temperature
This is a step many people overlook. Take the chicken legs out of the refrigerator about 20 to 30 minutes before baking. Letting them sit at room temperature helps them cook more evenly.
Cold chicken straight from the fridge takes longer to reach the safe internal temperature. This means the outside can overcook while waiting for the inside to be done. A quick tempering step solves this problem and leads to more evenly cooked, juicier chicken legs.
Step 4: Arrange on a Wire Rack
Place the chicken legs on a wire rack set over a baking sheet. The wire rack allows hot air to circulate around the chicken from all sides. This is a game changer for getting crispy skin on every piece.
If you do not have a wire rack, you can place the chicken directly on the baking sheet. But make sure to flip the pieces halfway through cooking. This ensures both sides get evenly crispy and browned.
Step 5: Bake and Monitor
Put the chicken in the oven on the middle rack. Set your timer and resist the urge to open the oven door too often. Every time you open the door, the temperature drops, and this can affect how evenly the chicken cooks.
At 425°F, check the chicken after about 30 minutes. Use a meat thermometer to test the internal temperature. If it has not reached 165°F yet, keep baking and check every 5 minutes. Once the temperature is right and the skin is golden brown, pull the chicken out.
Step 6: Rest Before Serving
Let the chicken legs rest for 5 to 10 minutes before serving. This allows the juices to redistribute throughout the meat. If you cut into them immediately, the juices run out and the chicken can taste dry.
Resting is a simple step that separates good cooks from great ones. It takes almost no extra time but makes a noticeable difference in the final result.
Common Mistakes That Ruin Crispy Chicken Legs
Even experienced cooks sometimes make mistakes that prevent them from getting the best results. Here are the most common errors and how to avoid them.
Not Drying the Chicken Skin
This is the number one mistake people make. Wet skin steams instead of crisping. Always pat the chicken legs bone dry with paper towels before seasoning. For even better results, you can leave the uncovered chicken in the refrigerator for a few hours or overnight. This dries the surface even more and leads to incredibly crispy skin.
Overcrowding the Pan
When chicken legs are crowded too close together, the hot air cannot circulate properly. This creates steam pockets that make the skin soggy. Give each piece plenty of space. If you need to bake a large batch, use two baking sheets or work in multiple batches.
Opening the Oven Door Too Often
Every time you open the oven door, you lose heat and disrupt the cooking environment. The temperature can drop by 25 degrees or more. This extends cooking time and prevents the skin from crisping properly. Trust your timer and only open the door when you need to check the temperature.
Skipping the Thermometer
guessing whether chicken is done is a recipe for disaster. Undercooked chicken is a serious food safety risk. Overcooked chicken is dry and tough. A simple instant-read meat thermometer takes the guesswork out completely. Invest in a good one and use it every time.
Pro Tips for Extra Crispy Chicken Legs
Want to take your oven-baked chicken legs to the next level? These expert tips will help you achieve restaurant-quality results at home.
Use a Baking Steel or Sheet
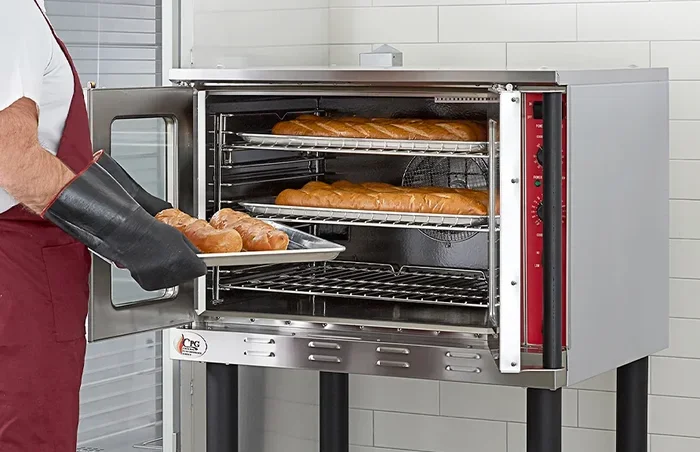
Placing a baking steel or an inverted baking sheet in the oven while it preheats creates a super-hot surface. When you put the chicken on it, the intense heat immediately starts crisping the skin. This technique mimics the results of a commercial convection oven and works wonders for crispy chicken legs.
Brush with Oil or Butter
A thin layer of oil or melted butter on the skin helps conduct heat more evenly. This promotes faster browning and crispier results. Use a neutral oil like vegetable or avocado oil for the best flavor. Some cooks swear by a light brush of melted butter mixed with a pinch of salt for extra flavor and crunch.
Try the Two-Stage Method
For the ultimate crispy chicken legs, try the two-stage approach. Bake at 425°F for 25 minutes, then increase the temperature to 475°F for the final 5 to 10 minutes. The blast of high heat at the end supercharges the crisping process and gives you an incredibly crunchy finish.
Add a Little Baking Powder
This might sound unusual, but a light dusting of baking powder mixed with salt on the chicken skin creates an alkaline environment. This breaks down the proteins in the skin and promotes extra crispiness. Just make sure you use baking powder, not baking soda, and use it sparingly. A little goes a long way.
Expert Insights on Baking Chicken Legs
Professional chefs and food scientists agree on a few key principles when it comes to roasting chicken legs. Understanding these insights can help you think more like a cook and less like a recipe follower.
Temperature is More Important Than Time
Many home cooks fixate on the clock. But experienced cooks know that internal temperature is the true indicator of doneness. Every oven is different. Some run hot, some run cold. The only way to know for sure is to use a thermometer.
When you rely on temperature rather than time, you take the guesswork out of baking chicken legs. You will consistently get perfectly cooked, juicy meat with crispy skin. This is the single most important habit you can build in the kitchen.
Bone-In vs. Boneless: Which is Better?
Bone-in chicken legs have more flavor and are more forgiving during cooking. The bone insulates the meat, so it is harder to overcook. Boneless leg pieces cook faster but can dry out more easily if you are not careful.
For beginners, bone-in chicken legs are the better choice. They are more forgiving and produce more flavorful results. Once you gain confidence, you can experiment with boneless pieces for quicker weeknight meals.
The Importance of Brining or Marinating
If you have time, brining chicken legs before baking makes a noticeable difference. A simple brine of water, salt, and sugar for 2 to 4 hours helps the meat retain moisture during cooking. The result is juicier chicken legs with more flavor.
Marinating works well too, especially if you want to add bold flavors. A buttermilk marinade tenderizes the meat and adds a subtle tang that pairs beautifully with crispy skin. Both methods are worth the extra effort if you want to elevate your oven-roasted chicken legs.
Quick Tips for Success
- Always preheat your oven before putting the chicken in. A hot oven from the start ensures even cooking and better crisping.
- Use parchment paper or foil on your baking sheet for easy cleanup. Parchment paper also promotes better air circulation than foil.
- Flip the chicken halfway through cooking if it is not on a wire rack. This ensures both sides get equally crispy.
- Let the chicken rest after baking. This simple step keeps the meat juicy and flavorful.
- Store leftovers properly in an airtight container in the refrigerator. Reheat in the oven at 375°F for 10 to 15 minutes to keep the skin crispy.
Frequently Asked Questions
What is the best oven temp for chicken legs?
425°F is widely considered the best oven temp for chicken legs. It strikes the perfect balance between crispy skin and juicy meat. If you want extra crunch, you can go up to 450°F. For a gentler cook, 400°F works well too. The key is to always check that the internal temperature reaches 165°F.
How long does it take to bake chicken legs at 425°F?
At 425°F, bone-in chicken legs typically need 35 to 45 minutes to cook through. Boneless pieces take about 25 to 30 minutes. The exact time depends on the size of the chicken legs and your specific oven. Always use a meat thermometer to confirm doneness.
Can you bake chicken legs at 350°F?
Yes, you can bake chicken legs at 350°F, but the results will be different. The skin will be less crispy and the cooking time will be longer, usually around 50 to 60 minutes for bone-in legs. For the best crispy chicken legs, higher temperatures between 400°F and 450°F are recommended.
How do you know when chicken legs are done?
The only reliable way to know when chicken legs are done is to use a meat thermometer. The internal temperature should read 165°F in the thickest part near the bone. The skin should be golden brown and the juices should run clear when you pierce the thickest part of the meat.
Should you cover chicken legs with foil when baking?
Most of the time, you should not cover chicken legs with foil. Leaving them uncovered allows the hot air to circulate freely around the skin, which promotes crispiness. If the chicken is browning too quickly on top, you can loosely tent it with foil for the last 10 minutes of cooking.
Is it better to bake chicken legs on a rack or directly on a sheet pan?
Baking on a wire rack is better for crispy skin because it allows air to flow underneath the chicken. This promotes even browning and prevents the bottom from getting soggy. If you do not have a rack, flipping the chicken halfway through baking on a sheet pan also works well.
Conclusion
Getting the oven temp for chicken legs right is the foundation of perfectly baked chicken. Whether you choose 400°F, 425°F, or 450°F, the principles remain the same. Dry the skin, season generously, use a wire rack, and always check the internal temperature with a thermometer.
425°F remains the most reliable temperature for most home cooks. It delivers crispy skin, juicy meat, and a reasonable cooking time. But now that you understand how temperature affects the final result, you can adjust based on your preferences and your schedule.
The next time you plan to make crispy baked chicken legs, you will know exactly what to do. No more guessing, no more soggy skin, no more dry meat. Just perfectly golden, delicious chicken legs that everyone will love. Follow the steps in this guide, experiment with your favorite seasonings, and enjoy the process. Good cooking is all about building confidence, and now you have everything you need to succeed every time you turn on the oven.