How To Clean Enamel Oven Interior The Ultimate Guide
Discover the best ways to clean enamel oven interior with simple household ingredients. This guide covers everything from daily maintenance to tackling tough grease and burnt-on stains. You will learn safe, effective techniques that keep your oven looking and working like new.
Your oven works hard for you every day. It bakes your favorite meals, roasts Sunday dinners, and warms up leftovers in a flash. But over time, the inside of your oven starts to show its age. Grease splatters, food spills, and burnt-on residue build up on every surface. If you have an enamel-coated oven, you know how frustrating this can be. The good news is that cleaning enamel oven interior does not have to be a dreaded chore.
In this ultimate guide, you will learn the best ways to clean enamel oven interior safely and effectively. We will cover everything from everyday maintenance to deep-cleaning methods that handle even the toughest stains. Whether you prefer natural cleaners or store-bought solutions, you will find practical tips that actually work. Let us get your oven sparkling again.
Key Takeaways
- Baking soda and vinegar are the safest, most effective cleaners for enamel surfaces.
- Regular maintenance prevents buildup and makes deep cleaning much easier.
- Avoid harsh chemicals and abrasive scrubbers that can damage enamel coatings.
- Soaking oven racks and using oven liners are great preventive strategies.
- Natural cleaners are just as powerful as commercial products when used correctly.
- Always let cleaning solutions sit for the right amount of time to dissolve grime.
📑 Table of Contents
- Why Cleaning Your Enamel Oven Interior Matters
- What You Will Need: Supplies and Tools
- Step-by-Step Guide to Cleaning Enamel Oven Interior
- Removing Tough Stains and Burnt-On Grease
- Tips for Keeping Your Enamel Oven Interior Spotless
- Common Mistakes to Avoid When Cleaning Enamel Oven Interior
- Expert Insights on Enamel Oven Care
- How Often Should You Deep Clean Your Enamel Oven Interior?
- Conclusion
Why Cleaning Your Enamel Oven Interior Matters
Some people skip oven cleaning for months. They think a little smoke and smell is normal. But neglecting your oven interior can cause real problems. A dirty oven affects the taste of your food. It can even become a fire hazard when grease and food particles build up. Here is why keeping your enamel oven interior clean should be a priority:
- Better-tasting food: Burnt residue inside the oven can transfer odd flavors to your dishes.
- Improved cooking performance: Grease buildup can block heat distribution, leading to uneven cooking.
- Fire safety: Accumulated grease and food debris can ignite at high temperatures.
- Longer appliance life: Regular cleaning protects the enamel coating and extends your oven’s lifespan.
- Fresh-smelling kitchen: A clean oven means no burnt odors when you turn it on.
Enamel is a durable, glass-like coating applied to the inside of most modern ovens. It is smooth and non-porous, which makes it easier to clean than bare metal. But enamel is not indestructible. Harsh chemicals and abrasive tools can scratch or chip the surface. That is why choosing the right cleaning method matters so much. A gentle but consistent approach works best for enamel oven interior cleaning.
What You Will Need: Supplies and Tools
Before you start, gather everything you need. Having your supplies ready saves time and keeps you from interrupting your cleaning flow. Here is a simple list of what works best for cleaning enamel oven interior:
Natural Cleaning Supplies
- Baking soda (sodium bicarbonate)
- White vinegar
- Warm water
- Dish soap (mild, non-abrasive)
- Spray bottle
- Microfiber cloths or soft sponges
Tools You Will Appreciate
- Plastic scraper or silicone spatula
- Rubber gloves
- Old toothbrush for corners and crevices
- Soft-bristle brush
- Clean spray bottle
Many commercial oven cleaners contain harsh chemicals that can damage enamel over time. They also leave behind fumes that linger in your kitchen. Natural alternatives like baking soda paste and vinegar solution are just as effective and much safer. They are also cheaper and better for the environment. For daily or light cleaning, warm soapy water and a soft cloth often do the job just fine.
Step-by-Step Guide to Cleaning Enamel Oven Interior
Now let us get into the process. Follow these steps for a thorough and safe cleaning session. This method works for both regular cleaning and deeper grime removal.
Step 1: Remove the Oven Racks
Start by pulling out all the oven racks. These collect a lot of grease and food bits too. You can clean them separately using warm soapy water and a soft sponge. Let them soak for 20 to 30 minutes if they are particularly greasy. This also gives you full access to the oven interior for cleaning.
Step 2: Make a Baking Soda Paste
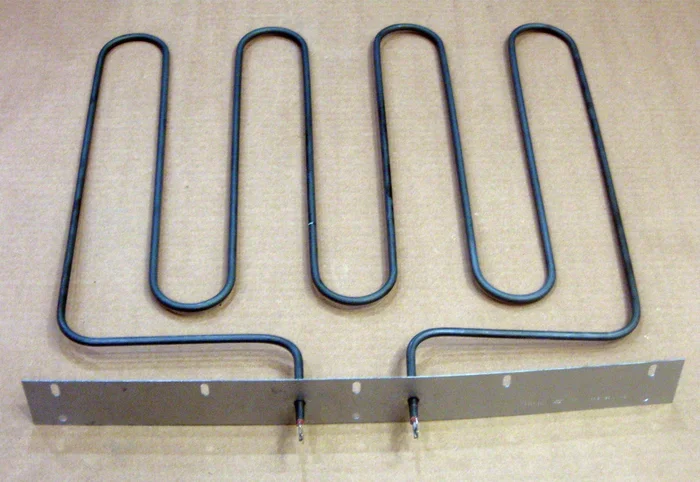
Baking soda is the star of natural oven cleaning. Mix about half a cup of baking soda with a few tablespoons of warm water. Stir it until you get a thick paste, similar to the consistency of toothpaste. This paste is gentle enough for enamel but powerful enough to break down grease and burnt-on food. Spread the paste evenly across the inside of the oven, avoiding the heating elements.
Step 3: Let It Sit
This is the step most people skip, and it is the most important. Let the baking soda paste sit for at least 12 hours or overnight. The paste needs time to break down the grease, grime, and baked-on food residue. The longer you let it sit, the easier the cleaning becomes. For light cleaning, two to three hours can work.
Step 4: Wipe Away the Paste
After the paste has had time to work, use a damp microfiber cloth to wipe it away. You will notice the grime comes off easily. For stubborn spots, use a soft plastic scraper or an old toothbrush. Do not use steel wool or abrasive pads. These can scratch and damage the enamel surface permanently.
Step 5: Use Vinegar for a Final Rinse
Fill a spray bottle with white vinegar and spritz the interior surfaces. The vinegar will react with any remaining baking soda, creating a fizzy foam. This reaction helps lift away the last bits of residue. Wipe everything down with a clean, damp cloth until no paste or vinegar remains. Your enamel oven interior should now look and feel clean.
Step 6: Replace the Racks and Done
Once the interior is completely dry, put the oven racks back in place. You can also turn on the oven at a low temperature for 10 to 15 minutes to ensure everything is fully dry. Your oven is now ready for its next use, free from grease and odors.
Removing Tough Stains and Burnt-On Grease
Sometimes, regular cleaning is not enough. You may face stubborn burnt-on stains or hardened grease that has been sitting for weeks. These tough spots need a stronger approach, but you still want to protect your enamel surface. Here are some proven methods for handling heavy-duty grime.
The Steam Method
Steam is a fantastic way to loosen baked-on food without harsh chemicals. Fill a heat-safe oven-safe dish with water and add a splash of vinegar. Place it on the bottom rack of the oven. Heat the oven to 200°F (about 93°C) and let it run for 20 to 30 minutes. The steam will soften the grime, making it much easier to wipe away afterward. After the steam cycle, turn off the oven and let it cool slightly before wiping the interior with a damp cloth.
Using a Commercial Enamel-Safe Cleaner
If you prefer a store-bought product, look for cleaners specifically labeled as safe for enamel surfaces. Avoid any cleaner that contains bleach, ammonia, or abrasive particles. Spray the cleaner on the interior, let it sit for the time recommended on the label, and wipe clean. Always rinse thoroughly with a damp cloth to remove any chemical residue. Some popular brands make non-toxic oven cleaners that work well on enamel without causing damage.
Dealing with Discolored Spots
Over time, enamel can develop discoloration or staining. These spots are usually not harmful, but they can make your oven look dirty. A paste made from baking soda and hydrogen peroxide can help lighten these stains. Apply the paste to the discolored area, let it sit for 30 minutes, and wipe clean. Repeat if needed. Avoid using bleach, as it can weaken the enamel coating over time.
Tips for Keeping Your Enamel Oven Interior Spotless
Cleaning is easier when you prevent buildup in the first place. Here are some simple habits that make a big difference in keeping your oven interior fresh and clean.
Use an Oven Liner
Oven liners are silicone or aluminum sheets that sit on the bottom of your oven. They catch drips, spills, and food debris before they can bake onto the oven floor. These liners are easy to remove and wash. They are one of the best investments for anyone who wants to spend less time on oven interior cleaning.
Clean Spills Immediately
When food spills happen, clean them up as soon as the oven cools down. The longer food sits, the harder it becomes to remove. A quick wipe with a damp cloth after each use can prevent the need for deep cleaning sessions. This habit alone can cut your cleaning time in half.
Cover Your Dishes
Using foil or oven-safe lids on dishes can prevent splatters from reaching the oven walls. This is especially helpful when roasting or baking foods that tend to bubble or drip. Less splatter means less buildup and less frequent deep cleaning.
Run a Self-Clean Cycle Regularly
If your oven has a self-cleaning function, use it every few months. The high heat burns off food residue and grease, leaving behind ash that is easy to wipe away. However, do not rely solely on the self-clean feature. It works best as a supplement to regular manual cleaning. Also, make sure your kitchen is well-ventilated during the self-cleaning cycle, as it can produce smoke and odors.
Common Mistakes to Avoid When Cleaning Enamel Oven Interior
Even with the best intentions, people often make mistakes that can harm their oven. Here are common errors to watch out for:
- Using abrasive scrubbers: Steel wool, harsh scrub brushes, and rough pads can scratch enamel. Always stick to soft cloths, sponges, or plastic scrapers.
- Using bleach or ammonia: These chemicals can corrode and discolor enamel over time. They also leave behind harmful fumes that can contaminate your food.
- Skipping the rinse: Any cleaning solution left on the enamel surface can cause damage or leave residue that affects food taste. Always rinse thoroughly.
- Ignoring the oven door glass: The glass on your oven door also needs regular cleaning. Grease and grime build up on it just like the interior walls.
- Using too much water: Excess water can drip into the oven’s heating elements or controls. Use damp cloths, not soaking wet ones.
Another mistake people make is waiting too long between cleanings. The longer grime sits, the harder it becomes to remove. A little regular attention goes a long way toward keeping your oven in great shape.
Expert Insights on Enamel Oven Care
Professional cleaners and appliance experts agree on a few key principles for maintaining enamel oven interiors. First, always test any cleaning product on a small, hidden area before applying it to the entire interior. This ensures the product does not react with or damage the enamel coating. Second, consistency beats intensity. A light cleaning after every few uses is far more effective than one massive cleaning session every six months. Third, never use metal utensils or tools inside the oven to scrape off food. These can chip or scratch the enamel, creating spots where grease and food can accumulate even more easily.
Experts also recommend keeping a dedicated cleaning kit for your oven. Having your supplies organized and ready to go makes the process faster and less intimidating. A spray bottle of vinegar solution, a container of baking soda paste, and a few soft cloths are all you need. Store them in a cabinet near your oven for easy access.
How Often Should You Deep Clean Your Enamel Oven Interior?
For most households, a deep clean every one to three months is sufficient. If you use your oven daily or frequently cook greasy or saucy foods, you may need to clean more often. Light wiping after each use and occasional deep cleaning strikes the right balance. This routine keeps your oven performing well and extends the life of the enamel coating.
Conclusion
Cleaning your enamel oven interior does not have to be a difficult or unpleasant task. With the right supplies, a little patience, and a consistent routine, you can keep your oven looking and working its best. Natural cleaners like baking soda and vinegar are safe, effective, and gentle on enamel surfaces. Avoid harsh chemicals and abrasive tools that can cause long-term damage. Prevention is your best friend, so use oven liners, clean spills quickly, and cover dishes when cooking.
Remember that a clean oven cooks better food and keeps your kitchen smelling fresh. The tips and methods in this guide give you everything you need to tackle any level of grime. Start with the basics, build good habits, and your oven will reward you with years of reliable performance. Clean enamel oven interior maintenance is one of the simplest ways to take better care of your kitchen and your cooking.
Frequently Asked Questions
Can I use bleach to clean my enamel oven interior?
No, you should avoid bleach on enamel surfaces. Bleach can corrode and discolor the enamel coating over time. It also leaves behind harmful chemical residues that can contaminate your food. Stick to baking soda, vinegar, or cleaners specifically labeled as safe for enamel.
How do I remove burnt-on food from my enamel oven?
The best method is to use a baking soda paste and let it sit overnight. The paste softens the burnt-on residue, making it easy to wipe away. For stubborn spots, the steam method with a dish of vinegar and water can help loosen the grime further. Avoid using metal scrapers that can scratch the enamel.
Is it safe to use commercial oven cleaners on enamel?
It depends on the product. Look for cleaners specifically marked as safe for enamel surfaces. Avoid any product containing bleach, ammonia, or abrasive particles. Always rinse the interior thoroughly after using any commercial cleaner to remove all chemical residues.
How often should I clean my enamel oven interior?
A light wipe-down after each use helps maintain cleanliness. For a deep clean, aim for every one to three months depending on how often you cook. If you notice grease buildup or odors, it is time for a cleaning session regardless of your schedule.
Can I use a self-cleaning oven feature on enamel interiors?
Yes, most modern ovens with enamel interiors are designed to handle the self-cleaning cycle. The high heat burns off food residue and grease. However, do not rely solely on self-cleaning. Manual cleaning with gentle methods helps maintain the enamel and prevents buildup that the self-clean cycle may not fully address.
What is the best homemade cleaner for enamel oven interiors?
A baking soda paste mixed with warm water is the most effective and safest homemade cleaner for enamel. For extra cleaning power, add a splash of white vinegar during the final rinse. This combination is non-toxic, inexpensive, and works wonders on grease and food residue without damaging the enamel surface.
=== CONCLUSION ===
Cleaning your enamel oven interior is simple when you know the right methods. Use baking soda paste, vinegar, and gentle tools to keep your oven in top shape. Avoid harsh chemicals and abrasive scrubbers that can damage the enamel. Build a regular cleaning routine that includes both quick wipes and deeper sessions. Your oven will stay clean, safe, and efficient for years to come.