How To Clean Power Air Fryer Oven Fast And Very Simple
Keeping your Power Air Fryer Oven clean is easier than you think. This guide walks you through a fast, simple cleaning process that removes grease, food residue, and odors in minutes. You will learn the best methods for both the interior and exterior, plus essential maintenance tips to keep your appliance running like new.
Your Power Air Fryer Oven is one of the most useful kitchen appliances you own. It cooks food quickly, uses less oil, and delivers crispy results every time. But here is the thing most people overlook. A dirty air fryer oven does not cook as well. Grease builds up, food residue sticks to the walls, and unpleasant odors start to linger. That is why knowing how to clean your power air fryer oven properly matters so much.
The good news is that cleaning does not have to be a dreaded chore. With the right approach, you can have your appliance looking and smelling fresh in under 30 minutes. This guide breaks down the entire process into simple, easy-to-follow steps. Whether you need a quick wipe-down after dinner or a thorough deep clean, you will find exactly what you need here. Let us get started and make air fryer cleaning a breeze.
Key Takeaways
- Regular cleaning prevents buildup: Wipe down your Power Air Fryer Oven after every use to avoid stubborn grease and food residue.
- Natural cleaners work great: Baking soda, vinegar, and warm soapy water are safe and effective for deep cleaning.
- Remove parts for easier access: Taking out the baking tray, drip tray, and racks makes interior cleaning much simpler.
- Never use abrasive scrubbers: Harsh tools can damage the nonstick coating and stainless steel surfaces.
- Deep clean monthly: A thorough monthly cleaning keeps odors away and extends the life of your kitchen appliance.
- Dry everything completely: Moisture left behind can cause rust and affect cooking performance.
📑 Table of Contents
- Why Regular Cleaning Matters for Your Power Air Fryer Oven
- What You Need Before You Start Cleaning
- Step-by-Step Guide to Cleaning Your Power Air Fryer Oven
- Deep Cleaning Your Power Air Fryer Oven: A Monthly Routine
- Common Mistakes to Avoid When Cleaning Your Air Fryer Oven
- Maintenance Tips to Keep Your Power Air Fryer Oven Clean Longer
- How Often Should You Clean Each Part?
- Final Thoughts
Why Regular Cleaning Matters for Your Power Air Fryer Oven
Many people only think about cleaning their air fryer oven when it looks really dirty. That is a mistake. Regular cleaning does more than just keep things looking nice. It directly affects how well your appliance performs and how long it lasts.
Prevents Grease Buildup and Smoke
When grease accumulates inside the oven, it can smoke during cooking. This affects the taste of your food and fills your kitchen with unpleasant fumes. A simple wipe-down after each use prevents this buildup from becoming a serious problem. Think of it like washing a pan right after you use it.
Extends the Lifespan of Your Appliance
Food residue and grease can damage the nonstick coating over time. Once that coating wears down, your food starts to stick. This means more scrubbing and more frustration. By keeping the interior clean, you protect that coating and help your appliance last for years.
Improves Cooking Performance
A clean power air fryer oven heats more evenly. When grease and crumbs block the air vents or coat the walls, heat distribution suffers. Your food may cook slower or come out less crispy than it should. A quick cleaning routine keeps everything running at peak efficiency.
Removes Odors and Keeps Food Fresh
Have you ever opened your air fryer and smelled last night’s dinner? That is trapped food residue causing the odor. Regular cleaning eliminates these smells so every meal tastes fresh. This is especially important if you cook strong-flavored foods like fish or spices frequently.
What You Need Before You Start Cleaning
Before you dive into the cleaning process, gather a few basic supplies. You do not need any fancy or expensive products. Most of what you need is already in your kitchen.
Here is a simple checklist of supplies for grease removal and general cleaning:
- Warm soapy water — the foundation of any cleaning solution
- Baking soda — a natural abrasive that lifts tough stains
- White vinegar — cuts through grease and eliminates odors
- Soft sponge or microfiber cloth — safe for delicate surfaces
- Soft-bristle brush — great for reaching corners and crevices
- Dish soap — a small amount for your soapy water
- Paper towels or clean rags — for drying and wiping
- Mild degreaser — optional, for heavy grease buildup
One important tip. Never use steel wool, abrasive pads, or harsh chemical cleaners. These can scratch the nonstick coating and damage the stainless steel exterior. Stick to gentle tools and natural cleaners whenever possible.
Step-by-Step Guide to Cleaning Your Power Air Fryer Oven
Now let us get into the actual cleaning process. Follow these steps in order for the best results. Each step targets a specific part of your power air fryer oven to ensure a thorough clean.
Step 1: Unplug and Cool Down the Appliance
Safety always comes first. Before you touch anything inside the oven, make sure it is unplugged and completely cool. Do not attempt to clean it while it is still warm. The removable parts may be hot, and you could burn yourself. Give it at least 20 to 30 minutes to cool down after cooking.
Step 2: Remove All Removable Parts
Take out the baking tray, drip tray, and any racks or inserts. These parts are usually dishwasher safe, but hand washing is gentler and extends their life. Removing these pieces gives you full access to the interior, which makes the next steps much easier.
As you remove each part, inspect it for heavy grease buildup or stuck-on food residue. This helps you determine how much elbow grease each piece needs during the soaking process.
Step 3: Soak the Removable Parts
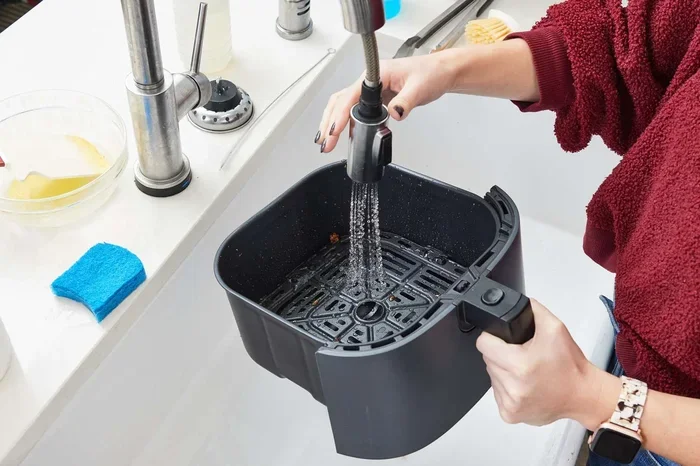
Fill your sink or a large basin with warm water and a few drops of dish soap. Submerge the baking tray, drip tray, and racks. Let them soak for 15 to 20 minutes. This softens the grease and loosens stuck-on food, making scrubbing much simpler.
For particularly greasy parts, add a tablespoon of baking soda to the water. The baking soda acts as a gentle abrasive that helps break down the grease without scratching the surface. This is one of the most effective cleaning solutions you can use at home.
Step 4: Scrub the Removable Parts
After soaking, take a soft sponge and gently scrub each part. Focus on areas with visible grease or food buildup. Use the soft-bristle brush for corners and hard-to-reach spots. Rinse everything thoroughly with clean water and shake off excess moisture.
If any stubborn spots remain, make a paste of baking soda and a small amount of water. Apply it to the spot, let it sit for 5 minutes, then scrub gently. This deep clean technique works wonders on baked-on residue.
Step 5: Clean the Interior of the Oven
Now it is time to tackle the inside of the power air fryer oven. Dip a soft sponge or microfiber cloth in warm soapy water. Wipe down all the interior walls, the ceiling, and the floor of the oven cavity.
Pay extra attention to the area around the heating element. Food residue tends to accumulate there and can affect cooking performance. Be gentle around the heating element to avoid damaging it.
For tough interior stains, sprinkle baking soda directly on the affected area. Spray or drizzle a small amount of vinegar on top. The fizzing reaction helps lift the stain. Let it sit for 5 to 10 minutes, then wipe clean with a damp cloth.
Step 6: Wipe Down the Exterior
The exterior of your air fryer oven collects grease, fingerprints, and dust over time. Use a damp microfiber cloth with a bit of mild dish soap to wipe down the outside. Focus on the handle, the control panel area, and the door.
For stainless steel exteriors, wipe in the direction of the grain. This prevents streaking and keeps the surface looking polished. Dry the exterior immediately with a clean, dry cloth to prevent water spots.
Step 7: Clean the Glass Door
The glass door is one of the most visible parts of your oven. It can get smudged and greasy quickly, especially after cooking foods that splatter. Mix equal parts water and vinegar in a spray bottle. Spray the glass and wipe it clean with a microfiber cloth.
For stubborn smudges, add a small amount of baking soda to the vinegar solution. The mild abrasion helps remove buildup without scratching the glass. Always dry the glass with a clean cloth to avoid streaks.
Step 8: Dry Everything Completely
This step is often overlooked but extremely important. Moisture left on any part of your power air fryer oven can lead to rust and mold. Use a dry towel or paper towels to thoroughly dry every piece and every surface.
Let the removable parts air dry completely before putting them back into the oven. Once everything is dry, reassemble the appliance and store it in a clean, dry area.
Deep Cleaning Your Power Air Fryer Oven: A Monthly Routine
A quick wipe-down after each use handles most of the daily cleaning. But once a month, you should give your appliance a deeper treatment. A monthly deep clean removes hidden grease and buildup that regular cleaning might miss.
How to Deep Clean the Heating Elements
The heating elements are critical for even cooking. Over time, grease and food particles can coat them, reducing their effectiveness. Use a soft brush or a damp cloth to gently clean the elements. Never spray liquid directly onto the heating element. Instead, dampen the cloth and wring it out well before wiping.
Dealing with Stubborn Grease Stains
If you have neglected your cleaning for a while, you may face some tough grease stains. Here is a powerful cleaning solution that works wonders:
- Mix 2 tablespoons of baking soda with 1 tablespoon of water to form a paste.
- Spread the paste over the greasy stains inside the oven.
- Let it sit for 20 to 30 minutes.
- Wipe it away with a damp cloth and repeat if needed.
- Spray vinegar on any remaining paste residue to neutralize the baking soda.
- Wipe clean and dry thoroughly.
This method is safe, effective, and uses products you already have in your kitchen. It is the best way to handle heavy food residue without damaging your appliance.
Cleaning the Fan and Air Vents
The fan and air vents play a huge role in how well your power air fryer oven cooks. When they get clogged with grease and crumbs, airflow is restricted. Use a soft brush or a cotton swab to gently clean the vents. You can also use a can of compressed air to blow out any debris from hard-to-reach areas.
Common Mistakes to Avoid When Cleaning Your Air Fryer Oven
Even with the best intentions, people make mistakes when cleaning their air fryer oven. Here are some common errors you should avoid:
- Using abrasive scrubbers or steel wool. These scratch the nonstick coating and damage stainless steel surfaces. Always use soft sponges or microfiber cloths.
- Submerging the main unit in water. The electrical components can be damaged by water. Only clean removable parts in water. Never put the main oven body in the sink or dishwasher.
- Using harsh chemical cleaners. Strong chemicals can leave residue that transfers to your food. Stick to gentle, food-safe cleaners like baking soda and vinegar.
- Skipping the drying step. Moisture causes rust and can lead to mold growth. Always dry every part and surface completely before reassembling.
- Cleaning while the appliance is still hot. This can burn your hands and may warp certain plastic components. Always wait for the oven to cool down first.
- Ignoring the drip tray. The drip tray catches a lot of grease and can overflow if not cleaned regularly. Check and clean it after every few uses.
Avoiding these mistakes keeps your appliance in great shape and ensures your cooking residue does not become a permanent problem.
Maintenance Tips to Keep Your Power Air Fryer Oven Clean Longer
Cleaning is easier when you build good habits. Here are some simple maintenance tips that make a big difference:
- Line the baking tray with parchment paper. This catches drips and prevents food from sticking directly to the tray. It also makes cleanup much faster.
- Wipe down the interior after every use. Spend just 2 minutes wiping the walls and floor while the oven is still warm. This prevents grease from hardening and becoming difficult to remove.
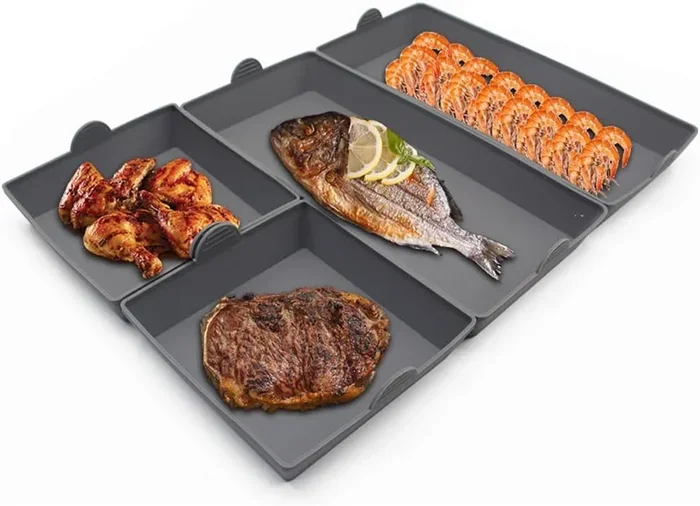
- Use a silicone mat on the baking tray. A silicone mat provides a nonstick surface that is easy to wash and helps protect the tray’s coating.
- Clean spills immediately. If food or grease spills during cooking, wait until the oven is cool enough to touch, then wipe it up right away. Do not let spills sit and bake onto the surface.
- Store the appliance with the door slightly open. This allows air to circulate inside and prevents moisture buildup and odors from developing.
- Check the seal and gasket regularly. The door seal can collect grease and food particles. Wipe it down weekly with a damp cloth to keep it clean and effective.
These small habits take very little time but save you from big cleaning jobs later. They are the secret to keeping your power air fryer oven in excellent condition for the long haul.
How Often Should You Clean Each Part?
Different parts of your power air fryer oven need cleaning at different frequencies. Here is a simple schedule to follow:
| Part | Cleaning Frequency | Method |
|---|---|---|
| Interior walls and ceiling | After every 3 to 5 uses | Wipe with warm soapy water |
| Baking tray | After every use | Hand wash or dishwasher |
| Drip tray | After every use or every 2 uses | Hand wash with warm soapy water |
| Racks and inserts | After every use | Hand wash or dishwasher |
| Glass door | Weekly or as needed | Vinegar and water solution |
| Exterior | Weekly | Wipe with damp microfiber cloth |
| Heating elements | Monthly | Soft brush or damp cloth |
| Air vents and fan | Monthly | Soft brush or compressed air |
| Full deep clean | Monthly | Baking soda paste and vinegar |
Following this schedule keeps your appliance in top shape and makes each cleaning session quick and easy. You will spend less time scrubbing and more time enjoying your perfectly cooked meals.
Final Thoughts
Cleaning your power air fryer oven does not have to be a difficult or time-consuming task. With the right supplies, a simple routine, and a few good habits, you can keep your appliance spotless and performing at its best. Regular cleaning after each use, combined with a monthly deep clean, ensures that grease and food residue never build up to problematic levels.
Remember to always use gentle cleaning tools and food-safe products. Protect the nonstick coating and stainless steel surfaces by avoiding harsh chemicals and abrasive scrubbers. And most importantly, make cleaning a quick habit rather than a dreaded chore. A few minutes of effort after each meal saves you from a major cleaning session later on.
Your air fryer oven is a valuable investment in your kitchen. Take care of it, and it will take care of you with delicious, perfectly cooked meals for years to come. Start today, follow the steps in this guide, and experience how simple and satisfying air fryer cleaning can be.
Frequently Asked Questions
Can I put the removable parts of my Power Air Fryer Oven in the dishwasher?
Yes, most removable parts like the baking tray, drip tray, and racks are dishwasher safe. However, hand washing with warm soapy water is gentler and helps extend the life of these components. Check your specific model’s manual to confirm which parts are dishwasher safe.
What is the best natural cleaner for a Power Air Fryer Oven?
A mixture of baking soda and vinegar is the best natural cleaner for your power air fryer oven. Baking soda lifts tough grease and stains, while vinegar cuts through residue and eliminates odors. Together, they create a powerful yet safe cleaning solution that will not damage your appliance.
How do I remove baked-on grease from the interior of my air fryer oven?
Make a thick paste of baking soda and water, spread it over the greasy areas, and let it sit for 20 to 30 minutes. The paste will break down the hardened grease. Then wipe it away with a damp cloth and spray any remaining residue with vinegar to neutralize the baking soda.
Is it safe to use soap directly on the nonstick coating inside the oven?
Yes, mild dish soap is safe for the nonstick coating. Just avoid using abrasive scrubbers or sponges with rough surfaces. A soft sponge with warm soapy water is the best way to clean the interior without damaging the nonstick surface.
How can I get rid of bad odors from my Power Air Fryer Oven?
Bad odors are usually caused by trapped food residue and grease. A thorough cleaning with baking soda and vinegar removes the source of the smell. You can also place a small bowl of lemon water inside the oven and run it on heat for 5 minutes to freshen up the interior.
Can I use store-bought oven cleaners on my Power Air Fryer Oven?
It is best to avoid commercial oven cleaners. These products contain harsh chemicals that can damage the nonstick coating and leave behind residues that may contaminate your food. Stick to natural cleaners like baking soda, vinegar, and warm soapy water for safe and effective cleaning.