How To Cook Duck Breast In Oven Easy With Crispy Skin
Cooking duck breast in the oven is easier than you think. This guide shows you exactly how to get crispy skin and juicy meat every single time. You will learn the best duck breast recipe, the right cooking temperature, and simple oven-roasted duck tips. Whether you are a beginner or a home cook, this method works perfectly.
There is something truly special about duck breast. It feels a little fancy, a little indulgent, and yet it is one of the simplest cuts of meat you can cook at home. Many people think you need a fancy restaurant or a lot of experience to get it right. That is simply not true.
In this guide, I will walk you through exactly how to cook duck breast in oven easy with crispy skin that crackles when you bite into it. The method is straightforward, forgiving, and almost impossible to mess up. By the end, you will wonder why you ever ordered duck at a restaurant. Let us get into it.
Key Takeaways
- Score the skin: This is the single most important step for getting crispy duck skin in the oven.
- Start skin-side down: Rendering the fat slowly on the stovetop first makes the skin incredibly crispy.
- Use a meat thermometer: The internal temp of 135°F gives you perfectly pink, juicy duck breast every time.
- Rest the duck: Letting it rest for 8-10 minutes keeps all those juices locked in.
- Low and slow works best: Roasting at 375°F after searing gives you even cooking and beautiful results.
- Simple seasoning is enough: Salt, pepper, and thyme let the natural flavor of the duck shine.
- Save the duck fat: It is liquid gold for cooking potatoes, vegetables, and more.
📑 Table of Contents
- Why Duck Breast Deserves a Spot in Your Kitchen
- What You Need to Get Started
- How to Prep Duck Breast for the Oven
- The Step-by-Step Cooking Process
- Common Mistakes to Avoid
- Quick Tips for Perfect Duck Breast Every Time
- Pairing Ideas and Serving Suggestions
- Storing and Reheating Leftover Duck
- Frequently Asked Questions
- Final Thoughts
Why Duck Breast Deserves a Spot in Your Kitchen
Duck breast is one of the most versatile proteins you can buy. It has a rich, slightly gamey flavor that pairs beautifully with sweet and savory sides. Unlike chicken breast, which can dry out quickly, duck breast has a natural layer of fat that keeps it moist and tender. Once you learn the basics, you will want to make it every week.
The beauty of cooking duck breast in oven is that you do not need any special equipment. A basic oven, a baking sheet, and a few simple ingredients are all you need. The oven does most of the work for you, giving you hands-off time while the duck skin renders into something golden and crispy.
Compared to pan-frying, the oven method gives you more even cooking. You get a beautiful sear on the skin without having to stand over the stove and watch it constantly. It is the perfect weeknight dinner or weekend special that impresses everyone at the table.
What You Need to Get Started
Choosing the Right Duck Breast
Start with a good-quality duck breast with skin on. This is non-negotiable if you want crispy skin. Most grocery stores carry whole duck breasts or even pre-cut portions. Look for breasts that feel firm and have a creamy white layer of fat underneath the skin.
You do not need to splurge on the most expensive option. A standard duck breast from your local supermarket works perfectly fine. If you can find a whole duck and cut your own breasts, that is even better. But honestly, the store-bought version works great for this recipe.
Essential Tools and Ingredients
Here is what you need to gather before you start:
- Duck breast (one per person, about 6-8 ounces each)
- A sharp knife or kitchen scissors
- A cutting board
- A cast iron skillet or oven-safe pan
- A baking sheet
- A meat thermometer (this is a game changer)
- Kosher salt and freshly ground black pepper
- Fresh thyme or rosemary (optional but recommended)
- A paper towel for drying the skin
The meat thermometer is the most important tool on this list. It removes all the guesswork and tells you exactly when your duck breast internal temp is perfect. I cannot stress this enough. Do not skip it.
How to Prep Duck Breast for the Oven
Step 1: Score the Skin
This is the secret to crispy duck skin. Take your duck breast and place it skin-side up on a cutting board. Using a sharp knife, make thin diagonal cuts across the skin. Cut through the skin and fat, but stop just before you hit the meat.
Space your cuts about half an inch apart. This creates channels for the fat to render out during cooking. Without scoring, the fat gets trapped and the skin turns rubbery instead of crispy. It is a small step that makes a massive difference.
Step 2: Dry the Skin
Take a paper towel and pat the skin completely dry. Moisture is the enemy of crispy skin. The drier the surface, the better the crispy skin will be. Some people like to leave the scored breast uncovered in the fridge overnight. This helps dry the skin even more and leads to better results.
Step 3: Season Simply
Generous salt and pepper on both sides. That is really it for a classic preparation. If you want to get fancy, add a sprig of thyme or a tiny sprinkle of five-spice powder. But honestly, good salt and pepper on quality duck breast is all you need.
Do not add salt too far in advance if you are not planning to refrigerate the breast. Salt draws out moisture, and you do not want extra moisture on the skin.
The Step-by-Step Cooking Process
Step 1: Start on the Stovetop
Place your cast iron skillet on medium heat. You do not need any oil. The duck breast has plenty of its own fat. Lay the breast skin-side down in the cold pan, then turn the heat to medium-low.
Let it cook undisturbed for about 8-10 minutes. You will see the fat start to render out. The skin will slowly turn golden and crispy. This slow rendering is what gives you that perfect crispy duck skin. Do not rush this step. Patience is your best friend here.
As the fat renders, you can carefully pour it off into a heatproof jar. Duck fat is incredible for cooking. Save it and use it to roast potatoes or sauté vegetables. It adds a rich, savory flavor that is hard to beat.
Step 2: Flip and Finish on the Stovetop
Once the skin is deep golden and crispy, flip the breast. Sear the meat side for about 1-2 minutes. You just want a nice color on the flesh. This step locks in the juices and sets up the oven-roasted duck for even cooking.
At this point, your duck breast should look beautifully seared on both sides. The skin should be crackly and golden brown. Transfer the breast to a baking sheet lined with parchment paper.
Step 3: Into the Oven
Preheat your oven to 375°F (190°C). Place the baking sheet with the duck breast into the oven. Roast for about 8-12 minutes depending on the thickness of the breast and how done you like your meat.
This is where the meat thermometer earns its keep. For duck breast pink inside and perfectly juicy, aim for an internal temperature of 135°F (57°C). The meat will carry over and rise a few degrees as it rests. If you prefer your duck more well-done, take it out at 145°F (63°C).
Here is a quick reference guide:
- 135°F (57°C): Medium-rare. Pink and juicy in the center. This is the recommended temp for the best flavor.
- 145°F (63°C): Medium. Slightly less pink, still very moist.
- 155°F (68°C): Medium-well. Less pink, but can start to dry out slightly.
Step 4: Rest the Duck
This step is just as important as the cooking. Transfer the duck breast to a cutting board and let it rest for 8-10 minutes. Do not skip this. Resting allows the juices to redistribute throughout the meat. If you cut into it too soon, all those beautiful juices run out onto the board instead of staying in the meat.
During the resting time, the internal temperature will continue to rise by about 5 degrees. This carryover cooking brings your duck breast internal temp right to where you want it.
Step 5: Slice and Serve
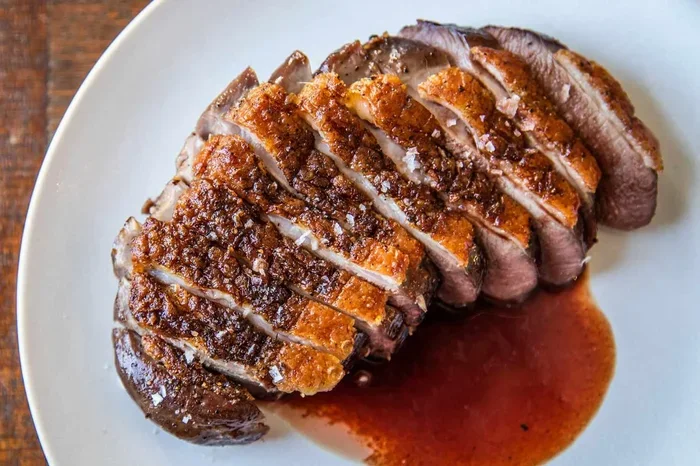
Use a sharp knife to slice the duck breast into thin medallions. Cut against the grain for the most tender bite. Arrange on a plate and serve immediately.
Duck breast pairs wonderfully with a variety of sides. Roasted sweet potatoes, sautéed green beans, wild rice, or a simple mixed green salad all work beautifully. The rich flavor of the duck stands up well to both sweet and savory accompaniments.
Common Mistakes to Avoid
Not Scoring the Skin
This is the number one mistake people make. Without scoring, the fat cannot escape, and you end up with rubbery, chewy skin instead of the crispy perfection you are after. Always score the skin before cooking.
Using Too High Heat on the Stovetop
High heat burns the skin before the fat has a chance to render out. Medium-low heat is your friend. Slow and steady wins the race here. You want that golden color to develop gradually over 8-10 minutes.
Skipping the Meat Thermometer
Guessing the doneness of duck breast almost always leads to overcooked, dry meat. A meat thermometer takes the guesswork out completely. It is a small investment that transforms your cooking instantly.
Cutting Into the Duck Too Soon
I know it is tempting. That beautiful golden breast is calling your name. But cutting too early releases all those juices. Give it the full 8-10 minutes of rest time. Your patience will be rewarded.
Not Drying the Skin
Moisture on the surface creates steam, and steam is the enemy of crispy skin. Always pat the skin dry thoroughly before seasoning and cooking. If you have time, leave it uncovered in the fridge for a few hours or overnight.
Quick Tips for Perfect Duck Breast Every Time
Here are some extra tips that will elevate your duck breast recipe from good to outstanding:
- Dry brine overnight: Sprinkle salt on the breast and leave it uncovered in the fridge overnight. This seasons the meat deeply and dries the skin even more.
- Prick any remaining fat pockets: After scoring, you might find small pockets of fat. Prick those too for even rendering.
- Use a wire rack: Placing the breast on a wire rack over the baking sheet allows air to circulate and helps the skin stay crispy.
- Add aromatics to the pan: Toss a few garlic cloves, shallots, or fresh herbs into the pan while the fat renders. They will infuse your kitchen with an incredible aroma.
- Let the duck come to room temperature: Take the breast out of the fridge 20-30 minutes before cooking. This ensures more even cooking throughout.
- Save the rendered fat: Store it in the fridge and use it within a month. It is one of the best cooking fats you can have.
Pairing Ideas and Serving Suggestions
Roast duck in oven pairs beautifully with a wide range of sides and sauces. Here are some ideas to round out your meal:
- Cherry or orange sauce: A classic pairing that complements the richness of the duck with a touch of sweetness.
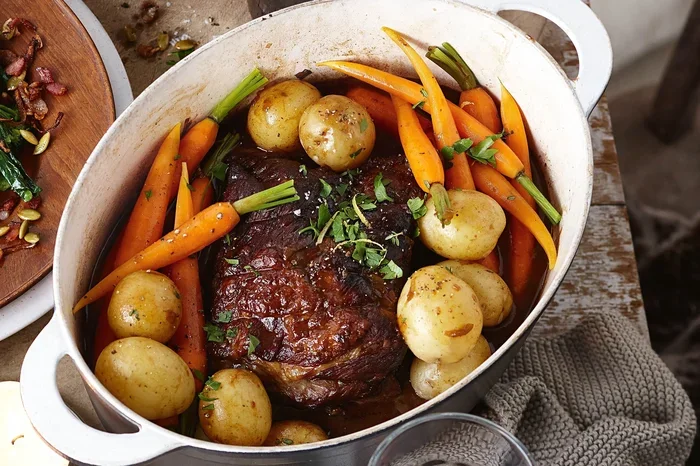
- Roasted root vegetables: Carrots, parsnips, and sweet potatoes caramelize beautifully alongside duck.
- Crispy potatoes: Toss baby potatoes in duck fat and roast them on the same baking sheet. You will love the results.
- Wild rice pilaf: The nutty flavor of wild rice is a perfect match for duck.
- Simple green salad: A light salad with a tangy vinaigrette cuts through the richness of the meat.
- Sautéed greens: Kale, spinach, or Swiss chard with a little garlic and lemon brightens up the plate.
The versatility of duck breast is one of its greatest strengths. You can go simple with just salt and pepper, or you can build an entire composed plate with sauces and sides. Both approaches taste amazing.
Storing and Reheating Leftover Duck
If you have leftovers, store them in an airtight container in the fridge for up to 3 days. Reheat gently in a low oven or in a skillet with a lid. The microwave can work in a pinch, but it may soften the crispy skin. For the best results, reheat in a hot skillet skin-side down for just 1-2 minutes to re-crisp the skin.
Frequently Asked Questions
How long does it take to cook duck breast in the oven?
The total time is about 25-35 minutes. This includes 8-10 minutes of stovetop searing skin-side down, a quick flip, and 8-12 minutes in the oven at 375°F. The exact time depends on the thickness of your breast and how done you prefer your meat.
What internal temperature should duck breast reach?
For perfectly pink and juicy duck breast, aim for 135°F (57°C). This is considered medium-rare and is the recommended temperature by most chefs. The meat will carry over and rise a few degrees as it rests, reaching around 140°F (60°C).
Do I need to soak duck breast before cooking?
No, you do not need to soak duck breast. The only prep step that matters is drying the skin thoroughly. Pat it with paper towels and make sure it is completely dry before scoring and seasoning. Some people brine or dry-brine the breast overnight for extra seasoning, but it is not required.
Can I cook duck breast without a cast iron skillet?
Absolutely. Any oven-safe pan will work. Stainless steel or a heavy-bottomed non-stick pan are great alternatives. The key is to use a pan that can handle medium-low heat on the stovetop and then transfer to the oven without any issues.
Is duck breast healthy?
Duck breast is a good source of protein and contains essential nutrients like iron and B vitamins. It does have more fat than chicken breast, but much of it is unsaturated fat. The fat renders out during cooking, so you can reduce the fat content by pouring off excess duck fat during the searing process.
Can I make crispy duck skin without the stovetop step?
The stovetop searing step is really the key to crispy duck skin. It renders the fat slowly and evenly, which creates the crackly texture. You can try putting the breast directly in the oven, but the results will not be as crispy. The two-step method of stovetop then oven is the easiest and most reliable way to get perfect skin.
Final Thoughts
Learning how to cook duck breast in oven easy is one of the best skills you can add to your kitchen repertoire. It is simpler than most people think, and the results are genuinely impressive. The combination of crispy skin, juicy pink meat, and rich flavor makes duck breast a standout dish for any occasion.
Remember the key steps: score the skin, dry it well, sear skin-side down low and slow, finish in the oven at 375°F, and always use a meat thermometer. Follow these steps and you will get perfect duck breast every single time.
Give this method a try this week. I promise you will be amazed at how easy it is and how good the results are. Once you master the basics, you can start experimenting with different seasonings, sauces, and sides. Duck breast is one of those ingredients that rewards a little effort with a lot of flavor. Happy cooking!