How To Make The Best Plunger Coffee And Enjoy Every Cup
Plunger coffee is a simple, rich brew that brings out the full flavor of your beans. This guide shows you how to make the best plunger coffee with the right grind, water temperature, and timing. You’ll learn expert tips to enjoy every cup like a pro.
Key Takeaways
- Use coarse grounds: A coarse grind prevents over-extraction and keeps your plunger coffee smooth.
- Water temperature matters: Heat water to 195–205°F for optimal flavor extraction.
- Steep for 4 minutes: This timing balances strength and clarity without bitterness.
- Preheat the plunger: Warming the pot before brewing keeps the coffee hot longer.
- Plunge slowly: A gentle, steady press preserves the coffee oils and rich aroma.
- Clean after every use: Regular cleaning prevents buildup and ensures consistent taste.
📑 Table of Contents
What Is Plunger Coffee And Why It’s The Best
Plunger coffee is one of the most satisfying ways to brew a cup at home. Also known as French press coffee, it uses a simple plunger pot to extract rich flavor directly from the grounds. The method relies on immersion brewing, which means the coffee sits in hot water for a few minutes before you press it down. This process pulls out more oils and flavor than paper filters can. The result is a full-bodied cup with a smooth, clean taste that feels luxurious. If you love a strong, aromatic brew, plunger coffee should be your go-to method.
Many coffee lovers choose this method because it is easy and forgiving. You do not need expensive equipment or a precise scale. A good plunger pot, coarse grounds, and hot water are all you need. The brewing time is short, usually around four minutes. That makes it perfect for busy mornings when you still want a café-quality drink. Once you master the basics, you can experiment with different beans and ratios to find your perfect cup. The simplicity of plunger coffee is what makes it so appealing to both beginners and seasoned baristas.
A Brief History Of The Plunger Pot
The plunger coffee maker has a long and interesting history. It was patented in 1929 by an Italian designer named Attilio Calimani. The design quickly spread across Europe and became a staple in homes and cafes. People loved how easy it was to use and how well it preserved the natural oils of the coffee. Over the decades, the basic design has changed very little. Modern versions use stainless steel and glass, but the brewing principle remains the same. Today, plunger coffee is enjoyed worldwide and is often considered the best way to taste the true character of coffee beans.
Why Plunger Coffee Beats Other Brewing Methods
Compared to drip machines or espresso makers, plunger coffee offers a unique experience. Drip coffee makers use paper filters that absorb many of the oils and fine particles. This can leave the cup tasting thinner and less complex. Espresso machines force hot water through finely ground coffee at high pressure. They produce a concentrated shot, but they require expensive gear and a learning curve. Plunger coffee sits right in the middle. It gives you a rich, full-flavored cup without the need for complicated machinery. The immersion method also allows you to control every variable, from water temperature to steeping time. That level of control is why so many coffee lovers prefer plunger coffee.
The Essential Tools You’ll Need
Before you start brewing, gather a few simple tools. Having the right equipment makes the process smoother and the coffee better. You do not need anything fancy, but quality items will last longer and perform better. Here is what you need to make great plunger coffee at home.
Choosing A Quality Plunger Pot
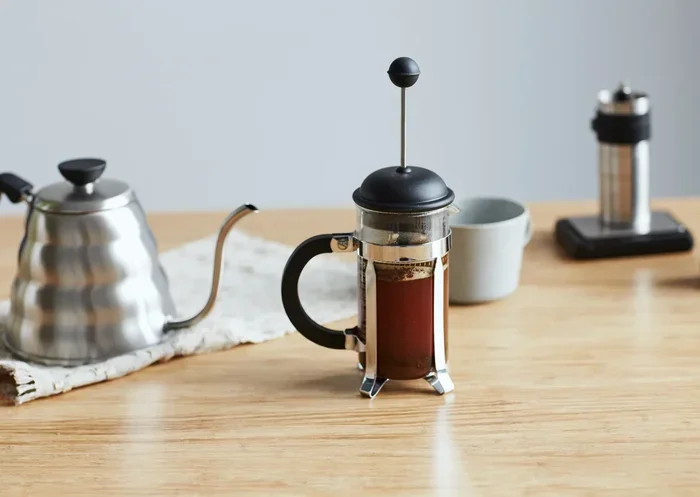
The plunger pot is the heart of the setup. Look for one made of stainless steel or borosilicate glass. Stainless steel pots are durable and keep coffee hot for a long time. Glass pots let you watch the coffee as it brews, which is a nice visual treat. Both materials are easy to clean and do not absorb odors. Avoid plastic pots if possible, as they can retain flavors over time. A good plunger should have a fine metal mesh filter. This filter catches most of the grounds while letting the oils pass through. Some high-end models use double filters for an even cleaner cup. Choose a size that fits your needs, whether you brew for one or a whole family.
The Right Grinder And Water Kettle
A burr grinder is the best choice for plunger coffee. It produces a consistent coarse grind, which is essential for even extraction. Blade grinders can work in a pinch, but they often create uneven particles. Uneven grounds lead to over-extraction and bitterness. If you do not have a grinder, many coffee shops will grind beans for you. Just ask for a coarse setting, like sea salt. For heating water, a simple kettle works fine. Gooseneck kettles are popular because they give you control over the pour. However, you can also heat water in a saucepan or microwave. The key is to reach the right temperature, which we will cover in the brewing guide.
Step-By-Step Guide To Brewing Plunger Coffee
Brewing plunger coffee is a simple ritual once you know the steps. Follow this guide to make a perfect cup every time. The process takes only a few minutes, but the flavor is worth the wait.
Step 1: Measure Your Coffee And Water
Start by measuring your coffee and water. A good ratio is 1 gram of coffee for every 15 grams of water. For a standard 8-cup plunger pot, that is about 50 grams of coffee and 750 milliliters of water. If you do not have a scale, use two tablespoons of coffee per cup of water. Using the right ratio ensures your coffee is balanced and not too weak or too strong. This is the foundation of a great cup of plunger coffee.
Step 2: Heat The Water To The Perfect Temperature
Next, heat your water. The ideal temperature for plunger coffee is between 195°F and 205°F. Boiling water is too hot and can scorch the grounds, leading to a bitter taste. If you do not have a thermometer, bring the water to a boil and then let it sit for 30 seconds. That brings it down to the perfect range. Always use fresh, cold water. Filtered water is best because it removes chlorine and other off-flavors. Good water makes a huge difference in the final taste.
Step 3: Add Grounds And Start The Brew
Place your plunger pot on a stable surface. Add the ground coffee to the bottom of the pot. Pour a small amount of hot water over the grounds first. This step is called the bloom. It allows the coffee to release carbon dioxide and prepares it for extraction. Let the bloom sit for about 30 seconds. Then pour the rest of the water slowly and evenly. Make sure all the grounds are saturated. Stir the mixture gently with a wooden spoon or chopstick. Avoid metal spoons, as they can scratch the glass if you are using a glass pot.
Step 4: Steep And Plunge Slowly
Place the lid on the plunger pot and let the coffee steep for four minutes. Do not rush this step. The steeping time is crucial for extracting the right flavors. If you steep too short, the coffee will be weak and sour. If you steep too long, it becomes bitter and harsh. After four minutes, it is time to plunge. Press the plunger down slowly and steadily with even pressure. A slow plunge prevents the grounds from being disturbed too much, which keeps the coffee clean. If you plunge too fast, you may create a lot of sediment. Take your time and enjoy the process.
Step 5: Serve Immediately
Once you have plunged, pour the coffee into your cup right away. Plunger coffee continues to extract if it sits in the pot, so it can turn bitter quickly. Serving immediately ensures the best flavor. If you have leftover coffee, pour it into a separate thermos or carafe. Do not leave it sitting in the plunger pot. A warm ceramic mug is ideal for keeping the coffee at the perfect drinking temperature. Now, sit back, sip, and enjoy the rich, smooth taste of your homemade plunger coffee.
How To Choose The Right Coffee Beans And Grind
The beans you choose and how you grind them are the two most important factors in making great plunger coffee. Even the best plunger pot cannot save poor-quality beans or an incorrect grind size. Take a moment to understand what works best for this brewing method.
Best Beans For Plunger Coffee
Almost any coffee bean can work in a plunger, but some are better than others. Medium to dark roasts are popular because they produce a rich, bold flavor that stands up well to immersion brewing. Light roasts can also work well, but they tend to be more acidic and fruity. If you like a smooth, chocolatey cup, look for beans from Brazil, Colombia, or Sumatra. Single-origin beans are great for tasting the unique characteristics of a specific region. Blends can also be excellent, as they are designed to be balanced and consistent. Choose whole beans and grind them just before brewing for the freshest possible cup. Fresh beans are the secret to truly great plunger coffee.
Grind Size: Coarse Is Key
Grind size is critical for plunger coffee. You need a coarse grind, similar to the texture of sea salt or coarse sand. A fine grind will slip through the mesh filter and create a gritty, muddy cup. It can also cause over-extraction, leading to bitterness. On the other hand, a grind that is too coarse will under-extract the coffee, resulting in a weak, sour taste. Invest in a burr grinder and set it to the coarsest setting. If you buy pre-ground coffee, ask the barista for a coarse grind specifically for French press or plunger pots. Always grind your beans just before brewing to preserve the aromatic oils.
Freshness Matters
Coffee is at its best within a few weeks of roasting. Look for a roast date on the bag, not just an expiration date. Storing beans properly is just as important. Keep them in an airtight container in a cool, dark place. Do not store coffee in the freezer, as moisture can ruin the flavor. A small bag that you finish within two weeks is ideal. Freshly roasted and freshly ground beans will give you the most flavorful and aromatic plunger coffee. The difference is noticeable from the very first sip.
Common Mistakes To Avoid When Making Plunger Coffee
Even experienced coffee lovers can make mistakes when brewing plunger coffee. Knowing what to avoid will save you from a bad cup. Here are the most common pitfalls and how to prevent them.
Using The Wrong Grind Size
This is the number one mistake people make. A fine grind will clog the filter and make the coffee taste muddy and bitter. It can also force you to press the plunger with too much pressure, which pushes fine particles through the mesh. Always use a coarse grind. If your coffee is gritty, the grind is too fine. Adjust the setting and try again. A consistent coarse grind is the foundation of a clean, smooth cup.
Water That Is Too Hot Or Too Cold
Boiling water burns the coffee grounds and extracts unpleasant flavors. Water that is too cold under-extracts the coffee and leaves it tasting sour. The sweet spot is between 195°F and 205°F. If you are unsure, let boiling water rest for 30 to 45 seconds before pouring. Using a thermometer is a great habit to build. Proper water temperature ensures balanced extraction and a rich, satisfying flavor.
Over-Steeping The Coffee
Leaving the coffee in the water for too long is another common error. Four minutes is the ideal steeping time. Going beyond five or six minutes will pull out too many bitter compounds. The coffee will taste harsh and astringent. Set a timer to keep yourself honest. Once the time is up, plunge and serve immediately. This simple habit keeps your plunger coffee tasting fresh and balanced.
Skipping The Preheating Step
Many people forget to preheat the plunger pot before adding the grounds. A cold pot can drop the water temperature quickly, leading to uneven extraction. To preheat, simply pour hot water into the empty pot and let it sit for a minute. Then swirl the water around and discard it. This small step makes a big difference. It keeps the brewing temperature stable and helps the coffee stay warm longer in your cup.
Conclusion
Making the best plunger coffee at home is easier than you think. With the right beans, a coarse grind, and proper water temperature, you can brew a rich, flavorful cup every single day. The process is simple, but the results are impressive. You control every variable, from the grind size to the steeping time. That level of control is what makes plunger coffee so rewarding. Once you start making it at home, you may never go back to paper-filtered drip coffee. Clean out your plunger pot, grab some fresh beans, and enjoy the ritual of brewing a perfect cup. The aroma alone is worth the effort.
Perfect Pairings For Your Plunger Coffee
To make your coffee ritual even more special, try pairing your brew with something from the oven. For a savory treat, our garlic bread with garlic powder in oven recipe is a perfect match. The buttery, aromatic bread complements the bold flavors of a strong plunger coffee beautifully. If you want a fresh bread without an oven, check out how to make bread without oven and yeast for a quick and easy option. And for a crunchy snack to enjoy alongside your cup, you can roast whole almonds in oven for a sweet and salty treat. These simple pairings turn your morning coffee into a delightful brunch experience.
Frequently Asked Questions
What is the best coffee grind size for plunger coffee?
The best grind size is coarse, similar to sea salt. A coarse grind prevents over-extraction and keeps the coffee smooth. Fine grinds will slip through the filter and make the cup gritty and bitter.
How long should I steep plunger coffee before plunging?
Steep the coffee for four minutes. This timing allows for optimal flavor extraction without pulling out bitter compounds. Use a timer to ensure consistency every time you brew.
Can I use tap water for plunger coffee?
You can, but filtered water is better. Tap water often contains chlorine and minerals that can affect the taste of your coffee. Clean, fresh water brings out the true flavor of the beans.
Is plunger coffee the same as French press coffee?
Yes, plunger coffee and French press coffee are the same thing. The plunger pot is the original French press design. Both use immersion brewing and a metal mesh filter to produce a rich, full-bodied cup.
How do I clean my plunger pot properly?
Disassemble the plunger and rinse all parts with warm water after each use. For a deep clean, use a mild dish soap and a soft brush. Avoid abrasive cleaners that can scratch the glass or damage the mesh filter.
Can I reheat leftover plunger coffee?
It is best not to reheat plunger coffee. Reheating can make the coffee taste flat and bitter. Instead, pour any leftover coffee into a thermos or carafe to keep it warm for later.
=== CONCLUSION ===
Now you know exactly how to make the best plunger coffee and enjoy every cup. From choosing the right beans to mastering the plunge, these steps will elevate your daily routine. Remember to use a coarse grind, heat the water properly, and steep for exactly four minutes. Clean your plunger pot after each brew to keep the coffee tasting fresh. With a little practice, you will brew café-quality coffee at home without any effort. Start your next morning with a perfect cup of plunger coffee and taste the difference that care and attention make.