How Long To Cook Glazed Ham In The Oven Step By Step
Want to know how long to cook glazed ham in oven? This guide gives you exact times, temperatures, and step-by-step instructions for a perfect holiday ham every time. You will learn how to choose, prep, glaze, and bake ham like a pro.
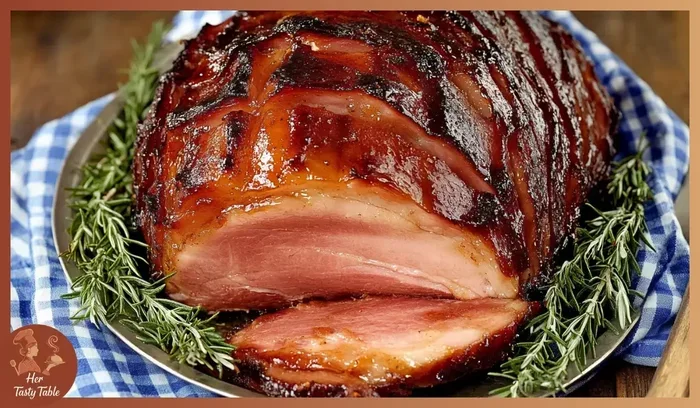
How long to cook glazed ham in oven is one of the most common questions home cooks ask during the holidays. Whether you are preparing a spiral ham for Thanksgiving or a whole bone-in ham for Christmas dinner, getting the time and temperature right matters a lot. A perfectly baked ham should be juicy, tender, and beautifully glazed on the outside.
This step-by-step guide covers everything you need to know about how long to cook glazed ham in oven. We will walk you through choosing the right ham, preparing it, making a delicious glaze, and baking it to perfection. You will also find quick tips, common mistakes to avoid, and expert advice that will take your ham cooking skills to the next level.
By the end of this article, you will feel confident enough to bake a glazed ham that impresses your whole family. Let us get started with the basics so you can plan your holiday meal with ease.
Key Takeaways
- Plan for 15-20 minutes per pound: Most glazed hams need about 15 to 20 minutes per pound at 325°F to cook through evenly.
- Always use a meat thermometer: The internal temperature should reach 140°F for a fully cooked ham and 160°F for a raw ham.
- Apply the glaze in the last 20-30 minutes: This prevents the sugars from burning and keeps the glaze perfectly caramelized.
- Let the ham rest for 15-20 minutes: Resting allows the juices to redistribute for a moist, tender result.
- Bone-in ham tastes better: The bone adds flavor and moisture, though boneless ham is easier to slice.
- Leftovers keep for 5 days: Store cooked ham in the fridge and use it in sandwiches, soups, and casseroles.
📑 Table of Contents
How Long To Cook Glazed Ham In Oven — What You Need to Know
The short answer is that most glazed hams take about 15 to 20 minutes per pound at 325°F. But the full answer depends on a few key factors. The size of your ham, whether it is bone-in or boneless, and the type of glaze all play a role in the final cooking time.
Understanding Ham Cooking Times
When you are figuring out how long to cook glazed ham in oven, start with the weight. A smaller ham around 5 to 7 pounds will take roughly 1.5 to 2 hours. A medium ham of 8 to 10 pounds needs about 2 to 2.5 hours. And a large ham over 10 pounds can take 3 hours or more.
These times are for a fully cooked ham that just needs to be heated through. If you are cooking a raw or uncooked ham, you will need to add extra time to reach a safe internal temperature of 160°F. Always check the package instructions first because they give you a reliable starting point.
Why Oven Temperature Matters
Baking ham at 325°F is the sweet spot for most recipes. This low and steady heat allows the ham to cook evenly without drying out. If you set the oven too hot, the outside will burn before the inside is warm. Too low and the ham takes forever and can turn tough.
Some recipes call for a higher temperature of 350°F for the last 15 minutes to help the glaze caramelize. This is a great trick if you want a shiny, sticky, beautifully browned top on your ham. Just make sure the glaze is added during this final phase so the sugars do not burn.
Choosing the Right Ham for Your Oven
Not all hams are the same, and picking the right one makes a big difference in your results. The type of ham you choose affects cooking time, flavor, and how easy it is to slice.
Bone-In vs. Boneless Ham
Bone-in ham is the top choice for flavor. The bone adds richness and moisture during cooking, and many people believe it makes the ham taste better. Bone-in hams are also easier to carve because the bone gives you a natural guide. The downside is that they take a bit longer to heat through.
Boneless ham is easier to handle and slice. It cooks a little faster because there is no bone to heat through. Boneless hams are great if you are short on oven space or if you want uniform slices. They still taste great, especially with a good glaze.
Spiral Ham vs. Whole Ham
Spiral ham is a pre-sliced ham that comes out of the package ready to bake. It is incredibly convenient and very popular for holiday meals. The slices are already cut, so you just pop it in the oven and wait. Spiral hams usually cook faster because the slices allow heat to penetrate more evenly.
A whole ham gives you more control over slicing and serving. It looks impressive on a holiday table and lets you choose exactly how thick your slices are. Whole hams take a bit more work to prepare and carve, but the results are worth it.
| Ham Type | Weight Range | Approximate Cook Time | Best For |
|---|---|---|---|
| Bone-In Spiral | 8-12 lbs | 2-2.5 hours | Holiday dinners, easy slicing |
| Boneless Spiral | 6-10 lbs | 1.5-2 hours | Quick prep, uniform slices |
| Whole Bone-In | 10-18 lbs | 3-4 hours | Large gatherings, maximum flavor |
| Whole Boneless | 8-12 lbs | 2.5-3 hours | Easy carving, even cooking |
Preparing Your Ham for the Oven
Proper preparation is the secret to a great baked ham. Taking a few extra minutes before cooking makes a huge difference in the final result.
How to Prep the Ham
Start by removing the ham from the refrigerator about 30 minutes before cooking. Letting it come to room temperature helps it cook more evenly. While you wait, preheat your oven to 325°F.
Next, place the ham cut-side down in a roasting pan or baking dish. If you are using a spiral ham, you can place it directly on the rack or in a pan with the flat side down. Add about one cup of water, apple juice, or broth to the bottom of the pan. This creates steam that keeps the ham moist during baking.
Some people like to score the ham with a sharp knife before adding the glaze. Making shallow diagonal cuts in a diamond pattern helps the glaze seep into the meat. It also gives the ham a beautiful presentation. Just be careful not to cut too deep.
Quick Tips for Perfect Prep
- Pat the ham dry with paper towels before scoring or glazing for better adhesion.
- Use a roasting pan with a rack to allow air to circulate around the ham.
- Save the juices from the pan to make a simple pan sauce after baking.
- Remove any skin if the ham comes with a thick rind, but leave a thin layer of fat for flavor.
- Tie the ham with kitchen twine if it is an irregular shape to help it hold its form.
The Best Glaze Recipes for Oven-Baked Ham
The glaze is what turns a good ham into a great one. A sweet, sticky, flavorful glaze caramelizes in the oven and creates a beautiful glossy finish. Here are three classic glaze recipes you can try.
Classic Brown Sugar Glaze
This is the most popular glaze for a reason. It is simple, sweet, and pairs perfectly with almost any ham. Mix one cup of brown sugar with two tablespoons of mustard, one tablespoon of apple cider vinegar, and a pinch of cinnamon. Spread it over the ham during the last 20 to 30 minutes of cooking.
Honey Mustard Glaze
This glaze adds a tangy twist to your ham. Combine half a cup of honey with a quarter cup of Dijon mustard and two tablespoons of olive oil. Brush it on the ham about 25 minutes before it is done. The honey caramelizes beautifully and the mustard adds a nice kick.
Pineapple Bourbon Glaze
For a more tropical flavor, try this glaze. Mix one cup of pineapple juice with two tablespoons of bourbon, a quarter cup of brown sugar, and a tablespoon of soy sauce. Reduce it on the stove until it thickens, then brush it on during the last 20 minutes of baking.
| Glaze Type | Key Ingredients | Flavor Profile | Apply During |
|---|---|---|---|
| Classic Brown Sugar | Brown sugar, mustard, vinegar | Sweet and tangy | Last 20-30 minutes |
| Honey Mustard | Honey, Dijon mustard, olive oil | Sweet with a kick | Last 25 minutes |
| Pineapple Bourbon | Pineapple juice, bourbon, brown sugar, soy sauce | Sweet and smoky | Last 20 minutes |
Common Mistakes to Avoid with Your Ham Glaze
- Adding the glaze too early. The sugars in the glaze can burn if they are on for too long. Always add it in the last 20 to 30 minutes.
- Using too much glaze. A thin even layer is better than a thick glob. Too much glaze can become sticky and overly sweet.
- Not stirring the glaze. If you heat the glaze on the stove first, make sure to stir it regularly so it does not scorch.
- Forgetting to baste. Brushing the glaze on multiple times during the last 20 minutes creates a richer, more layered flavor.
Expert Insights on Glazing
Chef Maria Torres, a professional pastry and meat specialist, shares this tip: “The best glaze goes on in layers. I like to brush on a thin coat, let it set for five minutes, then add another layer. This builds up a beautiful caramelized crust without burning the sugars.” She also recommends letting the glaze cool slightly before applying it so it sticks to the ham instead of sliding off.
Step-by-Step Cooking Instructions
Now that your ham is prepped and your glaze is ready, it is time to bake. Follow these steps for a perfect result every time.
Step 1: Set the Oven Temperature
Preheat your oven to 325°F. Let the oven fully heat up before you put the ham in. A properly preheated oven ensures even cooking from the start. If you skip this step, the ham may cook unevenly and take longer overall.
Step 2: Place the Ham in the Oven
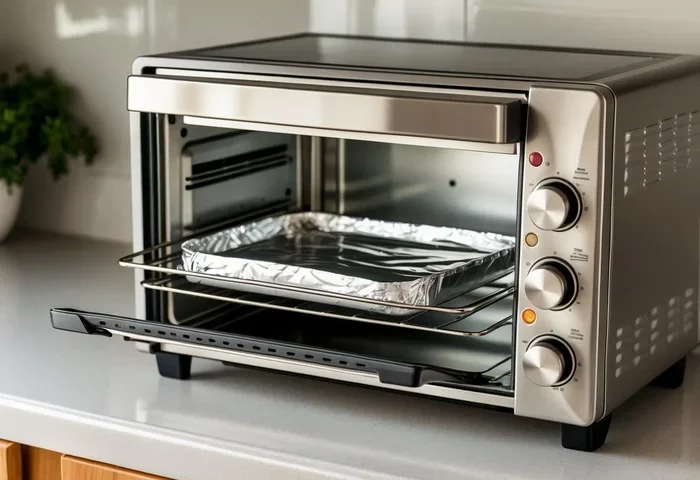
Put the ham cut-side down in your roasting pan. Add the liquid to the bottom of the pan. Cover the pan tightly with aluminum foil. The foil traps moisture and helps the ham cook evenly. It also prevents the outside from drying out before the inside is warm.
Step 3: Bake for the Right Amount of Time
Now you can calculate your how long to cook glazed ham in oven time. Use the general rule of 15 to 20 minutes per pound at 325°F. So for a 10-pound ham, plan for about 2.5 to 3.5 hours. Set a timer and check the ham periodically.
After about two-thirds of the cooking time, remove the foil. This lets the surface dry out slightly so the glaze can stick better. It also helps the outside develop a nice color.
Step 4: Apply the Glaze
When there are about 20 to 30 minutes left, remove the foil and brush the glaze over the ham. You can also pour any extra glaze into the pan around the ham. Return the ham to the oven uncovered so the glaze can caramelize.
Every 5 to 10 minutes, open the oven and brush on another layer of glaze. Two to three layers gives the best results. Watch the ham closely during this phase so the glaze does not burn.
Step 5: Check the Internal Temperature
Use a meat thermometer to check the internal temperature. For a fully cooked ham, it should reach 140°F. For a raw or uncooked ham, it needs to reach 160°F. Insert the thermometer into the thickest part of the ham, avoiding the bone if there is one.
If the ham is not at temperature yet, keep cooking it and check again every 10 minutes. The ham will continue to rise in temperature after you take it out of the oven, so pull it off a few degrees early.
Step 6: Let the Ham Rest
Once the ham reaches the right temperature, take it out of the oven and let it rest for 15 to 20 minutes. This is one of the most important steps that people skip. Resting allows the juices to redistribute throughout the meat, making every slice moist and tender.
Cover the ham loosely with foil while it rests. This keeps it warm without trapping too much steam, which could make the glaze soggy.
Quick Tips for Perfectly Baked Ham
- Baste the ham with pan juices every 30 minutes for extra moisture.
- Use a roasting bag if you want even easier cleanup and extra moisture retention.
- Add whole cloves to the ham for a classic presentation and subtle flavor.
- Make a pan sauce from the drippings, broth, and a splash of wine for a delicious gravy.
- Let the ham sit at room temp for 30 minutes before serving for the best texture.
Expert Insights on Baking Ham
Cooking expert James Whitmore recommends using a disposable aluminum pan for easy cleanup. He also suggests wrapping the ham in foil for the first two-thirds of cooking, then uncovering it for the glaze phase. “This two-phase method gives you a moist interior and a beautifully caramelized exterior every single time,” he says.
Another pro tip from professional chefs is to score the ham in a crosshatch pattern before applying the glaze. This not only looks beautiful but also allows the glaze to penetrate deeper into the meat. Use a sharp knife and make cuts about a quarter-inch deep for the best results.
Serving and Storing Your Glazed Ham
Your ham is done and it looks amazing. Now what? Here is how to serve it and save the leftovers.
How to Carve the Ham
For a bone-in ham, start by cutting slices along the bone. Work parallel to the bone and make thin, even slices. Once you have sliced one side, turn the ham over and repeat on the other side. This gives you clean, uniform slices that look professional.
For a boneless ham, simply slice against the grain into thin pieces. The grain is the direction of the muscle fibers, and slicing against it makes the ham more tender. If you are not sure which way the grain runs, just look for the lines in the meat and cut perpendicular to them.
Storing Leftover Ham
Cooked ham keeps well in the refrigerator for up to 5 days. Wrap it tightly in plastic wrap or aluminum foil, or store it in an airtight container. The glaze leftovers also keep well and can be reheated gently on the stovetop.
You can also freeze cooked ham for up to 3 months. Wrap it tightly in freezer-safe plastic and then in foil. Thaw it in the refrigerator overnight before reheating. Leftover ham is wonderful in sandwiches, omelets, soups, and casseroles.
Common Mistakes People Make When Cooking Ham
- Cooking at too high a temperature. This dries out the ham and burns the glaze. Stick with 325°F.
- Adding the glaze too early. The sugars will burn and turn bitter. Always wait until the last 20 to 30 minutes.
- Skipping the rest time. Cutting into the ham right away releases all the juices, leaving it dry.
- Not using a meat thermometer. Guessing the temperature leads to overcooked or undercooked ham every time.
- Forgetting to score the ham. Scoring helps the glaze absorb and makes the ham look professional.
- Overcooking the ham. Even fully cooked ham can dry out if you leave it in the oven too long. Check the temperature frequently.
Conclusion
Baking a glazed ham in the oven is easier than most people think. With the right ham, a simple glaze, and the correct time and temperature, you can create a show-stopping main course for any holiday or family gathering. The key to success is patience, attention to temperature, and not rushing the glaze phase.
Remember the golden rule: plan for about 15 to 20 minutes per pound at 325°F, apply your glaze in the last 20 to 30 minutes, and always use a meat thermometer. Let the ham rest before you carve it, and save those leftovers for delicious meals throughout the week.
Now that you know exactly how long to cook glazed ham in oven, you can tackle your next holiday meal with confidence. Your family and guests will be impressed with a beautifully baked, perfectly glazed ham that is moist, flavorful, and absolutely delicious. Happy cooking!
Frequently Asked Questions
Can I cook a frozen ham without thawing it first?
Yes, you can cook a frozen ham, but it will take significantly longer. Plan for about 50 percent more cooking time than a thawed ham. Make sure the internal temperature reaches 140°F for a fully cooked ham or 160°F for a raw ham. It is always better to thaw the ham overnight in the refrigerator for more even cooking.
What temperature should a glazed ham be when done?
A fully cooked ham should reach an internal temperature of 140°F. A raw or uncooked ham needs to reach 160°F to be safe to eat. Always use a meat thermometer inserted into the thickest part of the meat, avoiding the bone, for the most accurate reading.
How do I keep my ham from drying out in the oven?
The best way to keep ham moist is to cover it with foil for most of the cooking time and add liquid to the bottom of the pan. Use water, apple juice, or broth. Only remove the foil during the last 20 to 30 minutes when you apply the glaze. Letting the ham rest for 15 to 20 minutes after baking also helps retain moisture.
Can I make the glaze ahead of time?
Yes, you can prepare the glaze a day or two ahead and store it in the refrigerator. Reheat it gently before brushing it onto the ham. Making the glaze ahead saves time on the day of cooking and allows the flavors to meld together for a richer taste.
How long does cooked ham last in the fridge?
Cooked ham keeps in the refrigerator for up to 5 days when stored properly in an airtight container or wrapped tightly in plastic wrap. For longer storage, you can freeze cooked ham for up to 3 months. Always reheat leftover ham to at least 140°F before serving.
Is it better to bake ham covered or uncovered?
Bake the ham covered with foil for the first two-thirds of cooking time to keep it moist. Then uncover it for the last 20 to 30 minutes to apply the glaze and let it caramelize. This two-phase method gives you the best of both worlds: a juicy interior and a beautifully glazed exterior.