How To Finish Steak Off In The Oven For Perfect Results
Finishing steak in the oven is the easiest way to get a restaurant-quality meal at home. This method gives you a beautiful crust on the outside while keeping the inside perfectly juicy. You will learn the reverse sear technique, the right temperatures, and common mistakes to avoid. Whether you love rare or well-done, this oven finish steak method works every time.
There is something magical about a perfectly cooked steak. The outside is crispy and caramelized. The inside is tender, juicy, and cooked exactly how you like it. Many people think you need a fancy grill or a professional kitchen to achieve this. But the truth is, you can get incredible results right in your own home using your oven.
Finishing steak off in the oven is a simple technique that anyone can master. It is also called the reverse sear method, and it changes everything about how you cook beef. Instead of starting with a blazing hot pan, you begin in a low oven. This gentle heat cooks the steak evenly from edge to edge. Then, a quick sear in a hot pan gives you that stunning brown crust.
This method works beautifully for thick cuts of beef. It gives you more control over the final steak temperature. You do not have to guess anymore. You can pull the steak off the heat at the exact moment it reaches your preferred level of doneness. Whether you prefer a rare center or a more cooked steak, this approach delivers consistent, repeatable results every single time.
If you have ever struggled with uneven cooking or a gray band of meat just under the crust, this guide is for you. We will walk through every step in detail. You will learn why this method works, which cuts of beef are best, and how to avoid the mistakes that ruin a good steak. By the end, you will feel confident enough to cook a perfect oven-baked steak like a pro.
Key Takeaways
- The reverse sear method cooks steak evenly from edge to edge using low oven heat followed by a hot pan sear.
- A meat thermometer is the single most important tool for perfect steak doneness every time.
- Resting your steak for 5 to 10 minutes lets the juices redistribute for a juicier bite.
- Cast iron skillets are the best pan for achieving a thick, flavorful steak crust.
- Thicker cuts like ribeye and filet mignon work best for oven-finishing.
- Seasoning early with salt draws out moisture and builds a deeper flavor profile.
- Avoid common mistakes like skipping the rest or using a cold pan for the final sear.
📑 Table of Contents
Why Finishing Steak In The Oven Works So Well
The oven-finishing method is not just a trendy cooking hack. It is backed by food science. When you cook a thick piece of beef in a hot pan the entire time, the outside overcooks before the inside reaches your desired temperature. The heat has to travel from the surface to the center. This creates a large area of overcooked meat around the edge.
When you start in a low oven, the heat moves slowly and evenly. The entire steak warms up gradually. There is no sudden temperature shock. The internal temperature rises in a controlled way. This means the pink center stays exactly as you want it. Then, a short sear on the stovetop adds color and flavor without overcooking the inside.
The Science Behind Oven-Finished Steak
Cooking is chemistry. When you apply high heat to beef, the proteins in the muscle fibers tighten and squeeze out moisture. This is why overcooked steak feels dry. The reverse sear method keeps the internal temperature low for longer. This means less moisture is lost during the main cooking phase.
During the final sear, the Maillard reaction takes over. This is the chemical process that creates browning and complex flavors on the surface of meat. The high heat of a cast iron pan triggers this reaction in just a minute or two. You get a deep, savory crust without drying out the interior. This is the secret behind restaurant-quality beef steak at home.
The oven also provides consistent, surrounding heat. Unlike a grill, which has hot and cool spots, an oven wraps the steak evenly. This makes it much harder to mess up. Even beginners can achieve excellent steak doneness using this approach. The low and slow start is the real game-changer.
The Reverse Sear Method Explained
The reverse sear is the backbone of finishing steak in the oven. It is a two-step process that gives you total control. First, you cook the steak gently in the oven. Then, you finish it with a quick, high-heat sear on the stovetop. The result is a steak with a uniform pink interior and a deeply browned, flavorful crust.
Step-by-Step Reverse Sear
Follow these steps for the best results every time:
- Preheat your oven to 250°F (120°C). This low temperature is the key to even cooking.
- Pat your steak dry with paper towels. Moisture is the enemy of a good crust.
- Season generously with salt and pepper. You can add garlic powder or paprika if you like.
- Place the steak on a wire rack set inside a baking sheet. The rack allows air to circulate around the meat.
- Insert a meat thermometer into the thickest part of the steak. This is your most important tool.
- Cook until the steak is about 10°F below your target temperature. For a medium-rare finish, pull it at 115°F.
- Remove the steak and let it rest for a few minutes while you heat your pan.
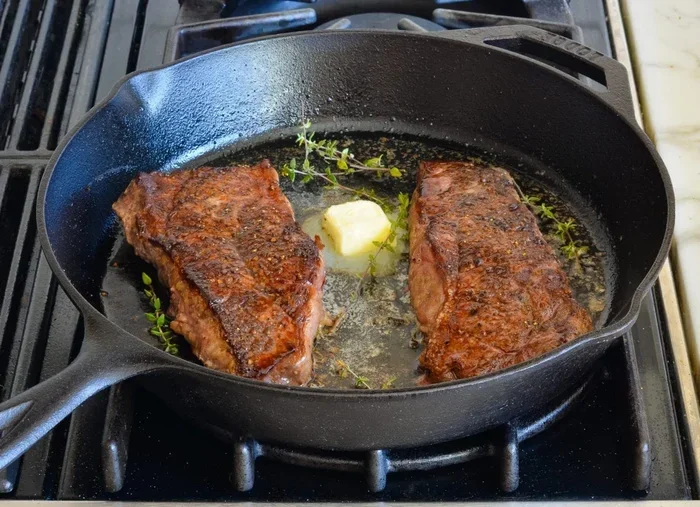
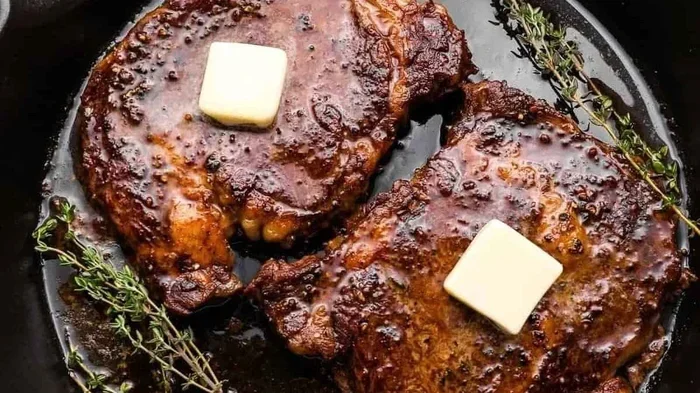
- Sear in a screaming hot cast iron skillet with a little oil for about one minute per side.
- Rest the steak again for 5 to 10 minutes before slicing.
That is it. The whole process takes about 30 to 45 minutes depending on the thickness of your cut. But the results are far superior to any other method. You get edge-to-edge consistency that is hard to achieve any other way.
How Long To Cook Steak In The Oven
Cooking time depends on the thickness of your steak and your oven temperature. A 1.5-inch thick ribeye might take 25 to 30 minutes at 250°F. A thicker 2-inch cut could take 40 minutes or more. This is why a meat thermometer is essential. You cannot rely on time alone because every oven and every steak is slightly different.
A good rule of thumb is to pull the steak when it is 10 degrees below your target steak temperature. The final sear will raise the internal temperature by about 5 to 10 degrees. This carryover cooking effect is important to account for. If you pull the steak at the exact target temperature, it will be overcooked by the time you are done searing and resting.
Best Cuts Of Steak For Oven Finishing
Not all steaks are created equal when it comes to oven-finishing. Some cuts work better than others. Thick, well-marbled steaks benefit the most from this method. The extra fat keeps the meat moist during the longer oven cook. Leaner cuts can also work but require more careful attention to avoid drying out.
Which Steaks Work Best
Here are the top cuts for oven-baked steak:
- Ribeye steak: Rich marbling makes this the perfect cut for the reverse sear. The fat melts during the slow cook and keeps the steak incredibly juicy.
- Filet mignon: This lean cut benefits from the gentle oven cooking. It stays tender and avoids the gray band that often forms with other methods.
- New York strip: A great balance of flavor and tenderness. Works beautifully with the reverse sear technique.
- Bone-in ribeye: The bone adds extra flavor. Just remember to account for the bone when checking temperature.
- Flat iron steak: An affordable cut that becomes tender and flavorful when finished in the oven.
Avoid thin cuts like skirt steak or flank steak for this method. They cook too quickly and can dry out before you get a good sear. Save those for high-heat grilling. Thickness is the key factor. You want steaks that are at least 1.25 inches thick, ideally 1.5 inches or more.
Essential Tools And Equipment
You do not need a lot of fancy equipment to finish steak in the oven. But a few key tools make a huge difference in the final result. Having the right gear set up before you start will make the process smooth and stress-free.
What You Need In Your Kitchen
- Meat thermometer: This is non-negotiable. A digital instant-read thermometer takes the guesswork out of cooking. You will use it multiple times during the process.
- Cast iron skillet: This heavy pan retains heat incredibly well. It is the best choice for achieving a deep, even crust on your sear steak.
- Wire rack and baking sheet: The rack elevates the steak so air circulates evenly. This prevents the bottom from getting soggy.
- Tongs: You need these for flipping the steak during the sear without piercing the meat.
- Aluminum foil: Useful for tenting the steak during the resting phase.
- A good sharp knife: For slicing against the grain after cooking.
You do not need a special oven mitt or a fancy baking dish. The basic tools in most kitchens will work perfectly. The cast iron skillet is the one item that really stands out. If you do not have one, any heavy-bottomed pan will do. But cast iron heats evenly and holds heat beautifully, which is exactly what you want for that final sear.
Temperature Guide For Perfect Doneness
Knowing your target temperatures is the difference between a good steak and a great one. The internal temperature at the moment you pull the steak from the oven determines the final result after resting and searing. Use the following guide as your reference point.
| Doneness | Pull From Oven (°F) | Final After Sear (°F) | Appearance |
|---|---|---|---|
| Rare | 115°F | 120-125°F | Cool red center |
| Medium Rare | 120°F | 125-130°F | Warm red center |
| Medium | 125°F | 130-135°F | Pink center |
| Medium Well | 130°F | 135-145°F | Slight pink center |
| Well Done | 135°F | 145-155°F | Little or no pink |
Remember that the temperature will rise 5 to 10 degrees during the sear and again during resting. This is called carryover cooking. Pulling the steak 10 degrees below your target is the sweet spot. It accounts for this rise and gives you the most accurate result.
For the best steak resting time, let the steak sit for at least 5 minutes after searing. The juices will redistribute throughout the meat. If you cut too early, those juices run out onto the plate instead of staying in the steak. A well-rested steak is significantly juicier than one that is cut immediately.
Common Mistakes To Avoid
Even experienced cooks make mistakes when finishing steak in the oven. Learning what to avoid will save you from disappointing results. Most errors are easy to fix once you know what they are.
Pitfalls That Ruin Your Steak
Here are the most common mistakes people make:
- Skipping the dry step: If your steak is wet on the surface, it will steam instead of sear. Always pat it dry thoroughly with paper towels before seasoning and cooking.
- Using the wrong oven temperature: Too high and the steak cooks unevenly. Too low and it takes forever. 250°F is the sweet spot for most steaks.
- Not using a wire rack: Placing the steak directly on a baking sheet traps moisture underneath. The result is a soggy bottom instead of an even crust.
- Over-seasoning with salt too early: Salting too far in advance can draw out too much moisture. Salt at least 40 minutes before cooking, or right before.
- Skipping the rest: Cutting into the steak immediately releases all the juices. Patience pays off with a juicier bite.
- Using a cold pan for searing: The pan must be ripping hot. A cold or warm pan will not create a proper crust and will just steam the meat.
- Moving the steak during the sear: Let it sit untouched for at least 60 seconds. Moving it too early breaks the crust and prevents proper browning.
Each of these mistakes is easy to avoid once you know about them. The good news is that the oven-finishing method is very forgiving. Even if you make a small error, the results will still be better than most pan-only methods. The gentle oven heat gives you a wider window of success.
Pro Tips For The Best Oven-Finished Steak
Once you have the basics down, these pro tips will take your oven finish steak to the next level. These are the small details that separate a good steak from an unforgettable one.
- Bring the steak to room temperature before cooking. Take it out of the fridge 30 to 45 minutes ahead. A cold steak cooks unevenly and takes longer in the oven.
- Add butter and garlic to the cast iron skillet during the final sear. Baste the steak with the melted butter for extra richness and flavor.
- Use a compound butter on top after resting. A mix of softened butter, fresh herbs, and a pinch of salt melts beautifully over a hot steak.
- Let the pan heat up fully before adding the steak for the sear. You should see a light wisp of smoke. That is when the pan is ready.
- Season the steak the night before for deeper flavor. Salt it, place it on a rack in the fridge uncovered, and cook it the next day. This dries the surface even more for a better crust.
- Slice against the grain when serving. This shortens the muscle fibers and makes each bite more tender.
These tips might seem small, but they add up to a big difference. The overnight salting technique is especially powerful. It dries the surface of the meat, which means a faster, more aggressive sear. It also seasons the steak deep into the muscle fibers. Your steak seasoning will taste more integrated and flavorful as a result.
The compound butter trick is another game-changer. It adds richness and a beautiful sheen to the finished steak. Simply mix softened butter with minced garlic, fresh thyme, and a pinch of salt. Roll it into a log using plastic wrap and refrigerate. Slice off a round and place it on your hot steak right before serving. It melts slowly and coats every bite with incredible flavor.
Serving Suggestions And Pairings
A great oven-baked steak deserves the right sides. Keep the accompaniments simple to let the steak shine. You do not want to compete with the star of the plate.
- Crispy roasted potatoes: Toss baby potatoes in olive oil, salt, and rosemary. Roast in the oven while the steak rests.
- Garlic butter green beans: Sauté fresh green beans with butter and minced garlic for a quick, elegant side.
- Simple mixed greens salad: A light vinaigrette and arugula cut through the richness of the beef.
- Creamy mashed potatoes: The classic pairing. Rich, smooth, and comforting.
- Grilled asparagus: Quick and easy. A squeeze of lemon adds brightness.
A glass of red wine pairs wonderfully with oven-finished steak. A bold Cabernet Sauvignon or a smooth Malbec complements the rich flavors of the beef. But honestly, a cold beer or even sparkling water with lemon works just as well. The steak is the star. Everything else is just supporting cast.
Conclusion
Finishing steak off in the oven is one of the simplest and most effective cooking techniques you can learn. It gives you consistent results, perfect doneness, and a beautiful crust every time. The reverse sear method takes the stress out of cooking steak and puts you in control.
You now know why this method works, which cuts to choose, and how to avoid the common pitfalls. You have the temperature guide, the pro tips, and the serving ideas to create a complete steakhouse experience at home. The best part is that this technique works for every skill level. Whether you are a beginner or a seasoned home cook, you will get better results with the oven-finishing approach.
Next time you are craving a great steak, skip the grill and try the oven instead. Pat the steak dry, season it well, and let the low oven do the heavy lifting. Finish with a hot cast iron sear and let it rest properly. You will be amazed at how restaurant-quality your steak can be. Give it a try tonight and taste the difference for yourself.
Frequently Asked Questions
Can I finish steak in the oven without searing it afterward?
Yes, you can skip the final sear if you prefer. The oven method alone will produce a tender, evenly cooked steak. However, you will miss out on the flavorful crust that the sear provides. The crust adds texture and deep savory flavor that many steak lovers consider essential. If you skip the sear, make sure your oven temperature stays low at around 250°F to avoid drying out the meat.
What is the best oven temperature for finishing steak?
250°F is the ideal temperature for most steaks. This low heat cooks the meat gently and evenly without overcooking the edges. Some cooks go as low as 225°F for extra-thick cuts that need more time. The key is to keep the temperature low enough that the steak warms gradually. A meat thermometer helps you track progress and pull the steak at exactly the right moment.
How long should I let my steak rest after oven-finishing?
Let your steak rest for at least 5 to 10 minutes after searing. During this time, the internal juices redistribute throughout the meat. If you cut too soon, those juices flow out onto the cutting board instead of staying in the steak. A well-rested steak is noticeably juicier and more flavorful. Tent the steak loosely with aluminum foil to keep it warm without trapping too much steam.
Can I use this method for frozen steak?
It is not recommended to finish frozen steak in the oven. The uneven thawing can lead to inconsistent cooking. The outside may cook while the center is still frozen. Always thaw your steak in the refrigerator overnight for the best results. If you are in a hurry, you can use the cold water method to thaw it faster, but make sure it is fully thawed before cooking.
Why does my steak have a gray band under the crust?
A gray band forms when the steak is cooked at too high a temperature for too long. The heat penetrates too far into the meat before the surface reaches the Maillard reaction temperature. The reverse sear method virtually eliminates this problem. Because the oven cooks the steak gently, the internal temperature rises slowly and evenly. The final sear then adds color only to the outer layer, leaving the interior perfectly pink.
Is a cast iron skillet necessary for the final sear?
A cast iron skillet is highly recommended but not absolutely required. Cast iron holds heat exceptionally well, which creates a powerful sear on contact. If you do not have cast iron, use the heaviest pan you have available. Preheat it on high heat for several minutes before adding the steak. You can also use a stainless steel or carbon steel pan. The key is that the pan must be very hot before the steak touches it.