How Long To Cook 5 Pound Chicken In Oven Step By Step
Cooking a 5 pound chicken in the oven takes about 1 hour 15 minutes to 1 hour 45 minutes at 375°F to 425°F. The exact time depends on whether the bird is stuffed, the oven temperature, and how you want the skin to turn out. This guide gives you the precise timing, the best temperature for juicy meat, and a clear step-by-step method so you never overcook a whole bird again.
There is nothing quite like pulling a golden, perfectly roasted whole chicken out of the oven. The kitchen smells incredible, the skin is crispy, and you know you have a centerpiece meal that will make everyone happy. If you have a 5 pound chicken, you might wonder exactly how long it needs to stay in the oven to turn out juicy and delicious.
How long to cook 5 pound chicken in oven depends on a few simple factors like the oven temperature, whether the bird is stuffed, and the type of pan you use. In this guide, I will walk you through the exact timing, the best temperature settings, and a foolproof step-by-step method. You will also learn how to check for doneness, how to get crispy skin, and the common mistakes that cause dry chicken. By the end, you will feel confident roasting a whole bird like a pro.
Key Takeaways
- Plan for 1 to 1.75 hours: A 5 pound whole chicken roasts perfectly in 75 to 105 minutes at 375°F to 425°F.
- Use a meat thermometer: The internal temperature must reach 165°F in the thickest part of the thigh to ensure safety.
- Higher heat means crispier skin: Roasting at 425°F gives you golden, crackling skin in less time than 350°F.
- Rest the chicken for 15 minutes: This lets the juices redistribute and keeps the meat juicy when you carve.
- Brine or dry brine for juiciness: Seasoning the bird ahead of time dramatically improves flavor and moisture.
- Avoid stuffing for even cooking: An unstuffed chicken cooks faster and more evenly than a stuffed one.
- Use a wire rack in the roasting pan: It allows hot air to circulate under the bird for crispier skin on all sides.
📑 Table of Contents
- How Long To Cook 5 Pound Chicken In Oven: The Quick Answer
- Best Oven Temperature For A 5 Pound Chicken
- Step By Step Cooking Instructions
- How To Tell When Your Chicken Is Done
- Tips For Juicy, Crispy Roasted Chicken
- Common Mistakes To Avoid
- Quick Tips For Perfect Roast Chicken
- Expert Insights From Professional Chefs
- Key Takeaways
How Long To Cook 5 Pound Chicken In Oven: The Quick Answer
The short answer is that a 5 pound whole chicken needs about 75 to 105 minutes in a preheated oven. At 375°F, plan for roughly 1 hour and 15 minutes. At 425°F, the cooking time drops to around 1 hour to 1 hour 10 minutes because the higher heat cooks the bird faster and crisps the skin more quickly. If you stuff the chicken, add about 15 to 20 extra minutes to the total time. Always use a meat thermometer to confirm the internal temperature reaches 165°F in the thickest part of the thigh.
What Affects Cooking Time?
Several variables can change how long your chicken roasts. Understanding these helps you adjust the timer and avoid guessing. Here are the main factors that affect cooking time for a 5 pound bird.
- Oven temperature: Lower temperatures like 350°F take longer, while higher temperatures like 425°F reduce the time but require more attention to prevent over-browning.
- Stuffed vs unstuffed: A stuffed chicken needs more time because the filling insulates the cavity and slows heat penetration to the center.
- Bone-in vs spatchcased: A whole bone-in chicken takes longer than a spatchcased (butterflied) bird because the bones slow cooking.
- Starting temperature: A chicken taken straight from the refrigerator will take longer than one brought to room temperature for 30 minutes first.
- Roasting pan and rack: A bird in a deep roasting pan without a rack can steam from the bottom, which slows crisping and may add a few minutes to the cook.
Best Oven Temperature For A 5 Pound Chicken
Choosing the right oven temperature is the single most important decision for a perfect roast. Most recipes call for 350°F, 375°F, 400°F, or 425°F. Each temperature has its own advantages depending on how much time you have and what kind of skin you want.
350°F vs 375°F vs 400°F vs 425°F
At 350°F, a 5 pound chicken roasts gently and evenly. This lower temperature gives you a wider window of doneness, which is forgiving for beginners. However, the skin may not get as crispy unless you baste it often. At 375°F, you get a nice balance of juicy meat and golden skin with a slightly shorter cook time. This is the most popular choice for home cooks.
At 400°F, the chicken cooks faster and the skin becomes noticeably crispier. You will need to watch it closely toward the end to prevent the breast from drying out. At 425°F, the skin crisps quickly and the chicken develops a beautiful deep golden color in about 60 to 70 minutes. This high-heat method works well if you want restaurant-style results in less than an hour.
| Oven Temperature | Approximate Cook Time | Skin Result | Best For |
|---|---|---|---|
| 350°F | 1 hour 30 minutes to 1 hour 45 minutes | Mildly golden | Beginners, unstuffed chicken |
| 375°F | 1 hour 15 minutes to 1 hour 30 minutes | Golden and crisp | Balanced juiciness and crispness |
| 400°F | 1 hour 5 minutes to 1 hour 20 minutes | Very crispy | Medium experience, crispy skin lovers |
| 425°F | 1 hour to 1 hour 10 minutes | Deep golden, crackling | Fast cooking, restaurant-style finish |
Step By Step Cooking Instructions
Follow this simple method to roast a 5 pound chicken perfectly every time. The process is straightforward, and once you do it a couple of times, you will not even need a timer because you will know exactly what to look for.
Step 1: Prep The Chicken
Remove the chicken from the refrigerator about 30 minutes before cooking. This lets the meat cook more evenly. Remove the giblets and neck from the cavity if they are inside. Pat the chicken completely dry with paper towels. Dry skin is the secret to crispy roasted chicken, so do not skip this step. If the chicken has a plug of fat near the neck opening, you can leave it in or remove it.
Step 2: Season Generously
Seasoning is where you build flavor. Mix salt, black pepper, garlic powder, and paprika in a small bowl. Gently loosen the skin over the breast and thighs with your fingers. Rub softened butter or olive oil all over the chicken, then sprinkle the seasoning mixture under the skin and on the surface. Stuff the cavity with lemon halves, fresh herbs like rosemary and thyme, and a few garlic cloves. This aromatic filling perfumes the meat as it roasts.
Step 3: Choose Your Cooking Setup
Place a wire rack inside a roasting pan or a sheet pan with edges. The rack elevates the chicken so hot air circulates underneath, which crisps the bottom skin. If you do not have a rack, you can pile halved onions or carrots in the pan to lift the bird. Drizzle a little olive oil over the top of the chicken and arrange it breast-side up on the rack. Tuck the wing tips under the body so they do not burn.
Step 4: Roast and Monitor
Place the pan in the preheated oven on the middle rack. Roast for the time that matches your chosen temperature. About halfway through, check the internal temperature with an oven-safe thermometer inserted into the thickest part of the thigh without touching bone. If the skin is browning too quickly, you can tent the breast loosely with a piece of foil. Baste the chicken with the pan juices once or twice during cooking for extra moisture and flavor.
Step 5: Rest Before Carving
When the internal temperature hits 165°F, remove the chicken from the oven. Transfer it to a cutting board and cover it loosely with foil. Let it rest for at least 15 minutes. This resting period allows the juices to settle back into the meat, which means when you carve, every slice stays juicy instead of running dry on the plate.
How To Tell When Your Chicken Is Done
The only reliable way to know your chicken is fully cooked is with a meat thermometer. The USDA recommends an internal temperature of 165°F for poultry. You should check the temperature in the thickest part of the thigh, avoiding the bone, and also in the innermost part of the wing. If you do not have a thermometer, you can pierce the thigh with a knife and check that the juices run clear, not pink. The meat should also feel firm when pressed, not rubbery.
Use A Meat Thermometer
An oven-safe probe thermometer is the best tool for roasting chicken. You can insert it before the bird goes in the oven and monitor the temperature from the door without losing heat. Digital instant-read thermometers are also great if you check the temperature near the end of cooking. Invest in a good thermometer because it removes all guesswork and guarantees perfectly cooked chicken every time.
Visual Cues
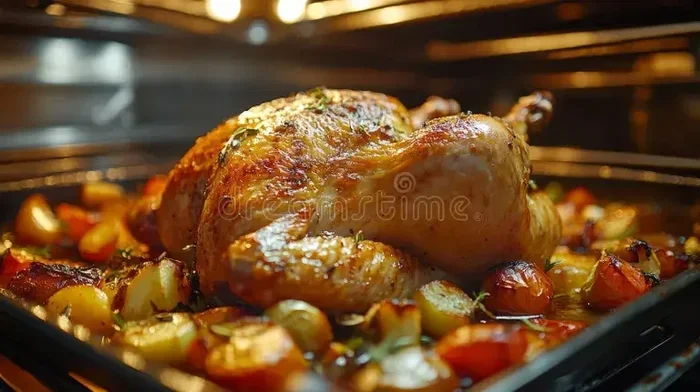
A properly roasted whole chicken has deep golden-brown skin that looks crisp and slightly wrinkled. When you tilt the pan, the juices that run out should be clear, not bloody. The legs should move freely in their sockets, which is another sign the bird is done. If you cut into the thickest part of the thigh and the meat is white all the way through with no pink, your chicken is ready.
Tips For Juicy, Crispy Roasted Chicken
Getting a juicy interior and crispy skin is all about technique. Here are the best tips to elevate your roast chicken from good to amazing.
Brining And Dry Brining
Brining means soaking the chicken in salt water for a few hours or overnight. This process helps the meat absorb extra moisture, which prevents it from drying out during roasting. If you do not have time for a wet brine, try dry brining. Simply rub the chicken with salt and let it sit uncovered in the refrigerator for 4 to 24 hours. The salt draws out moisture, which then gets reabsorbed, seasoning the meat deeply and creating a crispier skin when roasted.
Bring The Chicken To Room Temperature
A cold chicken straight from the fridge will cook unevenly. The outside can overcook while the center is still raw. Taking the chicken out 30 minutes before roasting lets it start closer to an even temperature. This simple step can shave 10 to 15 minutes off your cooking time and improve the final result.
Baste With Pan Juices
Basting means spooning the hot fat and juices from the bottom of the pan over the chicken as it roasts. This keeps the breast moist and adds flavor. I like to baste once halfway through and again about 20 minutes before the chicken is done. If you want extra crispy skin, stop basting the breast in the last 15 minutes and let the dry heat do its work.
Use A Wire Rack
A wire rack set inside the roasting pan is a game changer. It lifts the chicken off the bottom of the pan so hot air flows all around the bird. This promotes even browning and prevents the bottom from getting soggy. You can also use a V-rack or a cooling rack that fits inside your pan.
Common Mistakes To Avoid
Even experienced cooks sometimes make errors that lead to dry or unevenly cooked chicken. Here are the most common mistakes and how to avoid them.
Overcooking The Breast
The breast meat is the most delicate part of the chicken and dries out fastest. Many people cook the whole bird until the breast reaches 165°F, but by that time the thighs may be well done and the breast is already dry. To prevent this, pull the chicken out when the breast reads 155°F to 160°F. The temperature will rise 5 to 10 degrees during resting, bringing it up to the safe 165°F while keeping the breast juicy.
Skipping The Rest
Cutting into a chicken immediately after it comes out of the oven releases all the juices onto the cutting board instead of staying in the meat. Resting for 15 minutes lets the muscle fibers relax and reabsorb the juices. Cover the chicken loosely with foil during this time so it stays warm without steaming the skin.
Not Preheating The Oven
Putting the chicken in a cold oven means it starts cooking slowly and can steam instead of roast. Always preheat the oven to your target temperature before placing the bird inside. This ensures the skin begins crisping immediately and the cooking time stays accurate.
Crowding The Pan
Some people add potatoes, carrots, and onions around the chicken to make a one-pan meal. While this works, you need enough space for air to circulate. If the vegetables are piled too high, they can steam the bottom of the chicken and prevent the skin from crisping. Keep the vegetables to a single layer and do not cover more than half the pan surface.
Quick Tips For Perfect Roast Chicken
- Dry the chicken thoroughly with paper towels before seasoning for the crispiest skin.
- Bring the chicken to room temperature for 30 minutes before it goes in the oven.
- Use an oven-safe thermometer to monitor internal temperature without opening the door too often.
- Tent the breast with foil if the skin is browning too quickly while the thighs catch up.
- Let the chicken rest for 15 minutes under a loose foil tent before carving.
- Save the pan juices to make a quick gravy or drizzle over the sliced chicken.
- For extra crispy skin, brush the chicken with a thin layer of oil or melted butter before roasting.
- Do not skip the resting time; it makes a huge difference in juiciness.
Expert Insights From Professional Chefs
Professional chefs share a few secrets that make their roast chicken consistently outstanding. One chef I admire always starts with a dry brine, saying it seasons the meat deeply and dries the skin for better crisping. Another tip is to spatchcock the chicken, which means removing the backbone and flattening it. This reduces cooking time by about 20 minutes and ensures the breast and thighs finish at the same rate, eliminating the common problem of overcooked breast meat.
Many chefs also recommend cooking the chicken breast-side down for the first 20 minutes, then flipping it breast-side up. This allows the juices to baste the breast naturally while the dark meat crisps. I have tried this method and found it produces incredibly juicy breast meat with beautifully browned skin on both sides. It is a simple technique that elevates your roast chicken to a professional level.
Key Takeaways
- Cook time ranges from 75 to 105 minutes depending on your oven temperature and whether the chicken is stuffed.
- 375°F to 425°F is the sweet spot for juicy meat and crispy skin.
- Always use a meat thermometer and pull the chicken at 155°F to 160°F in the breast, letting it rest to reach 165°F safely.
- Rest the chicken for 15 minutes under foil to lock in juices.
- Dry brine or wet brine ahead of time for maximum moisture and flavor.
- Use a wire rack for even heat circulation and crispy skin on all sides.
- Avoid overcooking the breast by monitoring temperature closely toward the end of cooking.
Now you know exactly how long to cook 5 pound chicken in oven and all the tricks to make it perfect. With the right temperature, a reliable thermometer, and a little patience, you can roast a whole chicken that is juicy, flavorful, and crispy every single time. The process is simpler than it looks, and once you master it, you will have a go-to recipe for family dinners, holiday meals, or any day you want something special from your oven. Give it a try this weekend and enjoy the incredible aroma and taste of a perfectly roasted whole chicken.
Frequently Asked Questions
How long does it take to cook a 5 pound chicken at 350°F?
At 350°F, a 5 pound unstuffed whole chicken typically takes 1 hour 30 minutes to 1 hour 45 minutes. The exact time depends on whether the bird is stuffed and how your oven runs. Always use a meat thermometer to confirm the internal temperature reaches 165°F in the thickest part of the thigh.
Is it better to cook a whole chicken at 350°F or 400°F?
Both temperatures work well. 350°F is more forgiving and gives you a wider window, while 400°F produces crispier skin in less time. If you prefer juicy meat with a golden crust and have about 1 hour 15 minutes, 400°F is an excellent choice. For beginners, 375°F offers a great balance.
Should I cover the chicken with foil while roasting?
You do not need to cover the whole chicken for most of the cook. Covering it with foil traps steam and can make the skin soggy. However, if the breast is browning too fast while the thighs need more time, you can tent the breast loosely with foil for the last 20 to 30 minutes.
How do I know if the chicken is done without a thermometer?
If you do not have a thermometer, pierce the thickest part of the thigh with a knife. The juices should run clear, not pink. The meat should feel firm when pressed, and the legs should wiggle loosely in their sockets. However, a meat thermometer is the most accurate and reliable method.
Can I cook a stuffed 5 pound chicken in the oven?
Yes, you can stuff a whole chicken, but it will add about 15 to 20 minutes to the cooking time. Make sure the stuffing reaches 165°F as well. For even cooking, pack the stuffing loosely and do not overstuff the cavity. An unstuffed chicken is generally easier to cook evenly.
How long should I let the chicken rest after roasting?
Let the chicken rest for at least 15 minutes on a cutting board, covered loosely with foil. This resting period allows the juices to redistribute throughout the meat, so when you carve, each slice stays moist and flavorful instead of drying out on the board.