What To Do When You Get A New Oven Tips For Beginners
Getting a new oven is exciting, but there are important steps you should take before your first bake. This guide covers everything from initial setup and break-in to cleaning, calibration, and safety tips for beginners. You will learn how to properly set up your new oven, run a cleaning cycle, check temperature accuracy, and avoid common mistakes that ruin your first cooking experience. By the end, you will feel confident and ready to use your brand-new oven like a pro.
You just got a shiny new oven. Maybe it was a gift. Maybe you saved up for it yourself. Either way, that big beautiful box sitting in your kitchen is full of potential. But before you start whipping up cakes and roasting chicken, there are some important things you need to do.
Buying a new oven is a big deal. It is one of those appliances that can completely change how you cook at home. But a lot of people skip the setup steps and jump straight into cooking. That is a mistake. Taking the time to properly set up and break in your oven makes a huge difference. Your food will taste better. Your oven will last longer. And you will avoid frustrating problems down the road.
This guide walks you through every step of getting a new oven ready for use. We cover everything from unboxing and setup to calibration and maintenance. Whether you just bought a convection oven or a traditional conventional oven, these tips will help you get started on the right foot. Let us dive in.
Key Takeaways
- Always read the manual first: Your oven manual contains setup instructions, safety warnings, and warranty details you need before using the appliance.
- Run a cleaning cycle before cooking: New ovens often have manufacturing residues and oils that need to be removed before your first bake.
- Calibrate your oven temperature: Most new ovens are slightly off in temperature, so using an oven thermometer ensures accurate baking results.
- Break in your oven properly: Running a few empty bakes at high heat helps burn off any remaining factory residues and odors.
- Master rack positioning: Where you place your oven racks affects heat distribution and cooking quality significantly.
- Know your warranty rights: Registering your oven and understanding warranty coverage protects you from unexpected repair costs.
- Practice basic oven safety: Proper use of heat-resistant tools, ventilation, and cleaning routines keeps your oven running safely for years.
📑 Table of Contents
- Step 1: Read The Manual And Understand Your Oven
- Step 2: Clean Your Oven Before First Use
- Step 3: Run A Break-In Cycle
- Step 4: Check And Calibrate Your Oven Temperature
- Step 5: Learn Proper Rack Positioning
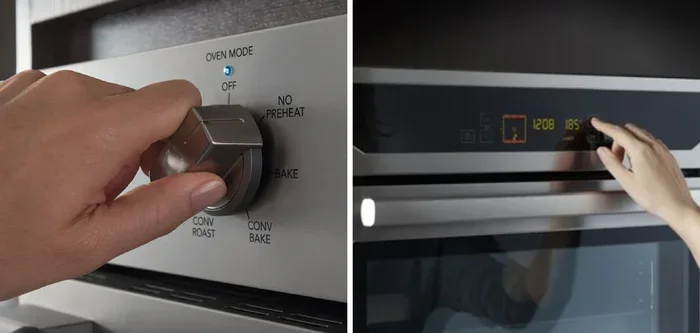
- Step 6: Preheat And Understand Your Oven Settings
- Step 7: Practice Safe Oven Use And Build Good Habits
- Final Thoughts: Enjoy Your New Oven
Step 1: Read The Manual And Understand Your Oven
The first thing you should do with any new appliance is read the manual. I know. It sounds boring. But your oven manual is packed with important information that you cannot get anywhere else. It tells you how your specific model works, what settings to use, and how to keep it running safely.
Why The Manual Matters
Every oven model is different. Even if you have used ovens before, your new one may have features you have never seen. The manual explains everything from control panel buttons to special cooking modes. It also includes safety warnings that protect you from accidents.
Here is what you should look for in the manual:
- Setup instructions for installation and first use
- Warranty details including what is covered and for how long
- Safety precautions specific to your oven model
- Cleaning guidelines for your particular type of oven
- Troubleshooting tips for common issues
Keep your manual in a safe place. You can also check the manufacturer website for a digital copy if you lose the paper version. Many brands offer downloadable PDFs that are easy to search.
Register Your Oven For Warranty Coverage
This is a step many people skip. But registering your oven is really important. It activates your warranty and gives you protection if something goes wrong. Most manufacturers offer a one to five year warranty on parts and sometimes labor.
Registration usually takes just a few minutes online. You will need your model number and serial number, which you can find on a sticker inside the oven door or on the back of the unit. Having your warranty registered means you are covered if your oven has any defects.
Quick Tip: Take a photo of the model and serial number stickers and save them in your phone. You will need this information if you ever call for support or file a warranty claim.
Step 2: Clean Your Oven Before First Use
This surprises a lot of people. Why clean a brand new oven? The answer is simple. New ovens often have manufacturing residues inside. These include oils, dust, metal shavings, and protective coatings from the production process. None of these belong in your food.
How To Clean A New Oven
Start by removing any racks, trays, or accessories that came with the oven. Wash these separately with warm soapy water and dry them completely. Then wipe down the inside of the oven cavity with a soft damp cloth. Do not use harsh chemicals at this stage.
If your oven has a self-cleaning function, this is a great time to use it. Run the self-cleaning cycle according to the manual instructions. This will burn off any remaining manufacturing residues at very high temperatures. Just make sure your kitchen is well ventilated because the self-cleaning process can produce smoke and odors.
After cleaning, wipe the interior one more time with a clean damp cloth to remove any ash or residue left behind. Your oven is now ready for the next step.
Quick Tips For First-Time Cleaning
- Wear gloves when handling oven racks to avoid cuts from sharp edges
- Use a mild dish soap, not abrasive cleaners, on the interior
- Leave the oven door open for a few hours after cleaning to air it out
- Never use steel wool or scouring pads inside the oven cavity
Step 3: Run A Break-In Cycle
Just like a new car needs a break-in period, a new oven benefits from a few empty heating cycles. This process, often called oven breaking in, helps burn off any remaining factory residues and odors. It also helps the heating elements settle into their normal operating pattern.
How To Break In Your New Oven
The break-in process is simple. Follow these steps:
- Make sure your oven is completely clean from the previous step
- Set your oven to a high temperature, around 400 to 450 degrees Fahrenheit
- Let it run empty for about 30 minutes
- Turn it off and let it cool completely
- Repeat this process two to three times
You may notice some smoke or a slight odor during these cycles. This is completely normal. It is just the remaining manufacturing residues burning off. Keep your kitchen ventilated by opening windows or turning on your range hood.
After the break-in cycles, your oven should smell clean and neutral. If you still notice odors after three cycles, wipe down the interior again and repeat the process. Most new ovens are odor-free after one or two break-in cycles.
Expert Insight: According to appliance experts, the break-in period is especially important for gas ovens. New gas ovens may have residual oils on the burner assemblies that can produce smoke during the first few uses. Running them at high heat clears this out safely.
Step 4: Check And Calibrate Your Oven Temperature
Here is something most beginners do not think about. New ovens are often not perfectly accurate right out of the box. Your oven might say it is at 350 degrees, but the actual temperature could be 335 or 365 degrees. That difference can completely change your baking results.
Why Temperature Accuracy Matters
Baking is a science. It depends on precise temperatures. If your oven runs too hot, your cookies burn on the outside but stay raw inside. If it runs too cool, your cakes fall flat and your bread does not rise properly. Getting the temperature right is essential for consistent results.
How To Test Your Oven Temperature
Buy an oven thermometer. These are inexpensive, usually under $15, and they are one of the best tools you can own. Here is how to use one:
- Place the oven thermometer on the middle rack
- Set your oven to 350 degrees Fahrenheit
- Wait at least 20 minutes for the temperature to stabilize
- Check what the thermometer reads
- Compare it to the oven display setting
If the thermometer shows a temperature that is more than 25 degrees off from the setting, your oven needs calibration. Many ovens have a calibration feature in the settings menu. Check your manual for instructions on how to adjust the temperature offset.
Common Mistakes: Do not rely on the oven light or the built-in display alone. These can be inaccurate. Always use a separate oven thermometer to verify the actual temperature inside the cavity.
Step 5: Learn Proper Rack Positioning
Where you place your oven racks has a big impact on how your food cooks. Many beginners put everything on the same rack and wonder why some dishes cook unevenly. Understanding rack positioning is one of the most useful oven tips for beginners you will learn.
The Basic Rack Positions
Most ovens have three to five rack positions. Here is what each one is best for:
- Bottom rack: Best for pizza, bread, and dishes that need intense bottom heat
- Middle rack: The default position for most baking and roasting. It provides the most even heat distribution
- Top rack: Good for dishes that need more top browning, like casseroles and gratins
For general baking, always use the middle rack. This gives hot air room to circulate around your food evenly. If you are baking multiple trays at once, rotate them halfway through cooking for even results.
Rack Positioning For Different Cooking Methods
Your oven rack placement should match what you are cooking:
- Roasting meat: Place the rack in the lower third of the oven so fat drips away from the meat
- Baking cookies: Use the middle rack and avoid overcrowding the oven
- Casseroles and lasagna: The middle rack works best for even cooking
- Broiling: Use the top rack and keep a close eye on food because broiling is very intense
Quick Tip: Never place foil on the bottom of your oven unless the manual specifically says it is okay. Blocking the bottom of the oven can trap heat and damage the heating elements or cause a fire hazard.
Step 6: Preheat And Understand Your Oven Settings
Preheating is one of the most important steps in cooking. Many beginners skip it or do not wait long enough. A properly preheated oven ensures your food starts cooking at the right temperature from the moment it goes in.
Why Preheating Is Essential
When you put food into a cold oven, it cooks unevenly. The outside might burn before the inside is cooked through. Preheating gives the oven time to reach the target temperature so the cooking environment is stable when your food enters.
Most ovens take 10 to 15 minutes to preheat to 350 degrees. Some newer models with powerful heating elements may be faster. Use your oven thermometer to confirm when the target temperature is reached.
Understanding Convection Vs Conventional Settings
If you have a convection oven, you have an extra setting to understand. Convection ovens use a fan to circulate hot air around the food. This cooks food faster and more evenly than a conventional oven.
Here is how the two settings compare:
| Feature | Conventional Oven | Convection Oven |
|---|---|---|
| Heat source | Top and bottom elements only | Fan circulates hot air from top and bottom elements |
| Cooking time | Standard time | About 25% faster |
| Temperature | Set to recipe temperature | Reduce temperature by 25 degrees |
| Best for | Cakes, custards, breads | Roasting, baking multiple trays, pizzas |
| Air circulation | Passive | Active fan-driven |
When using convection mode, always reduce the temperature by about 25 degrees from what the recipe calls for. The fan makes the oven more efficient, so it heats faster and cooks at a lower temperature.
Step 7: Practice Safe Oven Use And Build Good Habits
Oven safety is something every beginner should take seriously. A new oven is a powerful appliance that operates at very high temperatures. Following basic safety practices protects you, your family, and your kitchen.
Essential Oven Safety Tips
- Always use oven mitts or heat-resistant gloves when handling hot racks and dishes
- Keep flammable items like towels and paper away from the oven
- Never leave a running oven unattended during long cooking sessions
- Make sure children understand the oven is hot and should not be touched
- Use a kitchen timer so you do not forget food is cooking
- Keep the oven door closed as much as possible to maintain heat
- If you smell gas (in a gas oven), turn it off immediately and call for service
Oven Maintenance For Longevity
Taking care of your oven keeps it running well for many years. Regular maintenance prevents buildup that can affect performance and even create safety hazards.
Here is a simple maintenance routine:
- Wipe spills immediately: Clean up any food spills as soon as the oven cools down. This prevents sticky buildup that is harder to remove later.
- Deep clean monthly: Use the self-cleaning function or hand-clean the interior with mild cleaners once a month.
- Check the door seal: A damaged door seal lets heat escape, which wastes energy and affects cooking. Inspect it regularly and replace if needed.
- Clean the racks: Soak oven racks in warm soapy water and scrub off any residue every few weeks.
- Replace filters if applicable: Some ovens have grease filters or air filters that need periodic replacement.
Expert Insight: Appliance repair technicians say that most oven problems come from neglect. Simple habits like wiping spills right away and running the self-clean cycle regularly can prevent costly repairs later.
Common Mistakes Beginners Make With New Ovens
Even with the best intentions, beginners make mistakes. Here are some common ones to avoid:
- Opening the oven door too often: Every time you open the door, heat escapes and the temperature drops. This can cause cakes to fall and bread to stop rising.
- Overcrowding the oven: Putting too many trays in blocks air circulation and leads to uneven cooking.
- Not using a thermometer: Guessing the temperature leads to inconsistent results every time.
- Skipping the break-in cycle: This can leave manufacturing residues in your oven that affect the taste of your food.
- Ignoring unusual sounds or smells: If your oven makes strange noises or produces burning smells after the break-in period, check the manual or call for service.
Avoiding these mistakes will save you a lot of frustration and help you get better results from your very first bake.
Final Thoughts: Enjoy Your New Oven
Getting a new oven opens up a world of cooking possibilities. From fresh homemade bread to perfectly roasted dinners, your new appliance is going to become the heart of your kitchen. But it all starts with the right setup and good habits.
Now you know what to do when you get a new oven. You can set it up properly, break it in, calibrate the temperature, and use it safely. You understand rack positioning, preheating, and the difference between convection and conventional modes. You are also equipped with maintenance tips that will keep your oven running smoothly for years.
The most important thing is to start cooking and have fun with it. Do not worry about being perfect from day one. Every bake teaches you something new. Your brand-new oven is ready for you. Turn it on, preheat it, and start creating delicious meals. You have got this!
Remember: Taking the time to properly set up and learn your new oven pays off every single time you cook. Good food starts with a well-prepared oven. Enjoy the journey and happy baking!
Frequently Asked Questions
How long should I preheat my new oven before baking?
Most ovens need 10 to 15 minutes to reach the target temperature. Use an oven thermometer to confirm the temperature is accurate before placing your food inside. Preheating fully ensures even cooking and better results.
Should I use the self-cleaning cycle on a brand new oven?
Yes, running the self-cleaning cycle on a new oven is highly recommended. It burns off manufacturing residues, oils, and dust that may be present inside the oven cavity. Make sure your kitchen is ventilated during the process because it can produce smoke and odors.
How do I know if my new oven temperature is accurate?
The best way is to use a standalone oven thermometer. Place it on the middle rack, set the oven to 350 degrees, and wait 20 minutes. If the thermometer reading differs by more than 25 degrees from the set temperature, your oven may need calibration.
Can I cook immediately after unboxing a new oven?
No, you should not cook immediately. Always clean the oven first, run a break-in cycle, and check the temperature accuracy. Skipping these steps can lead to off-flavors in your food and uneven cooking results.
What is the difference between a convection oven and a conventional oven?
A conventional oven heats with elements on the top and bottom, while a convection oven uses a fan to circulate hot air. Convection ovens cook faster and more evenly, but you should reduce the temperature by 25 degrees when using the convection setting.
How often should I clean my new oven?
Wipe up spills right after they happen. Do a deeper clean using the self-cleaning cycle or manual cleaning once a month. Regular maintenance prevents buildup and keeps your oven performing at its best from day one.